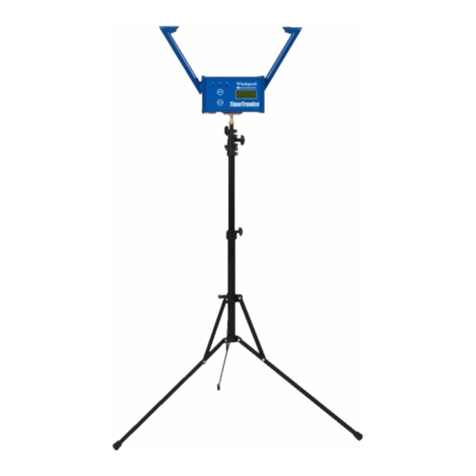
TimeTronics MacFinish 2HS 500 User manual

Manual
MacFinish 2HS 500
Version: 2014 v1

MacFinish 2HS 500 manual
Table of Contents
1.PREFACE.....................................................................................................................3
2.HOW DO WE CONNECT ALL CABLES?..............................................................................4
2.1 Camera connection ..............................................................................................4
2.2 Mounting the camera on the tripod and len on the camera .......................................4
2.3 Steamy len e ......................................................................................................5
2.4 Interface Box.......................................................................................................5
2.4.1 Start detection ..............................................................................................5
2.4.1.1 Start detector/ tart pi tol.............................................................................6
2.4.1.2 Manual Start Pu h Button ............................................................................6
2.4.1.3 Cable to witch of tarting gate ....................................................................6
2.4.2 Fini h detection .............................................................................................7
2.4.2.1 Photocell .................................................................................................7
2.4.2.2 Manual Fini h Pu h Button ..........................................................................8
2.4.3 Arrival Remote Control Box .............................................................................8
2.4.4 Serial port for ScoreBoard (SB) .......................................................................9
2.4.5 Serial port for WindSpeed (WS).......................................................................9
2.4.6 Serial port for FieldTerminal (FT) .....................................................................9
2.4.7 Power = 12 VDC battery, with optional battery charger ......................................9
3.SOFTWARE INSTALLATION..........................................................................................10
3.1 Framework .NET 4..............................................................................................10
3.2 Pylon in tallation:...............................................................................................10
3.3 MacFini h 2HS 500 oftware in tallation.................................................................10
4.SOFTWARE................................................................................................................11
4.1 In general..........................................................................................................11
4.2 File/Camera tab..................................................................................................12
4.2.1 File.............................................................................................................12
4.2.2 Viewer check box.........................................................................................12
4.2.3 Virtual photo cell .........................................................................................12
4.2.4 Line Rate bar / Gain Rate bar.........................................................................12
4.3 Po ition/Zoom....................................................................................................12
4.3.1 Po ition.......................................................................................................13
4.3.2 Zoom..........................................................................................................13
4.3.3 Orientation..................................................................................................13
4.4 Image...............................................................................................................13
4.4.1 Pixel Shift....................................................................................................13
4.4.2 Black/White Calibration.................................................................................14
4.4.3 Contra t/Lumino ity......................................................................................14
4.4.4 Delete.........................................................................................................14
4.5 Export...............................................................................................................15
4.5.1 Export Setting ............................................................................................15
4.5.2 Ticket.........................................................................................................15
4.5.3 Remote Control............................................................................................15
4.6 Re ult ..............................................................................................................15
5.ADVANCED USER SETTINGS........................................................................................17
5.1 Data file............................................................................................................17
5.2 Setting .............................................................................................................17
6.SHORTCUT KEYS........................................................................................................19
2

MacFinish 2HS 500 manual
1. PREFACE
MacFinish Photo-finish: Concept-Idea
Welcome to the 'MacFini h 2HS 500' u er manual.
May we recommend you to gently leaf through the entire manual fir t, ju t to have an initial idea of
how the manual i tructured. A we cannot po ibly explain all detail imultaneou ly, thi might
help you a bit in under tanding and tracing thing back. Of cour e, the table of content will al o
help you in doing o.
If you, after reading thi document, have any further que tion regarding the operation or ervice of
thi or any other TimeTronic equipment, plea e contact your local di tributor or TimeTronic directly,
by email; info@timetronic .be, or call u at (32) 14 / 23.19.11
Plea e al o contact u if you have any remark or advi e regarding thi u er manual;
info@timetronic .be.
Good luck with MacFini h 2HS 500 and thank you for your confidence in the TimeTronic product
and ervice .
The editor .
© Copyright 1998...2014 TimeTronic . All right re erved.
TimeTronic
Lammerdrie 27
B-2250 Olen
Belgium
Tel.: (32) 14 - 23.19.11
Fax: (32) 14 - 23.19.44
MacFini h II c i and MacFini h Ethernet are regi tered trademark of TimeTronic .
TimeTronic pecification or functional feature are ubject to change without notice.
TimeTronic i not re pon ible for the con equence of erroneou u age or functioning of the MacFini h (any ver ion).
Window and Window XP are regi tered trademark of Micro oft Corporation.
3
The idea of photo-fini h i , a the name indicate , to take
picture of the fini h line when an athlete or object arrive .
Contrary to ordinary ‘ till’ picture taken with your camera,
the MacFini h y tem record only the fini h line. With a
range from 100 to 9300 line per econd, the
MacFini h 2HS 500 end the re ulting picture to the
MacFini h PC. Thi allow the operator to read time with
an accuracy of up to 0.5 thou andth of a econd.

MacFinish 2HS 500 manual
2. H W D WE C NNECT ALL CABLES?
2.1 Camera connections
At the back of the MacFini h 2HS 500 camera, you have two
connection . In the “A” connection you need to plug in the Ethernet
cable, which i u ed to make the direct connection with your photo-
fini h computer. The “B” connection i u ed to plug in the cable of your Interface Box to make
further connection with the battery, photocell , tart ignal, etc.
Note: It i very important that you connect the camera directly with the photo-fini h computer!
There may be no interference by an Ethernet witch or hub for thi connection! Thi i very
important for the MacFini h 2HS 500.
If you need to u e other Ethernet connection on your computer, you will need to work with an
Ethernet witch. Plug in the 'USB to Ethernet converter' in one of the computer' USB port .
2.2 Mounting the camera on the tripod and lens on the camera
Photos: Tripod MacFinish 2HS 500 camera, lens and Pro camera head
Attach the camera head on the tripod or camera pole fir t. Then attach the camera on the camera
head.
Attach the F-mount (NIKON bayonet mount) len to the camera. Make ure that the little white ball
on the len i facing up, lide the len into the camera, and turn left until you hear a ‘click’. The len
i now fixed to the camera. Completely open the len diaphragm (= iri ) (on the malle t number,
for example "F2.8"). Adju t the focu between 10 meter and “infinite“ and zoom out (if you u e a
zoom len ).
4
Note: It i very important for the
MacFini h 2HS 500 to have a direct
connection between the Ethernet cable
from your camera and the photo-fini h
computer!

MacFinish 2HS 500 manual
Photo: Camera lens
2. Steamy lenses
You could ometime truggle with a teamy len in hot and moi t countrie . When having tored
the equipment in a cool or air-conditioned room, the wet air may tart conden ing on the cold len
gla during the fir t quarter of an hour when expo ed to thi ‘tropical’ weather. Water may tart
dropping from the len . In thi ca e, we recommend you to ju t wait for a quarter of an hour to
have the equipment adapted to thi new temperature. Sub equently, you hould dry both the len
gla and the CCD- en or with a dry and clean cloth.
2.4 Interface Box
The Interface Box i u ed to connect the camera with different erial port like the tart detector, the
fini h detector, Arrival Remote Control, ScoreBoard, WindSpeed, FieldTerminal and battery
(charger).
The different erial port are explained below:
Photo: Interface Box
2.4.1 Start detection
The y tem can u e different tart ignal ource , depending on which port the y tem i being
u ed for:
• tarting pi tol, for example with athletic
• manual tart pu h button, for example with road cycling race of many hour .
• cable to be connected to a tarting witch of the race track, for example at greyhound
race .
Plug the cable of the cho en tart- en or into 'Start' = leftmo t connection on the front of the
'MacFini h Interface Box', R in the tart connection of the 12-wire cabling y tem (cable-reel or
Connection-box).
5

MacFinish 2HS 500 manual
2 4 1 1 Start detector/start pistol
The tart detector (a hown below) i a little blue aluminium box, which hould be attached to the
barrel of the tarting pi tol. If the detector cannot be attached to the barrel, it mu t be po itioned at
a maximum di tance of 10 cm from the pi tol’ barrel.
Photo: Start detector
Note: TimeTronic al o offer their cu tomer a DOUBLE CHANNEL tart detector, which i
completely compatible with the (older) ingle channel (= tandard) tart detector. Thi double
channel ver ion ha TWO build-in tart en or , and two electronic circuit , to avoid a timing
problem if uddenly their would be a breakdown of a en or. If one or both of the e en or detect
a tarting hot, a tart i given to the MacFini h y tem. But how can YOU te t that both en or
and corre ponding circuit are till working correctly, even after a number of year ? If you plug uch
a double channel tart detector DIRECTLY IN THE START CONNECTION OF THE MACFINISH
INTERFACE BOX ( o not in the 12-wire cable reel or connection box on the track !), and you give it a
large shock to imulate a tart, you hould ee that both red led (on the MacFini h Interface) will
light up during a few econd . If only one of the led fla h, then one of the en or in ide the tart
detector i damaged.
Note: If you smoothly knock on one ide of the tart detector, for example with a finger, then only
ONE of the led will illuminate. You can even te t which en or i mounted on the top of the tart
detector, and which one i mounted on the oppo ite ide of the detector.
2 4 1 2 Manual Start Push Button
If no tarting pi tol i u ed, a manual tart pu h button can initiate the timing proce . The timing
accuracy will be without correct 'electronic timing', but with 'manual timing accuracy'.
Photo: Manual Start Push Button
2 4 1 3 Cable to switch of starting gate
It i al o po ible to u e your own witch (a normally open-contact, with a clo ing contact when the
race i tarted) to get the MacFini h y tem tarted. Do NOT worry if other people tell you that a
normally clo ed contact i much better, to be able to te t the tart cable BEFORE the tart of the
race. Thi i becau e we have included a 2K2 re i tor in parallel to the tart witch, o that the
MacFini h y tem can al o te t the tart cable, and give a warning beep if the cable i BROKEN or if
the cable i SHORT CIRCUITED. Our method i therefore better than a tart witch with normally
clo ed contact, which can only te t a broken cable...!
6

MacFinish 2HS 500 manual
2.4.2 Finish detection
The y tem can u e different fini h ignal ource , depending on the port for which the y tem i
being u ed:
• photocell , for example with athletic
• manual fini h pu h button, for example with road cycling race of many hour .
Plug the cable of the cho en fini h en or into 'Arrival' on the front of the 'MacFini h Interface Box',
R in the fini h connection of the 12-wire cabling y tem (cable-reel or Connection-box).
2 4 2 1 Photocells
Photocell are u ed to give an arrival ignal to the MacFini h Interface Box, o that the recording of
photo and time could take place automatically. The photocell con i t of an infrared light tran mitter
and receiver module, which hould be in talled clo e to the fini h line, on the left and right ide of
the track. Mount them at a uitable height (between athlete che t and hip height), depending on the
age of the athlete that you want to record. Make ure that you do not mount them too high, a
( mall) athlete who do not interrupt the photocell will not be recorded automatically. The
chematic repre entation may give you an idea.
Photo: Photocells
Try to po ition the photocell a clo e to the fini h line a po ible, but make ure that they do not
ob cure the view of your camera!
• The photocell tran mitter i imply connected to a battery pack (12Vdc), to receive power.
• The photocell receiver i connected to the MacFini h y tem (Interface Box or 12-wire
cabling).
You can identify the tran mitter and receiver by the following;
• On the photocell tran mitter you ee an arrow (→) pointing AWAY from the photocell.
• On the photocell receiver you ee an arrow (←) pointing TO the photocell.
You can fix your photocell ea ily with Velcro trip on the L- haped metal plate, which can be
crewed on top of the included tripod . Of cour e, they can al o be fixed more permanently by
mean of the crew . When the IR light beam i interrupted between the tran mitter and receiver, a
ignal i ent to the MacFini h Interface Box, indicating that a competitor i fini hing, or ju t ha
fini hed. You may wonder how image are correctly being recorded when the photocell are placed
ju t behind the fini h line! Make ure that both photocell module are correctly pointed toward each
7

MacFinish 2HS 500 manual
other, enabling the receiver to correctly receive the infrared light from the tran mitter. You can later
verify thi , when you have powered the MacFini h y tem with a battery; the led on the arrival
remote control box hould be out.
Note: TimeTronic al o offer their cu tomer a DOUBLE CHANNEL photocell pole, which i
completely compatible with the (older) ingle channel (= tandard) fini h detector. Thi double
channel ver ion i a blue lacquered aluminium bar with TWO build-in photocell beam , and an
electronic circuit, to give the MacFini h an arrival ignal only when BOTH parallel beam are broken.
The purpo e of the two beam i that the coreboard can now be topped ( howing the UNOFFICIAL
time of the fir t competitor) when the body or tor o of an athlete i pa ing the fini h line, and not
yet when a hand of a competitor i blocking a ingle infra-red beam ! The re ult i a ( tati tically)
more correct (unofficial) time on the coreboard, and on televi ion ! We can not GUARANTEE that it
will alway be more correct, becau e it could till be po ible that the hand of one athlete i blocking
the upper beam, and the hand of another athlete i blocking the lower beam.
Note: Thi i only the ca e if nobody tand between the detector , if both detector are correctly
pointed toward each other and if the photocell tran mitter i powered with a battery!
Note: From a di tance it i ea ier to verify the adju tment of the photocell tran mitter and receiver
than from a hort di tance, in other word ; tand a few meter behind and be ide the photocell to
check the direction of the photocell tran mitter and receiver module .
2 4 2 2 Manual Finish Push Button
MacFini h can al o be u ed without the u e of photocell . In that ca e, recording of a photo-fini h
picture will be done manually by operating the 'Manual Arrival' Button:
Photo: Manual Finish Push Button
2.4.3 Arrival Remote Control Box
The u e of any fini h detector can be combined with an 'Arrival Remote Control box', equipped with
an 'Off/Auto/Manual witch' plu a 'led' which indicate the tatu of the fini h detector:
Photo: Arrival Remote Control Box
Connect the plug of the 'Arrival Remote Control box' to 'Arrival Remote Control' at the front panel of
the 'MacFini h Interface Box'. The witch on the control box make it po ible for the operator to
di able ('off' po ition) or enable ('auto' po ition) the fini h detector (photocell ), for example if ome
athlete are pa ing the fini h line, but you do not want to take a picture, if they till have to run
one or more lap . The third po ition of the remote control witch (pre completely down) i to
8

MacFinish 2HS 500 manual
manually generate an arrival ignal if:
• there i no fini h detector connected.
• there i no fini h detector ignal; for example; athlete diving under the photocell beam.
2.4.4 Serial port for ScoreBoard (SB) - Not for 2HS 500
Thi connection hould be connected by mean of a TimeTronic erial cable with product number
'P244' to a RS232 erial port of your MacFini h computer, if you want to drive a timing coreboard
(of any brand of type). The coreboard( ) it elf hould be connected to a cable reel (mobile 12-wire
cable ) OR connection box (underground 12-wire cable ), by mean of the 12m cable (P229) that i
upplied with the coreboard, or any compatible 5-wire exten ion cable P063 (=50m) or P064
(=100m).
2.4.5 Serial port for WindSpeed (WS) - Not for 2HS 500
Thi connection hould be connected by mean of a TimeTronic erial cable with product number
'P244' to a RS232 erial port of your MacFini h computer, if you want to u e an (optional) ultra onic
'WindSpeed' anemometer. The WindSpeed it elf hould be connected by mean of the ‘P532’ erial
cable to a 12-wire cable reel, or a 12-wire connection box on the track.
2.4.6 Serial port for FieldTerminal (FT) - Not for 2HS 500
Thi connection hould be connected by mean of a TimeTronic erial cable with product number
'P244' to a RS232 erial port of your MeetManager computer, if you want to u e one or more
FieldTerminal( ). The FieldTerminal ( ) it elf hould be connected to a cable reel (mobile 12-wire
cable ) OR connection box (underground 12-wire cable ), by mean of the 50m cable (P063) that i
upplied with the FieldTerminal, or any compatible 5-wire exten ion cable P229 (=12m) or P064
(=100m).
2.4.7 Power = 12 VDC battery, with optional battery charger
You can now power-up the MacFini h y tem by connecting a fully charged 12Vdc battery pack
(P041) to the rightmo t connection on the front of the MacFini h Interface Box, marked with '12VDC
Power upply'. If you think that you will need to u e the MacFini h for everal hour , you better
immediately connect a battery charger to the battery pack, o that the battery remain fully
charged.
Warning: Be ure to protect the battery charger for rain or other water ource , a it ha an open
tructure and it i not protected again t water! Thi could be dangerou ! When you have plugged in
the battery, you will hear a beep immediately. Wait for two econd to give the MacFini h time to
tart up. If photocell are being u ed, check whether the led on the arrival remote control box i out.
You may now witch on your computer and your computer creen. We take it for granted that the
computer y tem oftware ha already been in talled. If not: plea e con ult your computer manual!
The hardware configuration ha now been in talled; we will explain in the next chapter how to u e
the (MacFini h) oftware.
9

MacFinish 2HS 500 manual
3. S FTWARE INSTALLATI N
Recommended PC operating system: Windows7 or Win8 1 (32bit or 64bit)
.1 Framework .NET 4
In tall or update to Framework .NET4: Framework_40_Full_x86_x64.exe
It i po ible that you have already in talled thi oftware with other program in tallation. In thi
ca e you will get following me age during the in tallation. In thi ca e ju t clo e and proceed to the
next tep.
.2 Pylon installation:
Depending on the computer y tem you are u ing you have to in tall the 32bit or 64bit
●Ba ler pylon x86 4.1.0.3660.exe (window 32bit)
●Ba ler pylon x64 4.1.0.3660.exe (window 64bit)
During the in tallation you have choo e following component :
. MacFinish 2HS 500 software installation
In tall the following: MacFini h_2H5500.m i
10
Table of contents
Other TimeTronics Measuring Instrument manuals