
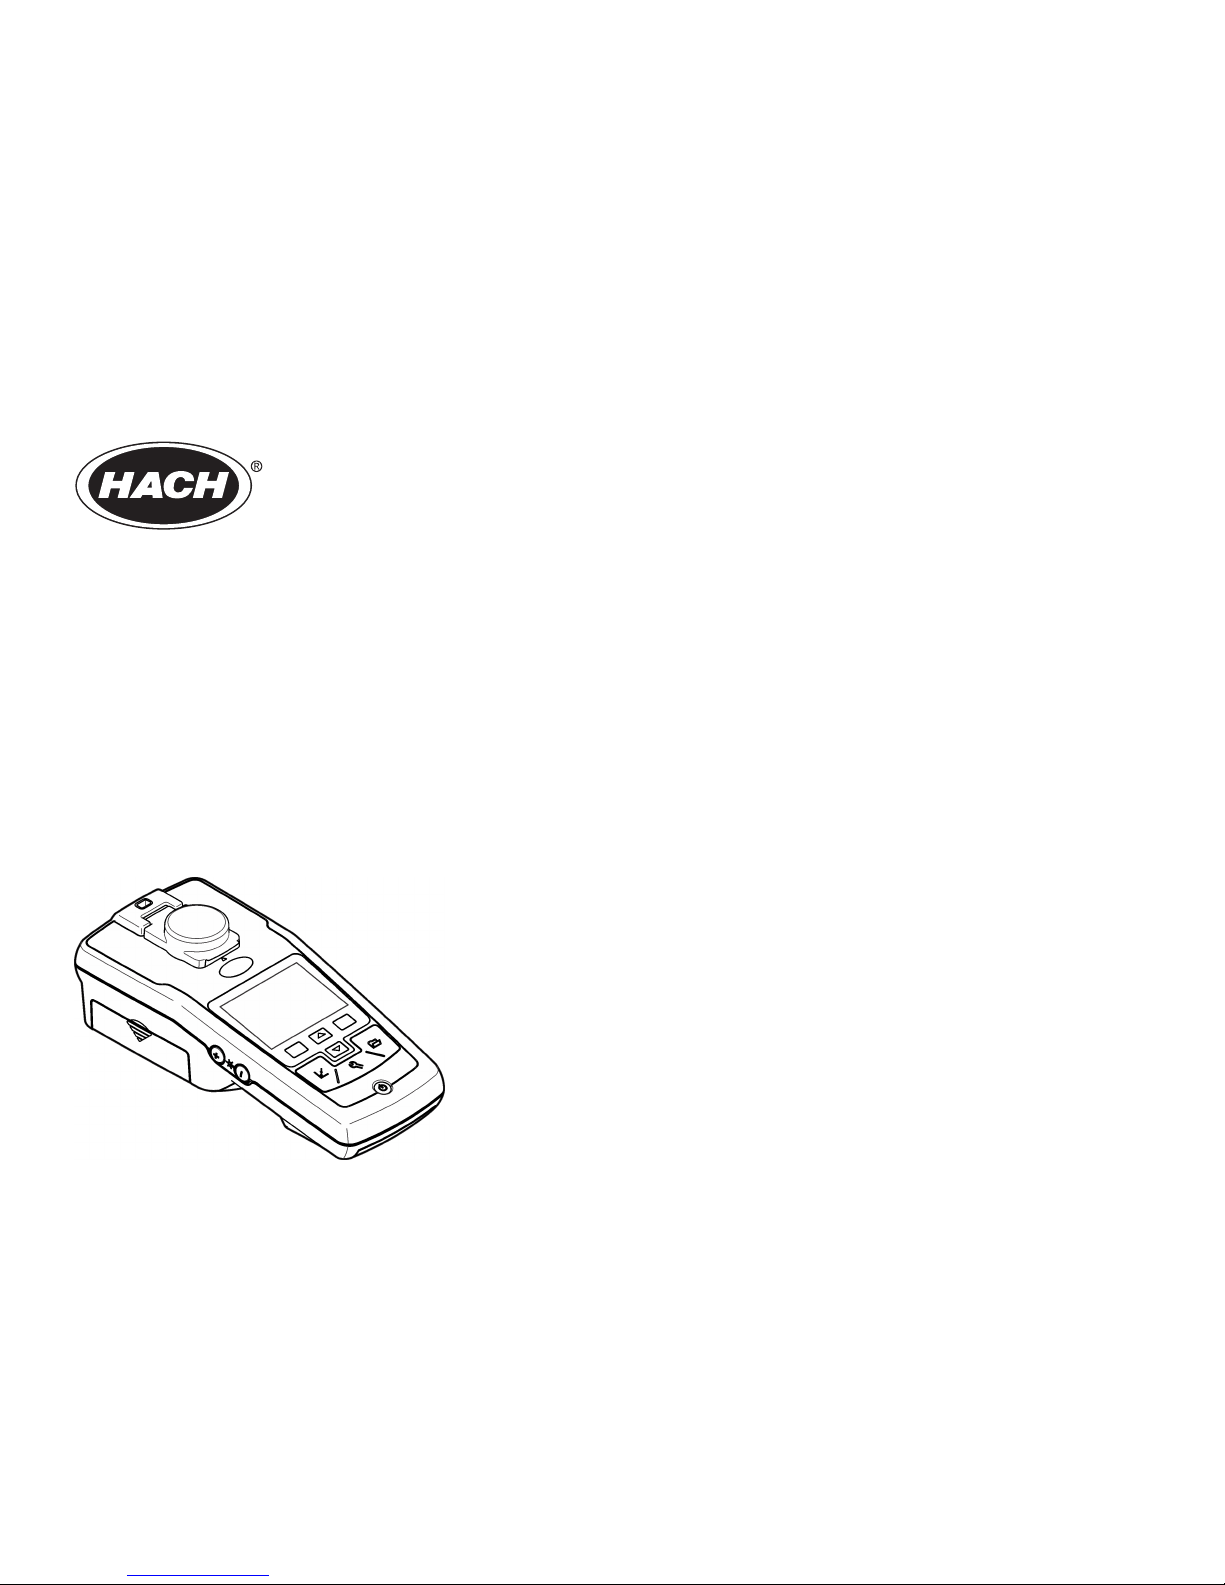
Hach 2100Qis User manual
DOC022.53.80041
2100Q and 2100Qis
12/2017, Edition 4
User Manual


Table of Contents
Specifications.................................................................................................................................................................................. 3
General information..................................................................................................................................................................... 3
Safety information.............................................................................................................................................................................. 4
Use of hazard information.................................................................................................................................................................. 4
Precautionary labels.......................................................................................................................................................................... 4
Certification........................................................................................................................................................................................ 4
Product overview............................................................................................................................................................................... 5
Product components.......................................................................................................................................................................... 5
Installation......................................................................................................................................................................................... 6
Install the battery................................................................................................................................................................................ 6
User interface and navigation............................................................................................................................................... 7
User interface..................................................................................................................................................................................... 7
Display description............................................................................................................................................................................. 8
Navigation.......................................................................................................................................................................................... 8
Startup................................................................................................................................................................................................. 8
Turn the meter on and off.................................................................................................................................................................. 8
Change the language ........................................................................................................................................................................ 8
Change the date and time ................................................................................................................................................................. 9
Standard operation...................................................................................................................................................................... 9
Use a sample ID................................................................................................................................................................................ 9
Use an operator ID............................................................................................................................................................................. 9
Calibrate the turbidimeter with StablCal® Standards......................................................................................................................... 9
Turbidity measurement.................................................................................................................................................................... 10
Measurement notes.................................................................................................................................................................. 10
Turbidity measurement procedure............................................................................................................................................ 11
Data management....................................................................................................................................................................... 11
About stored data............................................................................................................................................................................. 11
View data log................................................................................................................................................................................... 11
Delete data log................................................................................................................................................................................. 12
1

Send stored data.............................................................................................................................................................................. 12
Advanced operation.................................................................................................................................................................. 12
Display contrast............................................................................................................................................................................... 12
Power management......................................................................................................................................................................... 12
Set the sound options...................................................................................................................................................................... 13
Security options............................................................................................................................................................................... 13
Turn security options on........................................................................................................................................................... 13
View meter information.................................................................................................................................................................... 13
Calibration........................................................................................................................................................................................ 13
Calibration options.................................................................................................................................................................... 13
Calibration standard overview.................................................................................................................................................. 14
StablCal® RapidCal™ calibration.............................................................................................................................................. 15
Verification options................................................................................................................................................................... 16
Calibration verification (Verify Cal)........................................................................................................................................... 16
Reading modes................................................................................................................................................................................ 17
Apply silicone oil to a sample cell.................................................................................................................................................... 17
Indexing a single cell........................................................................................................................................................................ 17
Maintenance................................................................................................................................................................................... 19
Clean the meter............................................................................................................................................................................... 19
Store the sample cells...................................................................................................................................................................... 19
Replace the battery.......................................................................................................................................................................... 19
Replace the lamp............................................................................................................................................................................. 19
Troubleshooting.......................................................................................................................................................................... 22
Replacement parts and accessories............................................................................................................................... 23
Replacement parts .......................................................................................................................................................................... 23
Accessories ..................................................................................................................................................................................... 23
Index.................................................................................................................................................................................................... 25
Table of Contents
2

Specifications
Specifications are subject to change without notice.
Specification Details
Measurement
method
Ratio turbidimetric determination using a primary
nephelometric light scatter signal (90°) to the transmitted
light scatter signal.
Regulatory 2100Q: Meets EPA Method 180.1
Lamp source 2100Q: Tungsten filament lamp
2100Qis: Light-emitting diode (LED)
Range 0–1000 NTU (FNU)
Accuracy ±2% of reading plus stray light from 0–1000 NTU (FNU)
Repeatability ±1% of reading or 0.01 NTU (FNU), whichever is greater
Resolution 0.01 NTU on lowest range
Stray light ≤ 0.02 NTU (FNU)
Signal averaging Selectable on or off
Detector Silicon Photodiode
Reading modes Normal (Push to Read), Signal Averaging or Rapidly Settling
Turbidity™
Calibration
options
Single step RapidCal™ for Low-Level Regulatory Reporting
from 0–40 NTU (FNU)
Full range calibration from 0–1000 NTU (FNU)
Calibration to degrees of turbidity
Calibration logger Records the last 25 successful calibrations
Verification logger Logs the last 250 successful verifications
Data logger 500 records
Specification Details
Power
requirement
AC 100–240 V , 50/60 Hz (with power or USB/power
module)
4 AA alkaline batteries
Rechargeable NiMH (for use with USB/power module)
Operating
conditions
Temperature: 0 to 50 °C (32 to 122 °F)
Relative Humidity: 0–90% at 30 °C, 0–80% at 40 °C, 0–70%
at 50 °C, noncondensing
Storage
conditions
–40 to 60 °C (–40 to 140 °F), instrument only
Interface Optional USB
Sample required 15 mL (0.5 oz.)
Sample cells Round cells 60 x 25 mm (2.36 x 1 in.) borosilicate glass with
screw caps
Dimensions 22.9 x 10.7 x 7.7 cm (9.0 x 4.2 x 3.0 in.)
Weight 530 g (1.17 lb) without batteries
620 g (1.37 lb) with four AA alkaline batteries
Meter enclosure
rating
IP67 (closed lid, battery and module compartment excluded)
Protection class Power supply: Class II
Certification CE certified
Warranty 1 year (EU: 2 years)
General information
In no event will the manufacturer be liable for direct, indirect, special,
incidental or consequential damages resulting from any defect or
omission in this manual. The manufacturer reserves the right to make
changes in this manual and the products it describes at any time, without
notice or obligation. Revised editions are found on the manufacturer’s
website.
English 3

Safety information
NOTICE
The manufacturer is not responsible for any damages due to misapplication or
misuse of this product including, without limitation, direct, incidental and
consequential damages, and disclaims such damages to the full extent permitted
under applicable law. The user is solely responsible to identify critical application
risks and install appropriate mechanisms to protect processes during a possible
equipment malfunction.
Please read this entire manual before unpacking, setting up or operating
this equipment. Pay attention to all danger and caution statements.
Failure to do so could result in serious injury to the operator or damage
to the equipment.
Make sure that the protection provided by this equipment is not impaired.
Do not use or install this equipment in any manner other than that
specified in this manual.
Use of hazard information
DANGER
Indicates a potentially or imminently hazardous situation which, if not avoided, will
result in death or serious injury.
W A R N I N G
Indicates a potentially or imminently hazardous situation which, if not avoided,
could result in death or serious injury.
CAUTION
Indicates a potentially hazardous situation that may result in minor or moderate
injury.
NOTICE
Indicates a situation which, if not avoided, may cause damage to the instrument.
Information that requires special emphasis.
Precautionary labels
Read all labels and tags attached to the instrument. Personal injury or
damage to the instrument could occur if not observed. A symbol on the
instrument is referenced in the manual with a precautionary statement.
This is the safety alert symbol. Obey all safety messages that follow
this symbol to avoid potential injury. If on the instrument, refer to the
instruction manual for operation or safety information.
This symbol indicates that a risk of electrical shock and/or
electrocution exists.
Electrical equipment marked with this symbol may not be disposed of
in European public disposal systems after 12 August of 2005. In
conformity with European local and national regulations (EU Directive
2002/96/EC), European electrical equipment users must now return
old or end-of-life equipment to the Producer for disposal at no charge
to the user.
Note: For return for recycling, please contact the equipment producer or supplier
for instructions on how to return end-of-life equipment, producer-supplied
electrical accessories, and all auxiliary items for proper disposal.
Certification
Canadian Radio Interference-Causing Equipment Regulation,
IECS-003, Class A:
Supporting test records reside with the manufacturer.
This Class A digital apparatus meets all requirements of the Canadian
Interference-Causing Equipment Regulations.
Cet appareil numérique de classe A répond à toutes les exigences de la
réglementation canadienne sur les équipements provoquant des
interférences.
FCC Part 15, Class "A" Limits
Supporting test records reside with the manufacturer. The device
complies with Part 15 of the FCC Rules. Operation is subject to the
following conditions:
4 English

1. The equipment may not cause harmful interference.
2. The equipment must accept any interference received, including
interference that may cause undesired operation.
Changes or modifications to this equipment not expressly approved by
the party responsible for compliance could void the user's authority to
operate the equipment. This equipment has been tested and found to
comply with the limits for a Class A digital device, pursuant to Part 15 of
the FCC rules. These limits are designed to provide reasonable
protection against harmful interference when the equipment is operated
in a commercial environment. This equipment generates, uses and can
radiate radio frequency energy and, if not installed and used in
accordance with the instruction manual, may cause harmful interference
to radio communications. Operation of this equipment in a residential
area is likely to cause harmful interference, in which case the user will be
required to correct the interference at their expense. The following
techniques can be used to reduce interference problems:
1. Disconnect the equipment from its power source to verify that it is or
is not the source of the interference.
2. If the equipment is connected to the same outlet as the device
experiencing interference, connect the equipment to a different
outlet.
3. Move the equipment away from the device receiving the interference.
4. Reposition the receiving antenna for the device receiving the
interference.
5. Try combinations of the above.
Product overview
The 2100Q and 2100Qis portable turbidimeters measure turbidity from
0 to 1000 NTU (FNU). Primarily for field use, the portable meter operates
on four AA batteries. Data can be stored and transferred to a printer,
computer or USB storage device.
Figure 1 Product overview
1 Power on or off 5 Alignment arrow
2 Backlight keys (+ and -) 6 Module
3 Sample cell holder with lid 7 Lamp compartment
4 Attachment for lanyard 8 Battery compartment
Product components
Refer to Figure 2 to make sure that all components have been received.
If any of these items are missing or damaged, contact the manufacturer
or a sales representative immediately.
English 5

Figure 2 2100Q and 2100Qis components
1 2100Q or 2100Qis turbidimeter 6 Silicone oil
2 Carrying case 7 20, 100 and 800 NTU StablCal
calibration standards
3 User manual and Quick reference
guide
8 AA alkaline batteries (pk/4)
4 Oiling cloth 9 StablCal 10 NTU verification
standard
5 1" sample cell (10 mL) with cap
(pk/6)
Installation
CAUTION
Multiple hazards. Only qualified personnel must conduct the tasks
described in this section of the document.
Install the battery
W A R N I N G
Explosion hazard. An expired battery can cause hydrogen gas buildup
inside the instrument. Replace the battery before it expires. Do not
store the instrument for long periods with a battery installed.
W A R N I N G
Potential fire hazard. Use only alkaline or nickel metal hydride batteries (NiMH) in
the meter. Other battery types or incorrect installation can cause a fire. Never mix
battery types in the meter.
NOTICE
The battery compartment is not waterproof. If the battery compartment becomes
wet, remove and dry the batteries and dry the interior of the compartment. Check
the battery contacts for corrosion and clean them if necessary.
NOTICE
When using nickel metal hydride (NiMH) batteries, the battery icon will not
indicate a full charge after freshly charged batteries have been inserted (NiMH
batteries are 1.2 V versus 1.5 V for alkaline batteries). Even though the icon does
not indicate complete charge, 2300 mAH NiMH batteries will achieve 90% of
instrument operation lifetime (before recharge) versus new alkaline batteries.
NOTICE
To avoid potential damage to the meter from battery leakage, remove the meter
batteries prior to extended periods of non-use.
The meter can be powered with AA alkaline or rechargeable NiMH
batteries. To conserve battery life, the meter will power off after
10 minutes of inactivity, the backlight powers off after 30 seconds. This
time can be changed in the Power Management menu.
Note: Rechargeable batteries will only be recharged with the USB/power module.
Refer to the module documentation for further information.
For battery installation refer to Figure 3.
1. Remove the battery cover.
2. Install 4 AA alkaline or 4 AA nickel metal hydride (NiMH) batteries.
Make sure that the batteries are installed in the correct orientation.
3. Replace the battery cover.
6 English

Figure 3 Battery installation User interface and navigation
User interface
Figure 4 Keypad description
1 SETTINGS key: select menu
options for setting up the meter
5 UP key: scroll through menus, enter
numbers and letters
2 CALIBRATION key: shows
calibration screen, start calibration,
select cal options
6 RIGHT key (contextual): read
turbidity sample, selects or confirms
options, opens/jumps to sub-menus
3 DOWN key: scroll through menus,
enter numbers and letters
7 DATA MANAGEMENT key: view,
delete or transfer stored data
4 LEFT key (contextual): access for
calibration verification, cancels or
exits the current menu screen to the
previous menu screen
English 7
Display description
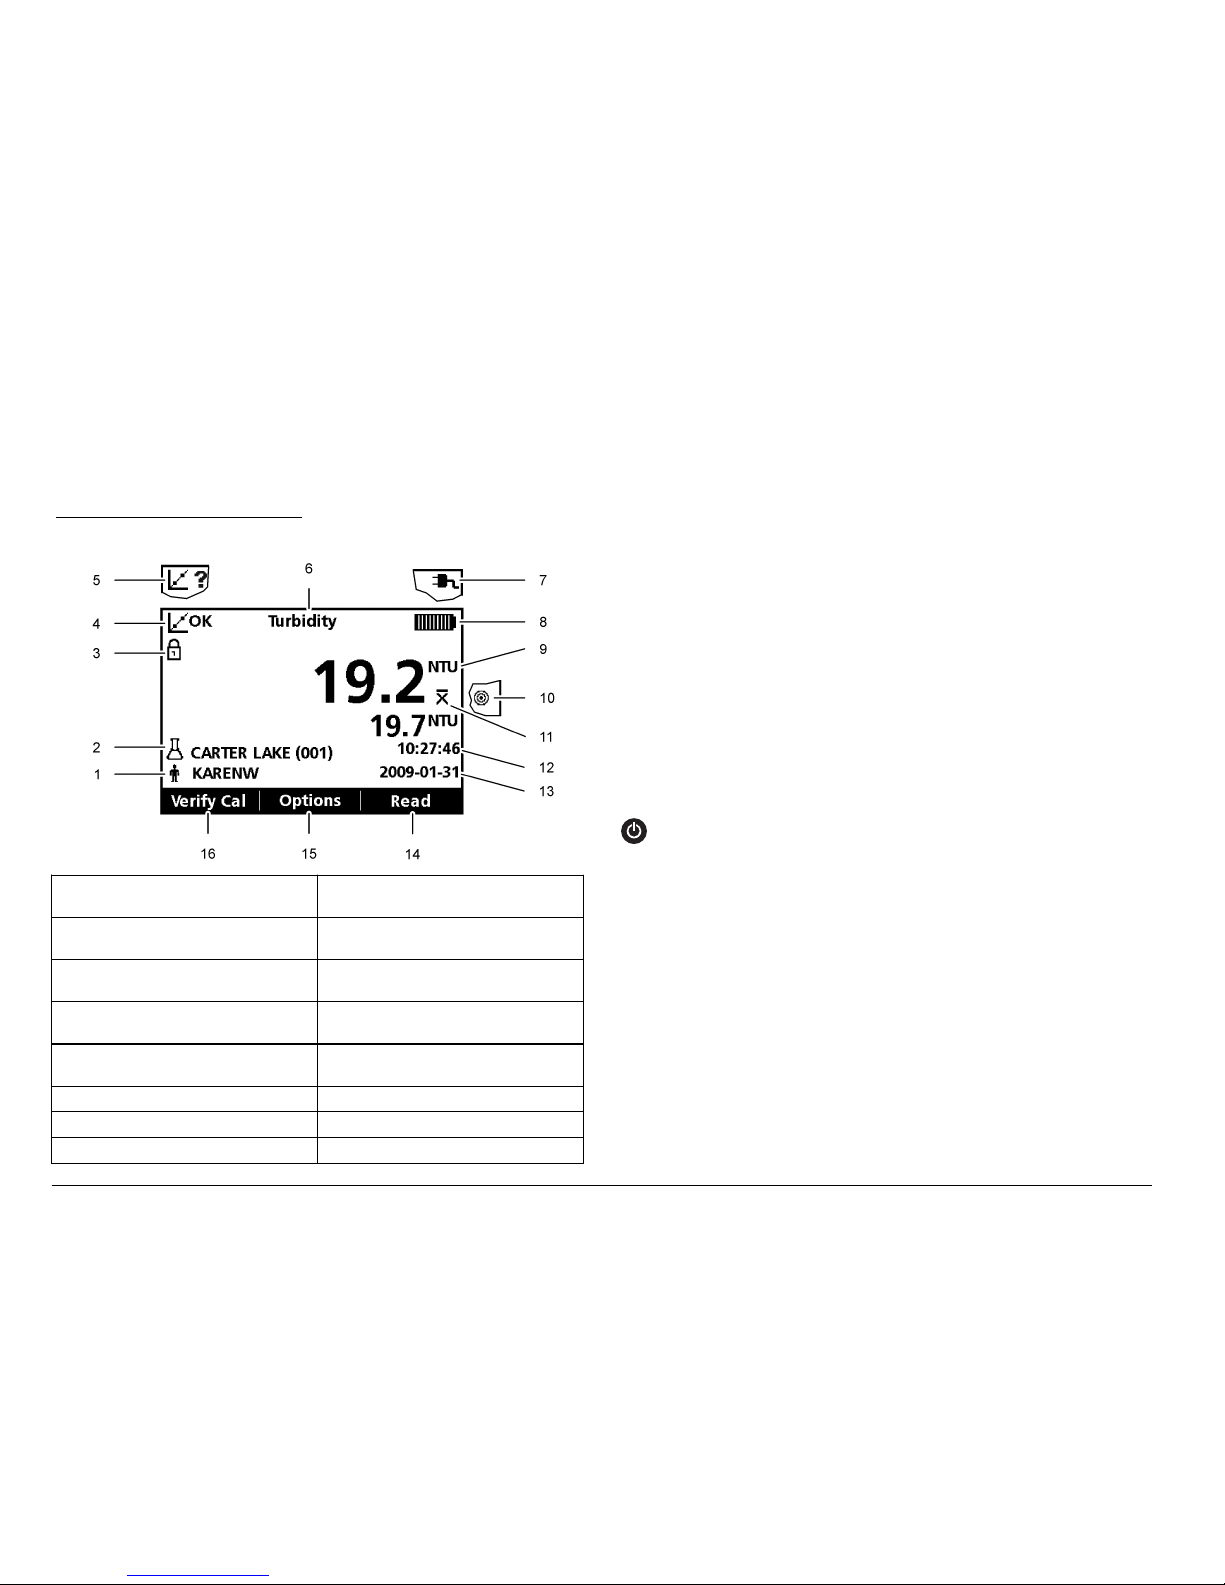
The measurement screen shows the turbidity, unit, calibration status,
date and time, operator ID (if setup) and sample ID (if setup). Refer to
Figure 5.
Figure 5 Single screen display
1 Operator identification 9 NTU (Nephelometric Turbidity Unit)
or FNU (Formazin Turbidity Unit)
2 Sample identification 10 Reading mode: Rapidly Settling
Turbidity (Target icon)
3 Stability or display lock indicator 11 Reading mode: Signal Average
(X-bar icon)
4 Calibration status indicator
(Calibration OK=pass)
12 Time
5 Calibration status indicator
(Calibration ?=fail)
13 Date
6 Parameter title 14 Read (contextual: OK, Select)
7 AC power icon 15 Options (contextual)
8 Battery icon 16 Verification calibration
Navigation
The meter contains a Settings menu, Reading Options menu, Calibration
Options menu and Calibration Verification Options menu to change
various options. Use the UP and DOWN keys to highlight different
options. Push the RIGHT key to select an option. There are two ways to
change options:
1. Select an option from a list: Use the UP and DOWN keys to select an
option. If check boxes are shown, more than one option can be
selected. Push the LEFT key under Select.
Note: To deselect check boxes, push the LEFT key under Deselect.
2. Enter an option value using the arrow keys:
Push the UP and DOWN keys to enter or change a value.
3. Push the RIGHT key to advance to the next space.
4. Push the RIGHT key under OK to accept the value.
Startup
Turn the meter on and off
Push the ON/OFF key to turn on or turn off the meter. If the meter
does not turn on, make sure that the batteries, or the module, are
properly installed or that the AC power supply is properly connected to
an electrical outlet.
Note: The Auto-Shutoff option can also be used to turn off the meter. Refer to
Power management on page 12.
Change the language
There are three options to set the language:
• The display language is selected when the meter is powered on for
the first time.
• The display language is selected when the power key is pushed and
held.
• The language can be changed from the Settings menu.
8 English
This manual suits for next models
1
Table of contents
Other Hach Measuring Instrument manuals

Hach
Hach LBOD101 User manual

Hach
Hach BioTector B7000 User manual

Hach
Hach BODTrak II User manual

Hach
Hach 2100Q User manual

Hach
Hach BioTector B3500dw User manual

Hach
Hach LOC 100 User manual

Hach
Hach sension ph31 User manual

Hach
Hach ORBISPHERE K-M1100 Quick manual

Hach
Hach polymetron 9240 Quick manual

Hach
Hach CLF10sc User manual

Hach
Hach POLYMETRON 9245 Quick manual

Hach
Hach DR1300 FL User manual

Hach
Hach sensION+ EC5 User manual

Hach
Hach PHC101 User manual

Hach
Hach ORBISPHERE 3655 User manual

Hach
Hach FL1500 Quick manual

Hach
Hach Micro Dist User guide

Hach
Hach sensION+ pH3 User manual

Hach
Hach POCKET COLORIMETER II User manual

Hach
Hach TitraLab User manual


