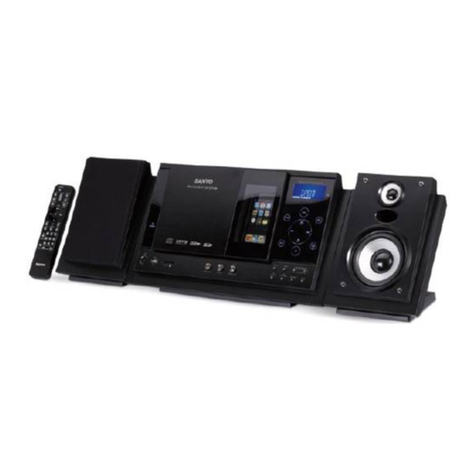
Denver MC-7100S User manual

MODEL: MC-7100S
Digital MW/FM Stereo Tuner
CD / CD-R / CD-RW
Clock
Wall Mountable
Remote Control
www.denver-electronics.com

-1-
IMPORTANT NOTES
* Avoid placing the unit in locations described below:
- Places exposed to direct sunlight or close to heat radiating
appliances such as electric heaters.
- On top of other stereo equipment that radiates too much heat.
- Places lacking ventilation or dusty places.
- Places subject to constant vibration.
- Humid or moist places.
* Do not attempt to clean this unit with chemical solvents as this
might damage the finish. Use a clean dry cloth.
* Be careful not to obstruct the ventilation opening on the rear panel.
* Operate the controls land switches as described in the manual.
* Before turning the power switch on for the first time, make certain all
connecting cords and power cord are properly installed.
* When moving the set, be sure to first pull out the power plug and
remove cords connected to other equipment.
CAUTION:
When operating this unit on 230V mains supply, please note that when
the power switch is in the off mode, this does not disconnect the unit
from the mains supply, However, please be assured that it is perfectly
safe to leave the unit connected to the mains supply.
SAFETY CERTIFICATION
CAUTION: TO REDUCE THE RISK OF ELECTRIC SHOCK,
DO NOT REMOVE COVER.
NO USER-SERVICEABLE PARTS INSIDE.
REFER SERVICING TO QUALIFIED SERVICE PERSONNEL
CAUTION
RISK OF ELECTRIC SHOCK
DO NOT OPEN
DANGEROUS VOLTAGE
Uninsulated Dangerous voltage, that may be of sufficient
magnitude to constitute a risk of electric shock to
persons, is present within this product's enclosure.
ATTENTION
The Owner's Manual contains important Operating and
maintenance instructions.
For your safely, it is necessary to refer to the manual.
WARNING: TO PREVENT FIRE OR SHOCK HAZARD, DO NOT
EXPOSE THIS APPLIANCE TO RAIN OR MOISTURE.
THIS SYMBOL MEANS THAT THIS UNIT IS DOUBLE
INSULATED AN EARTH CONNECTION IS NOT REQUIRED.

LOCATION OF CONTROLS
-2-
2
1
6
5
4
3
7
8
9
10
11
12
13
14 15 16 17 18 19 20 21 22
35
34
33
32
31
30
29
28
27
26
25
24
23
41
36
37
38
39
40
42
43
FM ANT
75Ω


LOCATION OF CONTROLS (cont. .)
CD / TUNING / SKIP forward setting button
CD - Press to skip/search forward.
TUNER - Press to radio stations scan forward.
CLOCK or TIMER - Press select the time forward while
setting the clock or timer.
TREBLE / - button
Press to reduce treble sound level.
TREBLE / + button
Press to increase treble sound level.
CD PLAY / PAUSE Button ( )
Press to begin CD play, to stop temporarily or to scan
tuner memory presets.
CD door open button
Press to open the CD door.
TUNER / BAND select button
Sets to tuner (radio) mode and selects the MW or FM
band.
PRESET DN / RANDOM
CD - Press to CD random play
TUNER - Press to select the preset down station.
AUX button
Press to activate operating mode AUX.
INTRO / MONO-ST. button
Press to CD Intro play.
Press to select Stereo or Mono at TUNER FM mode.
MODE / REMAIN button
CLOCK - Press mode to set clock time, wake-up or
shut-off time.
TUNER - Press mode to select clock time, wake-up or
shut-off time of radio frequency.
CD - Press remain to display the remaining time.
23.
24.
25.
26.
27.
28.
-4-
SUREWAKE button
Press to turn ON the SureWake function.
LCD display
Shows the operating status in all modes.
DYNAMIC BASS button
Press to turn the dynamic bass ON or OFF.
CD STOP button
Press to stop CD play.
AUX IN MINI Stereo Jack
AUX IN for external sources
& 35. Left and Right AUX OUT Socket
Connect with other external musical instruments to
perform AUX OUT functions.
Carrying Recess
SUBWOOFER Jack
To connect with external subwoofer speaker (not
included)
AC input socket
To connect the AC cord plug into the socket.
FM Antenna Terminal
Connect single antenna wire (supplied) to terminal
marked 75Ω
Battery compartment
Install eight “C” size batteries according to the polarity
diagram inside the battery compartment.
Alkaline type is recommended.
29.
30.
31.
33.
34.
37.
38.
32.
40.
39.
19.
20.
21.
22.
36.

LOCATION OF CONTROLS (cont. .)
Left channel speaker terminal
Connect the left speaker cable here.
Right channel speaker terminal
Connect the right speaker cable here.
Slot for Wall-Mounting Bracket
Used to connect the mounting (included) to
mount the unit on the wall.
-5-
41.
42.
43.
REMOTE CONTROL
1. Power ON/OFF - Standby button
2. Program select buttons
Tuner - To recall preset stations
CD - To recall tracks.
For 1-9, press 0 and 1-9 buttons.
For 10, press 1 and then “0”
For 11 - 19, press 1 and then 1 - 9.
For 20, press 2 and then “0”
For 21 - 29, press 2 and then 1 - 9.
For 30, press 3 and then “0”
3. MEM/CLK-ADJ: CD - Use to program CD tracks for
programmed play / TUNER - Use to programmed preset
memory / CLK-ADJ - Press to set hours and minutes
4. RANDOM/PRESET DN: CD Random play / Tuner - To select
Preset down station
5. AUX: Press to activate operating mode AUX
6. SLEEP/HOUR: Press to select the sleep/hour
7. CD - Skip/Search backward / TUNER - Tuning down
8. CD - Skip/Search forward / TUNER - Tuning up
9. VOLUME: Volume up or down
10. MUTE: Muting ON/OFF
11. INTRO/MONO-ST.: CD Intro play / Press to select Stereo or
Mono at TUNER FM mode
12. REPEAT/PRESET UP: CD - Repeat play / To select Preset up
station
13. REMAIN/MODE: CD - Check the remaining and clock
time / TUNER - Check clock and frequency
14. D-BASS (DYNAMIC BASS) button
15. BAND/TUNER: Press to select the MW/FM band in Tuner
mode / Press to select the Tuner mode
16. PLAY/PAUSE: CD Play/Pause
17. STOP: CD Stop
18. Battery Compartment
1
1
2
1
3
1
413
14
1
6
1
7
1
8
9
1
5
10
11
12
15
16
17
18

INSTALLATION
Installation options:
-6-
To mount the center section on the wall:
Position the bracket on the wall (as shown below) where you
want to hang the center unit. Drill 2 holes slightly undersized
for a firm fit.
Secure the bracket on the wall using 2 dowels and 2 screws
(supplied)
Mount the center unit onto the wall bracket.
Make sure the mounting tab on the center unit fits securely into
the mounting slot on the wall bracket.
Screws and plastic dowels are also provided for speakers if
they are to be wall-mounted away from the center section.
Wall mount
shelf placement
one or both speakers attached or detached
To install center section on a table or shelf:
Insert the base from the back of the unit, push until it clicks
into position.
To connect the speakers with the center section:
Attach left and right speakers to the center section by sliding down
each speaker straight along the side of the center section cabinet.
Connect the left/right speaker lead wires to the speaker terminals.
Pay attention to the polarity. The polarity wires (gray with black
stripe) should connect to the red color terminals.
TO ATTACH THE MAIN UNIT TO
THE BASE TO RELEASE THE MAIN UNIT
FROM THE BASE

When power is connected for the first time, or if the power cord
was unplugged and reconnected.
The STANDBY LED lights, and the LCD panel appears as follows
Press the POWER button. The STANDBY LED turns off and the
unit defaults to the tuner function, FM band.
Afterward, when the POWER is turned on, the previously chosen
function will be selected.
Power on
GENERAL OPERATION
1.
2.
-7-
Press the POWER button to turn the unit off “standby”.
Press the MEMORY/CLK-ADJ button ONCE. The Minute
segments display “00”. The Hour segments flash continuously.
Note: Press the SLEEP/HOUR button to select 24 hour format.
Press the CD-TUNING-SKIP + or - button to select the desired
hour.
Press the MEMORY button again and the minute segments flash.
Press the CD-TUNING-SKIP + or - button to select the desired
minute.
Press the MEMORY button once more. The flashing stops and
the time is set.
To set the clock
1.
2.
3.
4.
5.
6.

Basic operation
Press POWER button to turn on the power.
Open the CD door, display shows “OPEN”, then load the Disc
with the label side up and press it onto the spindle until it
“CLICKS” on the central support of the compartment. Close the
door.
-8-
3.
CD OPERATION
1.
2.
Step 1 - Push the CD door open button to open CD door.
Step 2 - Loading disc as shown.
Step 3 - Be sure that disc is located in proper position.
Step 4 - Push CD door close.
OPEN LOAD POSITION CLOSE
The disc will spin and the unit will read, display shows
“READING”, the display will show the total number of tracks and
the playing time of the disc. Press the CD-play/pause button
once. The display will show the first track number on the disc,
then indicate the elapsed time as shown, and play will start.
If there is no disc in the CD compartment and the CD button is
pressed, the LCD will show “NO DISC.”
Adjust the VOLUME control to a comfortable level.
Press and release the CD-TUNER-SKIP + or - button to skip to the
desired track.
Press and hold the CD-TUNER-SKIP + or - button to search for the
desired section within a track.
Press the button to pause temporarily. The LCD will appear
as shown below.
Press again to resume.
Press the STOP button to stop playing. The display will show the
total number of tracks and the playing time of the disc.
4.
5.
6.
7.
8.
9.

-9-
CD OPERATION (cont.)
To begin program play
The CD player can be programmed to play up to 32 tracks in the
order desired.
Press the CD-TUNING-SKIP + or - button to select the
desired track to be programmed.
3.
4.
2.
Press POWER button to turn on the power, then load a disc.
Press the MEMORY/CLK-ADJ button until the LCD appears
follows:
1.
Press the MEMORY/CLK-ADJ button to store the selection.
When operate the Remote Control, you must press the “0” +
NUMBER button (for example: 01, 02 …) then press the
MEMORY/CLK-ADJ button to store the selection.
5.
6.
7.
Repeat steps 3-4 to program additional tracks up to a maximum of
32 tracks.
While display showing tracks programmed, press the button.
The CD player will play the tracks in the order they were
programmed.
Press the CD-TUNING-SKIP button to skip forward or backward
through programmed tracks.
Any on of the following actions will cancel program play mode.
Press the STOP button twice, then press the button.
Open the CD door
8.
Table of contents
Other Denver Stereo System manuals

Denver
Denver MC-5400 User manual

Denver
Denver MCA-190 User manual

Denver
Denver MCB-600 User manual

Denver
Denver MCI-101 User manual

Denver
Denver MRP-141 User manual

Denver
Denver MCA-210 User guide

Denver
Denver MRD-166 User manual

Denver
Denver MCA - 150 User manual

Denver
Denver MC-5230DAB+ User manual

Denver
Denver MRP-131 User manual

Denver
Denver MDA-270 User manual

Denver
Denver MC-5230DAB+ User manual

Denver
Denver MRP-151 User manual

Denver
Denver MCB-700 User manual

Denver
Denver MC-7150 User manual

Denver
Denver MMP-390 User manual

Denver
Denver MMP-355 User manual

Denver
Denver TCU-209 User manual

Denver
Denver MCA-171 User manual

Denver
Denver MCA-220DAB+ User manual