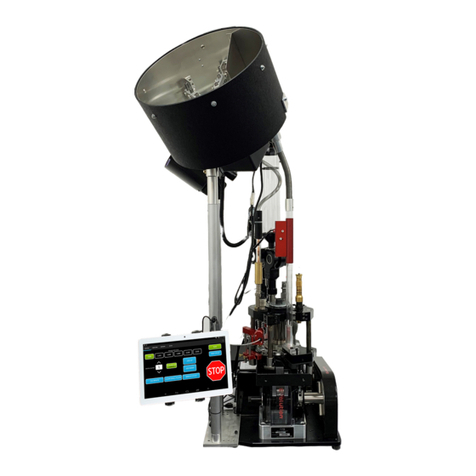
Vector Revolution 180 User manual

Operating Manual

_______________________________________
1
Relevance in print When buying the Vector Revolution 180 you decided in favour
of a model with an individual composition.
We ask for your understanding that there may be mentioned addi-
tional devices which you did not chose.
The high standard of quality and security is guaranteed by
continual development. Therefore there can appear differ-
ences between these operating instructions and your unit.
Also, errors cannot be totally excluded. Therefore we ask for
your understanding that from descriptions, indications and
illustrations there cannot be derived legal claims.
Order Information Please supply the following information:
Title of document
Code number
Date of issue
Language
Vector Systems Ltd
P O Box 78 331
Grey Lynn
AUCKLAND
NEW ZEALAND
Tel +64 9 950 4791
Fax +64 9 950 4792
+64 = International prefix
Contents .

_______________________________________
2
CHAPTERS
1 Technical data
1.1 Characteristic Data 1 - 1
1.2 Weight 1 - 1
1.3 Scope of application, operation and intended use 1 - 1
1.3.1 Scope of application 1 - 1
1.3.2 Operation 1 - 1
1.3.3 Intended use 1 - 1
1.4 Machine dimensions 1 - 2
1.5 Working dimensions 1 - 4
1.6 Connected load (Basic machine = units) 1 - 4
1.7 Ambient conditions 1 - 4
1.7.1 Electronic devices 1 - 4
1.8 Compressed air 1 - 4
2 Safety
2.1 Symbol and explanation of directions 2 - 1
2.2 Definitions 2 - 1
2.2.1 Correct use 2 - 1
2.2.2 Residual risk 2 - 1
2.2.3 Expert Personal 2 - 1
2.2.4 Proficient personnel 2 - 1
2.2.5 Qualified personnel 2 - 2
2.2.6 Protective clothing 2 - 2
2.3 Working safety directions 2 - 2
2.4 Protective devices 2 - 4
2.5 Residual risks 2 - 4
2.6 Emergency measures 2 - 5
2.6.1 General information 2 - 5
2.6.2 Fire hazard 2 - 5
2.6.3 First aid 2 - 6
3 General
3.1 Introduction 3 - 1
3.2 Application 3 - 1
3.3 Copyright ` 3 - 2
3.4 Address 3 - 2
3.5 Warranty 3 - 2

_______________________________________
3
Contents .
CHAPTERS
4 Transport, offloading, setting up
4.1 General instructions 4 - 1
4.2 Space requirement 4 - 1
4.3 Setting up area 4 - 1
4.4 Sensitivity 4 - 1
4.5 Ambient conditions 4 - 1
4.6 Transport routes 4 - 1
4.7 Interim storage 4 - 2
4.8 Cleaning 4 - 2
4.9 Transport from packaging to location 4 - 2
4.9.1 Transport means 4 - 2
4.9.2 Offloading 4 - 2
4.9.3 Levelling 4 - 6
5 Assembly
5.1 General instructions 5 - 1
5.2 Machine Assembly 5 - 1
5.2.1 Re-fitting of components removed for transportation 5 - 1
5.2.1.1 Fitting of X-Axis drive motor 5 - 1
5.2.1.2 Fitting of rear X Axis cable chain and support 5 - 3
5.2.1.3 Fitting and tensioning of X Axis drive belt 5 - 5
5.2.1.4 Fitting and tensioning of Y Axis drive belt 5 - 6
5.2.1.5 Fitting X Axis counter 5 - 8
5.2.1.6 Fitting X Axis +ve and X Axis –ve limit switches 5 - 9
5.2.1.7 Fitting emergency stop pullwire 5 – 10
5.2.1.8 Fitting edgeband coil support 5 - 11
5.2.2 Removing the axis transport brackets 5 – 13
5.3 Machine connections 5 – 14
5.3.1 Electrical 5 – 14
5.3.1.1 Cross section of connection cabling and input pre-fusing 5 – 14
5.3.2 Pneumatic 5 – 14
5.3.3 Testing End-Limit switches 5 – 15
5.3.4 Testing Axis counting direction (X + Y) 5 – 16
5.4 Preparations for no-load tests without workpieces 5 - 17
5.4.1 Mechanical 5 - 17
5.4.2 Electrical (provided by others) 5 – 17
5.4.2.1 Checking the direction of rotation 5 – 18
6 Design and mode of operation
6.1 General description 6 - 1
6.2 Design 6 - 1
6.3 Mode of operation 6 - 2
7 Operation panel
7.1 Control fields / control elements 7 - 1
7.2 Definition of control elements 7 - 1

_______________________________________
4
Contents .
CHAPTERS
8 Start up
8.1 Putting the basic machine into service 8 - 1
8.1.1 Switching on 8 - 1
8.1.2 Switching off 8 - 3
8.1.3 Emergency cut-out 8 - 4
8.1.4 Power failure 8 - 4
8.2 General Reset 8 - 4
9 Setting up basic machine
9.1 Preparation for Operation 9 – 1
9.1.1 Loading tape coil, feeding tape, setting guide height,
setting infeed top bar 9 – 1
9.1.2 End Trimming Band 9 – 5
9.1.3 Turning on the glue and setting height to match panel thickness 9 – 9
9.1.3.1 Setting glue height to match panel thickness 9 – 11
9.1.4 Setting glue start and stop adjustments 9 – 12
9.1.5 Setting Glue Pressures and Tape Presser 9 – 14
9.1.6 Setting the Nozzle Wiper 9 – 15
9.1.7 Loading a glue cartridge 9 – 16
9.1.7.1 Performing a glue-tape test 9 – 18
9.1.7.2 Manually purging glue cartridge 9 - 21
9.1.8 Selecting 360 degree setting for Butt Joint or Open Board 9 – 23
9.1.8.1 360 Degree Operation 9 – 24
9.1.8.2 Open Board Operation 9 – 27
9.2 Commencing a cycle 9 – 35
9.2.1 Setting Vacuum Cups and Lead Pods 9 – 35
9.2.2 Saving Start Positions 9 - 38
9.2.3 Single or Pendulum Operation 9 – 42
9.2.4 Start Cycle 9 – 43
9.2.4.1 Start Prevent Messages 9 – 44
9.2.5 Applying edging (without trimming or scraping) 9 – 45
9.2.6 Trimming edging (without gluing) 9 – 46
9.2.7 Setting trimmer shoes 9- 48
9.2.7.1 Setting horizontal trimmer tracer shoe 9 – 48
9.2.7.2 Setting vertical trimmer tracer shoe 9 – 50
9.2.8 Performing trimming and scraping cycle to test setup 9 - 53
9.2.8.1 Setting the glue joint scraper 9 – 54
9.3 Advanced Controls 9- 59
9.3.1 Advanced Controls: Glue 9- 60
9.3.2 Advanced Controls: Trimmer 9- 61
9.3.3 Advanced Controls: Scraper 9- 62

_______________________________________
5
9.3.4 Advanced Controls: Feed 9- 63
9.3.5 Advanced Controls: 360 Panel 9- 65
9.3.1 Advanced Controls: Panel Shapes 9- 66
9.4 Cycle Functions 9 – 67
9.4.1 Standard Conditions 9 - 67
9.4.2 Convex (external) Corner 9 - 67
9.4.3 Concave (internal) Corner 9 - 72
9.4.3.1 Aggregate pushed back by Bump Bar 9 - 73
9.4.3.2 Aggregate retracted by Bump Bar 9 - 74
9.4.3.3 Aggregate retracted by Bump Switch 9 – 75
9.4.4 Special Sequences 9 - 79
9.4.4.1 Setting trigger points 9 - 80
9.4.4.2 Setting up special sequences 9 - 81
9.5 Functions Page 9 - 83
9.6 Save/load settings 9 - 85
9.7 Alarms 9 - 87
10 Care and maintenance
10.1 General instructions 10 - 1
10.2 Maintenance chart 10 - 2
11 Troubleshooting and remedies
11.1 Simple fault schedule 11 – 1
11.2 List of alarms 11 – 3
11.3 Start Prevent alarms 11 - 4
12 Notes 12 - 1

Technical Data 1
________________________________________________________________________________________
_______________________________________
1-1
1.1 Characteristic Data
Machine designation: Contour Edgebander
Model Revolution 180
Manufacturer Vector Systems Ltd
P O Box 78 331
Grey Lynn
AUCKLAND, NEW ZEALAND
Serial Number ________________________
Year of Manufacture ________________________
1.2 Weight
Model Revolution 180
Weight (kg) 2500kg
1.3 Scope of application, operation and intended use.
1.3.1 Scope of application
This contour bander is for the automatic application of a wide range of banding
materials to contoured panels.
1.3.2 Operation
The workpieces are clamped to the worksurface using vacuum cups and the control
system positions the head against the panel and then follows the contour of the
panel.
1.3.3 Intended Use
The Tangent machine is used to profile the unfinished corners which result from
through-feed edgebanding. The cutter unit is mounted in a rotating suspension
system and is controlled by a copy bearing and tracer pin.
For admissible working dimensions, see section 1.5 . Any other use is deemed
incorrect. The manufacturer cannot accept liability for resultant damage. The user
shall bear the risk alone.

Technical Data 1
________________________________________________________________________________________
_______________________________________
1-2
1.4 Machine Dimensions
MODEL VECTOR Revolution 180
WIDTH 2606mm
HEIGHT 2450mm
LENGTH 4600mm

Technical Data 1
________________________________________________________________________________________
_______________________________________
1-3

Technical Data 1
________________________________________________________________________________________
_______________________________________
1-4
1.5 Working Dimensions
Pay attention to the restrictions for the working dimensions. See chapter -
Technical Data - for the related operating instructions.
Model VECTOR Revolution 180
Workpiece thickness min (mm)
max (mm)
16
36
External radius min (mm) 20
Internal radius min (mm)
50
1.6 Connected Load (Basic machine + units)
(For total connected load of machine, see serial plate)
Model VECTOR Revolution 180
400V 50Hz Power (kW)
Machine 0.6
Vacuum Pump 2.5
Control Voltage (V) 24VDC
1.7 Ambient Conditions
1.7.1 Electronic Devices
Operating Temperature 5°to 50°
Storage Temperature
-
10
°
to 50
°
1.8 Compressed Air
Model VECTOR Revolution 180
Compressed Air
- Operating pressure
- Limit Pressure
6 bar (6x10⁵ Pa)
8 bar (8x10⁵ Pa)
Connection 1/2” BSP female thread
CAUTION !
Table of contents
Other Vector Industrial Equipment manuals