STARTING TO USE THE EQUIPMENT
3.2 Daily operations for temperature
check and gas fill
AT EVERY START UP: The operator should
check for temperature and oxygen con-
centration. This ensures the correct opera-
tion of Gasglass Laser.
Temperature check
Laser component needs to be operated in
correct temperature in order to yield highly
accurate measurement results. Incorrect
temperature adjustment might result in in-
correct measurement results or unexpect-
ed functions. Take the following actions
to test the temperature adjustment every
time when starting up the device.
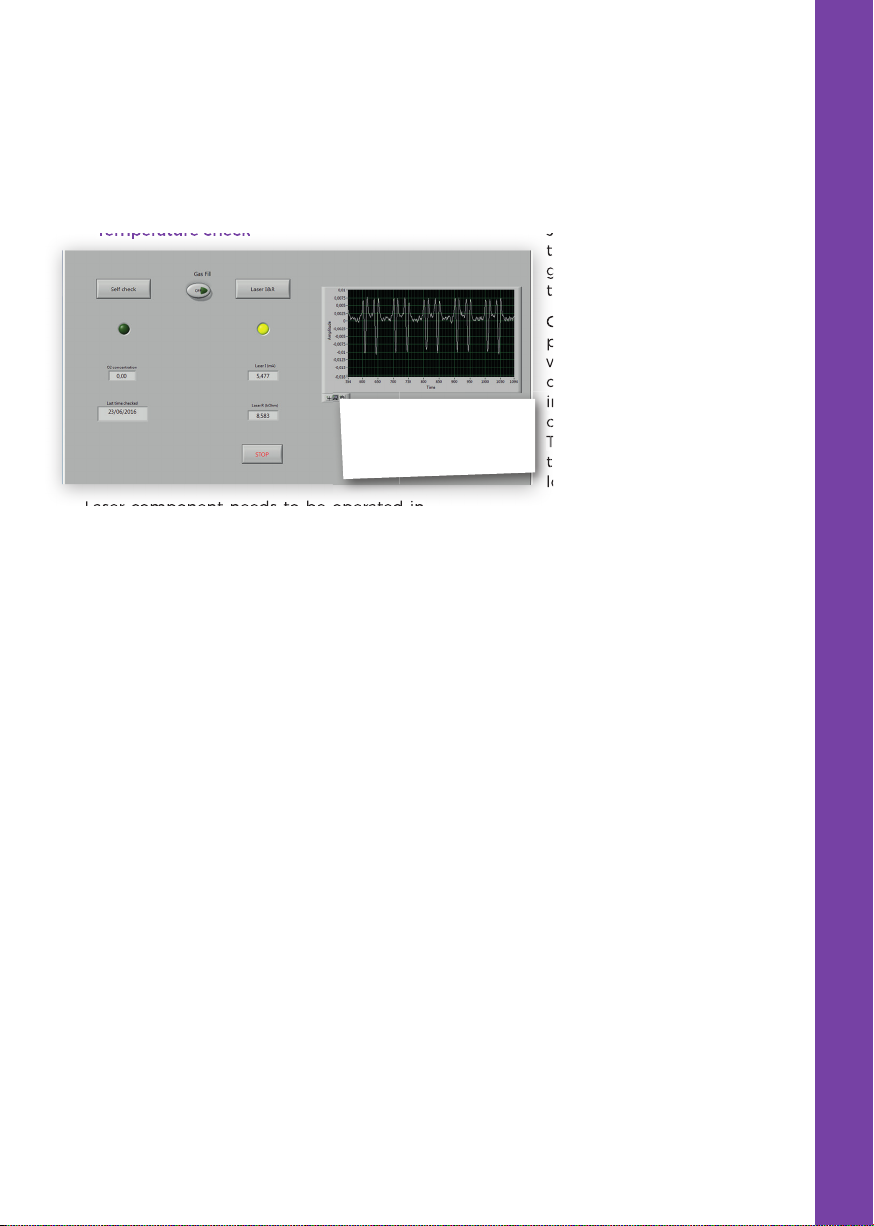
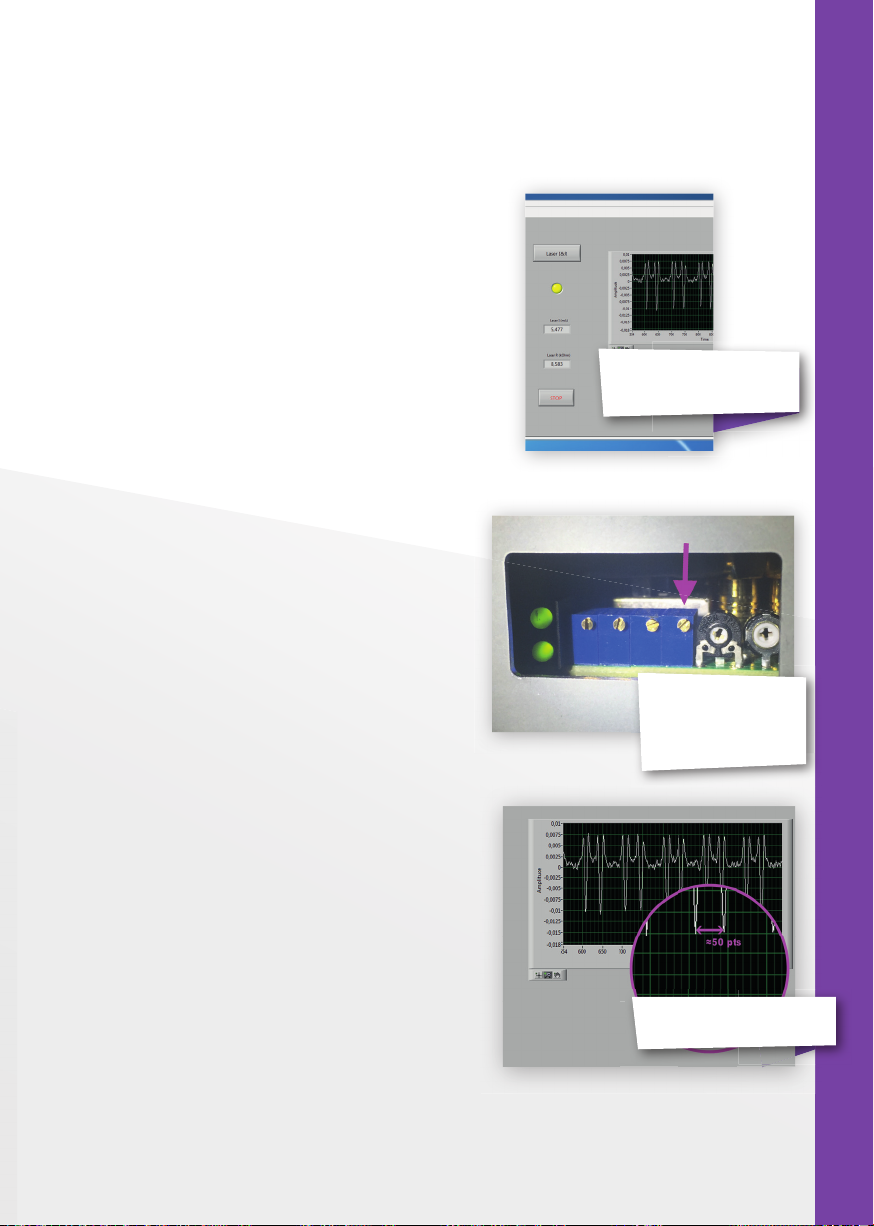
Choose the “Check and Gas fill” page from
the upper left corner on the software. Press
“Laser Test” button and see the following:
• Laser I should be 5,3 – 5,7mA and Laser
R 3 – 16 kΩ. Value is specific for each
device.
• Graph should be adjusted so that X
axis is approximately 500 points wide
and Y axis according to the height of
the spikes. This can be done from the
bottom left of the graph.
• Figures on the graph should be equally
spaced and with approximately 50 (in
older devices 100) points spacing.
If these are correct, press stop.
If these don’t apply, see troubleshooting
section in Chapter 5.
Oxygen concentration check
Gasglass Laser is a gas fill analyzer, however
it measures the oxygen absorption from the
insulating glass unit. For correct readings,
oxygen inside the measuring head needs
to be removed as well as pos-
sible. This is done by flushing
the measuring head with ar-
gon/xenon/nitrogen to replace
the oxygen.
On “Check and Gas Fill” page,
press “Self Check” button. This
will measure the oxygen con-
centration inside the measur-
ing head, and show the result
on the box below the button.
The operator can begin to use
the device if if the result is be-
low 0,15%.
If the result is over 0,15%,
there’s is too much oxygen inside the mea-
suring head and the following actions
should be taken:
• Place the measuring head facing
(glass window) down on unscratching
surface.
• Open the end cap from the left handle
on the measuring head, and take out
the two hoses.
• Apply dry and pure (>99,9 %) argon
flow of 1 – 3l/min to the hose marked
with “IN” label
• Press the “Gas fill” button on the
software (light on the button will turn
on). This will open the internal valves
and guide the argon flow through the
measuring head.
During the filling, press “Self Check” button
to check the concentration. On each check,
you should see the concentration to de-
crease. Continue filling as long as the con-
centration does not go any lower, and the
self-check result is < 0,15%.
Laser component needs to be operated in
sible. This is done by flushing
the measuring head with ar-
gon/xenon/nitrogen to replace
On “Check and Gas Fill” page,
press “Self Check” button. This
will measure the oxygen con-
centration inside the measur-
ing head, and show the result
on the box below the button.
The operator can begin to use
the device if if the result is be-
ing head, and show the result
on the box below the button.
The operator can begin to use
the device if if the result is be-
Gas fill and
temperature
check screen
on the software