Sencon SI9550 User manual

MANUAL NO 092-41020-00
REVISION 0
LANGUAGE ENGLISH
Hoverprobe
Refurbish ent
Instructions

2 Hoverprobe Refurbishment
1.
RECOGNIZING THE TWO MODELS ........................................................................... 3
2.
PACKING LIST .......................................................................................................... 4
3.
HOVERPROBE REFURBISHMENT INSTRUCTIONS ..................................................... 5
3.1
S
WITCH ASSEMBL
.................................................................................................... 9
3.1.1
SI9650 ........................................................................................................... 9
3.1.2
SI9550 ......................................................................................................... 10
3.2
F
INAL ASSEMBL
..................................................................................................... 12
4.
HOVERPROBE TEST ............................................................................................... 14
5.
REVISION LIST ....................................................................................................... 15
6.
FAX BACK SUGGESTION PAGE ............................................................................... 16
.
CONTACTS DETAILS FOR SENCON ......................................................................... 1
It is strongly advised that you
watch the enclosed video CD prior
to carrying out this refurbishment.

Hoverprobe Refurbishment 3
1. Recognizing the two models
SI9550 Hoverprobe – old version
SI9650 Hover probe - current version
Foot
s
witch socket only on SI9550 version

4 Hoverprobe Refurbishment
2. Packing List
ITEM QTY DESCRIPTION
1 1 Hoverplate
3 1 Gasket
4 1 O Ring, 98*2.5, NBR70
5 1 Airplate
6 14 Screw torx LN1442, K40x14 stainless steel
8 3 Pillar, M5x70mm long, male to female, stainless steel
9 1 Probe tip
13 1 Weight cushion
14 1 Bearing
15 1 Bearing holder
22 100mm Plastic air pipe, polyurethane, 4mm pipe in o/d 4mm
25 1 2 pole lever – ONLY REQUIRED FOR SI9550
28 1 Microswitch – ONLY REQUIRED FOR SI9550
29 1 Micro air valve
29A 2 x 15 mm Heat shrink 6/2 adhesive black – ONLY REQUIRED FOR SI9550
30 2 x 30 mm VHB tape Acrylic foam – ONLY REQUIRED FOR SI9550
31 1 Loctite 480 glue – ONLY REQUIRED FOR SI9550
1
6
29 14 4
15
3
13
9
22
28 29
22
25
8 31
30

Hoverprobe Refurbishment 5
3. Hoverprobe Refurbishment instructions
4
1
3
6
5
7
8
9
10
11
12
13
14
16
19
17
18
20
22
21
23
34
24
15
Countersinkholes up
Centralise on weight.
Press holder over ea ring top
in groove. Keep holder as fl at
as possi l e.
1. Disassemble the Hoverprobe down to the hoverplate (1).
In the process, cut the wires to the micro-switch just above the switch and
unscrew the old switch from the top plate (only necessary if Hoverprobe is of
old type SI9550)
2. Place a new O ring (4) and
a new gasket (3) in place
on the new hoverplate (1).

6 Hoverprobe Refurbishment
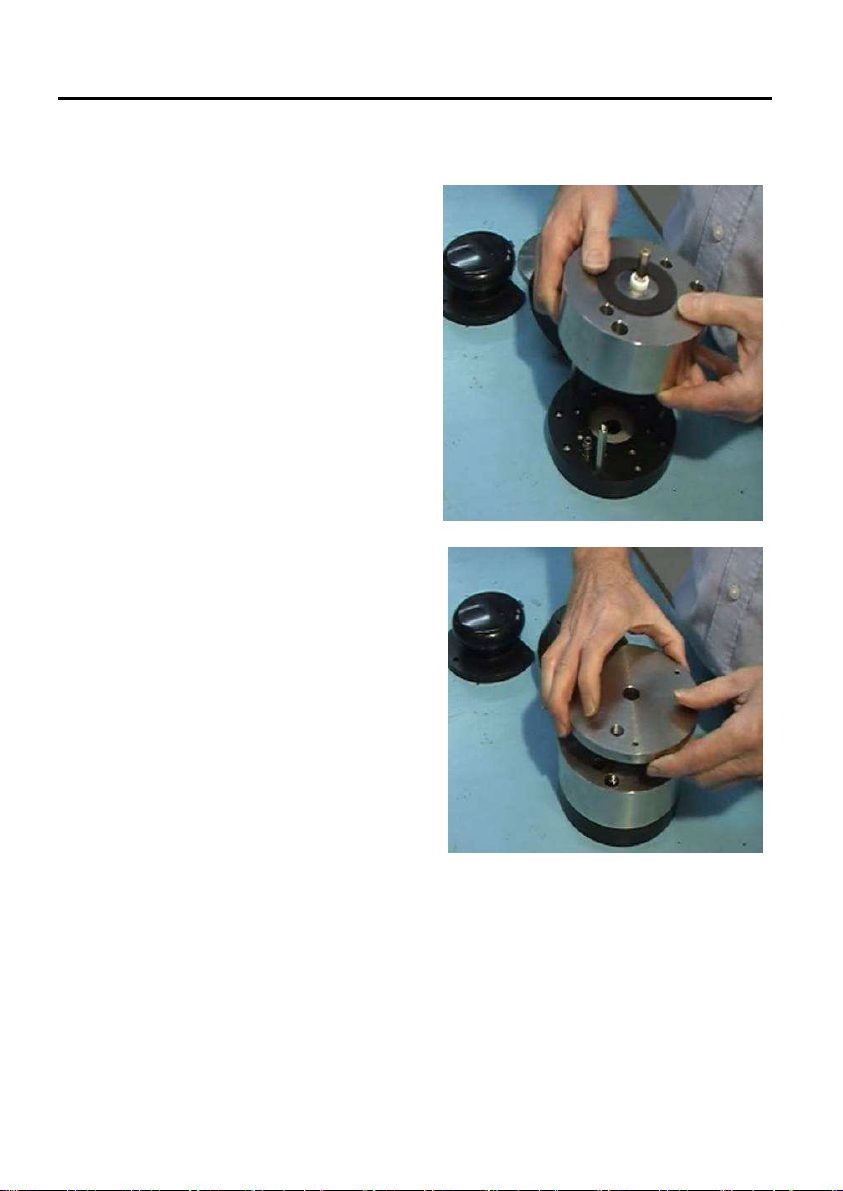
3. Screw Pillars (8) down to fasten the new
airplate to the hoverplate (1). The pillars
are supposed to have a tight fit in the
holes. The curved surface of centre hole
on airplate must be downwards
4. Tighten screws (6), with torque of 1.4Nm,
in sequence as shown in 'Top View'.
5. Take the air-fitting (7) out of the old
airplate (5) and mount it in the new
airplate (5)
6. Remove old weight cushion from weight
using a sharp knife.
7. Stick new weight cushion (13) onto weight
as central as possible.
2
11
414 7
12
8
10
9
513
3
T
op view of ase
6
1
T
o
r
que 1
N
m

Hoverprobe Refurbishment
8. Insert the new probe tip (9) in probe
tip holder (10).
9. Fit bearing holder spring plate (15)
on to the bearing (14). Take care it
doesn’t deform! Keep holder as flat
as possible. To aid you use a cylinder
or similar with a hole slightly bigger
than the bearing.
10. Place bearing (14) with bearing holder
(15) in to the weight assembly (12).
The longer part of the bearing goes
into the weight
8 Hoverprobe Refurbishment
11. Lock centre pillar (17) in the probe tip holder (10) with threadlocker (Loctite 242
or similar).
12. Place weight (12) over pillars (8).
13. Place the top plate (16) over the
weight (12).

Hoverprobe Refurbishment 9
3.1 Switch assembly
3.1.1 SI9650
14. Replace air valve (29) on bracket (24).
15. Connect the plastic air pipe (22) to
the air-valve and the external air
fitting.
16. Press the copper pipe (19) in to the
air-valve (29).
19
22

10 Hoverprobe Refurbishment
3.1.2 SI9550
17. Remove old micro switch and air valve
from bracket (24).
18. Clean the bracket (24) and flatten both
sides of the new air-valve (29) with
sanding paper.
19. Stick 30mm VHB tape (30) onto the
bracket (24), put some drops of glue (31)
on the tape to hold the plastic valve.
20. Stick the air-switch (29)
onto the bracket (24) as
high as possible and equal
with the front surface, but
make sure there is no leak.
21. Place whole assembly in a
vice to set for 5 minutes.
Do NOT over tighten the
vice!
This manual suits for next models
1
Table of contents
Other Sencon Measuring Instrument manuals


