
RedBack Lasers EGL624G User manual


CONTENTS
User Safety 2
Introduction and EGL624G™ Accessories 3
EGL624G™Diagram 4
Operating Instructions 6
Batteries 6
Power and Tilt 7
Grade Setting 8
Manual Mode & V-W-S 10
Vertical Rotation 11
Laser Receiver LRG715 12
Calibration Self Check & Technical Specications 13
Care & Maintenance, Trouble Shooting 14
Warranty 16
User Safety
• Laser output sign lies near the output aperture.
• Do not stare directly into laser beam.
• Do not disassemble the instrument or attempt to
perform any internal servicing. Repairs and service
should be performed only authorised service
centres of Redback Lasers.
• This instrument complies with the safety
Classication standards of laser radiation.
2
CAUTION: Class 3R laser <5mW at 522-542nm.
Do NOT stare into laser beam or aim at another person.
Follow relevant Australian Standards
Copyright © CMI LasersTM RedBack lasersTM and Level1LasersTM . All rights reserved CMI Industries Pty Ltd 2010
No artwork or photographs produced by CMI Industries Pty Ltd may be used copied or reproduced without the written consent
from CMI Industries Pty Ltd
3
EGL624GTM INTRODUCTION
Congratulations on purchasing the EGL624G™ an electronic self levelling
contractors rotating lasers level built tough to handle the harshest of job
sites.
The EGL624G™ is ideal for general site levelling, earth movers and
installation both indoors and out, simply set it up on a tripod, turn on,
it electronically self levels and the laser starts rotating. Then using the
supplied LRG715 receiver you can set up your levels or grades.
The EGL624G™ has manual dual grade setting capability and can be
mounted on its side for vertical alignment and site squaring.
The EGL624G™ high visibility green diode makes it ideal for indoors both for
horizontal levelling and vertical alignment and with variable rotation speeds
and scan modes the EGL624GTM provides exceptional visible range.
Other features of the EGL624G™ include grade setting on the plumb dot
when mounted on its side, Vibration and Wind setting control, rechargeable
Ni-Mh and Std “C” Size battery operation and Five Year Redback Warranty.
(See page 16)
www.redbacklasers.com.au
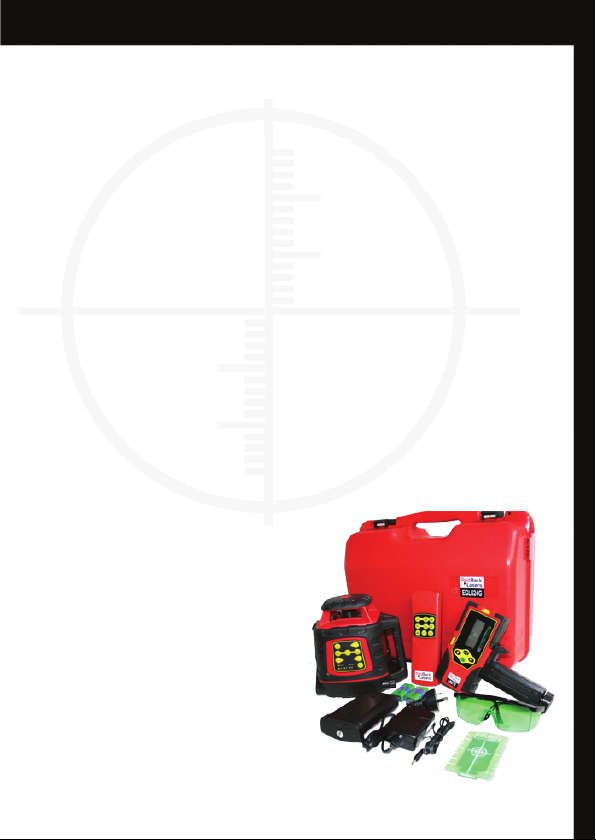
EGL624G™ Included Accessories
• EGL624G™LaserUnit
• ProtectiveCarryCase
• RechargeableNi-MhBatteries
• Charger
• StdBatteryCompartment
• LaserReceiverLRG715
• ReceiverStaffClamp
• RemoteControl
• MagnetisedTarget
• GlassestoAssistViewingofLaser
• InstructionManual

4
EGL624GTM DIAGRAMS
EGL624GTM Laser Unit
1
2
3
5
7
1. Laser Output Window
2. Adjustment Vertical Operation
3. Bubble Vial Vertical Operation
4. Keypad (below)
5. Datum Point Vertical Operation
6. 5/8” – 11tpi Screw (Vert)
7. Battery Compartment
8. 5/8” - 11tpi Screw (Horiz)
Keypad
www.redbacklasers.com.au
2
4
6
8
Power On/Off
Scan Mode
Tilt On/Off
Slope (Grade)/Manual
Rotate Button
Vibration & Wind
Sensor Select
Mode LED’s
Axis LED’s Slope
(Grade)/ Calibration
Power LED

5
www.redbacklasers.com.au
Remote Control
Receiver - LRG715
Transmitting LED
Power/Standby Button
Calibration Controls
(For Service Technicians Only)
Battery Compartment
Scan Mode
Slope (Grade)/Manual
Rotate Button
Re-Level Button
Reception Sensors
Fine/Coarse Mode
Speaker Control
Power On/Off
Rubber Casing
LCD Display
(Repeated on rear)
Bubble Vial
Display back light
Magnetic Mounting

6www.redbacklasers.com.au
EGL624TM OPERATING INSTRUCTIONS
Battery Instructions
To charge this battery pack simply inserting the charger plug into the charging
socket above the locking screw. The LED on the charger is illuminated red
during the charging process and will turn green once the batteries are
fully charged. Battery pack can be charged while inserted in the laser or
independently.
WhenthepowerLEDonthekeypadashes,therechargeablebatterypack
needs recharging or standard batteries need replacing. Note the charger will
only charge the supplied rechargeable battery pack.
Handy Hints
•
Prior to initial use, charge the rechargeable batteries for at least 8
hours.
•
Runningrechargeablebatteriescompletelyatwillincreasebatterylife.
•
The EGL624G™ can operate off mains by plugging the charger (for
indoor use only) into the unit.
•
Remember the EGL624G™ can operate using standard batteries when
rechargeable pack is out of charge.
The EGL624G has two battery options either 4 x standard “C” size Alkaline
or the Ni-Mh rechargeable pack. For standard 4 x “C” alkaline operation
simply insert into standard battery holder in the direction indicated and slide
into battery recess and tighten the locking screw.
To use the rechargeable
battery pack rst
remove standard pack
if inserted and place
into the same battery
recess and tighten
locking screw.

7
www.redbacklasers.com.au
Turning Laser On
Press Power button on the keypad to turn on the EGL624G™, power
LEDwilllight.BatteriesarelowifpowerLEDashes.Afterturningthelaser
on, the laser will auto level and rotate. The power button on the remote will
not operate until the laser has been powered up from the keypad direct, the
power button on the remote then acts as a standby button. The EGL624GTM
has a large self levelling range, if the laser happens to be set up outside this
range,awarningwillsoundandthelaserwillash.Re-setthelasermore
level if this occurs.
Tilt Mode
Tilt mode is somewhat similar to tilt on a pinball table in that if when running
theEGL624Gdetectssignicantdisturbanceormovementthatcouldeffect
the accuracy of your work the laser will “Tilt” (stop working) and the laser
beamswillashtoindicatethis.You will need to then re levelthe laser
by either pressing the level button on the remote or pressing the tilt
button twice on the keypad, wait a few seconds to level and then re-
check your work to maintain maximum accuracy.
Tilt mode is turned on and off with the tilt button on the keypad, the default
setting is off. Once the tilt button has been pressed the tilt LED will light
indicating it is on.
To deactivate the tilt mode press the tilt button the LED goes out. It
is recommended to use tilt mode when optimal accuracy is required or when
there is a chance that machinery or worker may interfere inadvertently with
the lasers level.
Rotation Speed Settings
• A short press of the Rotating Speed Button will switch the rotating
speed between 3 different rotational speeds, 800 rpm (default), 300
rpm and 5 rpm and rotating can also be stopped to create a dot.
Rotation speed will effect receiver performance at different distances.

8
EGL624GTM OPERATING INSTRUCTIONS cont.
Setting Slope/Grades (refer to diagram page 4)
The EGL624GTM can be used to set grades. In Slope (Grade) Mode you can
set a Grade in either the X or the Y Axis of up to 8% see the markings on
top of laser for axis alignment. With the EGL624G both “TILT” and “V-W-S”
modes can be used. The EGL624G is dual grade capable so a grade can be
set on the X and Y axis simultaneously, however, only when in manual mode
page 10.
• Turn the laser on, allow to level and begin rotating.
• On either the key pad of the laser or on the remote control a short press
of the Slope (Grade)/Manual Mode button will activate slope mode
indicated by LED and the X LED will also illuminate. Note a long press
will enter Manual mode see page 10.
• Select the axis you wish to grade by again pressing this same button
and the selected X or Y axis LED will light. A long press when already
in slope mode will exit back to normal levelling.
• Move the laser plane on the selected axis up or down using the Slope
Grade Direction buttons . For dual grade use manual mode
see page 10.
• To reset and re-level press and hold the Slope Grade button .
www.redbacklasers.com.au

9
Setting a Grade
Following is a method of setting a grade using the slope (grade) buttons as
previously discussed. Here we will show setting a single grade on the X axis,
for a dual grade simple repeat the process on the Y axis (Manual Mode Only).
Set up the laser aligning the X axis with the direction of the required grade
rise/fall, the laser can be placed anywhere on site as long as the X axis runs
parallel with the desired grade.
For this example we want a grade of 1 in 60 or 1.667% or in other words for
every 6m (6000mm) travelled away from the laser along the X axis we want
the laser plain to tilt down/up 0.1m (100mm).
To achieve this measure out 6m away from the laser along the X axis and
hold the staff at this point slide the receiver up/down the staff until the
receiver indicates level (see receiver instructions page 10).
Then making a note of the height on the staff slide the receiver up/down the
staff 100mm, this is now the height the laser needs to be hitting to be setting
a 1 in 60 slope or grade.
Usingtheremote,selectgrademodeontheXaxisandusetheSlopeGrade
Direction buttons to slope the laser until the receiver shows level.
The Grade is now set at 1 in 60 or 1.667% on the X axis and anywhere
parallel to the X axis on site.
Chart below gives a range of grades and the distance the receiver shifts all
based a 5m distance of staff away from laser.
GRADIENT % DISTANCE LASER (M) MOVE RECEIVER (MM)
1 IN 20 5 5 250
1 IN 30 3.3 5 167
1 IN 40 2.5 5 125
1 IN 60 1.66 5 83
1 IN 80 1.25 5 63
1 IN 100 1 5 50

10
EGL624GTM OPERATING INSTRUCTIONS cont.
Manual Levelling Mode
V-W-S Vibration & Wind Sensor Setting
Manual mode can be used to simulate a manually levelling laser thus allowing
you to set the laser up at any angle and allow the laser to rotate. This can
be usefull for setting large manual grades on dam walls or indoor alignment
such as roof lines or balustrades.
In manual mode you can also set slopes (grades) on both axis at the same
time, however, “V-W-S” and “TILT” cannot be used and any disturbances of
the laser will not be indicated to the user.
• To enter manual mode press and hold Slope/Manual button note
short press will enter slope mode see page 8. Press and hold to exit.
• To set dual grade follow same instructions as pages 8/9, select axis and
slope beam, select second axis and slope that beam.
The EGL624G continuously self levels for utmost accuracy, in high winds or
vibrations the laser will stop rotating to re-level this may be inconvenient by
slowing down your work, however, by selecting V-W-S button the laser
continually re-levels but does not stop rotating whilst doing so.
An added feature in vertical rotation and using manual mode can be used to
slope the dot laser for setting manual pipe grades. Press the Slope/manual
button 3 times quickly on key pad (press hold on remote) manual LED
will light and use slope direction buttons on the remote to slope up
and down the dot.
www.redbacklasers.com.au
Table of contents
Other RedBack Lasers Measuring Instrument manuals


