
Motrona AX320 User manual
Operating Instructions
motrona GmbH, Zeppelinstraße 16, DE - 78244 Gottmadingen, Tel. +49 (0) 7731 9332-0, Fax +49 (0) 7731 9332-30, [email protected], www.motrona.com
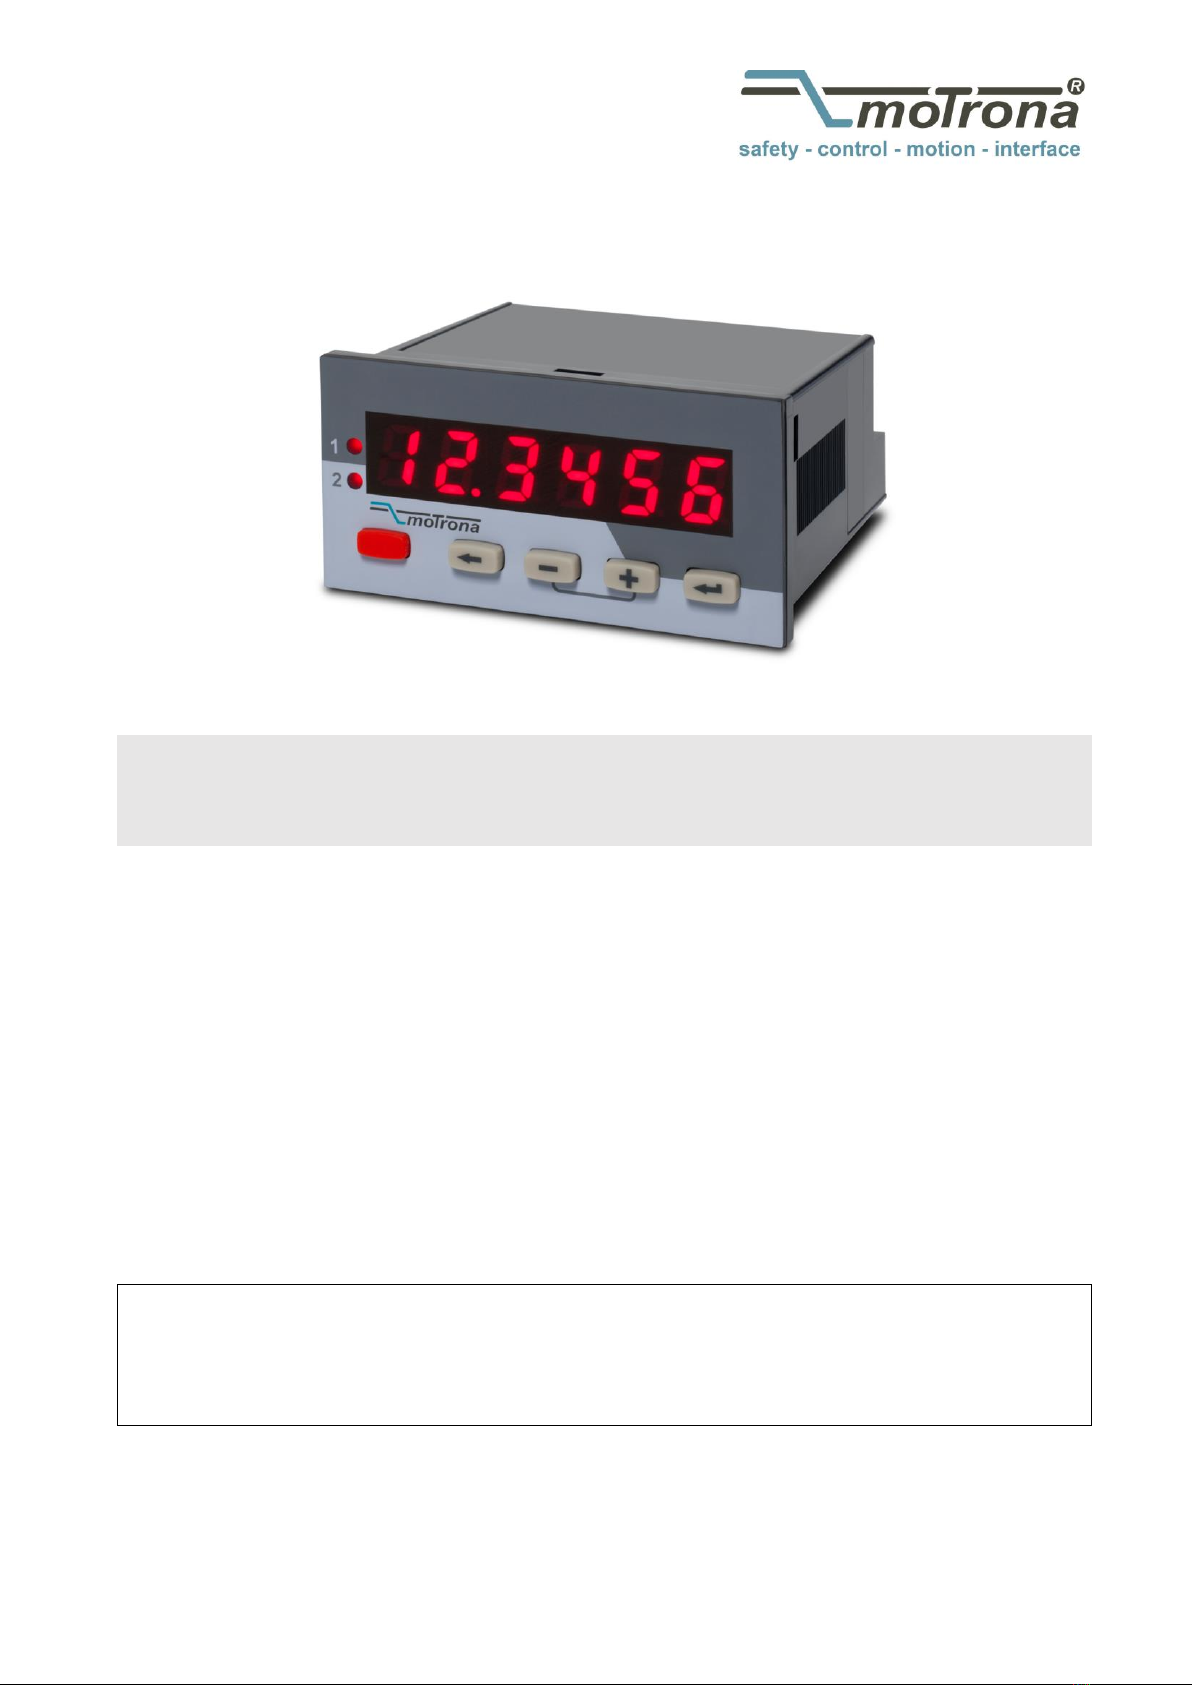
AX320 / AX322
Process indicators for standard analog signals with 2 presets / relays and 2 control inputs
Product features:
Two identical models, but with a different power supply range
Analog input 0 … +/-10 V (or 2 –10 V) and 0 –20 mA (or 4 –20 mA)
Two relay outputs for limit monitoring (dry changeover contacts)
Two digital multi-function inputs with programmable control function
Useful supplementary functions like Digital Filter, Linearization, Totalizer etc.
6 digit 14-segment display (14 mm / 0.55’’ size) for readout and menu dialogues
Available devices:
AX320: Power supply 10 –30 VDC
AX322: Power supply 90 –240 VAC and auxiliary output 24 VDC

Ax320_01c_oi_e.doc / Apr-16 Page 2 / 31
Version:
Description
AX32001a/hk/05_2011
First edition
AX32001b/tj/nw/02_2014
Small changes
Ax320_01c_oi/Apr-16/ag
Design and “Safety Instructions”updated
Legal notices:
All contents included in this manual are protected by the terms of use and copyrights of motrona GmbH. Any
reproduction, modification, usage or publication in other electronic and printed media as well as in the internet requires
prior written authorization by motrona GmbH.
Table of Contents
1. Safety Instructions and Responsibility ......................................................................... 3
1.1 General Safety Instructions ...........................................................................................................3
1.2 Use according to the intended purpose.........................................................................................3
1.3 Installation......................................................................................................................................4
1.4 Cleaning, Maintenance and Service Notes ...................................................................................4
2. Short Form Description................................................................................................. 5
3. Display and Operating Elements .................................................................................. 6
3.1 Overview.........................................................................................................................................6
3.2 Special Key Functions ....................................................................................................................6
4. Block Diagram and Terminal Assignments ................................................................... 7
5. Operating Concept (Mode of Operation)....................................................................... 8
6. Programming................................................................................................................ 9
6.1 How to Enter the Menu / Select a Function Group / Quit the Menu:...........................................9
6.2How to Select Functions / Set Parameters / Accept Settings ....................................................10
7. Function Groups ......................................................................................................... 11
7.1 Help Texts (running text) ..............................................................................................................11
7.2 Signal Inputs.................................................................................................................................11
7.3 User Linearization.........................................................................................................................12
7.4 Multifunction Key (MP-Key) and Multifunction inputs (MP-INP)................................................15
7.5 Totalizer Function .........................................................................................................................18
7.6 Limit Value (Alarm) Monitoring....................................................................................................20
7.7 Monitoring of the Measuring Circuit ...........................................................................................25
8. Technical Specifications ............................................................................................ 26
9. Dimensional Drawings ............................................................................................... 28
10. Help Texts.................................................................................................................. 29

Ax320_01c_oi_e.doc / Apr-16 Page 3 / 31
1. Safety Instructions and Responsibility
1.1 General Safety Instructions
This operation manual is a significant component of the unit and includes important rules and
hints about the installation, function and usage. Non-observance can result in damage and/or
impairment of the functions to the unit or the machine or even in injury to persons using the
equipment!
Please read the following instructions carefully before operating the device and observe all
safety and warning instructions! Keep the manual for later use.
A pertinent qualification of the respective staff is a fundamental requirement in order to use
these manual. The unit must be installed, configured, commissioned and serviced by a qualified
electrician.
Liability exclusion: The manufacturer is not liable for personal injury and/or damage to property
and for consequential damage, due to incorrect handling, installation, operation and maintaining.
Further claims, due to errors in the operation manual as well as misinterpretations are excluded
from liability. In addition the manufacturer reserves the right to modify the hardware, software or
operation manual at any time and without prior notice. Therefore, there might be minor
differences between the unit and the descriptions in operation manual.
The raiser respectively positioner is exclusively responsible for the safety of the system and
equipment where the unit will be integrated.
During installation, operation or maintenance all general and also all country- and application-
specific safety rules and standards must be observed.
If the device is used in processes, where a failure or faulty operation could damage the system or
injure persons, appropriate precautions to avoid such consequences must be taken.
1.2 Use according to the intended purpose
The unit is intended exclusively for use in industrial machines, constructions and systems. Non-
conforming usage does not correspond to the provisions and lies within the sole responsibility of
the user. The manufacturer is not liable for damages which has arisen through unsuitable and
improper use.
Please note that device may only be installed in proper form and used in a technically perfect
condition in accordance to the “Technical Specifications”. The device is not suitable for
operation in explosion-proof areas or areas which are excluded by the EN 61010-1 standard.

Ax320_01c_oi_e.doc / Apr-16 Page 4 / 31
1.3 Installation
The device is only allowed to be installed and operated within the permissible temperature
range. Please ensure an adequate ventilation and avoid all direct contact between the device
and hot or aggressive gases and liquids.
Before installation or maintenance, the unit must be disconnected from all voltage-sources.
Further it must be ensured that no danger can arise by touching the disconnected voltage-
sources.
Devices which are supplied by AC-voltages, must be connected exclusively by switches,
respectively circuit-breakers with the low voltage network. The switch or circuit-breaker must be
placed as near as possible to the device and further indicated as separator.
Incoming as well as outgoing wires and wires for extra low voltages (ELV) must be separated
from dangerous electrical cables (SELV circuits) by using a double resp. increased isolation.
All selected wires and isolations must be conform to the provided voltage- and temperature-
ranges. Further all country- and application-specific standards, which are relevant for structure,
form and quality of the wires, must be ensured. Indications about the permissible wire cross-
sections for wiring are described in the “Technical Specifications” chapter.
Before first start-up it must be ensured that all connections and wires are firmly seated and
secured in the screw terminals. All (inclusively unused) terminals must be fastened by turning the
relevant screws clockwise up to the stop.
Overvoltages at the connections must be limited to values in accordance to the overvoltage
category II.
For placement, wiring, environmental conditions as well as shielding and earthing/grounding of
the supply lines the general standards of industrial automation industry and the specific shielding
instructions of the manufacturer are valid. Please find all respective hints and rules on
www.motrona.com/download.html --> “[General EMC Rules for Wiring, Screening and Earthing]”.
1.4 Cleaning, Maintenance and Service Notes
To clean the front of the unit please use only a slightly damp (not wet!), soft cloth. For the rear
no cleaning is necessary. For an unscheduled, individual cleaning of the rear the maintenance
staff or assembler is self-responsible.
During normal operation no maintenance is necessary. In case of unexpected problems, failures
or malfunctions the device must be shipped for back to the manufacturer for checking,
adjustment and reparation (if necessary). Unauthorized opening and repairing can have negative
effects or failures to the protection-measures of the unit.

Ax320_01c_oi_e.doc / Apr-16 Page 5 / 31
2. Short Form Description
The units of series AX320 and AX322 have been designed for digital readout and monitoring of
analog measuring values with industrial applications of automation.
-Model AX320 provides a power supply input of 24 VDC.
-Model AX322 provides a power supply input of 90 –240 VAC and offers an additional
auxiliary output with 24 VDC / 30 mA for sensor supply purpose.
All further properties of these two models are fully identical.
The subsequent list shows a summary of technical specifications of AX320 / AX322 units::
•6-digit 14-segment LED display, 14 mm, for displaying measured values and dialogs
•Running text can be switched on as Help Text
•Language for the Help Text selectable as English or German
•Signal input for 0 –10 V, 2 –10 V, ±10 V, 0 –20 mA and 4 –20 mA
•Sampling rate 10 readings per second
•Digital filter (1st order) for smoothing display fluctuations with unstable input signals
•Customized linearization
•MIN/MAX memory function
•Totalizer function
•2 Relay outputs (changeover contacts) for limit monitoring
•Start delay for relay outputs after Power ON
•Versions for supply voltage 10 ... 30 V DC and 90 … 260 V AC
•Auxiliary power supply 15 V DC / 25 mA
•Additional aux. power output 24 V / 30 mA with AC supply
•Programmable via the front keys
•Multifunction key and two multifunction inputs, function programmable
Ax320_01c_oi_e.doc / Apr-16 Page 6 / 31
3. Display and Operating Elements
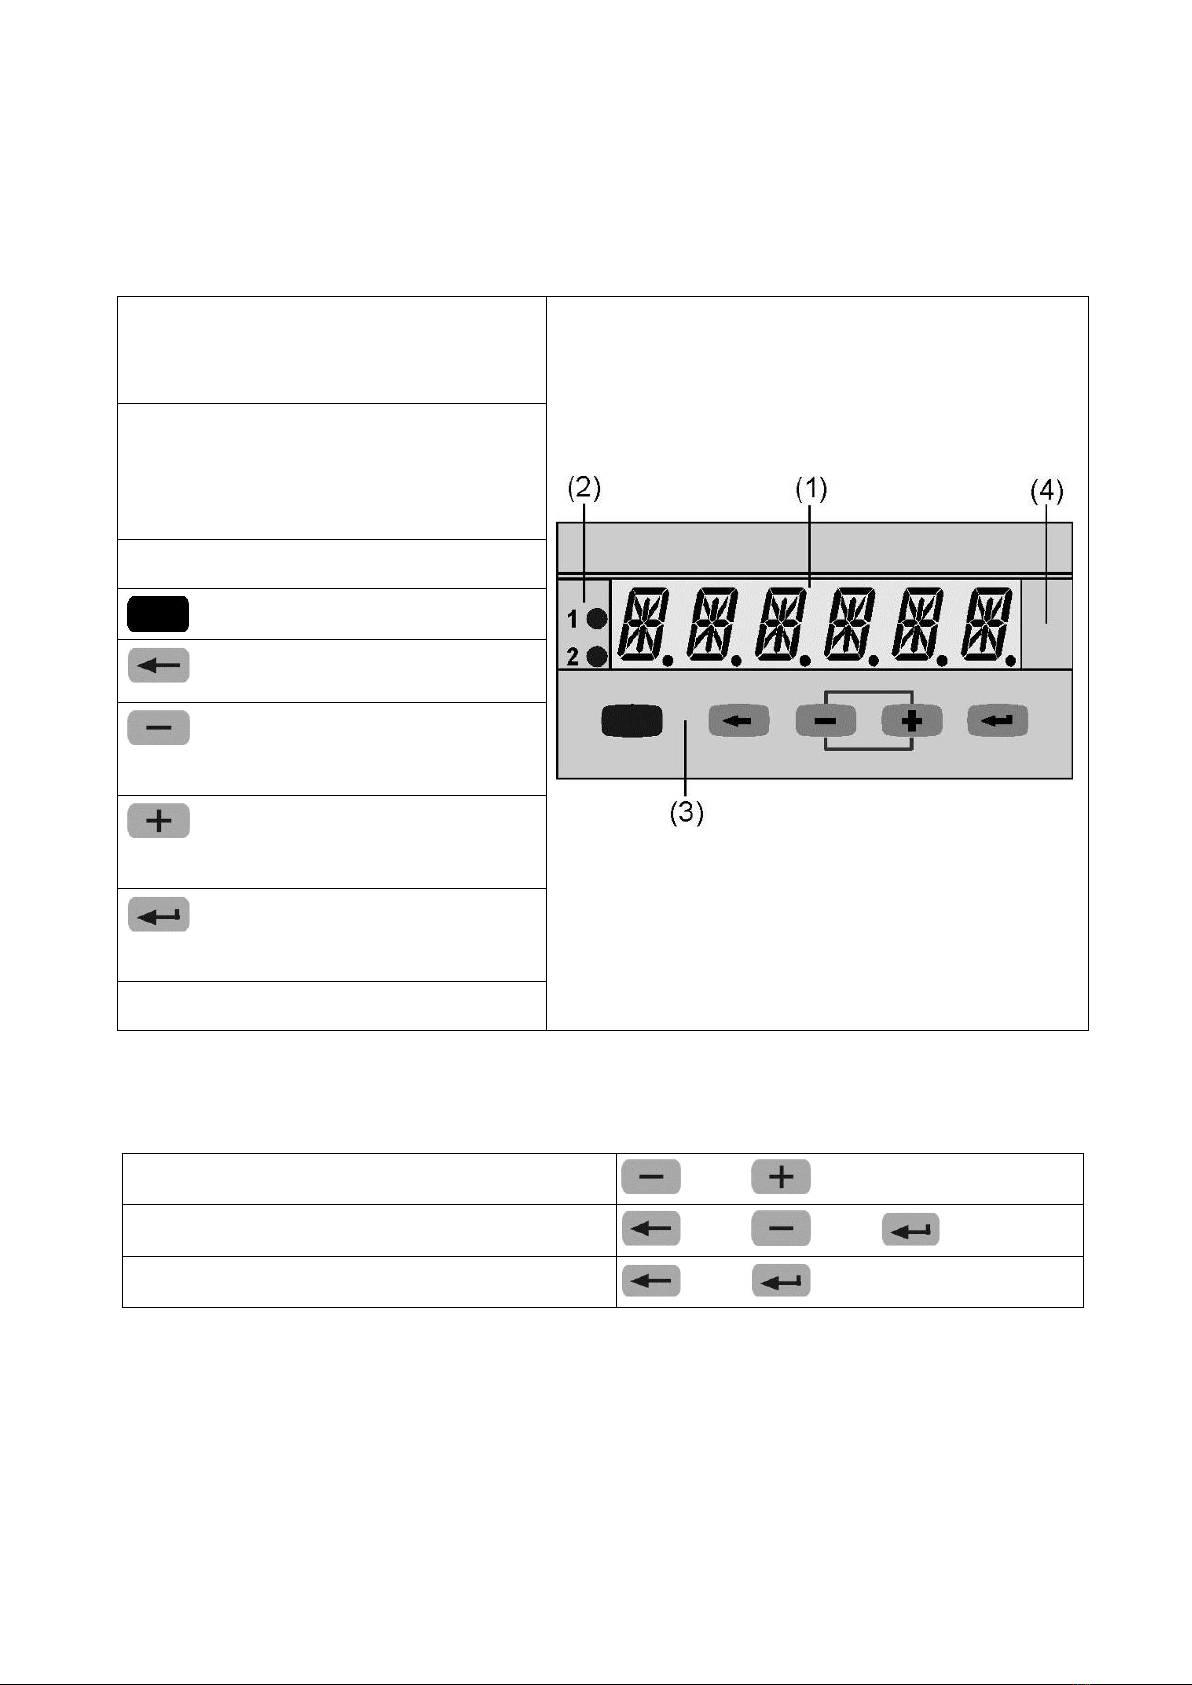
3.1 Overview
(1) Display
- 14 segment display, 6-digit, red
- Height of figures 14 mm
(2) Status display ( 2 LED annunciators, red)
- Switching status of Alarm 1 and Alarm 2
- Indication Function Group or Function
(3) MP-Key and Programming Keys
- Multifunction key (MP-Key)
- Return from Function Group
- Return from Function
- Select previous Function Group
- Select previous Function
- Decrement parameter value
- Select next Function Group
- Select next Function
- Increment parameter value
- Enter a Function Group
- Enter a Function
- Accept the new setting
(4) Space for unit overlay
3.2 Special Key Functions
To enter the Programming Menu:
+ [ > 3 sec ]
To display Device Type and Software Version:
+ + [ > 5 sec ]
To restore factory default settings:
+ [ > 3 sec ]

Ax320_01c_oi_e.doc / Apr-16 Page 7 / 31
4. Block Diagram and Terminal Assignments

Ax320_01c_oi_e.doc / Apr-16 Page 8 / 31
5. Operating Concept (Mode of Operation)
see 7.4

Ax320_01c_oi_e.doc / Apr-16 Page 9 / 31
6. Programming
To enter the programming menu, press
+
[ > 3 sec ]
During programming the relays are inactive (not energized)
When quitting the programming menu via SAVE, the minimum and maximum values
and the totalizer value are all cleared
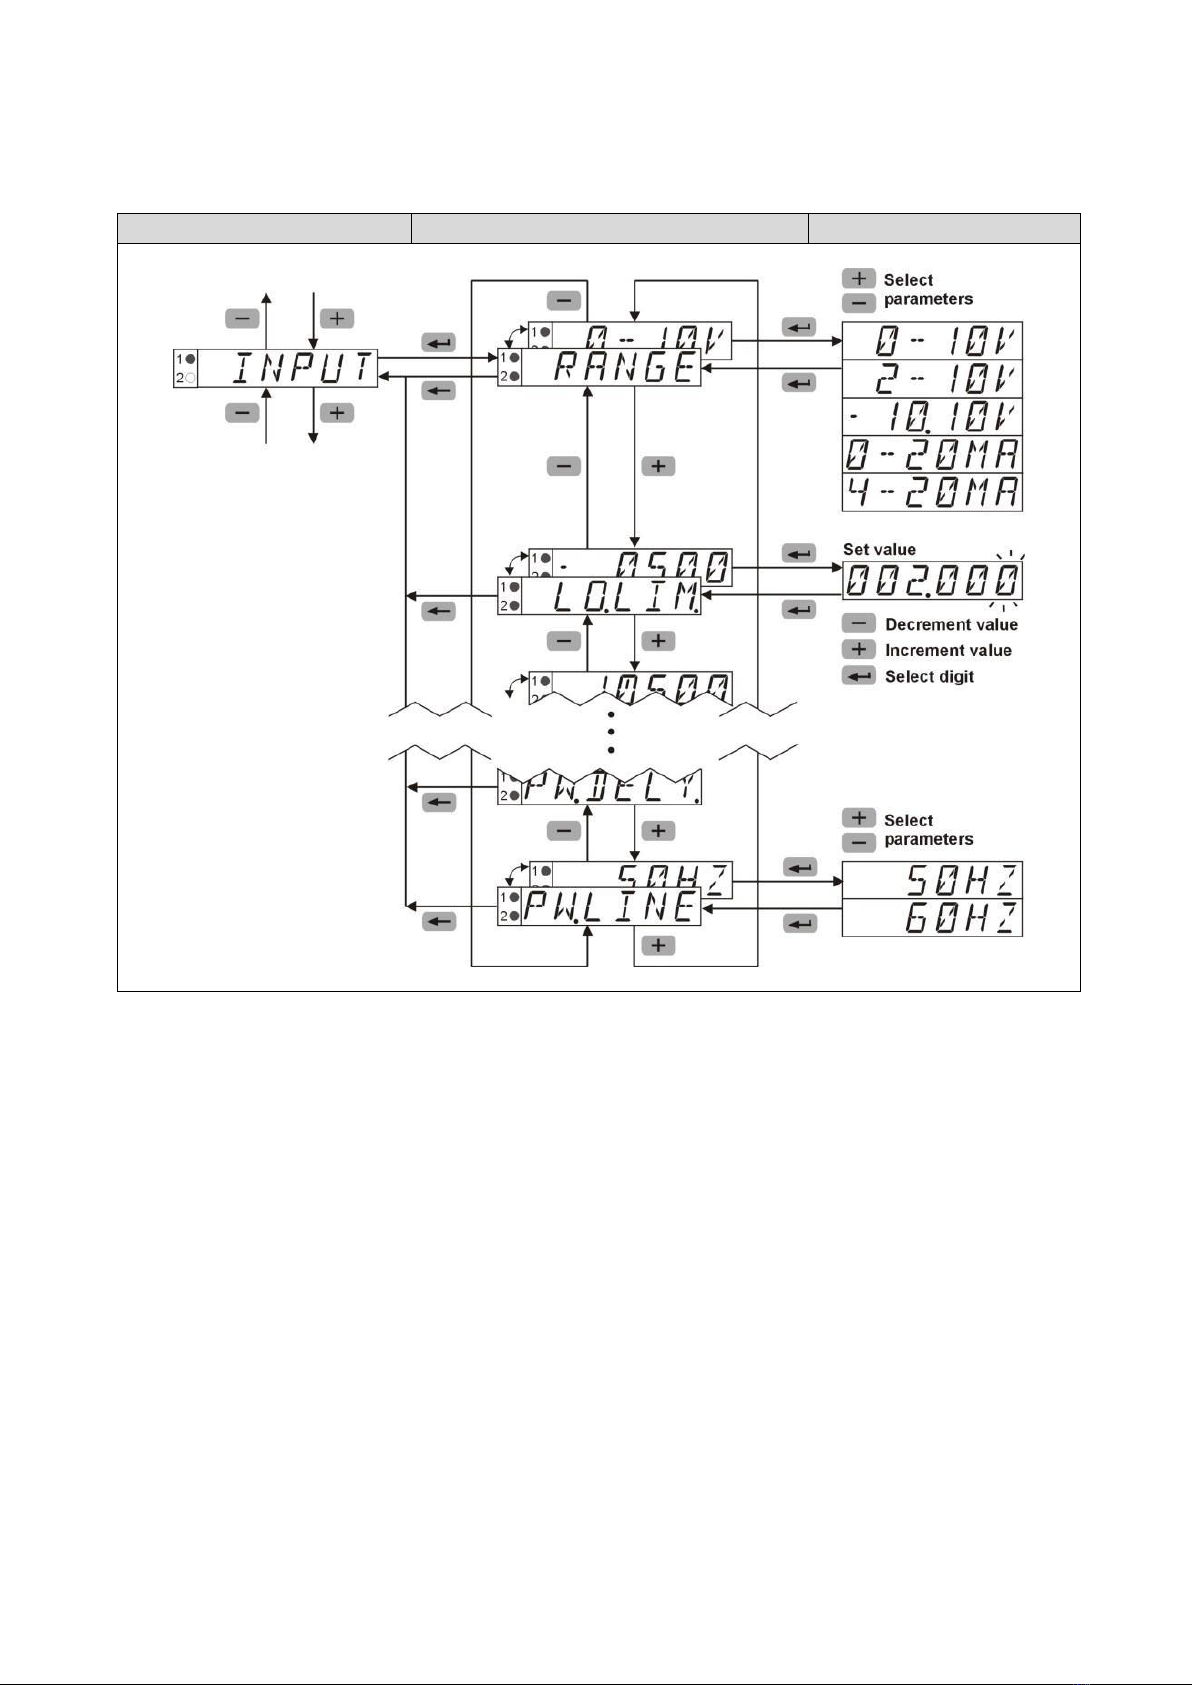
6.1 How to Enter the Menu / Select a Function Group / Quit the Menu:
Ax320_01c_oi_e.doc / Apr-16 Page 10 / 31
6.2 How to Select Functions / Set Parameters / Accept Settings
Function Groups
Function
Parameter
This manual suits for next models
1
Table of contents
Other Motrona Measuring Instrument manuals

Motrona
Motrona DS230 Series User guide

Motrona
Motrona AX 342 User manual

Motrona
Motrona AX020 User manual

Motrona
Motrona touchMATRIX PN350 User manual

Motrona
Motrona TouchMATRIX DM350 User manual

Motrona
Motrona AX 346 User manual

Motrona
Motrona IX 345 User manual

Motrona
Motrona MS 640 User manual

Motrona
Motrona touchMATRIX DP350 User manual

Motrona
Motrona IX348 User manual


