
PAGE 3
III. SET UP
If this is your first time using the iMonnit online portal, you will need to create a
new account. If you have already created an account, start by logging in. For
instructions on how to register and set up your iMonnit account, please consult
the iMonnit User Guide.
STEP 1: ADD DEVICE
1. Add the sensor to iMonnit.
Add a sensor to your account by choosing Sensors in the main menu.
Then, navigate to the Add Sensor button.
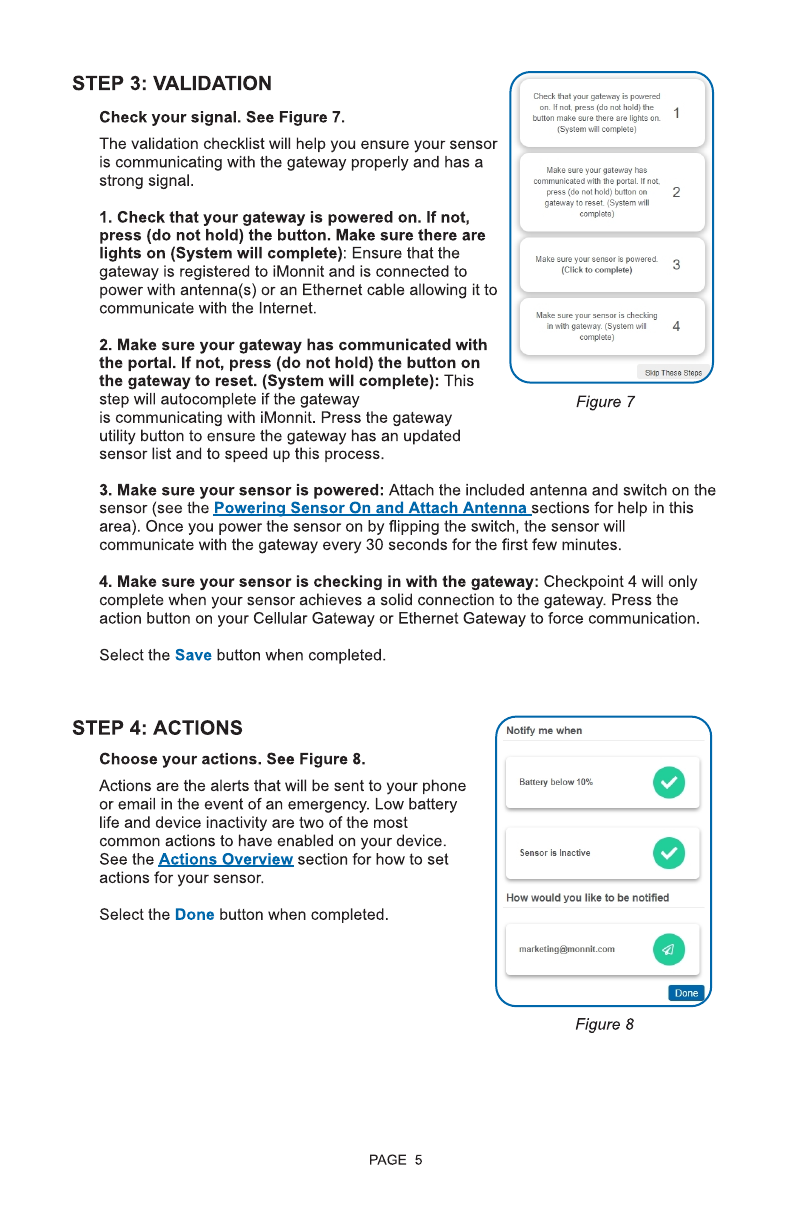
2. Find the device ID. See Figure 2.
The Device ID (ID) and Security Code
(SC) are necessary to add a sensor.
These can both be located on the label
on the side of your device.
3. Adding your device. See Figure 3.
You will need to enter the Device ID
and the Security Code from your
sensor in the corresponding text boxes.
Use the camera on your smartphone to
scan the QR code on your device. If you
do not have a camera on your phone,
or the system is not accepting the QR
code, you may enter the Device ID
and Security Code manually.
- The Device ID is a unique number
located on each device label.
- Next, you?ll be asked to enter the Security Code from your device. A
security code consists of letters and must be entered in upper case (no
numbers). It can also be found on the barcode label of your device.
When completed, select the Add Device button.
Figure 2
Figure 3
Select your use case. See Figure 4.
Choose one of the following options for your
use case: Very Low Light, Low Light,
Moderate Light, High Light, Very High Light,
or Full Light.
STEP 2: SET UP
Figure 4
Desktop Mobile


