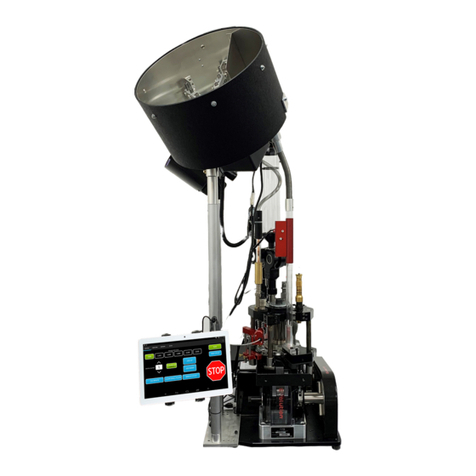
Hunter AutoComp Elite Technical manual

Form LM07298-00,08-20
Supersedes 7298-T,10-17
AutoComp Elite®
On-Car Disc Brake Lathe
with ACT
Copyright © 2016-2020 Hunter Engineering Company
Operation Instruction

OWNER INFORMATION
Customer Name:________________________________
Model Number: ________________________________
Order Number:_________________________________
Installation Date:_________________________________
Serial Number: __________________________________
Software Number:________________________________
Sales Representative Name and Number:____________________________________________________________
Sales Representative Phone:______________________________________________________________________
Service and Parts Representative Name and Number:___________________________________________________
Service and Parts Representative Phone: ____________________________________________________________
Hunter On-Car Lathe - Equipment Training Report
Technicians Trained: Please Print
Technician 1: Technician 2:
Technician 3: Technician 4:
Please have trained technicians initial each training item:
Brake Lathe Training Task Tech 1 Tech 2 Tech 3 Tech 4
Safety Precautions, Power On/Off, Safety Switch
Overview of Lathe Panel Controls
Overview of Tablet Controls
Inspecting & Replacing Cutting Bits
Adjustment of cutting bit tool holders
Flipping Tool Bit Holder
Adaptor Identification using Online QCL lookup
Adaptor Mounting/Set-Up
Compensation Procedure
Machining Procedures
One-Cut Finish Procedure
Special Application Adaptors
Maintenance Procedures
Installation & Training Acknowledgment: I, the undersigned, do hereby acknowledge that my Hunter Engineering
Brake Lathe has been installed and is operational. I also acknowledge that the above technicians have been trained to
my satisfaction in those areas of safety and operation as indicated above.
Management Name (print): Date:
Management Signature:

CONTENTS i
1. Getting Started . . . . . . . . . . . . . . . . . . . . . . . . . . . . . . . . . . . . . . . . . . . . . . . . . 1
1.1 Introduction . . . . . . . . . . . . . . . . . . . . . . . . . . . . . . . . . . . . . . . . . . . . . . . . . . . . . . . . . . 1
1.2 For Your Safety . . . . . . . . . . . . . . . . . . . . . . . . . . . . . . . . . . . . . . . . . . . . . . . . . . . . . . . 2
IMPORTANT SAFETY INSTRUCTIONS . . . . . . . . . . . . . . . . . . . . . . . . . . . . . . . . . . 2
1.3 Specific Safety Precautions/Power Source. . . . . . . . . . . . . . . . . . . . . . . . . . . . . . . . . . 3
Specifications for Extension Cords . . . . . . . . . . . . . . . . . . . . . . . . . . . . . . . . . . . . . . 3
Power Source Grounding Instructions . . . . . . . . . . . . . . . . . . . . . . . . . . . . . . . . . . . 3
Power Source Instructions . . . . . . . . . . . . . . . . . . . . . . . . . . . . . . . . . . . . . . . . . . . . . 3
Optional 220v Power Source (US & Canada) . . . . . . . . . . . . . . . . . . . . . . . . . . . . . . 4
Export ACE Lathes 220v Power Source . . . . . . . . . . . . . . . . . . . . . . . . . . . . . . . . . . 4
1.4 ACE Series Specifications . . . . . . . . . . . . . . . . . . . . . . . . . . . . . . . . . . . . . . . . . . . . . . 4
Domestic: US & Can . . . . . . . . . . . . . . . . . . . . . . . . . . . . . . . . . . . . . . . . . . . 4
Export:. . . . . . . . . . . . . . . . . . . . . . . . . . . . . . . . . . . . . . . . . . . . . . . . . . . . . . 4
1.5 Major Operating Controls . . . . . . . . . . . . . . . . . . . . . . . . . . . . . . . . . . . . . . . . . . . . . . . 5
Electrical Controls . . . . . . . . . . . . . . . . . . . . . . . . . . . . . . . . . . . . . . . . . . . . . . . . . . . 5
Rotor Feed Control. . . . . . . . . . . . . . . . . . . . . . . . . . . . . . . . . . . . . . . . . . . . . . . . . . . 5
Feed Engagement Knob . . . . . . . . . . . . . . . . . . . . . . . . . . . . . . . . . . . . . . . . . . . . . . 5
Depth of Cut Adjustment Knob. . . . . . . . . . . . . . . . . . . . . . . . . . . . . . . . . . . . . . . . . . 5
Cutting Tool Lock Knob (Inside and Outside) . . . . . . . . . . . . . . . . . . . . . . . . . . . . . . 6
Tool Holder Shaft Locking Bolt. . . . . . . . . . . . . . . . . . . . . . . . . . . . . . . . . . . . . . . . . . 6
Trolley Height Adjustment . . . . . . . . . . . . . . . . . . . . . . . . . . . . . . . . . . . . . . . . . . . . . 6
1.6 Lathe Tablet Operation . . . . . . . . . . . . . . . . . . . . . . . . . . . . . . . . . . . . . . . . . . . . . . . . . 7
Basic Operation . . . . . . . . . . . . . . . . . . . . . . . . . . . . . . . . . . . . . . . . . . . . . . . . . . . . . 7
Power on / off . . . . . . . . . . . . . . . . . . . . . . . . . . . . . . . . . . . . . . . . . . . . . . . . 7
Navigating . . . . . . . . . . . . . . . . . . . . . . . . . . . . . . . . . . . . . . . . . . . . . . . . . . . 7
Making Selections . . . . . . . . . . . . . . . . . . . . . . . . . . . . . . . . . . . . . . . . . . . . . 7
Lathe Controls . . . . . . . . . . . . . . . . . . . . . . . . . . . . . . . . . . . . . . . . . . . . . . . . . . . . . . 7
Select vehicle . . . . . . . . . . . . . . . . . . . . . . . . . . . . . . . . . . . . . . . . . . . . . . . . 7
Main Screen Features . . . . . . . . . . . . . . . . . . . . . . . . . . . . . . . . . . . . . . . . . . . . . . . . 7
BitMinder . . . . . . . . . . . . . . . . . . . . . . . . . . . . . . . . . . . . . . . . . . . . . . . . . . . . 7
Change Vehicle. . . . . . . . . . . . . . . . . . . . . . . . . . . . . . . . . . . . . . . . . . . . . . . 7
Direction . . . . . . . . . . . . . . . . . . . . . . . . . . . . . . . . . . . . . . . . . . . . . . . . . . . . 7
Menu . . . . . . . . . . . . . . . . . . . . . . . . . . . . . . . . . . . . . . . . . . . . . . . . . . . . . . . 7
2. Operation Information . . . . . . . . . . . . . . . . . . . . . . . . . . . . . . . . . . . . . . . . . . . . 9
2.1 Workpiece (Rotor) Preparation . . . . . . . . . . . . . . . . . . . . . . . . . . . . . . . . . . . . . . . . . . . 9
2.2 Twin Cutter Insert Holder Installation . . . . . . . . . . . . . . . . . . . . . . . . . . . . . . . . . . . . . 10
Recommended Insert Holder Installation - Standard Rotation. . . . . . . . . . . . . . . . . 10
Alternative Insert Holder Installation - Standard Rotation . . . . . . . . . . . . . . . . . . . . 10
Recommended Insert Holder Installation - Reverse Rotation . . . . . . . . . . . . . . . . . 10
Alternative Insert Holder Installation - Reverse Rotation . . . . . . . . . . . . . . . . . . . . . 11
2.3 Disc Resurfacing on the Vehicle . . . . . . . . . . . . . . . . . . . . . . . . . . . . . . . . . . . . . . . . . 11
Overview . . . . . . . . . . . . . . . . . . . . . . . . . . . . . . . . . . . . . . . . . . . . . . . . . . . . . . . . . 11
Reverse Rotation . . . . . . . . . . . . . . . . . . . . . . . . . . . . . . . . . . . . . . . . . . . . . . . . . . . 12
Preparation . . . . . . . . . . . . . . . . . . . . . . . . . . . . . . . . . . . . . . . . . . . . . . . . . 12
Mounting Adaptor . . . . . . . . . . . . . . . . . . . . . . . . . . . . . . . . . . . . . . . . . . . . 13
Mounting the lathe to the Vehicle . . . . . . . . . . . . . . . . . . . . . . . . . . . . . . . . 13
Compensation Procedure . . . . . . . . . . . . . . . . . . . . . . . . . . . . . . . . . . . . . . . . . . . . 13
Adjusting the Twin Cutter Assembly and Cutting the Rotor . . . . . . . . . . . . 14
ACT (Anti-Chatter Technology) Chatter Control . . . . . . . . . . . . . . . . . . . . . . . . . . . 15
Using the Stabilizer Support Rod . . . . . . . . . . . . . . . . . . . . . . . . . . . . . . . . . . . . . . . 15
Using the Reverse Function. . . . . . . . . . . . . . . . . . . . . . . . . . . . . . . . . . . . . . . . . . . 15
2.4 Optional Extended Cutting Head Kit 20-3092-1 or 20-3345-1 . . . . . . . . . . . . . . . . . . 16
Installation . . . . . . . . . . . . . . . . . . . . . . . . . . . . . . . . . . . . . . . . . . . . . . . . . . . . . . . . 16
Operation . . . . . . . . . . . . . . . . . . . . . . . . . . . . . . . . . . . . . . . . . . . . . . . . . . . . . . . . . 16
Contents

ii CONTENTS
3. Maintenance . . . . . . . . . . . . . . . . . . . . . . . . . . . . . . . . . . . . . . . . . . . . . . . . . . . 19
3.1 Equipment Maintenance . . . . . . . . . . . . . . . . . . . . . . . . . . . . . . . . . . . . . . . . . . . . . . . 19
Insert Maintenance and Replacement . . . . . . . . . . . . . . . . . . . . . . . . . . . . . . . . . . 19
Flange Plates . . . . . . . . . . . . . . . . . . . . . . . . . . . . . . . . . . . . . . . . . . . . . . . . . . . . . 19
3.2 Replacing Cutting Inserts . . . . . . . . . . . . . . . . . . . . . . . . . . . . . . . . . . . . . . . . . . . . . . 20
Removal . . . . . . . . . . . . . . . . . . . . . . . . . . . . . . . . . . . . . . . . . . . . . . . . . . . . . . . . . 20
Installation . . . . . . . . . . . . . . . . . . . . . . . . . . . . . . . . . . . . . . . . . . . . . . . . . . . . . . . 20
3.3 Cleaning and Lubrication. . . . . . . . . . . . . . . . . . . . . . . . . . . . . . . . . . . . . . . . . . . . . . . 20
Cleaning the Machine. . . . . . . . . . . . . . . . . . . . . . . . . . . . . . . . . . . . . . . . . . . . . . . 20
Lubrication . . . . . . . . . . . . . . . . . . . . . . . . . . . . . . . . . . . . . . . . . . . . . . . . . . . . . . . 20
Care and Maintenance of the Compensation Adaptor . . . . . . . . . . . . . . . . . . . . . . 20
3.4 Parts Warranty Summary . . . . . . . . . . . . . . . . . . . . . . . . . . . . . . . . . . . . . . . . . . . . . . 21
4. Troubleshooting . . . . . . . . . . . . . . . . . . . . . . . . . . . . . . . . . . . . . . . . . . . . . . . . 23
Calibration . . . . . . . . . . . . . . . . . . . . . . . . . . . . . . . . . . . . . . . . . . . . . . . . . . . . . . . 1
Figure 1: On Car Operation . . . . . . . . . . . . . . . . . . . . . . . . . . . . . . . . . . . . . . . . . . 1

GETTING STARTED 1
1. Getting Started 1.1 Introduction
This manual provides instructions and information
required to operate the ACE series on-car disc brake
lathe.
This manual assumes that the technician is familiar with
the basics of brake service. Section 1 provides mechani-
cal and electrical safety information, specifications, as
well as general information about the ACE. The following
sections contain detailed information about equipment,
procedures, and maintenance.
The owner of the lathe is solely responsible for arranging
technical training. Only qualified Hunter trained techni-
cians should operate the lathe. Maintaining records of
personnel trained is solely the responsibility of the owner
or management.
This On-Car Disc Brake Lathe has been
designed to machine disc brake rotors on
passenger cars and light trucks. Use the lathe
only for its intended purpose as outlined in
this manual.
California Warning: This product may contain
chemicals known to the State of California to
cause cancer and reproductive harm.
www.P65Warnings.ca.gov

2 GETTING STARTED
1.2 For Your Safety
IMPORTANT SAFETY INSTRUCTIONS
Read and follow the instructions and warnings provided
in the service, operation and specification documents of
the products with which this lathe is used (i.e., automo-
bile manufacturers, brake component manufacturers
etc.).
Read and follow all caution and warning labels affixed to
your equipment and tools. Misuse of this equipment can
cause personal injury and shorten the life of the brake
lathe.
Keep all decals, labels, and notices clean and visible.
Always use wheel chocks in front of and behind the
appropriate wheel after positioning, to prevent movement
of the vehicle on the rack.
Use caution when jacking the vehicle.
Always wear OSHA approved safety glasses. Everyday
eyeglasses have only impact resistant lenses and are not
appropriate eye protection.
Wear proper back support when lifting or removing
wheels.
Do not operate equipment with a damaged cord or equip-
ment that has been dropped or damaged until it has been
examined by a Hunter Service Representative.
The power plug serves as the disconnect device for this
equipment. The receptacle outlet shall be installed near
the equipment and shall be easily accessible.
Always unplug equipment from electrical outlet when not
in use. Never use the cord to pull the plug from the outlet.
Grasp plug and pull to disconnect.
If an extension cord is necessary, a cord with a current
rating equal to or more than that of the equipment should
be used. Cords rated for less current than the equipment
may overheat. Care should be taken to arrange the cord
so that it will not be tripped over or pulled.
Verify that the electrical supply circuit and the receptacle
are properly grounded.
Do not use lathe in a dangerous environment. Do not use
in damp or wet locations, or expose to rain. Keep the
work area well lighted.
Verify that the electrical supply circuit is adequate.
All visitors and children should be kept a safe distance
from the work area.
To reduce the risk of fire, do not operate the equipment
near open containers of any flammable liquids (such as
gasoline or diesel fuel).
Do not let cord hang over edge of table, bench, counter,
or come in contact with hot manifolds or moving parts.
Remove adjusting keys and wrenches. Form a habit of
verifying that keys and adjusting wrenches are removed
from the brake lathe before turning it on.
Keep the work area clean. Cluttered floors, benches, and
areas around the lathe invite accidents.
Wear proper apparel. Wear no loose clothing, gloves,
neckties, rings, bracelets, or other jewelry, which may be
caught in moving parts. Non-slip footwear is recom-
mended. Wear protective hair covering to contain long
hair.
Do not overreach. Keep proper footing and balance at all
times.
If cutting operation is dusty, use face or dust mask.
Never stand on the brake lathe or trolley. Serious injury
could occur if the brake lathe is tipped or if the cutting tool
is unintentionally contacted.
Keep guards in place and in good working order.
Unplug brake lathe before servicing, or when changing
accessories such as insert holders, bits, or cutters.
Do not force or overload the brake lathe. It will do the job
better and safer at the rate for which it was designed.
Manufacturer recommended maximum loading: 120
RPM and .012 inch cutting depth.
Use the correct attaching components. Do not force or
overload a tool or attachment to do a job for which it was
not designed.
Maintain the brake lathe and its components with care.
Keep brake lathe and its components sharp and clean for
best and safest performance. Follow instructions for lubri-
cating and changing accessories.
Use only Hunter recommended accessories. The use of
non-recommended accessories may cause risk of injury
to persons and may not produce satisfactory finish
results.
Check for damaged parts. Before further use of the brake
lathe and components, a guard or other part that is dam-
DO NOT ALTER THE ELECTRICAL PLUG.
Plugging the electrical plug into an unsuitable
supply circuit will damage the equipment and
may result in personal injury.

GETTING STARTED 3
aged should be carefully checked to determine that it
would operate properly and perform its intended function.
A guard or other part that is damaged should be properly
repaired or replaced. Check for alignment of moving
parts, binding of moving parts, breakage of parts, mount-
ing, and any other conditions that may affect its opera-
tion.
Never leave the brake lathe running while unattended.
Turn the power “OFF.” Do not leave the brake lathe until it
comes to a complete stop.
Use equipment only as described in this manual.
SAVE THESE INSTRUCTIONS
1.3 Specific Safety Precautions/
Power Source
Specifications for Extension Cords
The lathe comes equipped with a 25-foot power cable,
which should be adequate to reach an outlet in most
cases.
In the event that an extension cord is needed a good
quality/heavy duty cord must be used. Failure to use an
appropriate cord may induce poor lathe performance and
intermittent operation. (For example: Most drop lights
have 16 gauge or smaller wire. A drop light is not an
acceptable extension cord.)
See below for the maximum length and rating of cord
required.
12 gauge wire – 25 feet is maximum extension cord
length.
10 gauge wire – 50 feet is maximum extension cord
length.
Power Source Grounding Instructions
In case of a malfunction or breakdown, grounding pro-
vides a path of least resistance for electric current to
reduce the risk of electric shock. The brake lathe is
equipped with an electric cord having an equipment-
grounding conductor and a grounding plug. The plug
must be plugged into a matching outlet that is properly
installed and grounded in accordance with all local codes
and ordinances.
Do not modify the plug provided. If it will not fit the outlet,
have the proper outlet installed by a qualified electrician.
Improper connection of the equipment-grounding con-
ductor can result in a risk of electric shock. The conduc-
tor with insulation having an outer surface that is green,
with or without yellow stripes, is the equipment-grounding
conductor. If repair or replacement of the electric cord or
plug is necessary, do not connect the equipment-ground-
ing conductor to a live terminal.
Check with a qualified electrician or service personnel, if
the grounding instructions are not completely under-
stood, or if in doubt as to whether the tool is properly
grounded.
Use only 3-wire extension cords that have 3-prong
grounding plugs and 3-pole receptacles that accept the
tool’s plug.
Repair or replace damaged or worn cords immediately.
Power Source Instructions

4 GETTING STARTED
The lathe is intended for use on all grounded supply cir-
cuits having a nominal rating of 110 volts AC in the
United States and Canada. The lathe has a grounding
plug. Do not use adaptors that allow you to bypass
required equipment electrical grounding.
The international version of the ACE lathe is intended to
be used with 220 volts of AC.
Optional 220v Power Source (US & Canada)
The lathe can also be connected to a power source that
will apply 230 VAC (208 VAC - 240 VAC) 50/60 Hz
between the supply conductors of the power cord. This
will require conversion to 220 V and the plug, 42-36-2, to
be installed. Refer to Form 7299-T, AutoComp Elite®
Installation Instructions, for information on converting to
220 V. This conversion must be performed by a certified
Hunter representative only.
The power cord utilizes a twist lock connector, Nema L6-
20P. The receptacle may need modification to allow the
proper connection of the power cord. Any modification to
the receptacle should be done by a certified electrician.
Export ACE Lathes 220v Power Source
Excluding Canada, lathes built for export are meant to be
connected to a power source that will apply 230 VAC
(208 VAC - 240 VAC) 50/60 Hz between the supply con-
ductors of the power cord.
1.4 ACE Series Specifications
A protective ground connection, through the
grounding conductor in the power cord, is
essential for safe operation. Use only a power
cord that is in good condition.
Maximum Rotor Turning
Diameter
15.75 inches (400 mm)
Maximum Rotor Thickness 2.75 inches (51 mm)
Maximum Rotor Friction
Surface Area
3.00 inches (76 mm)
Feed Distance 4.3 inches (110 mm)
Spindle Revolutions Variable Speed 0-150 RPM
forward and reverse
Motor Power 1.5 HP (1.12 kw) @ 3450 rpm
Dimensions 27 inches Long x 20 inches
Wide x 15 inches High (686 mm
x 508 mm x 381 mm)
Net Weight Approximately 90 lbs. (41 kg)
(Without trolley)
Lubrication Gear box, AGMA #8 Gear
Lubricant
Carriage slides, light motor oil
Carriage screw, EP grease
Electric Power Domestic: US & Can
115 VAC, 60 Hz, 15 Amp,
NEMA L5-15P
(230 V, 50-60 Hz optional)
Export:
230v, 50-60hz, 17 amp NEMA
L6-20p

GETTING STARTED 5
1.5 Major Operating Controls
Electrical Controls
Figure 1
The ACE control panel can be rotated 180° to be used on
the other side of the vehicle. The fixed power supply plug
delivers all power to the ACE.
The STOP button is a general stop for all lathe functions.
The SPEED adjustment knob controls the speed of the
lathe. Quickly turning the adjustment stops the motor, as
a safety feature.
The ACT light indicates when the ACT switch has been
enabled.
The COMP button displays indicator lights showing the
progress of the compensation procedure.
The REVERSE switch reverses the direction of lathe
motor.
Rotor Feed Control
Figure 2
The feed hand wheel moves the cutting inserts along the
rotor surface. Using the feed positioning knob on the
hand wheel, rotate the feed hand wheel clockwise to
move the cutting inserts toward the inner diameter (cen-
ter) of the rotor, or counterclockwise to move them
toward the outer diameter of the rotor. In other words, the
rotor feed control moves the cutting inserts in towards the
hub, or out to the outer edge of the rotor.
Feed Engagement Knob
The feed engagement knob is the wing nut located on the
rotor feed control. This knob is tightened to engage the
automatic feed.
Depth of Cut Adjustment Knob
The depth of cut adjustment knob adjusts the cutting
depth of the cutting inserts. Rotating the depth of cut
adjustment knob clockwise feeds the cutting inserts into
the rotor’s friction surface. Rotating the depth of cut
adjustment knob counterclockwise moves the cutting
inserts away from the rotor’s friction surface. Each mark
on the depth of cut adjustment knob represents 0.004
inch of cut.
Figure 3
Lights on the bar graph (I) turn off once the
lathe motor has been engaged. The lights will
not return unless the compensation process
is repeated.
Adjust depth of cut only after removing slack
from adjustment assembly (by turning depth
of cut adjustment knob clockwise, with inside
and outside cutting tool lock knobs locked).
Turning the depth of cut adjustment knob
counterclockwise and then clockwise without
first removing slack on locking cutting tool
lock knobs will cause improper depth of cut
adjustment.

6 GETTING STARTED
Each mark represents 0.004 depth of cut on the adjust-
ment handle.
Cutting Tool Lock Knob (Inside and Out-
side)
Figure 4
Loosen these handles one at a time to set the depth of
cut. Lightly tighten them to hold the cutting tools in place.
Tool Holder Shaft Locking Bolt
Figure 5
By loosening the tool holder shaft locking bolt, the cutting
tool holder bar may be slid along the cutting tool slide.
This allows for proper alignment of the cutting tool holder
bar and the disc being machined. After proper alignment
is achieved, the tool holder shaft locking bolt should be
lightly tightened.
Trolley Height Adjustment
The trolley lift strut can be adjusted to accommodate low
and high operational ranges. The low range of travel is
20.25 in. to 36.25 in. (514.35 mm, 920.75 mm), as mea-
sured from the lathe output shaft centerline to the floor.
The high range is 24.5 in. to 40.5 in. (622.3 mm, 1028.7
mm) as measured from the lathe output shaft centerline
to the floor.
Lock the carriage in place using the provided locking pin,
then remove the stop bolt at the top of the column.
Figure 6
Push down on the carriage to unload the stop pin and
then remove the pin. Slowly release the carriage and
allow the strut to fully extend.
Figure 7
Lift the carriage to pull the strut out of the trolley base,
install the strut into the lower position.
Figure 8
Push the carriage down and pin it in position, then rein-
stall the stop bolt.
The lift strut contains highly pressurized gas
and is under compression in the trolley at all
times.
Other manuals for AutoComp Elite
1
Table of contents
Other Hunter Industrial Equipment manuals