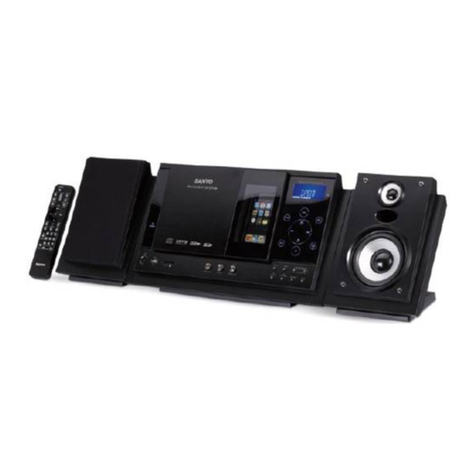
Yamaha GX-3 User manual

MIC
MIN MAX
MIC MIXING KARAOKE
MODE DOLBY NR
B
DUBBING
NORMAL HIGH
TIMER REC
PLAYBACK REC/PLAYBACK
EJECT
A DECK A/B B
PLAY
DIRECTION
REC/
PAUSE
EJECT
A B
RANDOM
REPEAT TIME EDIT
OPEN/CLOSE
LOCATION
USER MEMORY
MUSIC
VOLUME
POWER
PHONESSTANDBY DISPLAY FM/AM
TAPE AUX
CD TUNER
PRESET TUNING
HOUR
MIN
AUTO/MAN’L
MEMORY
TIME ADJ
Active Servo
Technology
TIMER
GX-3
OWNER’S MANUAL
MANUAL DE INSTRUCCIONES
Active Servo
Technology
GX-3: TCD-GX3 + KMA-GX3 + NX-GX3
Natural Sound Mini Component System
Sistema de Componentes con Sonido Natural
MIC
MIN MAX
MIC MIXING KARAOKE
MODE DOLBY NR
B
DUBBING
NORMAL HIGH
TIMER REC
PLAYBACK REC/PLAYBACK
EJECT
A DECK A/B B
PLAY
DIRECTION
REC/
PAUSE
EJECT
A B
RANDOM
REPEAT TIME EDIT
OPEN/CLOSE
LOCATION
USER MEMORY
MUSIC
VOLUME
POWER
PHONESSTANDBY DISPLAY FM/AM
TAPE AUX
CD TUNER
PRESET TUNING
HOUR
MIN
AUTO/MAN’L
MEMORY
TIME ADJ
Active Servo
Technology
TIMER

22
●Remote control transmitter
●Controlador remoto
●AM loop antenna
●Antena de cuadro AM
●System connector cables
●Cables de conexión del sistema
●Batteries (size AAA, R03)
●Pilas (tamaño AAA, R03)
●Indoor FM antenna
●Antena interior de FM
●Speaker cords
●Cables de los altavoces
●Pin-plug connection cord
●Cable de conexión de toma
SUPPLIED ACCESSORIES ●After unpacking, check that the following parts are included.
ACCESORIOS INCLUIDOS ●Desembale el aparato y verificar que los siguientes accesorios están en la caja.
CD
TUNER
TAPE
POWER
123
123
FM/AM
456
456
789
789
0
0
CD/TUNER
+10
DISPLAY
SLEEP
AUX
PLAY/PAUSE
TIME
REPEAT
STOP
TAPE EDITPROG
RANDOM
MUSIC
LOCATION
USER
VOLUME
TAPE
A
B
REC/
PAUSE
DECK

33
1 TCD-GX3
1234 5 67 8 9
0
A
B
C
D
EFG HIJKLMNO
P
RANDOM
REPEAT TIME EDIT
OPEN/CLOSE
LOCATION
USER MEMORY
MUSIC
VOLUME
POWER
PHONESSTANDBY DISPLAY FM/AM
TAPE AUX
CD TUNER
PRESET TUNING
HOUR
MIN
AUTO/MAN’L
MEMORY
TIME ADJ
Active Servo
Technology
1
9
23456
7
8
0ABC D E
F
G
H
I
J
LM
STEREO
SLEEP
TUNED
AUTO
TIMER
MEMORY
TRACK
TOTAL
REMAIN
REPEAT
RANDOM
SINGLE
FULL
EDIT
PGM
AB
ARENA
NORMAL
CLUB STUDIO
KARAOKE
ROCK
BLUES
RAP
JAZZ
FLAT
USER 1
USER 2
USER 3
USER 4
60Hz I50Hz 400Hz IkHz 2.5kHz 6kHz I5kHz
1
6
2
7
3
8
4
9
5
10
OVER 15
1514131211
PM AM FM
kHz
MHz
VOLUME
MIN MAX
K
N
O
TIMER

44
2 KMA-GX3
3 NX-GX3
UV W X
Z[\
i
j
h
gfedcba`]
MIC
MIN MAX
MIC MIXING KARAOKE
MODE DOLBY NR
B
DUBBING
NORMAL HIGH
TIMER REC
PLAYBACK REC/PLAYBACK
EJECT
A DECK A/B B
PLAY
DIRECTION
REC/
PAUSE
EJECT
TSRQ
Y
A B
l
k

55
1
2
3
4
5
7
9
C
B
6
A
0
8
CD
TUNER
TAPE
POWER
123
123
FM/AM
456
456
789
789
0
0
CD/TUNER
+10
DISPLAY
SLEEP
AUX
PLAY/PAUSE
TIME
REPEAT
STOP
TAPE EDITPROG
RANDOM
MUSIC
LOCATION
USER
VOLUME
TAPE
A
B
REC/
PAUSE
DECK
4
5
30°
30°
0.2 m – 6 m
(8” – 20’)
6
D
K
M
L
E
F
G
HI J
CD
TUNER
TAPE
POWER
123
123
FM/AM
456
456
789
789
0
0
CD/TUNER
+10
DISPLAY
SLEEP
AUX
PLAY/PAUSE
TIME
REPEAT
STOP
TAPE EDITPROG
RANDOM
U
N
O
P
Q
T
S
R
MUSIC
LOCATION
USER
VOLUME
TAPE
A
B
REC/
PAUSE
DECK

66
R L
7
SYSTEM CONNECTOR
SYSTEM CONNECTOR
OUTPUT
CD
R
L
9
OUTPUT
CD
R
L
INPUT
AUXCD
R
L
8
CD
TUNER
TAPE
POWER
123
123
FM/AM
456
456
0
To AC outlet
Al tomacorriente

E-1
English
ENGLISH
INTRODUCTION
CONTENTS
Page
PRECAUTIONS..................................................................2-3
PLACING THE SYSTEM .......................................................3
NAMES OF CONTROLS AND INDICATORS....................4-5
REMOTE CONTROL TRANSMITTER................................5-6
LISTENING WITH HEADPHONES........................................6
CONNECTIONS..................................................................6-7
TURNING THE POWER ON/OFF TO THIS SYSTEM...........8
SETTING THE CLOCK..........................................................8
VOLUME CONTROL..............................................................8
COMPACT DISC PLAYER OPERATION.........................9-14
TUNING OPERATION ....................................................15-17
Page
TAPE DECK OPERATION ............................................17-20
RECORDING A COMPACT DISC..................................21-24
OTHER RECORDINGS...................................................25-26
GRAPHIC EQUALIZER/SOUND FIELD PROCESSOR
CONTROL.......................................................................27-30
KARAOKE OPERATION.....................................................31
HOW TO USE THE BUILT-IN TIMER.............................32-34
CONNECTING EXTERNAL UNITS .....................................35
MAINTENANCE...................................................................35
SPECIFICATIONS................................................................36
TROUBLESHOOTING.........................................................37
Thank you for purchasing this YAMAHA product. We hope it will give you many years of trouble-free enjoyment. For the best
performance, read this manual carefully. It will guide you in operating your YAMAHA product.
FEATURES
•35W + 35W (8Ω) Output Power, 10% THD, 1 kHz
•4 Preset Graphic Equalizer Modes Selectable
According to the Music Source (MUSIC)
•3-Mode Sound Field Processor (LOCATION)
•4 User
’s
Equalizer Pattern Storing Capability
•Karaoke Function Which Makes a General Stereo
Source Usable for Karaoke
•Microphone Jack and Mixing Level Control for
Karaoke
•Random Access Programmable CD Playback
•Single Track/Entire Disc Repeat Play
•Random-sequence Play
•Automatic Synchronized Recording with CD
Playback
•Automatic CD Editing Function for Recording to
Tape
•Double Cassette Tape Deck with Automatic
Reversing Function
•2-Way Speed Dubbing
•Dolby B Type Noise Reduction System
•10 FM and 10 AM Station Random Access Preset
Tuning
•Timer/Sleep Timer
•Active Servo Processing Speaker System
(NX-GX3)
•Remote Control Capability
•Large Liquid Cristal Display Easy to See
Including Dot Matrix Information Display
For basic source play, the following illustrations on top of
pages will help you to look for the section you need.
......CD playback ......Tuning
......Tape playback/recording

E-2
NOTE
Please check the copyright laws in your country to record from
records, compact discs, radio, etc. Recording of copyright material
may infringe copyright laws.
IMPORTANT
Please record the serial number of this unit in the space below.
Serial No.:
The serial number is located on the rear of the unit.
Retain this Owner’s Manual in a safe place for future reference.
WARNING
TO REDUCE THE RISK OF FIRE OR ELECTRIC SHOCK, DO
NOT EXPOSE THIS APPLIANCE TO RAIN OR MOISTURE.
PRECAUTIONS: READTHIS BEFORE OPERATINGYOUR UNIT
•CD pickup
Leave the power on with no disc in the unit until normal
playback is possible (about 1 hour).
•Tape head
Leave the power on with no cassette in the unit until normal
playback is possible (about 1 hour).
Note
If condensation forms on the tape head, foreign matter may
accumulate during use.
•Remote control
Wipe off condensation on the transmitter window with a soft
cloth before operating the unit.
■To assure the finest performance, please read this manual
carefully. Keep it in a safe place for future reference.
■This system is equipped with the newly developed Active Servo
Processing Speaker System. It is not designed for use with
conventional speakers. Therefore, do not attempt to connect
other speakers than the provided speaker system.
■Choose the installation location of this unit carefully. Avoid
placing it in direct sunlight or close to a source of heat. Also avoid
locations subject to vibration and excessive dust, heat, cold or
moisture. Keep it away from sources of hum such as
transformers and electric motors.
■Do not operate this unit upside-down. It may overheat, possibly
causing damage.
■Never open the cabinet. If something drops into the set, contact
your dealer.
■The openings on the rear assure proper ventilation of the unit. If
these openings are obstructed, the temperature inside the
cabinet will rise rapidly and eventually damage the circuits.
Therefore, avoid placing objects against these openings and do
not install the unit where the flow of air through the ventilation
openings could be impeded.
■Always set the VOLUME control to minimum before starting the
audio source: increase the volume gradually to an appropriate
level after play has started.
■When not planning to use this unit for long periods of time (ie.,
vacation, etc.), disconnect the AC power plug from the wall outlet.
■Grounding or polarization – Precautions should be taken so that
the grounding or polarization of an appliance is not defeated.
■Do not use force on switches, controls or connection wires. When
moving the unit, first disconnect the power plug and the wires
connected to other equipment. Never pull the wire itself.
■Do not attempt to clean the unit with chemical solvents; this might
damage the finish. Use a clean, dry cloth.
■Be sure to read the “TROUBLESHOOTING” section regarding
common operating errors before concluding that the unit is faulty.
■To prevent lightning damage, disconnect the AC power plug and
the antenna cable when there is an electrical storm.
■Do not plug the AC power plug to the wall socket before you
finish all connections.
■Never allow metallic items (e.g. screwdrivers, tools, etc.) to come
near the cassette deck’s record/playback head assembly in this
unit. Doing so may not only scratch or damage the head’s mirror-
smooth finish, it may change the magnetic characteristics of the
heads, causing a deterioration in reproduction performance
quality.
■Although the cassette deck’s record/playback heads used in this
unit are high quality heads with outstanding reproduction
characteristics, they can become dirty through the use of old
tapes or from dust accumulation over time. This can have a
serious effect on reproduction quality. Clean the heads regularly
with one of the commonly available head cleaners or with
cleaning solutions.
■The voltage to be used must be the same as that specified on
this unit. Using this product with a higher voltage than that which
is specified is dangerous and may result in a fire or other type of
accident causing damage. YAMAHA will not be held responsible
for any damage resulting from use of this unit with a voltage other
than that which is specified.
■The sound level at a given volume setting depends on speaker
location and other factors. Care should be taken to avoid
exposure to sudden high levels of sound, which may occur when
turning on the unit with the volume control setting at high, and to
continuous high levels of sound.
■Sudden temperature changes and storage or operation in an
extremely humid environment may cause condensation inside the
cabinet.
Condensation can cause the unit to malfunction.
To eliminate condensation:

E-3
English
CAUTION FOR CARRYING THIS UNIT
Be sure not to carry or tip this unit with a disc remaining in it.
PLACINGTHE SYSTEM
CAUTION 1
Use of controls or adjustments or performance of procedures
other than those specified herein may result in hazardous
radiation exposure.
CAUTION 2
As the laser beam used in this unit is harmful to the eyes, do not
attempt to disassemble the cabinet. Refer servicing to qualified
personnel only.
Laser component in this product is capable of emitting radiation
exceeding the limit for Class 1.
PRECAUTIONS: READTHIS BEFORE OPERATINGYOUR UNIT
WARNING
To reduce the risk of fire or electric shock, do not expose this unit to
rain or moisture.
To avoid electrical shock, do not open the cabinet. Refer
servicing to qualified personnel only.
Laser Diode Properties
•Material: GaAlAs
•Wavelength: 780nm
•Emission Duration: continuous
•Laser Output: max. 44.6µW*
* This output is the value measured at a distance of about 200mm
from the objective lens surface on the Optical Pick-up Block.
The apparatus is not disconnected from the AC power
source as long as it is connected to the wall outlet, even if
the apparatus itself is turned off.
TCD-GX3 KMA-GX3
TCD-GX3
KMA-GX3
Placing examples •If the system is put in a rack, allow a space of at least 5
cm (1-15/16”) above and behind the system for proper
ventilation.
•Disconnect the AC supply lead from the AC outlet before
connecting or disconnecting any component.
VOLTAGE SELECTOR
The voltage selector on the rear panel of this unit must
be set for your local main voltage BEFORE plugging
into the AC main supply.
Voltages are 110-120/220-240V AC, 50/60 Hz.

E-4
NAMES OF CONTROLS AND INDICATORS
TCD-GX3 (CD player/pre-amplifier/tuner)
1RANDOM Button
2REPEAT Button
3TIME Button
4EDIT Button
5Disc Table
6Stop Button:
7Play/Pause Button: /
8OPEN/CLOSE Button
9Skip Buttons: /
(Search Buttons: / )
0LOCATION Button
AMUSIC Button
BEqualizer Control Buttons
CUSER Button
DUser Program MEMORY Button
EPOWER Switch
FSTANDBY Indicator
GPHONES Jack
HDISPLAY Button
IFM/AM Button
JPRESET (Down)/ (Up) Buttons
KTUNING (Down)/ (Up) (HOUR/MINUTE)
Buttons
LInput Selector Buttons (TAPE, CD, TUNER, AUX)
MAUTO/MAN’L Button
NTuner MEMORY (TIME ADJUST) Button
OTIMER Button
PVOLUME Control
Display
For pre-amplifier/tuner
1Current Time/Station Frequency Display
2FM/AM Indicator
3Preset Equalizer Mode Indicators (MUSIC)
4User Program Number Indicators
5Sound Field Mode Indicators (LOCATION)
6KARAOKE Indicator
7AUTO Tuning Indicator
8MEMORY Indicator
9TIMER Set Indicator
0VOLUME Level Indicator
ASLEEP Indicator
BTUNED Indicator
CSTEREO Indicator
DInformation Display Area
EGraphic Equalizer Level Indicators
For CD player
FMusic Calendar Indicator
GMusic Calendar OVER 15 Indicator
HTrack Number Indicator
IPlay Indicator:
JEDIT Indicator
KTape Side Indicator
LProgram (PGM) Play Indicator
MREPEAT Mode (SINGLE, FULL) Indicator
NRANDOM Play Indicator
OTime Display
(See figure 1on page 33at the beginning part of this manual.)
This manual suits for next models
3
Table of contents
Other Yamaha Stereo System manuals

Yamaha
Yamaha TSX-10 User manual

Yamaha
Yamaha TSX-10 User manual

Yamaha
Yamaha crx-e200 User manual

Yamaha
Yamaha GX-707 User manual

Yamaha
Yamaha TSX-B235 User manual

Yamaha
Yamaha TSX-B235 User manual

Yamaha
Yamaha GX-500VCD User manual

Yamaha
Yamaha TSX-112 User manual

Yamaha
Yamaha MCR-B142 User manual

Yamaha
Yamaha MCRB020BLK User manual

Yamaha
Yamaha GX-700 User manual

Yamaha
Yamaha CRX-330 User manual

Yamaha
Yamaha CC-75 User manual

Yamaha
Yamaha TSX-120 User manual

Yamaha
Yamaha TSX-70 User manual

Yamaha
Yamaha TSX-100 User manual

Yamaha
Yamaha GX-90VCD User manual

Yamaha
Yamaha TSX-130 User manual

Yamaha
Yamaha TSX-130 User manual

Yamaha
Yamaha TSX-140 User manual