Sony HCD-VX5A User manual

MICROFILM
SERVICE MANUAL
MINI Hi-Fi COMPONENT SYSTEM
E Model
HCD-VX5A/VX7A
Tourist Model
HCD-VX5AJ
SPECIFICATIONS
HCD-VX5A/VX5AJ/VX7A
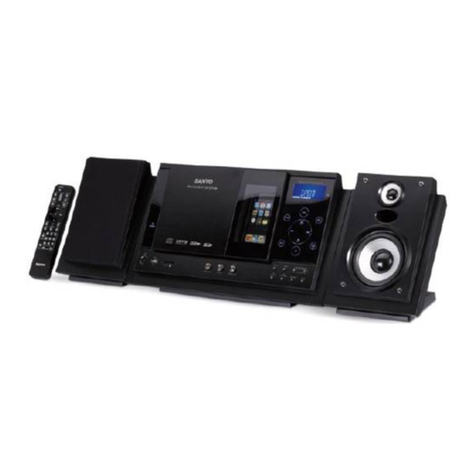
Photo: HCD-VX7A
Dolby noise reduction manufactured under license
from Dolby Laboratories Licensing Corporation.
“DOLBY” and the double-D symbol aare trade-
marks of Dolby Laboratories Licensing Corporation.
HCD-VX5A/VX5AJ/VX7AistheAmplifier,
Video CD player, Tape Deck and Tuner
section in MHC-VX5A/VX5AJ/VX7A.
– Continued on next page –
Model Name Using Similar Mechanism HCD-GRX50/RXD7
CD Mechanism Type CDM38L-5BD34L
Base Unit Name BU-5BD34L
Optical Pick-up Name KSS-213D/Q-RP
Model Name Using Similar Mechanism HCD-GRX50/RXD7
Tape Transport Mechanism Type TCM-230AWR2
CD
Section
Tape deck
Section
www.freeservicemanuals.info
1/11/16
Published in Heiloo, Holland.

– 2 –
TABLE OF CONTENTS
1. SERVICING NOTES ............................................... 3
2. GENERAL .................................................................. 6
3. DISASSEMBLY ........................................................ 10
4. TEST MODE............................................................. 13
5. MECHANICAL ADJUSTMENTS...................... 16
6. ELECTRICAL ADJUSTMENTS
DECK Section................................................................ 16
CD Section ..................................................................... 19
VIDEO Section .............................................................. 20
7. DIAGRAMS
7-1. Block Diagram – CD SERVO Section – ...................... 21
7-2. Block Diagram – AUDIO/VIDEO CD Section – ........ 23
7-3. Block Diagram – TAPE DECK Section –.................... 25
7-4. Block Diagram – MAIN Section –............................... 27
7-5. Block Diagram – DISPLAY/KEY CONTROL/
POWER SUPPLY Section – .......................................... 29
7-6. Note for Printed Wiring Boards and
Schematic Diagrams ...................................................... 31
7-7. Printed Wiring Board – BD Board– ............................. 33
7-8. Schematic Diagram – BD Board– ............................... 35
7-9. Schematic Diagram – VIDEO Board (1/2) – .............. 37
7-10. Schematic Diagram – VIDEO Board (2/2) – .............. 39
7-11. Printed Wiring Board –
VIDEO Board –............................................................. 41
7-12. Printed Wiring Boards – CD MOTOR Section –......... 45
7-13. Schematic Diagram – CD MOTOR Section – ............ 47
7-14. Printed Wiring Board – AUDIO Board – ..................... 49
7-15. Schematic Diagram – AUDIO Board – ....................... 51
7-16. Printed Wiring Board – LEAF SW Board –................. 53
7-17. Schematic Diagram – LEAF SW Board – .................. 53
7-18. Printed Wiring Board – MAIN Board – ....................... 55
7-19. Schematic Diagram – MAIN Board (1/4) – ................ 57
7-20. Schematic Diagram – MAIN Board (2/4) –................. 59
7-21. Schematic Diagram – MAIN Board (3/4) –................. 61
7-22. Schematic Diagram – MAIN Board (4/4) –................. 63
7-23. Printed Wiring Board – PANEL Board – ..................... 65
7-24. Schematic Diagram – PANEL Board – ........................ 67
7-25. Printed Wiring Board – CD SW Board – ..................... 69
7-26. Schematic Diagram – CD SW Board – ...................... 70
7-27. Printed Wiring Board
– TRANSFORMER Board– .......................................... 71
7-28. Schematic Diagram
– TRANSFORMER Board – ......................................... 71
7-29. Printed Wiring Board – SURROUND Board – ........... 73
7-30. Schematic Diagram – SURROUND Board – .............. 74
7-31. IC Pin Function Description .......................................... 80
8. EXPLODED VIEWS............................................... 90
9. ELECTRICAL PARTS LIST .............................. 99
www.freeservicemanuals.info
1/11/16
Published in Heiloo, Holland.

– 3 –
SECTION 1
SERVICING NOTES
SAFETY-RELATED COMPONENT WARNING!!
COMPONENTS IDENTIFIED BY MARK !OR DOTTED
LINE WITH MARK !ON THE SCHEMATIC DIAGRAMS
AND IN THE PARTS LIST ARE CRITICAL TO SAFE
OPERATION. REPLACE THESE COMPONENTS WITH
SONY PARTS WHOSE PART NUMBERS APPEAR AS
SHOWN IN THIS MANUAL OR IN SUPPLEMENTS PUB-
LISHED BY SONY.
SELF-DIAGNOSIS
This unit is equipped with a self-diagnosis function.
The function is used for diagnosing the conditions of the circuits
of the VIDEO board.
The circuits can be determined if normal or abnormal by the light-
ing of D502 of the VIDEO board.
Lighting of D502
When lit : Operates normally
Blinks repeatedly: The circuit may be faulty.
– VIDEO Board (Side A) –
D502
IC505
The laser diode in the optical pick-up block may suffer electro-
static break-down because of the potential difference generated
by the charged electrostatic load, etc. on clothing and the human
body.
During repair, pay attention to electrostatic break-down and also
use the procedure in the printed matter which is included in the
repair parts.
The flexible board is easily damaged and should be handled with
care.
NOTES ON LASER DIODE EMISSION CHECK
The laser beam on this model is concentrated so as to be focused
on the disc reflective surface by the objective lens in the optical
pick-up block. Therefore, when checking the laser diode emis-
sion, observe from more than 30 cm away from the objective lens.
Notes on chip component replacement
• Never reuse a disconnected chip component.
• Notice that the minus side of a tantalum capacitor may be dam-
aged by heat.
Flexible Circuit Board Repairing
• Keep the temperature of the soldering iron around 270 ˚C dur-
ing repairing.
• Do not touch the soldering iron on the same conductor of the
circuit board (within 3 times).
• Be careful not to apply force on the conductor when soldering
or unsoldering.
NOTES ON HANDLING THE OPTICAL PICK-UP
BLOCK OR BASE UNIT
CAUTION
Use of controls or adjustments or performance of procedures
other than those specified herein may result in hazardous ra-
diation exposure.
This appliance is classified as a CLASS 1 LASER product.
The CLASS 1 LASER PRODUCT MARKING is located on
the rear exterior.
Laser component in this product is capable of emitting radiation
exceeding the limit for Class 1.
The following caution label is located inside the unit.
www.freeservicemanuals.info
1/11/16
Published in Heiloo, Holland.

– 4 –
MODEL IDENTIFICATION
– Rear Panel –
PART No.
MODEL PART No.
VX5A : Saudi Arabia model 4-215-639-0π
VX5A : Malaysia and Singapore models 4-215-639-1π
VX5A : Taiwan model 4-215-639-2π
VX5A : E model 4-215-639-3π
VX5A : Thai model 4-215-639-4π
VX5A : Hong Kong model 4-215-639-5π
VX5A : Indonesia model 4-215-639-6π
VX5AJ: Saudi Arabia model 4-215-639-7π
VX5AJ: Tourist model 4-215-639-8π
VX5AJ: E model 4-215-639-9π
VX7A : Saudi Arabia model 4-215-640-0π
VX7A : Malaysia and Singapore models 4-215-640-1π
VX7A : E, Indonesia and Thai models 4-215-640-4π
www.freeservicemanuals.info
1/11/16
Published in Heiloo, Holland.

– 5 –
NOTE FOR INSTALLATION (ROTARY ENCODER)
1
Remove the Case.
3
Pull-out the disc tray.
2
Turn the cam to the
direction of arrow.
HOW TO OPEN THE DISC TRAY WHEN POWER SWITCH TURNS’ OFF.
BU cam
Groove Section A
Note:When attaching the Base unit, Insert th
e
section A into the groove of BU cam.
Note:When attaching the BU cam,
engage the Rotary encoder
switch as shown in the figure.
www.freeservicemanuals.info
1/11/16
Published in Heiloo, Holland.

– 6 –
SECTION 2
GENERAL
• LOCATION OF CONTROLS
– FrontView –
12 3 4 5 6 7
9 0 !¡ !™8 !£
!¢
!∞
!§
!¶
!•
!ª
@º
@¡
@™
@£
@¢
@∞
@¶
@§
@•
#¢#£#™#¡#º@ª
11/u button
2(STANDBY) POWER SAVE, DEMO button
3DISC 1 button
4DISC 2 button
5DISC 3 button
6DISC SKIP, EX-CHANGE button
7§button
89TAPE A button and indicator
9(TAPE A button and indicator
09TAPE B button and indicator
!¡ (TAPE B button and indicator
!™ pbutton
!£ ^CD button and indicator
!¢ EFFECT indicator
!∞ SYNC EQ indicator
!§ FUNCTION button
!¶ ECHO LEVEL knob
!• MIC LEVEL knob
!ª MIC 1 jack
@º MIC 2 jack
@¡ VIDEO CD indicator
@™ PBC indicator
@£ PBC OFF indicator
@¢ TUNER BAND button
@∞ REC PAUSE/START button and indicator
@§ HI-DUB button
@¶ CD SYNC button
@• PHONE jack
@ª CD LOOP button
#º CD FLASH button
#¡ – 0button and indicator
#™ JOG dial and indicator
#£ + )button and indicator
#¢ VOLUME knob
www.freeservicemanuals.info
1/11/16
Published in Heiloo, Holland.

– 7 –
#∞ #ª
$§
$•
%º
%¡
%ª%¶%£
#∞ EFFECT button (VX7A)
EDIT/DIRECTION
TUNER MEMORY button (VX5A/VX5AJ)
#§ FILE SELECT button (VX7A)
PLAY MODE, DOLBY NR button
(VX5A/VX5AJ)
#¶ GEQ CONTROL button (VX7A)
REPEAT STEREO/MONO button
(VX5A/VX5AJ)
#• P FILE MEMORY button (VX7A)
FILE SELECT button (VX5A/VX5AJ)
#ª SELECT button
$º RETURN button
$¡ PREV button
$™ NEXT button
$£ CD NON-STOP button and indicator
$¢ KARAOKE PON/MPX button
$∞ PLAY MODE, DOLBY NR button
(VX7A)
$§ EDIT, DIRECTION, TUNER MEMORY
button (VX7A)
$¶ REPEAT, STEREO/MONO button (VX7A)
$• SYNC BASS H indicator
$ª SYNC BASS L indicator
%º SYNC EQ button
%¡ SYNC BASS button
%™ DISPLAY button
%£ CLOCK TIMER SET button
%¢ TIMER SELECT button and indicator
%∞ SPECTRUM ANALYZER button
%§ GROOVE button and indicator
%¶ ENTER/NEXT button and indicator
%• DBFB button
%ª CINEMA SPACE/SURROUND button
$¶
$∞
#§ #¶ #• $º$¡$™ $£ $¢
$ª
%•%§%¢%∞%™
– FrontView –
www.freeservicemanuals.info
1/11/16
Published in Heiloo, Holland.

– 8 –
– Rear View –
11S VIDEO jack
2SYSTEM SELECT switch
3VIDEO OUT jack
4CD DIGITAL OUT, OPTICAL connector
5VIDEO (AUDIO) IN jack
6MD IN jack
7MD OUT jack
8SUPER WOOFER jack
9FM ANTENNA terminals
0AM ANTENNA terminals
!¡ SURROUND SPEAKER terminals (VX7A)
!™ SPEAKER terminals
!£ VOLTAGE SELECTOR switch
(EXCEPT Thai model)
2 3
4
8
5
7
6
9
0
!£!™!¡
www.freeservicemanuals.info
1/11/16
Published in Heiloo, Holland.

– 9 –
This section is extracted from
instruction manual.
www.freeservicemanuals.info
1/11/16
Published in Heiloo, Holland.

– 10 –
COVER
Note: Follow the disassembly procedure in the numerical order given.
SECTION 3
DISASSEMBLY
3
two screws
(case 3TP2) (3
×
8)
2
screw
(case 3TP2) (3
×
12)
1
three screws
(BVTP3
×
8)
6
cover
2
screw
(case 3TP2) (3
×
12)
3
two screws
(case 3TP2) (3
×
8)
5
4
4
LOADING PANEL ASS’Y
3
loading panel ass’y
2
Pull-out
the disc tray.
1
Turn the cam-in the
direction of the arrow
A
.
A
www.freeservicemanuals.info
1/11/16
Published in Heiloo, Holland.
Other manuals for HCD-VX5A
1
This manual suits for next models
2
Table of contents
Other Sony Stereo System manuals


Sony
Sony CMT-HPX10W - Micro Hi Fi Component System User manual

Sony
Sony LBT-V8900AV User manual

Sony
Sony CMT-FX350I User manual

Sony
Sony CMTBX5BT - CMT Micro System User manual

Sony
Sony MHC-DX20 User manual

Sony
Sony HCD-H5 User manual

Sony
Sony HCD-H1700 User manual

Sony
Sony MHC-501 User manual

Sony
Sony HCD-EP303 User manual

Sony
Sony LBT-D117CD User manual