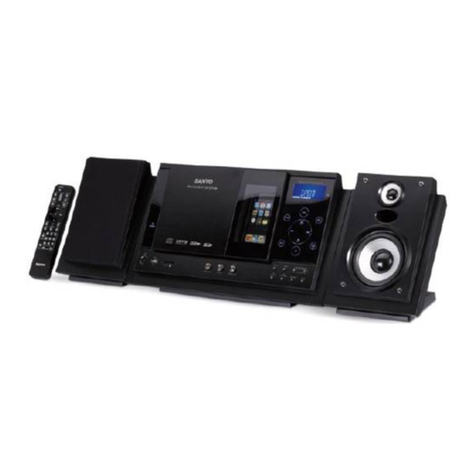
Lenoxx Sound SL-326 User manual

®
COMPACT DISC PLAYER
AM/FM STEREO CASSETTE RECORDER
MODEL SL-326
OPERATING INSTRUCTIONS
DIGITAL RADIO WITH PRESETS
PLAYS ALL MUSIC COMPACT DISCS
FULLY PROGRAMMABLE CD PLAYER WITH REPEAT PLAY
RECEIVES AM/FM STEREO BROADCASTS
RECORDS CASSETTES FROM CD OR RADIO
AC POWER INDICATOR
LARGE BACKLIT LCD DISPLAY FOR CD & RADIO
PRESET GRAPHIC EQUALIZER SYSTEM
BASS REFLEX SPEAKER SYSTEM
CD AUDIO SYSTEM
PLEASE READ CAREFULLY BEFORE USE
SL-326SY041200L v.1 E
Get user manuals: See SafeManuals.com

SAFETY INSTRUCTIONS
The lightning flash
and arrow head
within the triangle is
a warning sign
alerting you of
dangerous voltage
inside the product.
CAUTION
RISK OF ELECTRIC
SHOCK
DO NOT OPEN
CAUTION: TO REDUCE THE
RISK OF ELECTRIC SHOCK,
DO NOT REMOVE COVER (OR
BACK). NO USER SERVICEABLE
PARTS INSIDE. REFER
SERVICING TO QUALIFIED
SERVICE PERSONNEL.
The exclamation point
within the triangle is a
warning sign alerting
you of important
instructions
accompanying the
product.
WARNING: TO REDUCE THE RISK OF FIRE OR ELECTRIC SHOCK, DO NOT
EXPOSE THIS APPLIANCE TO RAIN OR MOISTURE.
THESE IMPORTANT SAFETY INSTRUCTIONS ARE INCLUDED, AS APPLICABLE TO THE
APPLIANCE, CONVEYING TO THE USER THE INFORMATION ITEMIZED BELOW:
1. Read Instructions - All the safety and operating instructions should be read before
the appliance is operated.
2. Retain Instructions - The safety and operating instructions should be retained for
future reference.
3. Heed Warnings - All warnings on the appliance and in the operating instructions
should be adhered to.
4. Follow Instructions - All operating and use instructions should be followed.
5. Water and Moisture - The appliance should not be used near water - for example near a
bathtub, washbowl, kitchen sink, laundry tub, in a wet basement, or near a swimming pool,
and the like.
6. Wall or Ceiling Mounting - The appliance should not be mounted to a wall or ceiling.
7. Ventilation - The appliance should be situated so that its location or position does not
interfere with its proper ventilation. For example, the appliance should not be situated on a
bed, sofa, rug, or similar surface that may block the ventilation openings; or,
placed in a built-in installation, such as a bookcase or cabinet that impede the flow of air
through the ventilation openings.
8. Heat - The appliance should be situated away from heat sources such as radiators,
heat registers, stoves, or other appliances (including amplifiers) that produce heat.
9. Power Sources - The appliance should be connected to a power supply only of the
type described in the operating instructions or as marked on the appliance.
10. Grounding or Polarization - Precautions should be taken so that the grounding or
polarization means of an appliance is not defeated.
11. Power Cord Protection - Power supply cords should be routed so that they are not
likely to be walked on or pinched by items placed upon or against them, paying particular
attention to cords at plugs, convenient receptacles, and the point where they exit
from the appliance.
12. Cleaning - The appliance should be cleaned only as recommended by the manufacturer.
13. Nonuse periods - The power cord of the appliance should be unplugged from the
outlet when left unused for a long period of time.
1SL-326SY041200L v.1 E
Get user manuals: See SafeManuals.com

EXAMPLE OF ANTENNA GROUNDING AS PER
NEC - NATIONAL ELECTRICAL CODE
It is the intent of Lenoxx that this product be used in full compliance with the
copyright laws of the United States and that prior permission be obtained from
copyright owners whenever recording songs from the RADIO or CDs.
Do not apply oil or petroleum products or solvents to any part of this set.
CAUTION
Use of controls or adjustments or performance of procedures other than those
specified herein may result in hazardous radiation exposure.
This compact disc player is classified as CLASS 1 LASER PRODUCT as stated
on the back of the set.
14. Object and Liquid Entry - Care should be taken so that objects do not fall and liquids
are not spilled into the enclosure through openings.
15. Damage Requiring Service - The appliance should be serviced by qualified service
personnel when:
A. The power supply cord or the plug has been damaged; or
B. Objects have fallen, or liquid has been spilled into the appliance; or
C. The appliance has been exposed to rain; or
D. The appliance does not appear to operate normally or exhibits a marked change in
performance; or
E. The appliance has been dropped, or the enclosure damaged.
16. Servicing - The user should not attempt to service the appliance beyond that described in the
operating instructions. All other servicing should be referred to qualified service personnel.
17. Power lines - An outdoor antenna should be located away from power lines.
18. Outdoor Antenna Grounding - If an outside antenna is connected to the receiver, be sure the
antenna system is grounded so as to provide some protection against voltage surges and
built up static charges. Section 810 of the National Electrical Code, ANSI/NFPA 70 provides
information with respect to proper grounding of the mast and supporting structure, grounding
of the lead-in wire to an antenna discharge unit, size of grounding conductors, location of
antenna-discharge unit, connection to grounding electrodes, and requirements for the
grounding electrode. See Figure.
ANTENNA
LEAD IN WIRE
ANTENNA DISCHARGE UNIT
(NEC SECTION 810-20)
GROUNDING CONDUCTORS
(NEC SECTION 810-21)
POWER SERVICE GROUNDING
ELECTRODE SYSTEM
(NEC ART 250, PART H)
ELECTRIC
SERVICE
EQUIPMENT
GROUND
CLAMP
GROUND CLAMPS
SAFETY INSTRUCTIONS
SL-326SY041200L v.1 E
2
Get user manuals: See SafeManuals.com

POWERING UP
TIP
If the plug of the AC power cord does not match your outlet, do not force it.
Reverse it and try again. The plug is polarized and only fits one way into the wall
outlet.
3
To a wall outlet
NOTE: One blade of
plug and outlet
is wider.
Carefully unwind and stretch out the speaker wire on the back of each speaker
box and plug the right plug into Speaker Jack marked RIGHT, and the left plug into
Speaker Jack marked LEFT.
Plug the AC POWER CORD into a 120V, 60Hz wall outlet. The AC POWER STANDBY
INDICATOR will be on. This indicator shows you that the set & outlet are OK.
CONNECTING THE SPEAKERS
LEFT
S
PEAKER
RI GH T
Unwind the FM ANTENNA (thin wire) at the back of the set and straighten it out for
FM reception.
FM ANTENNA
AC CORD
AC POWER
STANDBY
INDICATOR
SL-326SY041200L v.1 E
Get user manuals: See SafeManuals.com

1
Press the CD FUNCTION
switch, the display will show
six zeros 0.
4
1
2
3
Press the PUSH OPEN
button to open the CD
DOOR and place the disc
in the CD compartment.
The label side of the CD
should face upward.
2
4
Connect the AC power cord (see page 3).
PLAYING A CD
RADIO TAPE CD
FU NCT ION
POWER Press the POWER switch,
the AC POWER STANDBY
INDICATOR will go off and
the display will light up.
3
Close the CD DOOR by
pushing it down at the right
corner. The display will
show the total tracks on that
CD (after a few seconds).
Press the CD PLAY
button. The player will
play all the tracks (songs)
once.
4
5
TRACK
PUSH OPEN
PL AY/PAU SE
5
Press the EQULALIZER
button to choose different
music effects (CLASSIC,
ROCK, POP or normal).
6
TRACK
TOTAL
TRACKS
TOTAL PLAYING
TIME ON THE CD
6
POP
TOP VIEW
TRACK
PLAYING
TIME
TRACK
SL-326SY041200L v.1 E
Get user manuals: See SafeManuals.com

USE THESE BUTTONS FOR
ADDITIONAL OPERATIONS
To Press or Adjust
Adjust the volume VOLUME control
Stop playback
Pause playback The elapsed playing time will
flash during pause. Press
again to resume play after
pause.
Go to the next track
Go back to the previous
track
Locate a point in a song
or
Press and hold down while
playing until you find the
point.
TIP
When CD play
is paused, the
elapsed playing
time will flash and
no music will play.
Remove the CD Press the CD DOOR OPEN
button (press STOP first)
Turn off the player Press the POWER switch, the
AC POWER STANDBY
INDICATOR will go on.
To resume play,
press the PAUSE
button again, the
elapsed playing
time will stop
flashing and music
will play.
PRESS TO OPEN
THE CD DOOR
5
If you bump the set
or table it is sitting
on, during CD play,
the music will stop
or skip for a few
seconds. This is
normal for this type
of player.
TIP FORWARDS
BACKWARDS
SL-326SY041200L v.1 E
Get user manuals: See SafeManuals.com

REPEAT PLAY
PLAYING CD SONGS (TRACKS) OVER AND OVER
2. Press the CD FUNCTION switch.
3. Select the track by pressing or , and then press .
4. Press the CD REPEAT button.
To repeat Press
a single track (song) Press the REPEAT button twice
all the tracks (all songs)
You can play CD tracks over and over in normal or programmed play modes (see
page 7).
Press the REPEAT button once
programmed tracks During programmed play, press
the REPEAT button once
Display shows
REPEAT Flashing
REPEAT steady
on (MEMORY also
on)
PROGRAM
To cancel Repeat Play
Press the REPEAT button until the REPEAT goes off in the display.
6
GRAPHIC
EQUALIZER
REPEAT steady on
POWER
SWITCH
1. Press the POWER switch, the AC POWER STANDBY INDICATOR will go off.
CD FUNCTION
SWITCH
SL-326SY041200L v.1 E
Get user manuals: See SafeManuals.com

You can make a program of up to 20 tracks
in the order you want them to be played.
PROGRAM
7
SELECTING YOUR OWN MUSIC PLAYING ORDER
(Programmed Play)
NOTE: Programming is only done during
stop mode.
TRA CKMEMORY
MEMORY TRACK
1
2
3
4
5
During STOP mode, press the
PROGRAM (MEMORY) button.
The display will show ,
MEMORY and TRACK will
flash in the display.
Press the SKIP/SEARCH buttons
either or until the desired
track shows in the display.
Press the PROGRAM button. The
display will show .
Repeat steps 2&3 until all the
desired tracks are programmed.
Press the PLAY button to start
program play. MEMORY and
TRACK will be steady in the
display, the track number being
played will show in the display.
To change the current program
Just create a new program following the programing procedure.
To cancel Program Play
Press the STOP button.
MEMORY TRACK
MEMORY TRACK
SKI P/SEARCH
DOWN - TU NING - UP
PL AY/PAU SE
SL-326SY041200L v.1 E
Get user manuals: See SafeManuals.com

LISTENING TO THE RADIO
Connect the AC power cord (see page 3).
1
1
2
3
Press the BAND switch to choose the
proper band (AM or FM ) that you want.
4
STEREO will light up when receiving FM
Stereo broadcasts.
8
RADI O TAPECD
FUN CTI ON Press the RADIO FUNCTION switch.
POWER Press the POWER switch, the AC POWER
STANDBY INDICATOR will be off.
Tune into the station you prefer using
the TUNING UP or DOWN button. Each
time the button is pressed, the
frequency changes. Keep the button
pressed, the station will change rapidly
(automatic tuning), release the button
and it will stop at the next strong station.
5
MHZ
ST ER EO
FM
DOWN - TUNING - UP
3
4
Press the GRAPHIC EQULALIZER button
to choose different music effects
(CLASSIC,ROCK, POP or normal).
6
6
2
(NOTE: For FM stations, unwind and
straighten out the FM antenna at the
back of the set.)
SL-326SY041200L v.1 E
Get user manuals: See SafeManuals.com

PRESETTING RADIO STATIONS
3
Press the PROGRAM (MEMORY)
button again to confirm, the station
now broadcasting is stored into that
preset memory location. MEMORY
disappears from the display.
4
Repeat the above steps to store other
19 stations into memory.
While the MEMORY is flashing,
press the PRESET (REPEAT)
button to choose a memory location
(01-20).
1
Follow Steps 1 to 4 (LISTENING TO
THE RADIO on the previous page)
to select a station.
2Press the PROGRAM (MEMORY)
button, CH will show and
MEMORY will flash in the display
for about 5 seconds.
5
2&4 3
NOTE: Steps 2-4 should be done quickly.
TIP: UP TO 20 AM AND 20 FM STATIONS CAN BE STORED INTO THE
PRESET MEMORY LOCATIONS.
Connect the AC power cord (see page 3).
MHZ
CH
FM
MEMORY
MHZ
CH
FM
MEMORY
MHZ
CH
FM
R EPE AT
PRESET
9
Allows you to store your favorite stations for quick one button tuning.
SL-326SY041200L v.1 E
Get user manuals: See SafeManuals.com
Other Lenoxx Sound Stereo System manuals