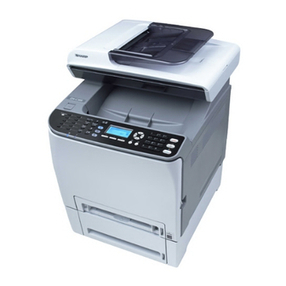
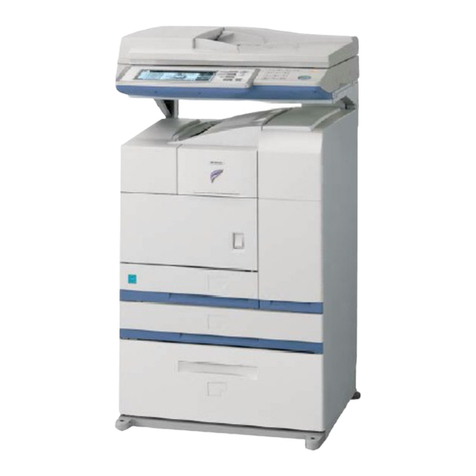
Sharp SD-2060 User manual


1
I
I
I
I
I
I
I
I
This KEY OPERATOR’S GUIDE contains all of the programs
and programming information for use by the Key Operator.
The programs allow the Key Operator to tailor many functions
of the SD-2060 for specific modes of operation. These pro-
grams can only be accessed after a Key Operator Code
Number has been entered.
Please familiarise yourself with this entire guide. Keep it
handy, and refer to it as needs arise for the information you
will need to keep the SD-2060 operating smoothly.
CONTENTS Page
●KEY OPERATOR CODE NUMBER (P19).................... 2
●Registering the Key Operator Code Number............. 2
●KEY OPERATOR PROGRAMS ....................................3
●Using the Key Operator Programs .............................5
●OPTIONAL COUNTER COMMANDER (SF-EA13) .... 23
●Loading Printer Paper ..............................................23
●For Printing Data through Key Operator Programs . 24
●KEY OPERATOR ASSISTANCE CALL ..................... 25
Downloaded from: http://www.usersmanualguide.com/

2
I
I
I
I
I
I
I
I
KEY OPERATOR CODE NUMBER (P19)
A Key Operator Code Number must be registered before using the
key operator programs. The Key Operator must remember this
number. Only this registered number will allow access to the key
operator programs. Registering the Key Operator Code Number
Press the CLEAR/STOP key, the INTERRUPT key, and
the CLEAR/STOP key again.
●The following message will appear.
ENTER KEY OPERATOR CODE. –––––
Enter 0 five times using the 10-key pad.
●As each 0 is entered, the dashes on the message will change
to asterisks.
●When the entry is complete, a “P” will appear on the COPIES
SELECTED display and the following message will appear.
INPUT A PROGRAM NUMBER, AND PRESS
START.
Enter the number 19 using the 10-key pad and press
the START key.
●The following message will appear.
P19: KEY OPERATOR CODE NUMBER CHANGE.
FROM 00000 TO –––––, AND PRESS START.
Choose a new 5-digit code number and enter it using
the 10-key pad.
Press the START key.
●The code number will change from the factory setting to the
new setting.
●“P” will appear on the COPIES SELECTED display.
To continue with other key operator programs, enter
the appropriate program code number.
To exit the key operator program mode, press the
CLEAR ALL key.
1
2
<P006>
3
4
5
6
ERA
CHAN
START
9
C /
3
6
CLEAR/STOP
4
789
AUDIT
CLEAR
123
56
CLEAR/STOP
0 / C /
COPIES SELECTED
<P036>
<P007>
4
789
AUDIT
CLEAR
123
56
CLEAR/STOP
0 / C /
INTERRUPT
AUDIT
CLEAR
CLEAR/STOP
0 / C /
Downloaded from: http://www.usersmanualguide.com/

3
I
I
I
I
I
I
I
I
KEY OPERATOR PROGRAMS
A complete list of all Key Operator Programs is provided below.
These programs can only be accessed by first entering the Key Op-
erator Code Number.
If the optional Card Counter (SF-EA11) is installed, programs 10 to
16 and 18 cannot be accessed.
Code No. Program Name Function Page No.
P10 Auditing Mode Enables or disables the basic auditing mode for 6
copier access.
P11 Copies by Account Displays or prints the total number of copies made 6
against account numbers.
P12 Billing by Account Displays or prints the accumulated cost of copies 7
by account number.
P13 Billing Clear Mode Clears all audit accounts or selectively clears indi- 8
vidual accounts.
P14 Account Number Enters account numbers, clears account numbers, 9
Control changes an account number, or prints all assigned
account numbers.
P15 Price/Copy Setting Sets up to 3 levels of price per copy against ac- 11
count numbers.
P16 Account Limit Sets the maximum number of copies which can be 12
Setting made against an assigned account number.
P17 Machine Identifica- Enters or prints the machine number. 13
tion Number
P18 Account Number Guards against trial and error entering of audit ac- 13
Security count numbers.
P19 Key Operator Code Changes the Key Operator Code Number. 14
Number Change
P20 Auto Exposure Lightens or darkens copies in the automatic expo- 14
Adjust sure mode.
P21 Power Up Timer Activates and sets a time interval after which the 14
copier automatically turns off.
P22 Toner Save Mode Reduces toner consumption. 14
P23 Auto Clear Setting Sets a time interval after which the copier returns to 15
the initial settings.
P24 Add or Change Adds or changes reduction and enlargement preset 15
Extra Presets copy ratios.
P25 Limit of Maximum Sets the limit of maximum copies to be selected. 16
Copies Selected
P26 Initial Margin Shift Sets the initial margin shift values. 16
Setting
P27 Erase Width Sets the amount of the erase area. 16
Adjustment
Downloaded from: http://www.usersmanualguide.com/

4
I
I
I
I
I
I
I
I
Code No. Program Name Function Page No.
P28 Initial Status Sets the copier’s initial settings in the ready condi- 17
Setting tion.
P29 Total Copy Count Recalls the total copy counts of the copier, RADF, 17
duplex module, and staple sorter.
P42 Right/Left Shift Determines whether shift direction change is to be 18
Direction Selection allowed.
P43 Erase Mode Sets the initial mode for erase function. 18
Selection
P44 Restrict Storage Prevents insert pages from being stored in job 18
of Inserts in Job memory.
Program Memory
P45 Message Time Sets the length of time that messages are dis- 18
Setting played.
P46 Disable Operation Prevents the copier from being started by people 19
other than key operator.
P70 Disabling of Auto Prevents automatic paper selection. 19
Paper Selection
P71 Disabling of Auto Prevents automatic switching between the paper 19
Tray Switching trays.
P72 Bypass-Tray Prohibits the use of the bypass tray during duplex 19
Prohibited in copying.
Duplex Copy
P73 Disabling of Job Prevents stored programs from being altered. 20
Program Changing
P74 Disabling of Prevents the use of the RADF when it malfunc- 20
Document Feeder tions.
P75 Disabling of Duplex Temporarily prevents the duplex system from ope- 20
Copying rating when it malfunctions. Allows the use of the
copier but not the duplex system.
P76 Disabling of Prevents damage to the stapler while awaiting re- 20
Stapler pair service.
P77 Disabling of Prevents the selection of COVERS and INSERTS 21
Covers and Inserts mode.
P78 Restricted Access Provides access to paper trays only for adding 21
to Paper Trays paper or during misfeed removal.
P90 Display the List of Sequentially displays all available programs. 21
All P Codes
P92 P Code List Sequentially prints all available programs. 22
Printout
KEY OPERATOR PROGRAMS
Downloaded from: http://www.usersmanualguide.com/

5
I
I
I
I
I
I
I
I
Using the Key Operator Programs
Press the CLEAR/STOP key, the INTERRUPT key, and
the CLEAR/STOP key again.
●The following message will appear.
ENTER KEY OPERATOR CODE. –––––
Enter the key operator code number.
●The dashes on the message will change to asterisks. If the
enteredcodenumber is correct,“P” will appearon the COPIES
SELECTED display.
Enter the desired 2-digit program code number and
press the START key.
●If a mistake is made during entry, press the CLEAR/STOP key
to clear the entry.
●The message display will show the number and name of the
program.
●In some programs, the current setting will be displayed on the
COPIES MADE display and highlighted in the message dis-
play.
Follow instructions for the program.
●When all steps for the program have been completed or when
the PROGRAM key is pressed to exit the program, “P” will ap-
pear on the COPIES SELECTED display so that another pro-
gram can be selected.
To exit the key operator program mode, press the
CLEAR ALL key.
4
1
<P006>
2
3
5
PROGRAM
CLEAR ALL
INTERRUPT
P
CA 4
7
1
COPIES SELECTED
4
789
AUDIT
CLEAR
123
56
CLEAR/STOP
0 /
INTERRUPT
AUDIT
CLEAR
CLEAR/STOP
0 / C /
KEY OPERATOR PROGRAMS
Downloaded from: http://www.usersmanualguide.com/

6
I
I
I
I
I
I
I
I
KEY OPERATOR PROGRAMS
P10 Auditing Mode
Program P10 is used to enable or disable the basic auditing mode of
operation.
When disabled, the message in the display will be “READY TO
COPY.” Access to copying is open to any operator.
When enabled, the message in the display will be “ENTER YOUR
ACCOUNT NUMBER -----.” Copying in this state is limited to oper-
ators with an assigned 5-digit account number.
A maximum of 500, 5-digit account numbers can be assigned. Use
Key Operator Program P14 to assign account numbers.
P11 Copies by Account
Program P11 is used to display or print the total number of copies
made against each account number. For printing the data, an option-
alcounter commander SF-EA13is needed.(Seepage 23for instruc-
tions to print.)
When P11 is entered, the following message will appear.
P11: COPIES BY ACCOUNT.
1.PRINT 2.DISPLAY(SINGLE)
To print accounts
1. Press key 1.
●The following message will appear.
PRINT: 1.ALL ACCOUNTS.
2.SINGLE ACCOUNT.
2. To print all accounts, press key 1.
To print a single account, press key 2, enter the
account number, and press the START key.
3. Press the START/STOP key of the counter commander.
To sequentially display accounts
1 Press key 2.
2. Press the SCROLL DISPLAY key to advance through
the accounts.
●The account numbers and the number of copies made against
each account will be sequentially displayed.
3. Press the PROGRAM key to exit the program.
<P010>
<P009>
Downloaded from: http://www.usersmanualguide.com/

7
I
I
I
I
I
I
I
I
KEY OPERATOR PROGRAMS
To display an individual account
1. Press key 2.
●The following message will appear.
INPUT ACCOUNT NUMBER TO BE DISPLAYED
AND PRESS START.
ACCOUNT NUMBER NUMBER OF COPIES MADE
––––– –––––
2. Enter the account number and press the START key.
●The number of copies made will be displayed.
3. Continue with step 2 for other account numbers.
Press the PROGRAM key to exit the program.
P12 Billing by Account
Program P12 is used to display or print the accumulated cost of cop-
ies made when a relevant price per copy has been set using pro-
gram P15. For printing the data, an optional counter commander SF-
EA13 is needed. (See page 23 for instructions to print.)
When P12 is entered, the following message will appear.
P12: BILLING BY ACCOUNT.
1.PRINT 2.DISPLAY(SINGLE)
To print accounts
1. Press key 1.
●The following message will appear.
PRINT: 1.ALL ACCOUNTS.
2.SINGLE ACCOUNT.
2. To print all accounts, press key 1.
To print a single account, press key 2, enter the
account number, and press the START key.
3. Press the START/STOP key of the counter commander.
To sequentially display costs
1. Press key 2.
2. Press the SCROLL DISPLAY key to advance through
the account numbers.
●The account numbers and the accumulated cost of copies
made against each account will be sequentially displayed.
3. Press the PROGRAM key to exit the program.
<P014>
<P015>
<P010>
Downloaded from: http://www.usersmanualguide.com/

8
I
I
I
I
I
I
I
I
KEY OPERATOR PROGRAMS
To display the cost of a particular account
1. Press key 2.
●The following message will appear.
INPUT ACCOUNT NUMBER TO BE DISPLAYED
AND PRESS START.
ACCOUNT NUMBER BILLING
––––– –––––
2. Enter the account number and press the START key.
●The accumulated cost of copies made will be displayed.
3. Continue with step 2 for other account numbers.
Press the PROGRAM key to exit the program.
P13 Billing Clear Mode
Program P13 is used to clear all audit accounts or to selectively clear
individual accounts.
When P13 is entered, the following message will appear.
P13: BILLING CLEAR MODE.
1.ALL ACCOUNTS. 2.SINGLE ACCOUNT.
To clear all accounts
Press key 1.
To clear a single account
1. Press key 2.
●The following message will appear.
INPUT AN ACCOUNT NUMBER TO BE CLEARED.
ACCOUNT # –––––, PRESS START TO CLEAR.
2. Enter the account number to be cleared.
3. Press the START key.
4. Continue with steps 2 and 3 for other account num-
bers. Press the PROGRAM key to exit the program.
<P017>
<P018>
<P019>
Downloaded from: http://www.usersmanualguide.com/
Other manuals for SD-2060
1
Table of contents
Other Sharp Printer manuals

Sharp
Sharp AL-1340 - B/W Laser - Copier User manual

Sharp
Sharp MX-M350/M450 U User manual

Sharp
Sharp MX-B557P User manual
Sharp
Sharp MX-M350 User manual

Sharp
Sharp DX-B450P User manual

Sharp
Sharp JX-9400 User manual

Sharp
Sharp BP-1200S Instruction Manual

Sharp
Sharp AR-235 User manual

Sharp
Sharp MZ-80P6 User manual

Sharp
Sharp JX-9500E User manual