SaunaFit Cedar POD User manual
Cedar POD Sauna Assembly Instructions
Please read and understand t e complete instructions prior to assembly and use of your sauna. Customer agrees
not to old Dundalk LeisureCraft Inc. and any of its aut orized dealers liable for improper installation, maintenance
and repair of t is product.
Required:
•2 People (recommended)
•Rubber Mallet
•Carpenter’s Hammer
•6’ Step Ladder
•Cordless Drill (we supply t e bit)
•Carpenter’s Level
•Tape Measure
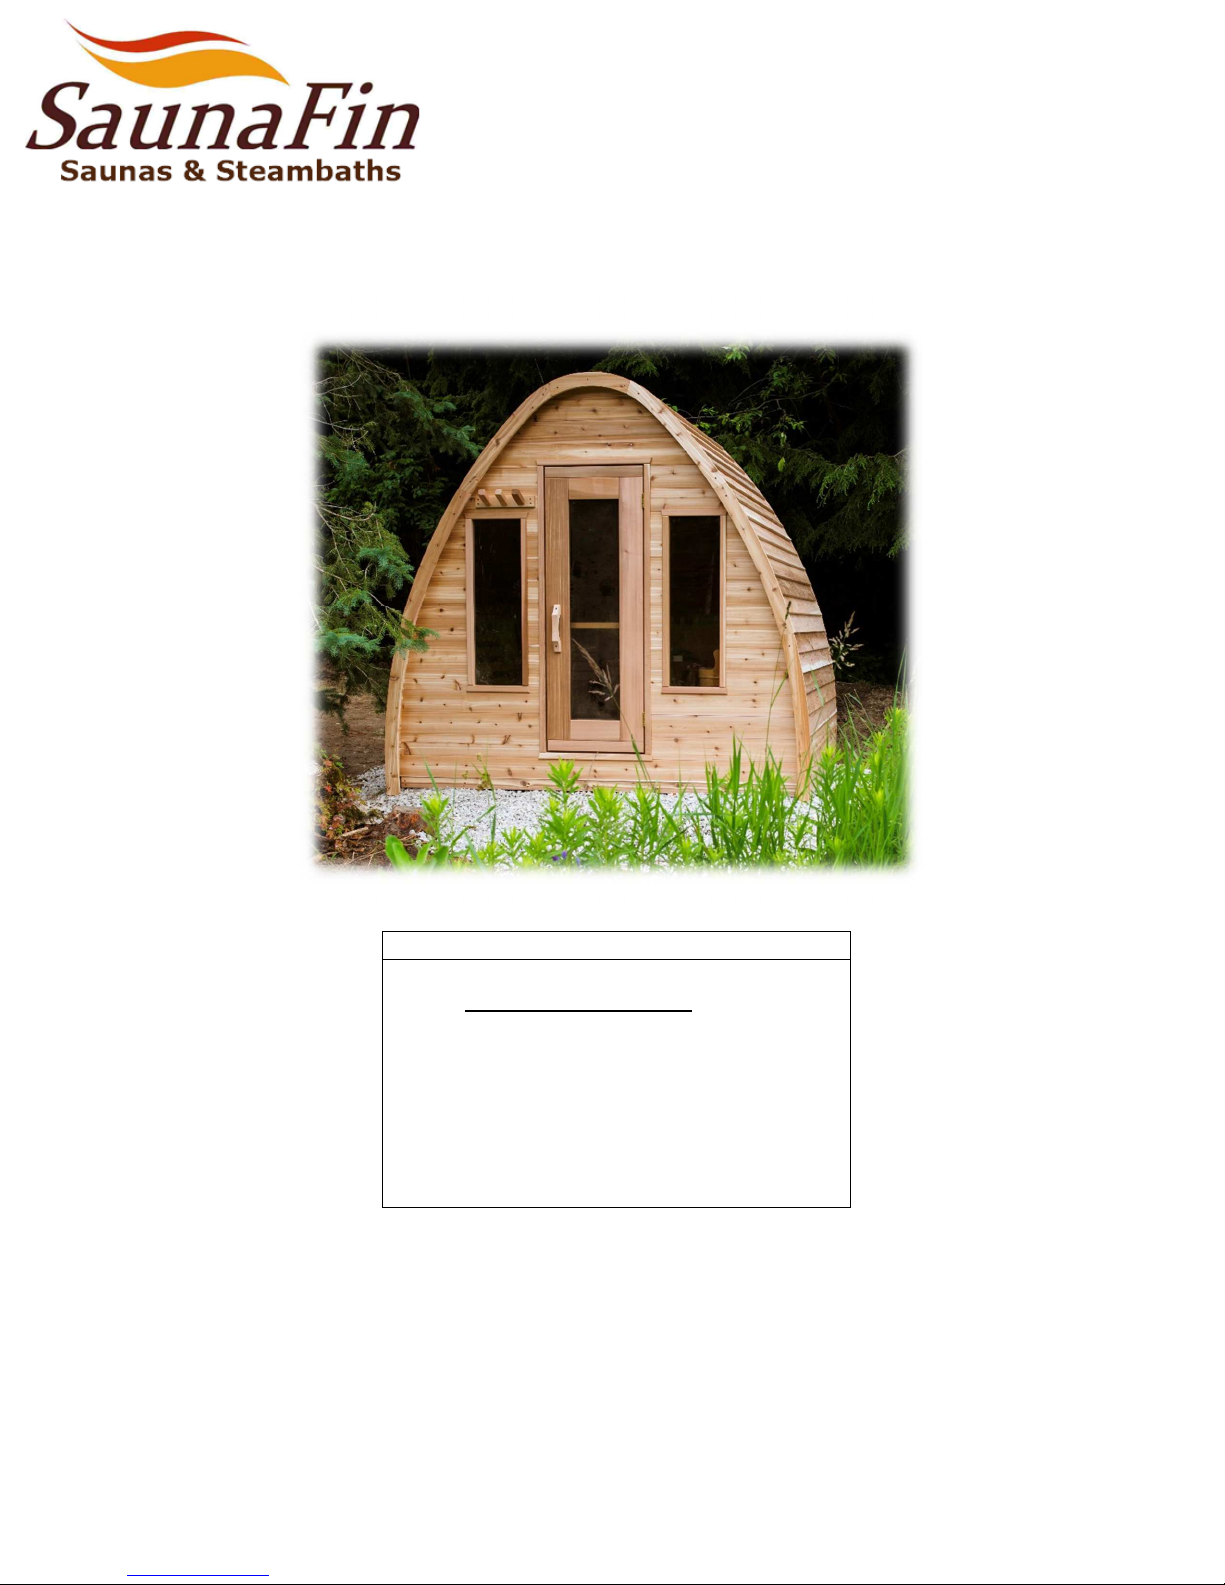
Preparing the base. Crus ed limestone
gravel: Clear loose vegetation and soil, level
t e ground, lay down weed barrier clot if
desired, and fill t e area wit 2-4” of crus ed
limestone gravel. Level and tamp. Patio
stones on top are an option but not
necessary.
A solid concrete slab, or a new or existing
wooden deck are good options as long as
t ey are stable and drain well. Consult a
professional building contractor if you’re not
sure ow to proceed wit t ese options.
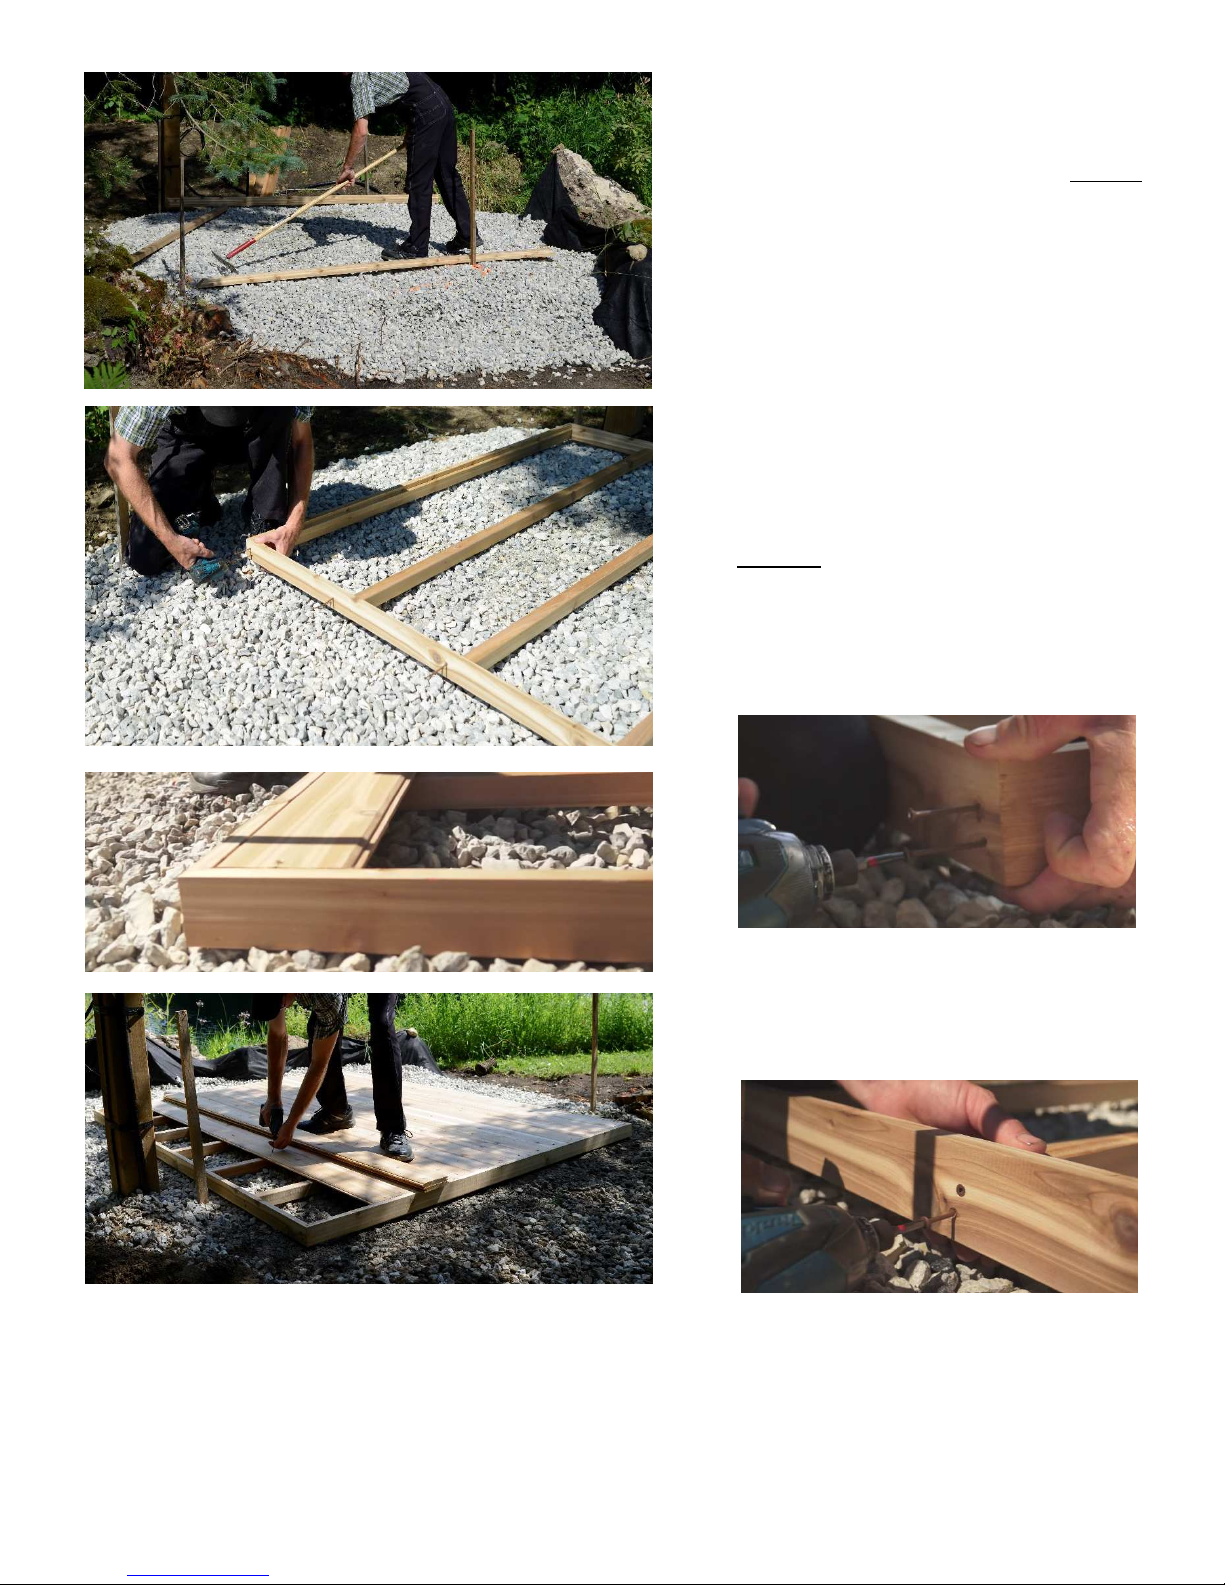
Assembling the floor:
Lay t e outer four sides of t e floor on your
prepared level base wit t e front and rear
pieces (t e ones wit t e X’s on t em)
opposite eac ot er (notc ed edges upward).
Screw t e four mitred corners toget er wit
two 3” wood screws per joint, as s own.
Align t e floor joists wit t e X’s on t e floor
frame, so t at t e sides of t e joists line up
wit t e lines beside t e X’s. Fasten wit two
3” wood screws on eac end.
Now it is time to fasten t e floor boards. Start by laying a floor board groove-side into t e notc in t e front side of
t e floor frame. Continue laying down t e boards and tap t em tig t toget er wit a mallet. Don’t worry if t ere is a
gap left over at t e back wall w en t e last board is put in place as t at will be covered by t e back wall. Drive one 1
½” deck screw at eac intersection wit t e floor joists.
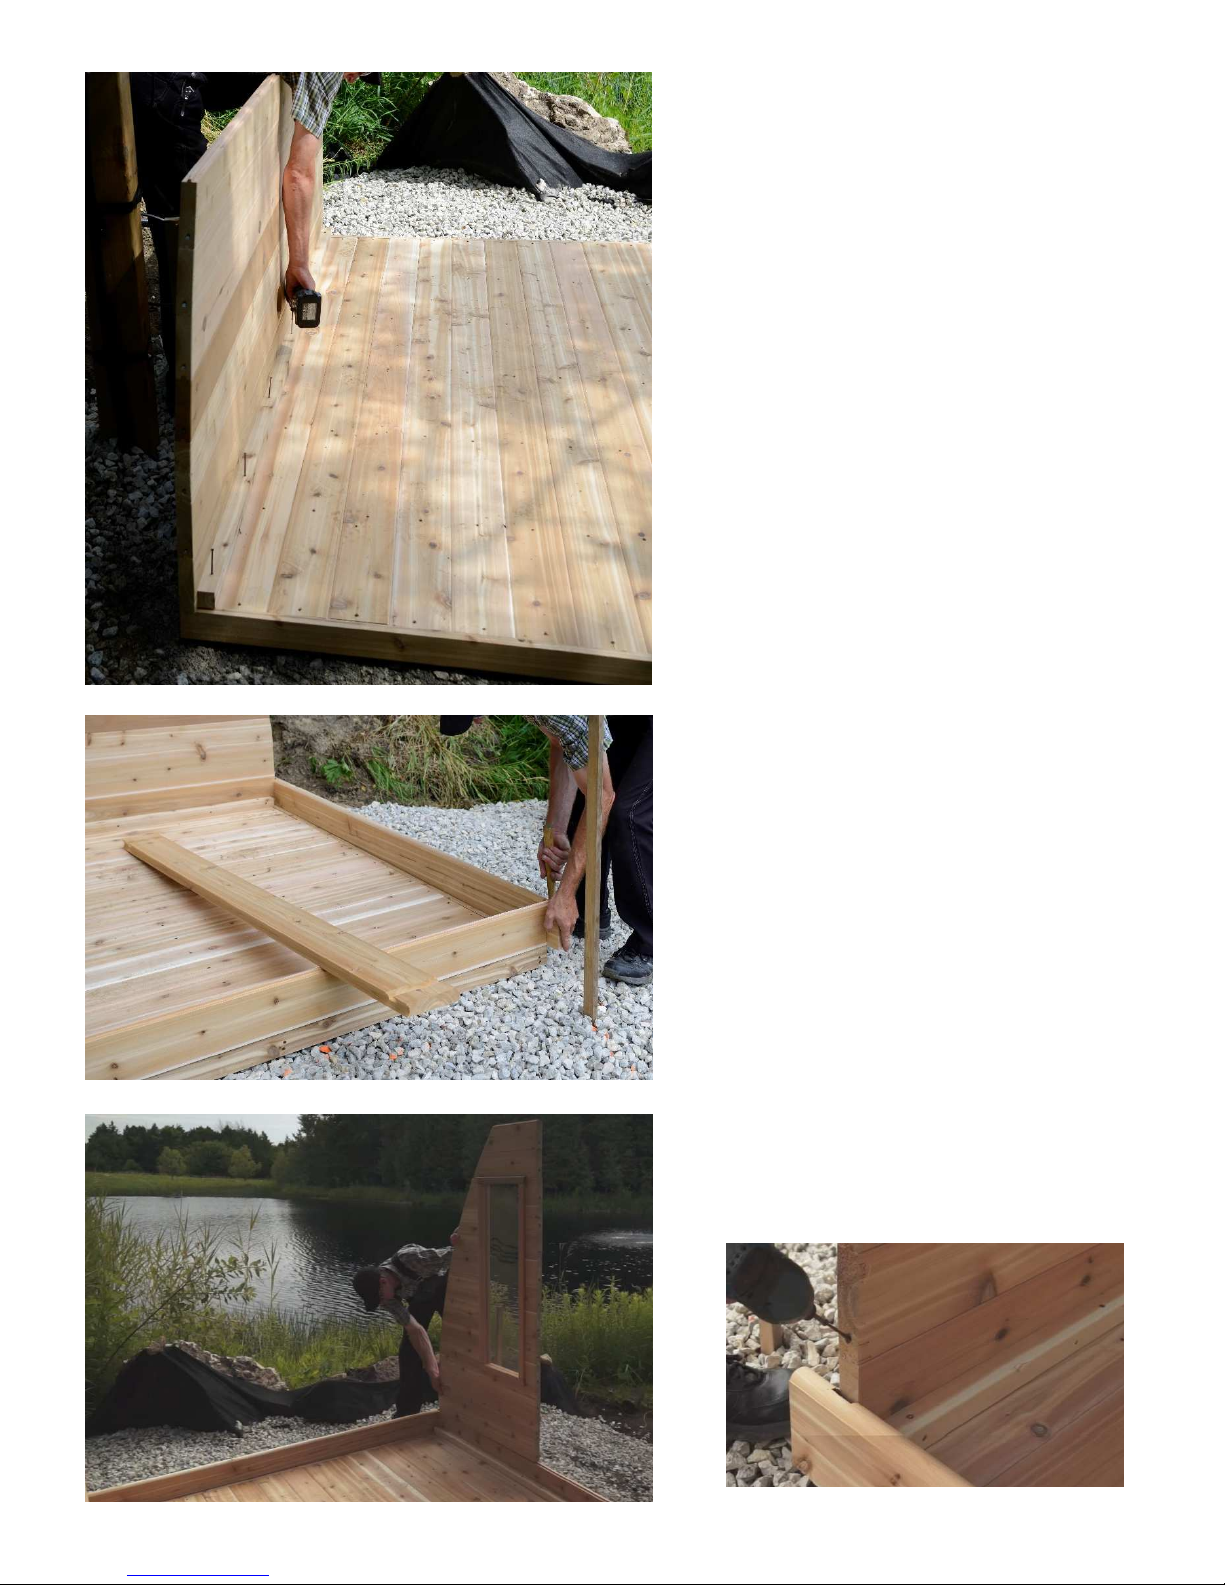
Locate and position t e back bottom wall
assembly (picture left) flus wit t e back
edge of t e floor.
Centre it side to side on t e back edge of t e
floor and fasten it wit 2½” deck screws
approximately every 16”.
Now locate t e bottom board assembly of the
front wall. (picture below) It as a 2x2 bracket
attac ed like t e back wall. Orient t e bracket
toward t e back.
Space it t e correct distance from t e back
wall by using two staves wit grooves in t e
ends, one on t e left and one on t e rig t.
T is s ould align t e bottom front wall board
flus wit t e front edge.
Note t at if your sauna was ordered wit a
c ange room option t ere will be more t an
one groove in t e side wall boards because
t ere will be an extra wall.
Once correctly positioned using wall boards for
spacing on bot sides, centre it side-to-side and
fasten t e front bottom wall assembly to t e
floor as wit t e back wall, along t e 2x2 bracket
approximately every 16” wit 2½” deck screws.
Start building t e front and back walls using t e
pre-built assemblies, as s own.
Fasten t e wall boards to t e floor using 2½”
deck screws into pre-drilled oles on t e bottom
edges.
Use a wall board as a brace to steady t e wall
segments, as s own, to old t e wall segments
in place until t e roof is in place.
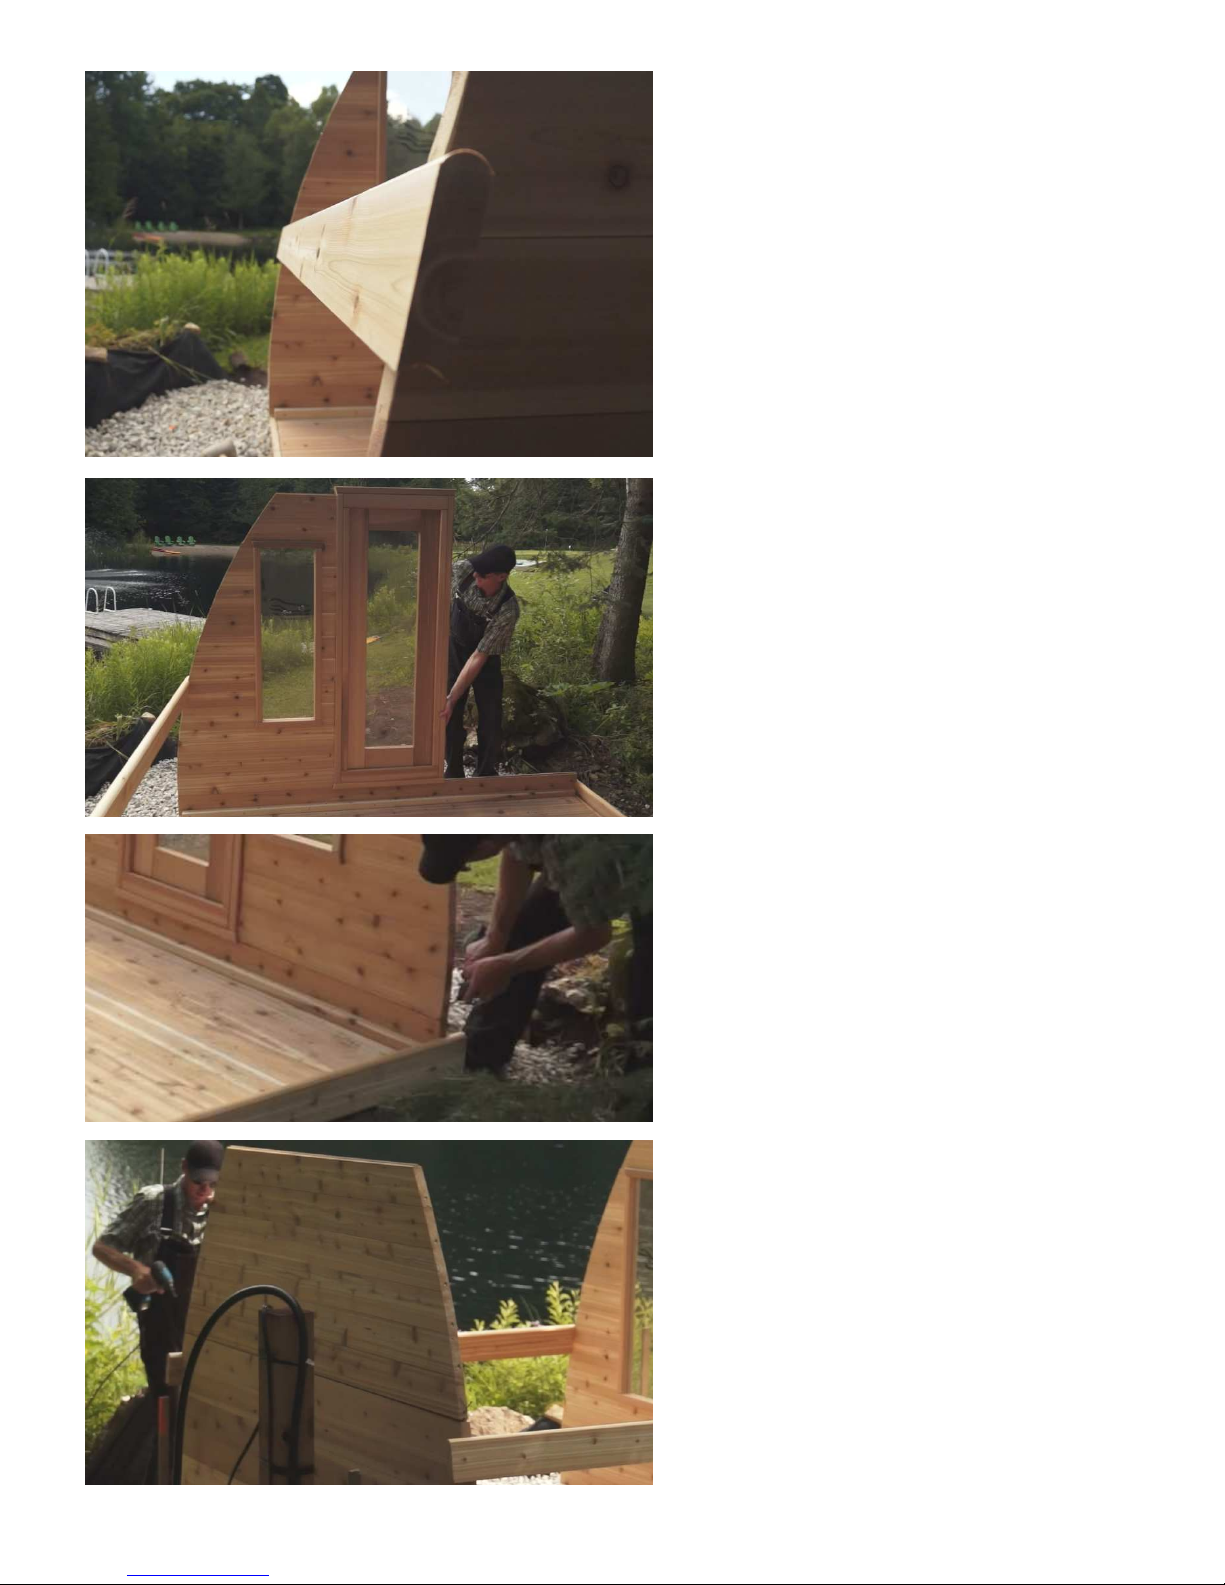
Install t e pre- ung door assembly by sliding it
firmly into place.
Place and attac t e ot er front wall section.
Install t e middle section of t e back wall.
Brace t e middle back wall section wit anot er
stave on eac side.
Centre t e top section of t e back wall and
fasten at t e bottom corners wit 2½” deck
screws.
Repeat for t e top section of t e front wall.
W en t e front and back walls are secured,
fasten t e two alves of t e roof top board using
2½” Kreg screws into pre-drill screw pockets as
s own.
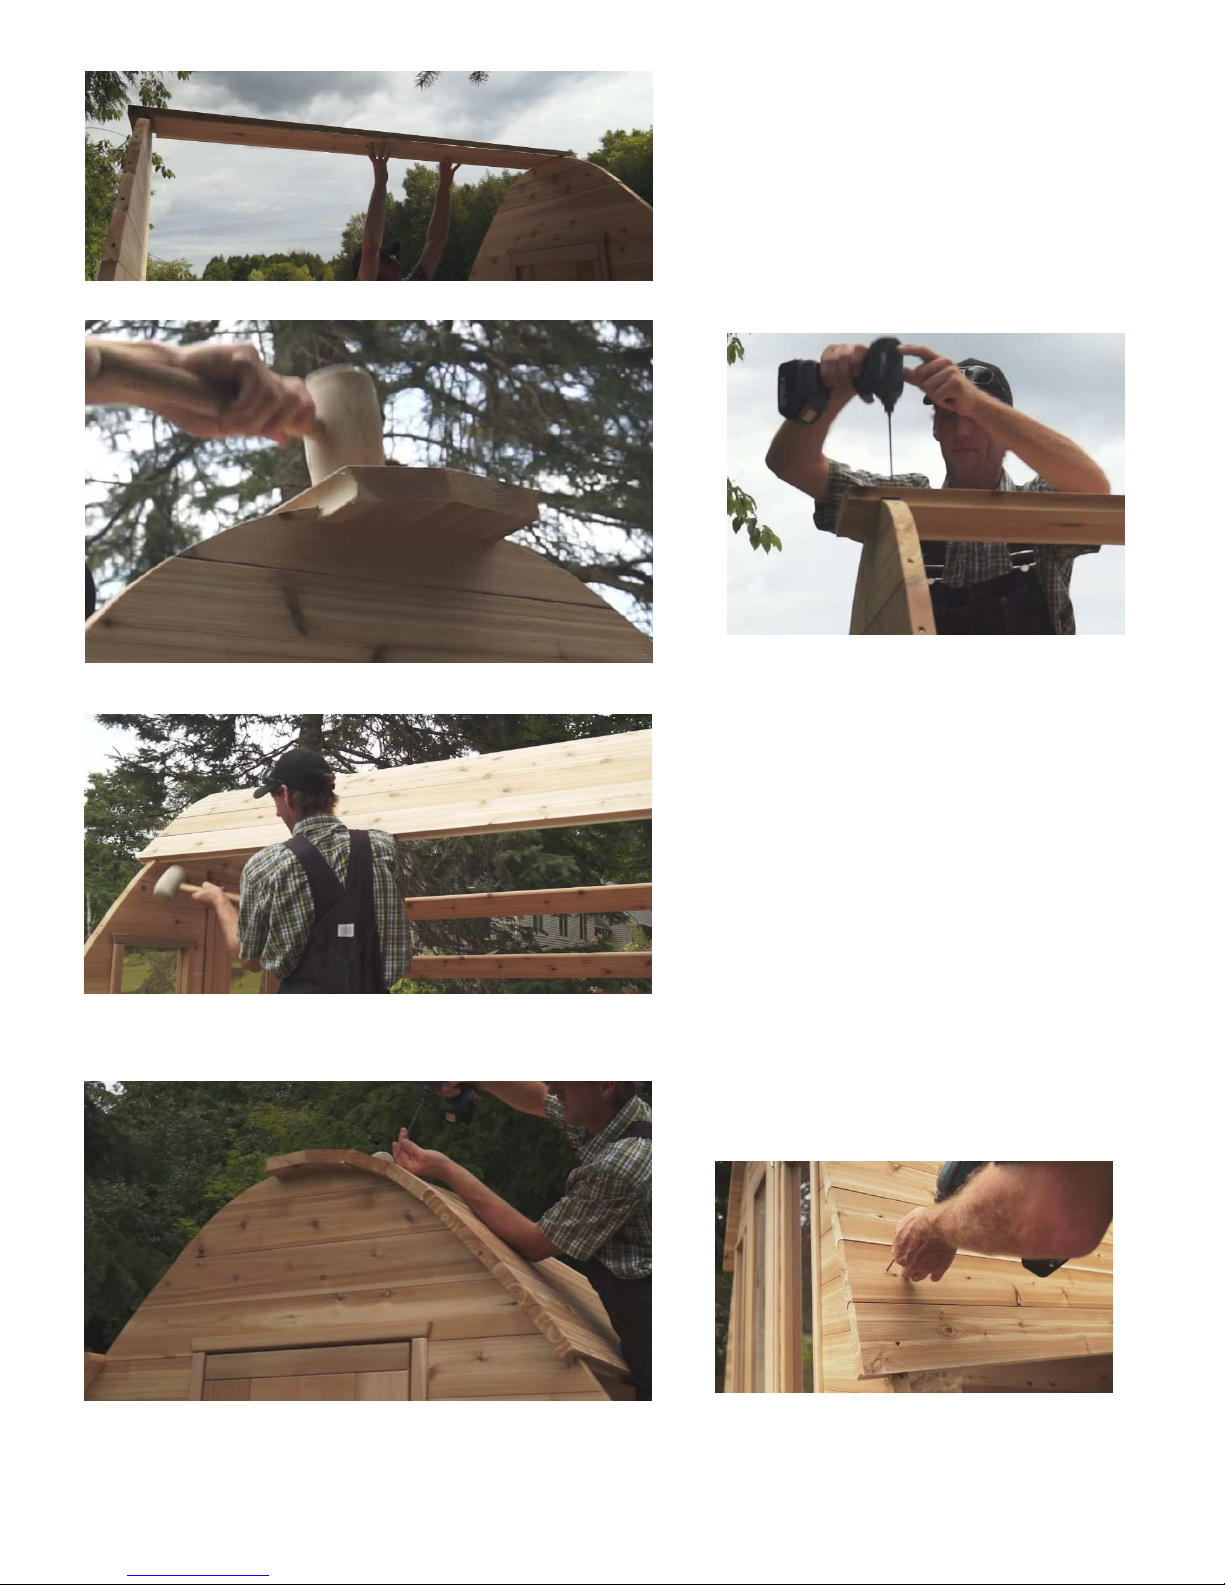
Centre t e top piece on top of t e walls and
fasten it using two 1½” deck screws on eac end.
Install the wall boards from the top down,
tapping t em into place wit a rubber mallet.
Secure t e wall boards in place using 2½” deck
screws w ere t ey join t e front and rear walls.
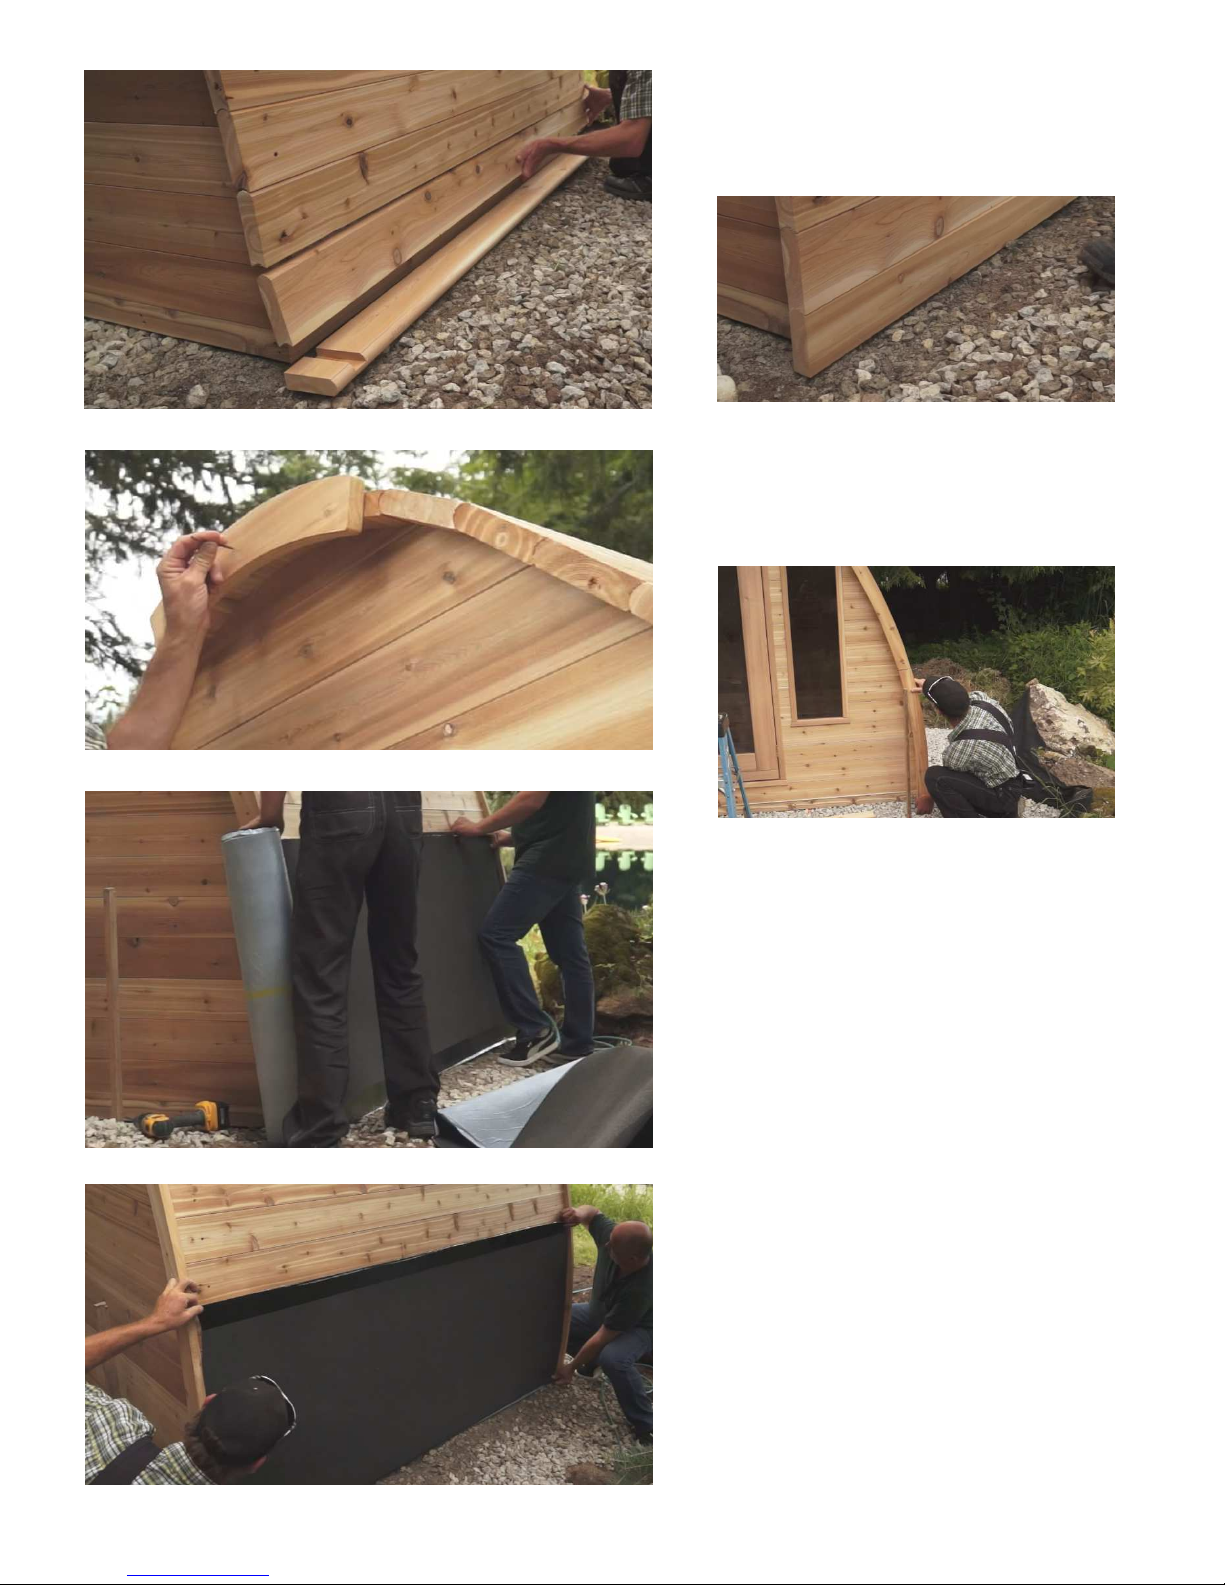
Continue installing t e wall boards until you
reac t e bottom of eac side. Note t at t e
bottom boards ave a flat bottom. Install it as
you would t e rest.
Install t e front and back trim boards as s own
using supplied 1½” deck screws. Place t e
screws approximately every t ird wall board.
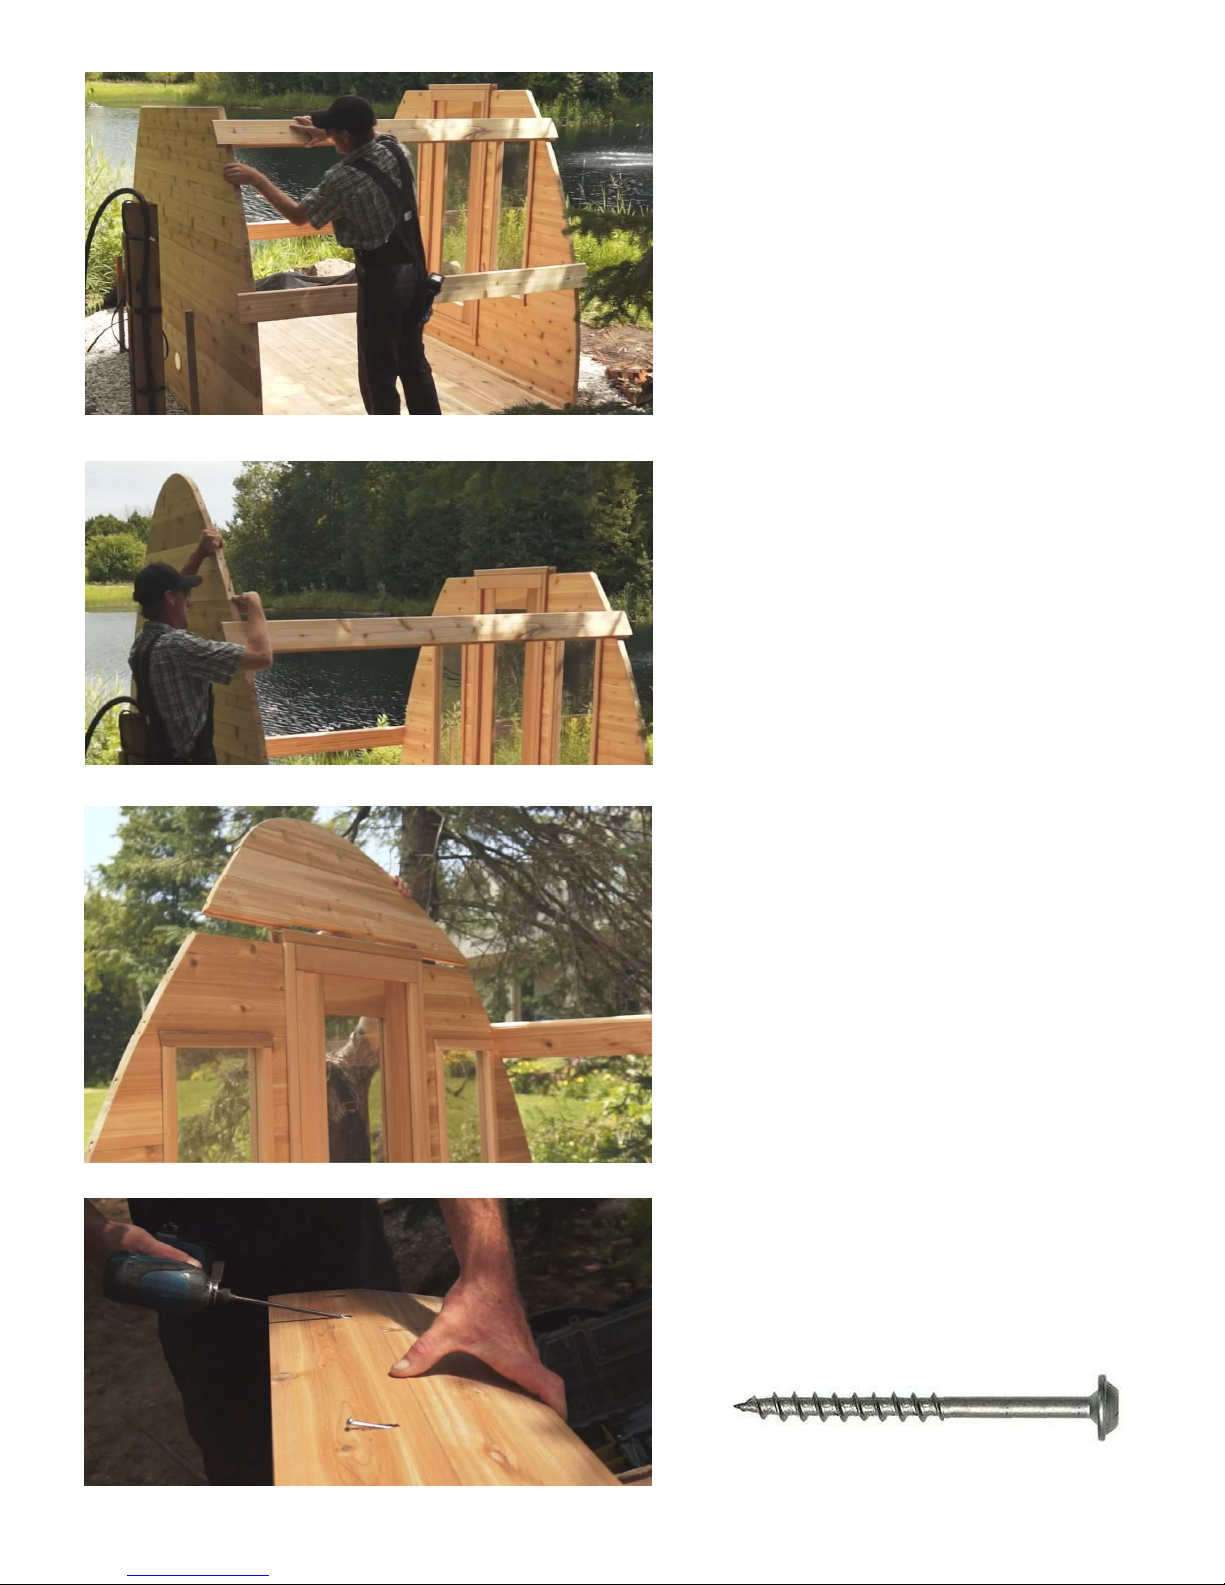
Roll out t e underlay (Ice and Water Dam S ield)
and cut eac lengt about one inc longer t an
t e lengt of t e wall boards.
Place a piece as s own, wit t e black front side
adhesive strip oriented towards t e top. Peel
and fold back t e top 3 or 4 inc es of t e
backing from t e top edge, and stick in place so
t at t e bottom edge is flus wit t e bottom of
t e sauna wall.
T en peel off t e rest of t e backing, and
smoot t e entire piece onto t e wall.
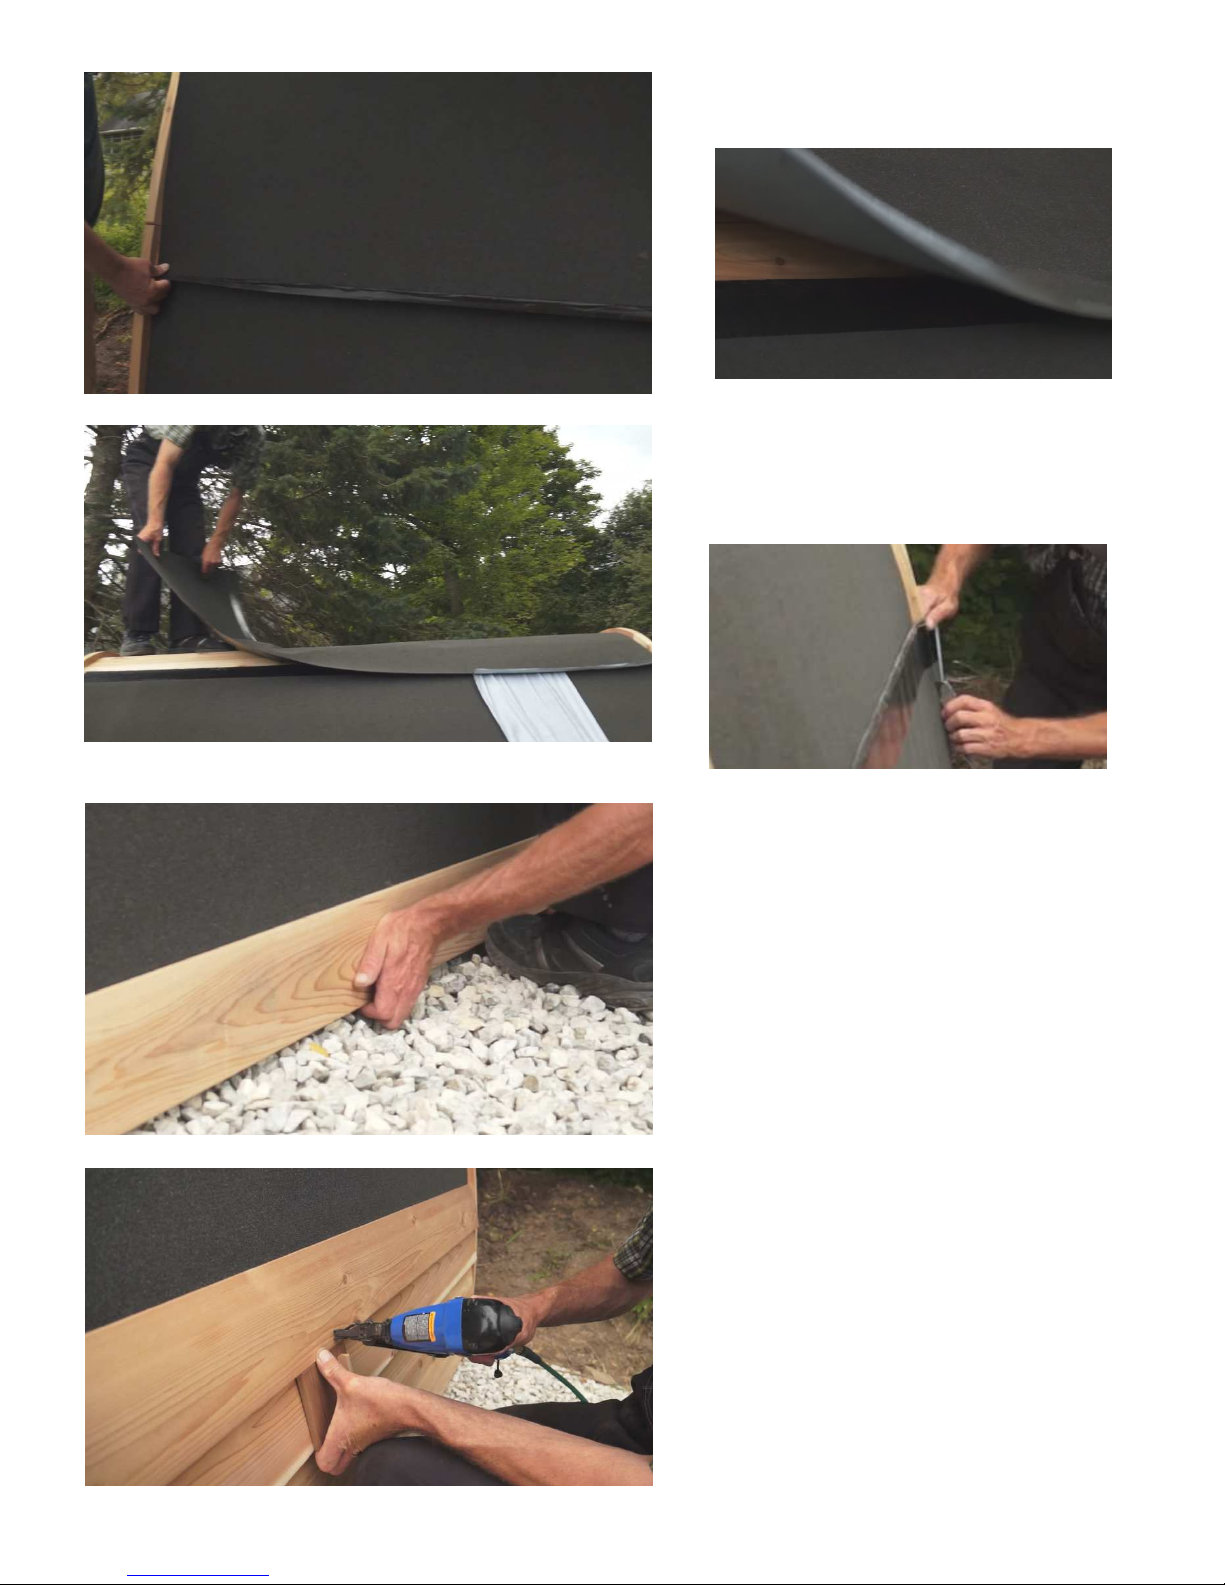
Peel t e protective plastic off t e top side black
adhesive strip, t en apply t e next piece on top.
W en you ave applied t ree strips on eac
side, place t e final strip across t e peak as
s own. Trim t e ends precisely at the joint of
roof board and trim wit a utility blade.
It is advisable to put a bead of caulk at t e
newly trimmed edge of t e underlay w ere it
meets t e trim. Don’t use a pure silicone caulk
as it will not ad ere well to t e cedar. Instead, it
is best to use a Polyether caulk like 3M 4000UV
Polyet er Ad esive Sealant. It is rated safe for
all polymers, is low in VOCs, and will ad ere to
t e cedar very well.
[
Next, install t e beveled siding. Use rust-proof
staples or 1½” stainless nails wit ¼” ead. It is
best to use ring-s anked “splitless” s ingle nails.
Place t e first strip flus wit t e bottom edge
of t e wall. Eac strip s ould be overlapped
about one inc , so use a 4½” spacer as s own.
Drive the nails ABO E the overlap (1” – 1 ¼”
from the bottom edge. (do not drive nails
through both strips of siding) Space nails out
approximately every two feet. Make sure you
don’t drive t em on an angle, or drive t e ead
of t e nail below t e surface of t e siding.
Repeat for t e ot er side and use t e last board
for a ridge cap on t e peak.
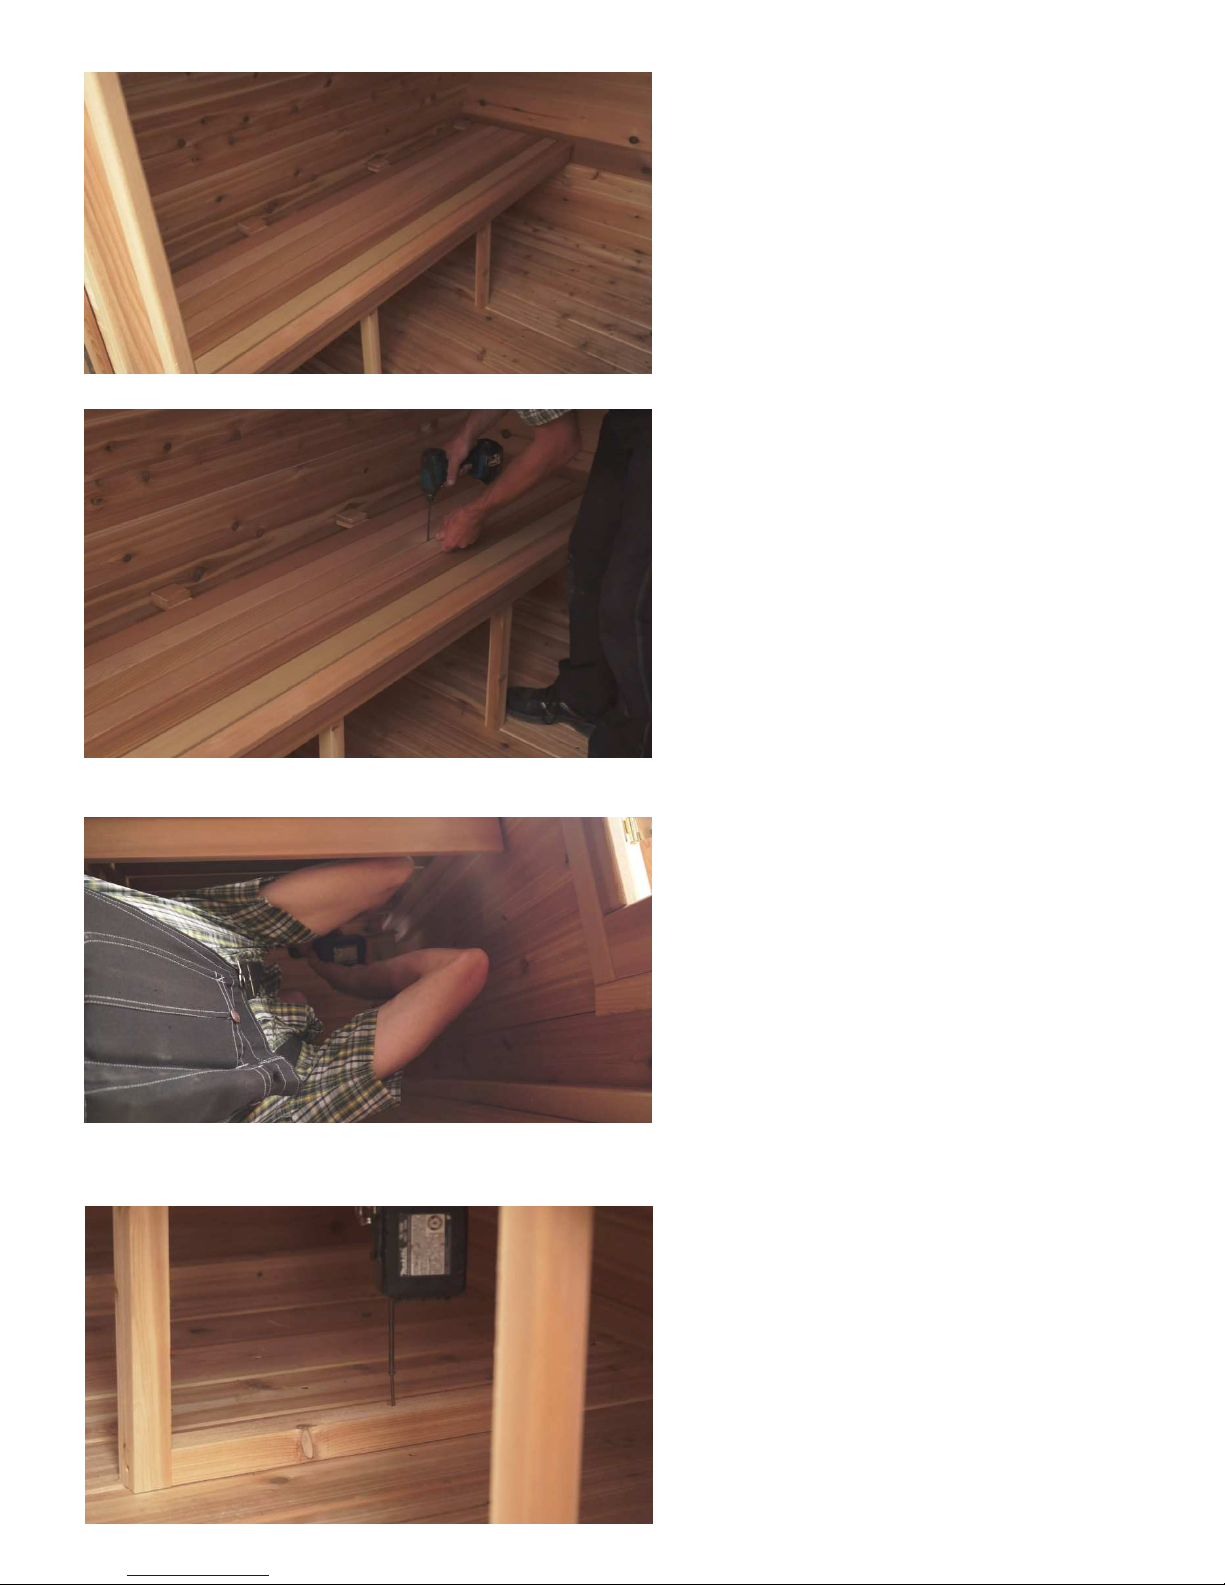
Benches:
Space two benc supports next to t e side wall
w ere t e benc will go. Place t e benc on
top, and adjust t e positon of t e supports so
t at t ey are directly under t e underside cross
members, flus wit t e front trim, and in
contact wit t e wall.
Place 2½” deck screws between t e benc
boards, front and back, at eac support.
Screw t e benc end brackets into t e walls wit
2½” deck screws (3 places)
Secure t e bottom of eac benc support to t e
floor using 2½” deck screws, front and back.
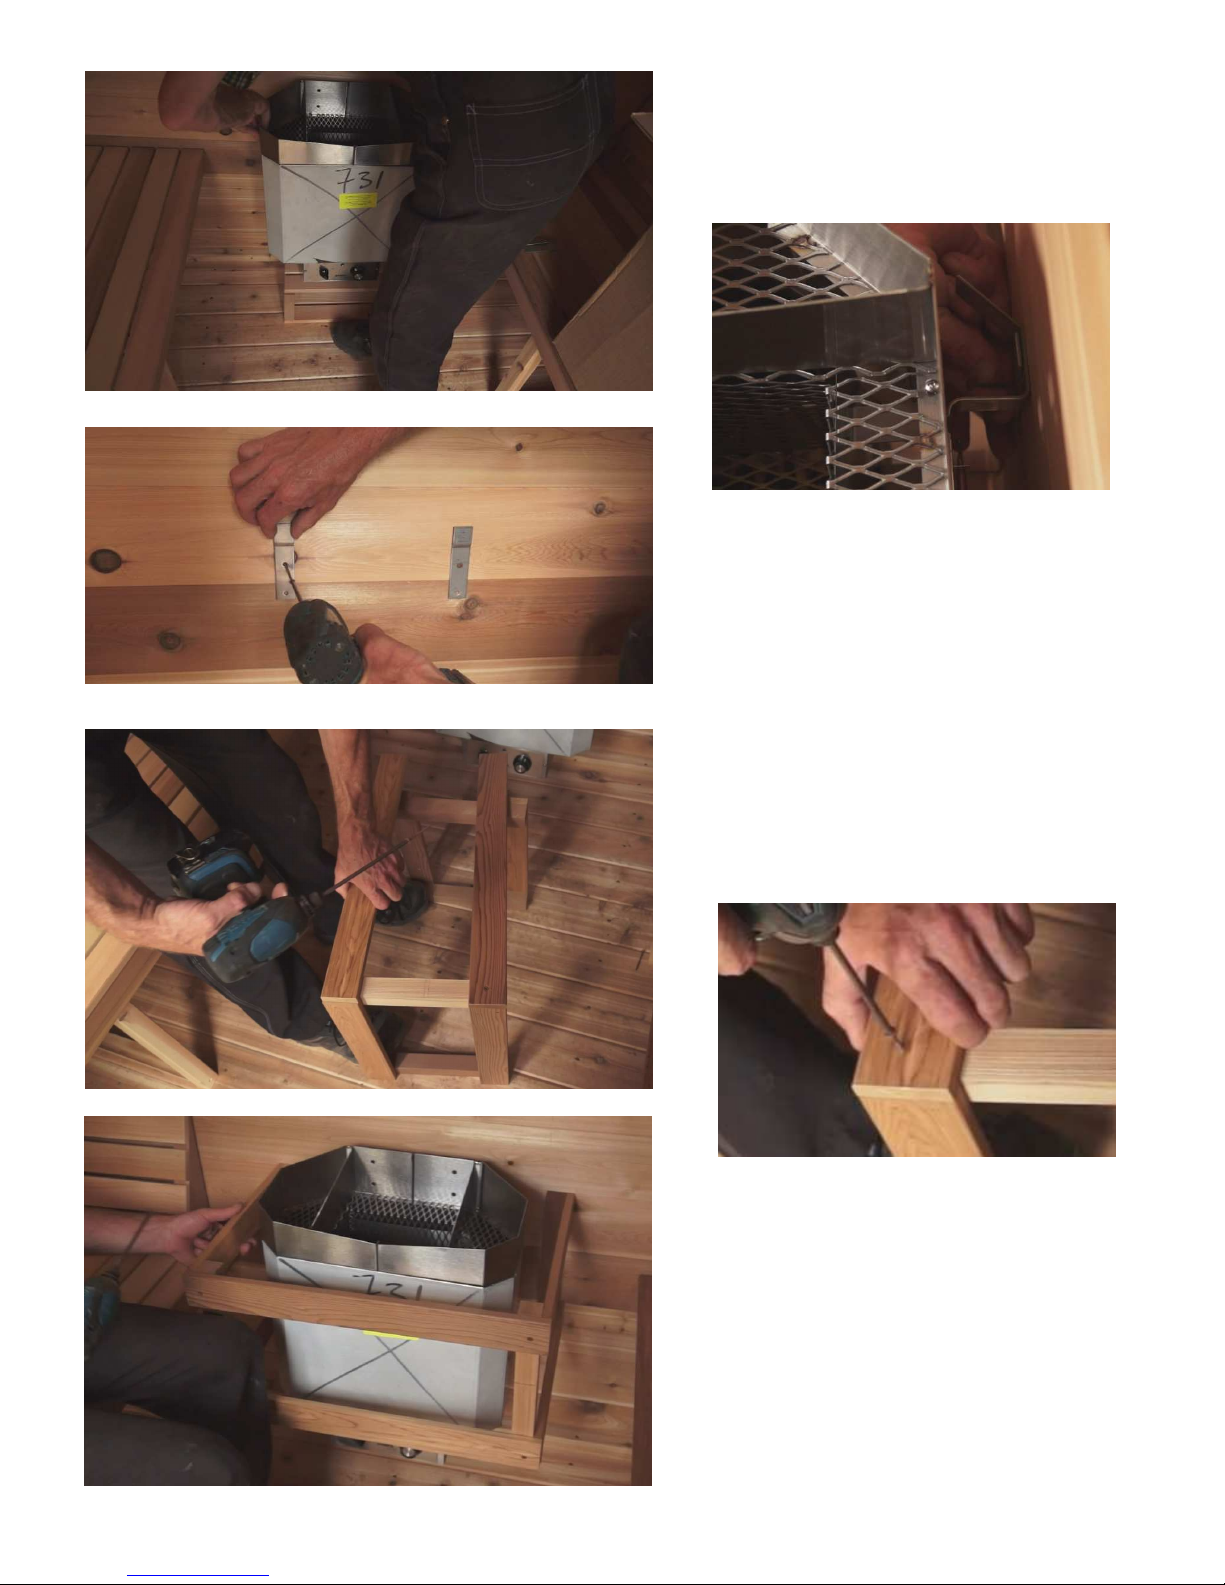
Heater: (see manufacturer’s instructions)
Sauna Craft: Place one of t e ead rests on t e
floor to old t e eater in place w ile you mark
t e positions of t e wall bracket, as s own.
Use t e screws supplied wit t e eater to
fasten t e wall brackets, and ang t e eater on
t em.
T e eater is now ready for t e electrical
ookup by a qualified electrician.
Was t e rocks wit a scrub brus under water
to get t e dust off of t em before use. Remove
the protective plastic film and operate t e
eater for a full our on t e ig est temperature
setting wit t e sauna door open to burn off any
residue from manufacturing.
Assemble t e cedar eater guard fence using
2½” deck screws.
IMPORTANT:
For Electric and Wood-burning Heaters:
Operate the heater for an hour at the highest
setting with the sauna door fully open to burn
off any residual coating from the manufacturing
process before using.
Table of contents
Other SaunaFit Plumbing Product manuals


Popular Plumbing Product manuals by other brands

Weka
Weka 506.2020.00E ASSEMBLY, USER AND MAINTENANCE INSTRUCTIONS

Kohler
Kohler K-6228 Installation and care guide

UBERHAUS DESIGN
UBERHAUS DESIGN 75175017 Operator's manual

American Standard
American Standard DetectLink 6072121 manual

Uponor
Uponor Contec TS Mounting instructions

Pfister
Pfister Selia 49-SL Quick installation guide


Kohler
Kohler Centerset K-15240 Homeowner's guide

Viega
Viega Prevista Dry 8522.33 Instructions for use

Sanela
Sanela Lema SLP 59RB Instructions for use

Elkay
Elkay EDF15AC Installation, care & use manual

Hans Grohe
Hans Grohe AXOR Citterio E 36702000 Instructions for use/assembly instructions

baliv
baliv WT-140 manual