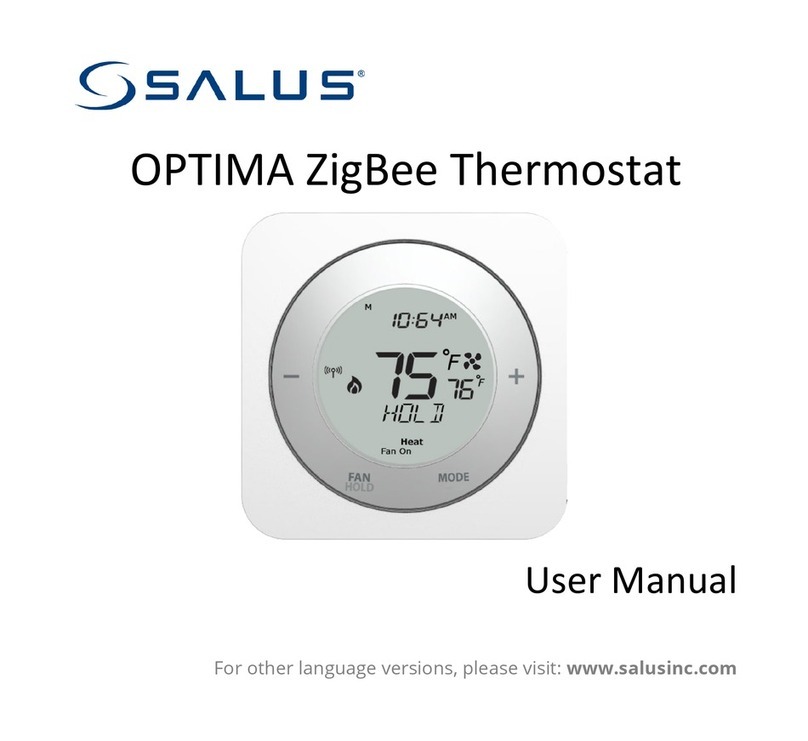
Salus RT300 User manual

Instruction Manual
Model No RT300
Digital Room Thermostat
RT300 100X115mm_Layout 1 23/08/2013 09:09 Page 1

PRODUCT COMPLIANCE
This product complies with the essential requirements of the following EC
Directives:
•Electro-Magnetic Compatibility directive 2004/108/EC
•Low Voltage Directive 2006/95/EEC
•EC Marking directive 93/68/EEC
SAFETY INFORMATION
These instructions are applicable to the SALUS Controls model stated on the
front cover of this manual only, and must not be used with any other make or
model.
These instructions are intended to apply in the United Kingdom only, and
should be followed along with any other statutory obligations.
This accessory must be fitted by a Competent person, and installation must
comply with the guidance provided in the current editions of BS7671 (IEE
Wiring Regulations) and Part ‘P’ of the Building Regulations. Failure to
comply with the requirements of these publications could lead to
prosecution.
Always isolate the AC Mains supply before opening or removing the
unit from the wall or wall box.
When fitting batteries don’t mix old and new batteries together. Do
not use rechargable batteries.
Please leave these instructions with the end user where they should be kept
in a safe place for future reference.
RT300 INSTRUCTION MANUAL
2
RT300 100X115mm_Layout 1 23/08/2013 09:09 Page 2

What is a room thermostat?
... an explanation for householders
A room thermostat simply switches the heating system on and off as necessary. It
works by sensing the air temperature, switching on the heating when the air
temperature falls below the thermostat setting, and switching it off once this set
temperature has been reached.
Turning a room thermostat to a higher setting will not make the room heat up any
faster. How quickly the room heats up depends on the design of the heating system,
for example, the size of boiler and radiators.
Neither does the setting affect how quickly the room cools down. Turning a room
thermostat to a lower setting will result in the room being controlled at a lower
temperature, and saves energy.
The heating system will not work if a time switch or programmer has switched it off.
The way to set and use your room thermostat is to find the lowest temperature setting
that you are comfortable with, and then leave it alone to do its job. The best way to
do this is to set the room thermostat to a low temperature – say 18oC – and then turn
it up by one degree each day until you are comfortable with the temperature. You
won’t have to adjust the thermostat further. Any adjustment above this setting will
waste energy and cost you more money.
If your heating system is a boiler with radiators, there will usually be only one room
thermostat to control the whole house. But you can have different temperatures in
individual rooms by installing thermostatic radiator valves (TRVs) on individual
radiators. If you don’t have TRVs, you should choose a temperature that is reasonable
for the whole house. If you do have TRVs, you can choose a slightly higher setting to
make sure that even the coldest room is comfortable, then prevent any overheating in
other rooms by adjusting the TRVs.
Room thermostats need a free flow of air to sense the temperature, so they must not
be covered by curtains or blocked by furniture. Nearby electric fires, televisions, wall
or table lamps may prevent the thermostat from working properly.
RT300 INSTRUCTION MANUAL 3
RT300 100X115mm_Layout 1 23/08/2013 09:09 Page 3

INSTALLATION
Please read the important safety information at the start of this manual before you
begin to install the thermostat.
The ideal position to locate the RT300 thermostat is about 1.5m above floor level, in
a location where the thermostat is accessible, reasonably lit and free from extremes of
temperature and draughts. Do not mount the thermostat on an outside wall, above a
radiator or in a location where it may be subjected to direct sunlight.
The electrical connections to the RT300 are made to the supplied industry standard
backplate. This simplifies installation, as no connections are made to the controller
itself. Connection details are shown below - no Earth connection is required for the
correct and safe operation of the RT300, but a parking terminal is provided to connect
an Earth wire if one is present.
RT300 INSTRUCTION MANUAL
4
INTRODUCTION
A thermostat is a device that is used to switch the heating system in your home on
and off as needed. It works by sensing the air temperature and switching on the
heating when the air temperature falls below the thermostat setting, and switching
it off once the set temperature has been reached.
The RT300 from SALUS Controls is a stylish and
accurate digital thermostat with a large, easy to
read Liquid Crystal Display (LCD). This thermostat
has been specifically designed to be used Volt Free.
Features
•Volt free contacts
•Frost protection
•Large, easy to read LCD with blue backlight
•Burner on symbol
•User friendly
•Stylish casing
RT300 100X115mm_Layout 1 23/08/2013 09:09 Page 4

Backplate Connections
Terminal Description Backplate
L Mains Live
SL Switched Live
(Normally Open Contact)
Earth Parking (no electrical
connection)
After installing the backplate in a suitable location, wiring connections can be made as
shown above. The following criteria apply to the installation:
• The incoming AC mains supply should be 230V AC and fused at 5 amps.
• Optimum cable size for installation is 1.5 mm2; wiring colours should be
in accordance with the current requirements of the IEE Wiring Regulations.
• Cable entry should be from the rear of the backplate.
• All wiring connections should be securely made, and be firmly
gripped beneath the square brass washer on each terminal.
The RT300 requires two ‘AA’ alkaline batteries to function correctly. Ensure that the
batteries are inserted correctly, paying careful attention to the polarity markings on the
battery and next to the battery holders.
Do not restore the mains supply to the system until all associated items are fully installed.
NOTE: All electrical installation work should be carried out by a suitably qualified Electrician
or other competent person. If you are not sure how to install this thermostat consult either
with a qualified electrician, heating engineer or your boiler / heating system supplier for
advice on how to continue.
Do not remove or refit the RT300 onto the backplate without
the mains supply to the system being isolated.
RT300 INSTRUCTION MANUAL 5
RT300 100X115mm_Layout 1 23/08/2013 09:09 Page 5

JUMPER SETTINGS
Changes to the jumper settings should only be made by the Engineer carrying out the
installation or other qualified person.
The installer should select the jumper positions required if changes need to be made
to the factory default settings. These jumpers are found on the rear of the Control
Centre.
Jumper Function Default
Temperature Movable jumper for ± 0.5 ºC span
Span ± 0.5 ºC or ± 1.0 ºC span.
RT300 INSTRUCTION MANUAL
6
RT300 100X115mm_Layout 1 23/08/2013 09:09 Page 6

AFTER INSTALLATION
After completing installation and powering up the RT300 for the first time the
thermostat will behave in the following way:
All the indicators on the display and the backlight will be turned
on for two seconds. After two seconds, the RT300 will then
operate in Normal mode (Normal mode is when the thermostat
is displaying the room temperature).
The following table shows the settings of the RT300 digital thermostat
after Power on:
Function Status After Reset or Power On
Operation Mode Normal mode
Room Temperature 22.0 °C, updated within 5 seconds
Set Point Temperature 20.0 °C
°C indicator On
Frost Protection indicator Off
Heat indicator Off
Low-Battery Warning indicator Off, updated within 5 seconds
Output Relay Off
After Power on, the thermostat will operate in Normal mode (Normal mode is when
the thermostat is displaying the room temperature):
•The set point temperature is reset to the default setting
•The room temperature display is updated within 5 seconds
•The control process starts
RT300 INSTRUCTION MANUAL 7
RT300 100X115mm_Layout 1 23/08/2013 09:09 Page 7

OPERATION
The status and operation of the RT300 is clearly
shown on the large backlit Liquid Crystal Display
(LCD). This display allows the user a clear
indication of the current room temperature, and
the status of the heating system.
There are few user controls for the RT300, making
this thermostat very easy to operate. These
controls are shown below, along with a description
of each of their functions.
USER CONTROL FUNCTION SUMMARY
Key / Operation Symbol Functions
UP key Increases the selected setting
DOWN key Decreases the selected setting
BACKLIGHT / Manually turns on the LCD backlight
FROST key for 5 seconds, or activates /
deactivates Frost Protection
RT300 INSTRUCTION MANUAL
8
RT300 100X115mm_Layout 1 23/08/2013 09:09 Page 8

REVIEWING SET POINT TEMPERATURE
You can view the set point temperature at any time by
pressing either the UP or DOWN key.
To exit from the set point review, press the BACKLIGHT /
FROST key, or don’t press any keys for approximately four
seconds – either of these actions will return the RT300 to
displaying current room temperature.
SETTING SET POINT TEMPERATURE
You can change the set point temperature very easily while
you are reviewing the set point temperature. Press the UP or
DOWN keys repeatedly to change the temperature setting.
The set point temperature will flash to indicate that it can be
changed:
The temperature will be changed in 0.5°C steps per key press. The RT300 will return
to Normal mode if no keys are pressed for more than four seconds.
Set point temperature cannot be changed if Frost Protection mode is enabled.
Y
T
RT300 INSTRUCTION MANUAL 9
RT300 100X115mm_Layout 1 23/08/2013 09:09 Page 9

FROST PROTECTION
To enable the Frost Protection mode, press and hold the BACKLIGHT / FROST button
for three seconds. Once Frost Protection is enabled, the set point temperature is
automatically set to 5°C to provide protection from the risk of freezing.
Whenever Frost Protection is activated, the Frost Protection indicator will flash in the
sequence shown below:
To turn off Frost Protection mode, press and hold the BACKLIGHT / FROST button for
three seconds.
Please be aware that the Frost Protection mode operates as an additional protection
feature but should not be used in place of a correctly installed frost thermostat, which
is required to override all other controls in the system.
The backlight will remain illuminated for approximately 5 seconds.
RT300 INSTRUCTION MANUAL
10
RT300 100X115mm_Layout 1 23/08/2013 09:09 Page 10
Other manuals for RT300
2
Table of contents
Other Salus Thermostat manuals

Salus
Salus ST625TX User manual

Salus
Salus ERT20RF User manual

Salus
Salus RT510BC+ User manual

Salus
Salus RT310RF User manual

Salus
Salus WBNTSQ61024 Quantum User manual

Salus
Salus BTRP230V User manual

Salus
Salus WBRT520TX User manual

Salus
Salus S Series User manual

Salus
Salus RT500 User manual

Salus
Salus RT500BC User manual
Popular Thermostat manuals by other brands

Saswell
Saswell SAS920XWHB-7-S-RF User manual and warranty card

Aircalo
Aircalo TFP1-ET85P2 operating manual

Honeywell
Honeywell CM721 user manual

Carrier
Carrier DEBONAIR 33CS Installation and operating instructions

Lennox
Lennox iHarmony Zone Thermostat Installation and setup guide

Gemtech
Gemtech GT7000 Operation