Olmo OS-18ALP230VGF User manual
Read this manual
WARNING
Do not connect the air conditioner to a multi-purpose
socket.
This appliance can be used by children ages 8 years
and above and persons with reduced physical, sensory,
or mental capabilities or lack of experience and
knowledge. Ensure that they have been given
supervision or instruction concerning use of the
appliance in a safe way and understand the hazards
involved.
Operation and Maintenance
If the supply cord is damaged, it must be replaced by
the manufacturer, its service agent, or similarly qualified
persons to avoid a hazard.
Do not spray water on the indoor unit. This may cause
electric shock or malfunction.
This may cause a fire.
Children should not play with the appliance.
Cleaning and user maintenance should not be made by
children without supervision.
Do not wash the air conditioner with water. This may
cause electric shock.
To avoid injury, do not touch the fins after removing the
filter.
To avoid deformation or fire, do not use fire or a hair
dryer to dry the filter.
Do not disconnect the power supply when cleaning the
air conditioner. This may cause electric shock.
Precautions
Page 1
Do not block the air inlet or air outlet. This may cause
malfunction.
-
-
-
-
-
The power cord is overheating or damaged
An abnormal sound is heard during operation
The circuit break trips off frequently
The air conditioner produces a burning smell
The indoor unit is leaking
When turning on or turning off the unit by emergency
operation switch, please press this switch with an insulating
object other than metal.
WARNING
If the air conditioner operates under abnormal conditions,
malfunction, electric shock, or fire may result.
Spilling water on the remote control may ruin it.
Please contact your dealer when you need to repair
your air conditioner; do not repair it by yourself. This
may cause electric shock or damage.
Do not step on the top panel of the outdoor unit or place
heavy objects on it. This may cause personal injury or
damage.
When below phenomena occur, please turn of the air
conditioner, disconnect the power immediately, and
contact the dealer or qualified professionals for service:
Do not extend your fingers or objects into the air inlet or
air outlet. This may cause personal injury or damage.
To avoid personal injury or damage, only allow
qualified professionals to perform maintenance.
Page 2
Page 3
To avoid malfunction, install the circuit break.
of at least 1/8in (3mm)in all poles should be connected in
fixed wiring.
WARNING
Make sure the power supply matches the requirement of
the air conditioner. Unstable power supply may cause a
malfunction. Please install the proper power supply
cables before using the air conditioner.
An all-pole disconnection switch with a contact separation
Qualified professionals should follow the electric safety
regulations when installing the unit.
Please connect the live wire, neutral wire, and
grounding wire of the power socket.
any work related to electricity and safety.
Be sure to cut off the power supply before performing
Include an air switch with suitable capacity. The air
switch should include a magnet buckle and heating
buckle function to protect the unit from circuit-short and
overload.
The air conditioner should be properly grounded.
Don't use an unqualified power cord.
Incorrect grounding may cause electric shock.
In accordance with local safety regulations, use a
qualified power supply circuit and circuit break.
To avoid personal injury or damage, allow installation to
be performed by qualified professionals.
Attachment
Page 4
Installation must be performed by authorized personnel
only in accordance with the requirements of National
Electrical Codes (NEC) and local electrical codes.
The appliance must be positioned so that the plug is
accessible.
If the length of power connection wire is insufficient, please
contact the supplier for a new one. Avoid extending the
wire by yourself.
All wires of both the indoor unit and the outdoor unit
should be connected by a professional.
national wiring regulations.
WARNING
The grounding resistance should comply with National
Electric Safety regulations.
The air conditioner is a first-class electrical appliance. It
must be properly grounded by a professional with a
specialized grounding device. To avoid electric shock,
ensure that it is grounded effectively.
Because the temperature of the refrigerant circuit will be
high, ensure that the interconnection cable is kept away
from the copper tube.
the manufacturer, the service agent, or similarly
qualified persons for a hazard to be avoided.
If the supply cord is damaged, it must be replaced by
The yellow-green wire in the air conditioner is the
grounding wire and cannot be used for other purposes.
The appliance should be installed in accordance with
Do not add power before finishing installation.
Page 5
The indoor unit should be installed close to a wall.
Instructions for installation and use of this product are
provided by the manufacturer.
WARNING
Only a qualified professional should relocate the air conditioner.
Personal injury or damage may result if you try to move it yourself.
For the air conditioner model without a plug, a circuit break must be
installed in the line.
Select a location that is out of reach of children and far away from
animals or plants. If this is impossible, please add a fence for safety
purposes.
For the air conditioner model with a plug, the plug should be reachable
after installation is complete.
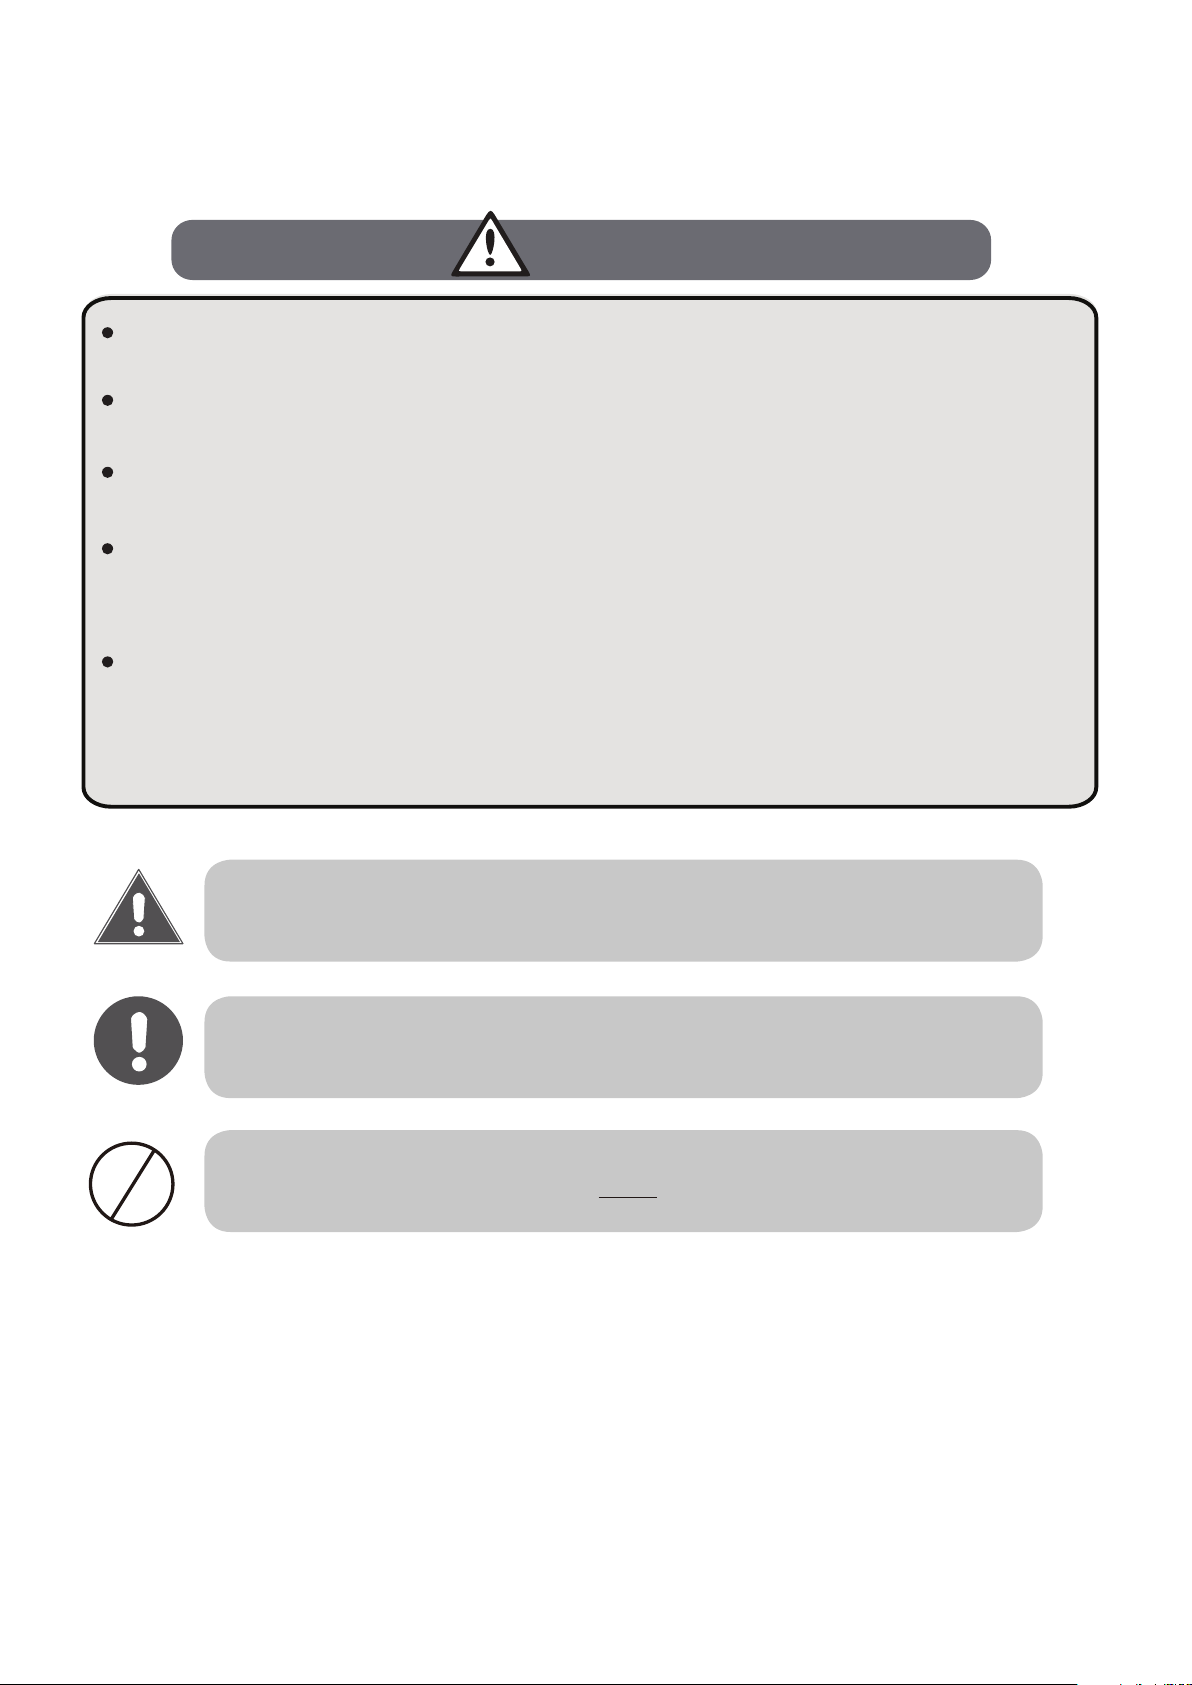
This symbol indicates that ignoring instructions may cause death or serious
injury.
This symbol indicates that ignoring instructions may cause moderate injury
to your person or damage to your unit or other property.
WARNING
CAUTION
This symbol indicates that you must never perform the action indicated.
Page 6
Unit Specications and Features 1
Unit
Specifications
and Features
NOTE:
A guide on using the infrared remote is not included
in this literature package.
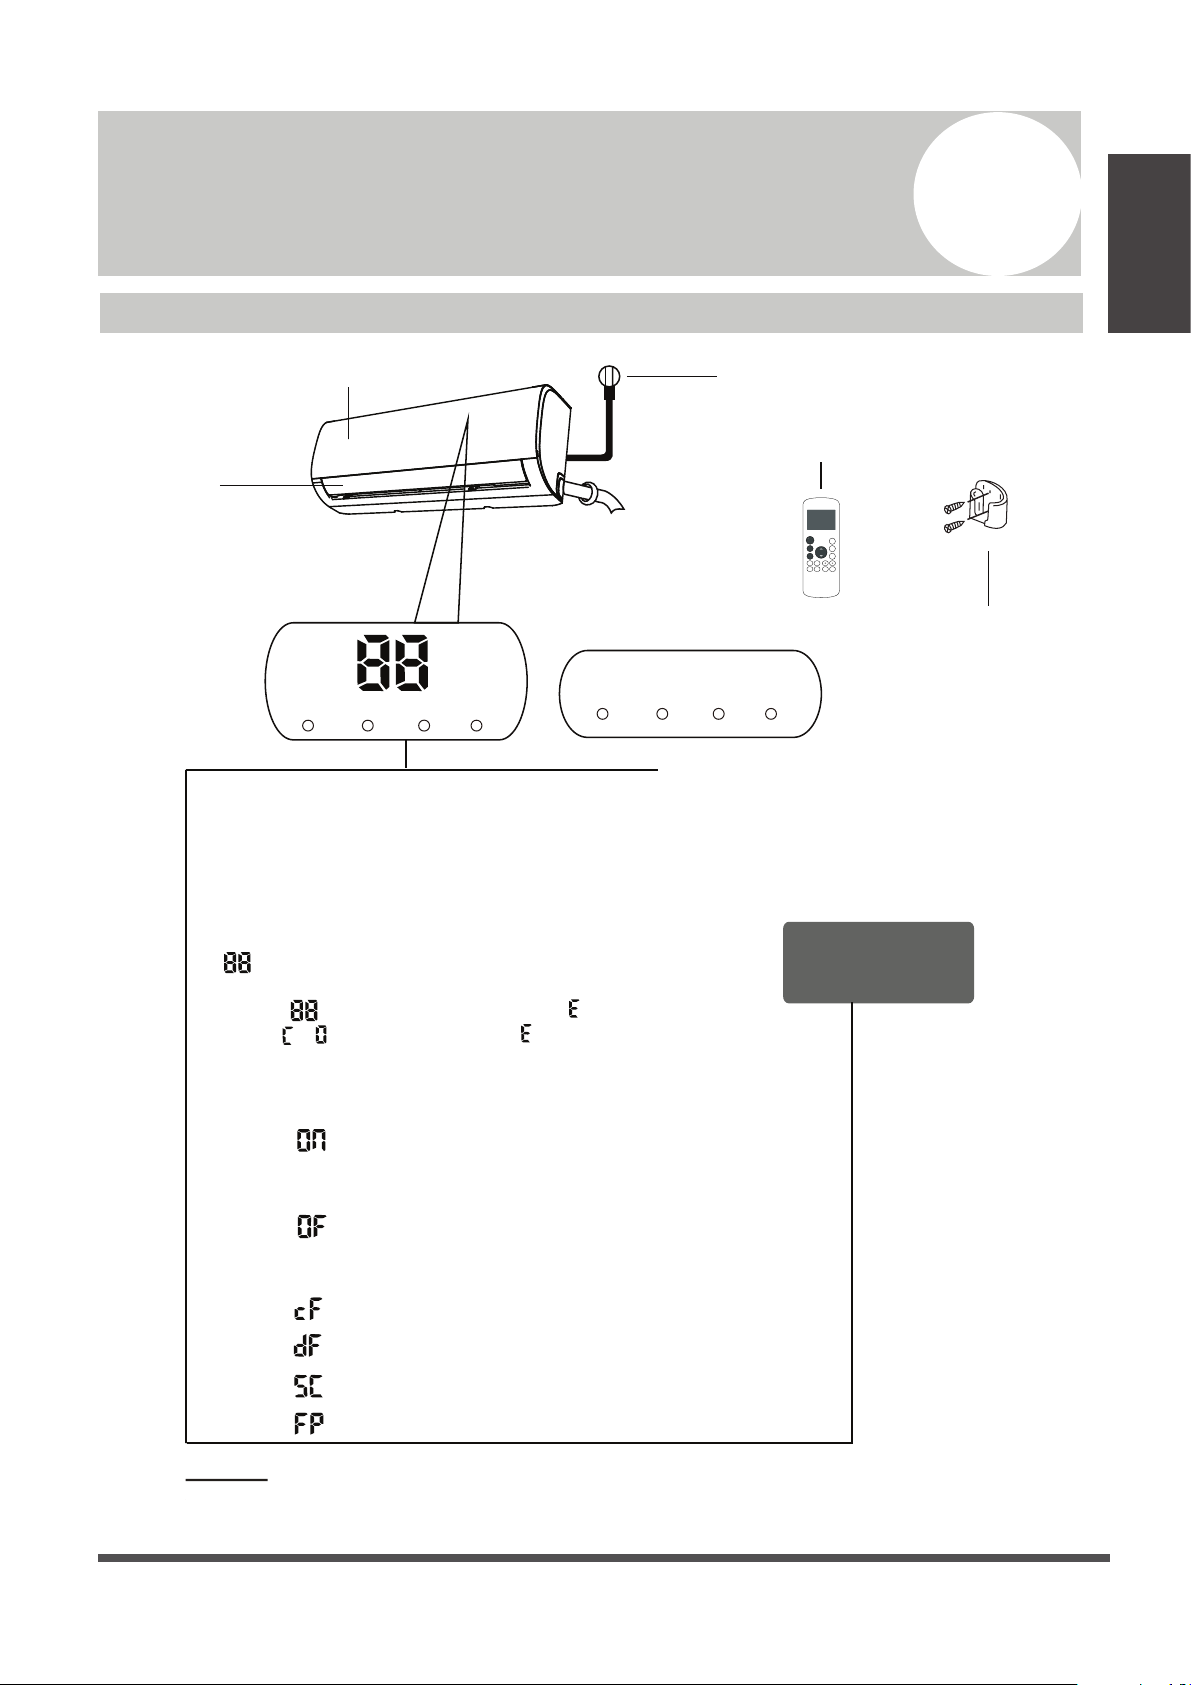
Unit Parts
fresh defrost run timer
Power Cable (Some Units)
Remote Control
Remote Holder
(Some Units)
Louver
Front Panel
Display window (A)
Display window (B)
“ ” for 3 seconds when:
• TIMER ON is set
• FRESH, SWING, TURBO, or SILENCE features are turned on
“ ” When the fresh feature is activated (some units)
“ ” for 3 seconds when:
• TIMER OFF is set
• FRESH, SWING, TURBO, or SILENCE features are turned off
“ ” when defrosting
“ ” when anti-cold air feature is turned on
“ ” when unit is self-cleaning
“ ” when freeze protection is turned on
“ ” When the defrost feature is activated.
Display Code
Meanings
In fan mode, the unit will display the room temperature.
In other modes, the unit will display your temperature setting.
,
,
“ ” Not available for all units.
When ECO function (some units) is activated, the
illuminates gradually as --
-- -- set temperature -- in one second intervals.
fresh defrost run timer
“ ” When the unit is on.
“ ” When the timer is set.
When an error occurs, it will display an error code.
fresh
defrost
run
timer
ON/O F F
TE M P
SHORT
CUT
TIMER
ON
TIMER
OFF
MODE
FAN
SLEEP
TRUBO
FRESH
CLEAN LE D
FOLLOW
Unit
Specifications
and Features
Page 7
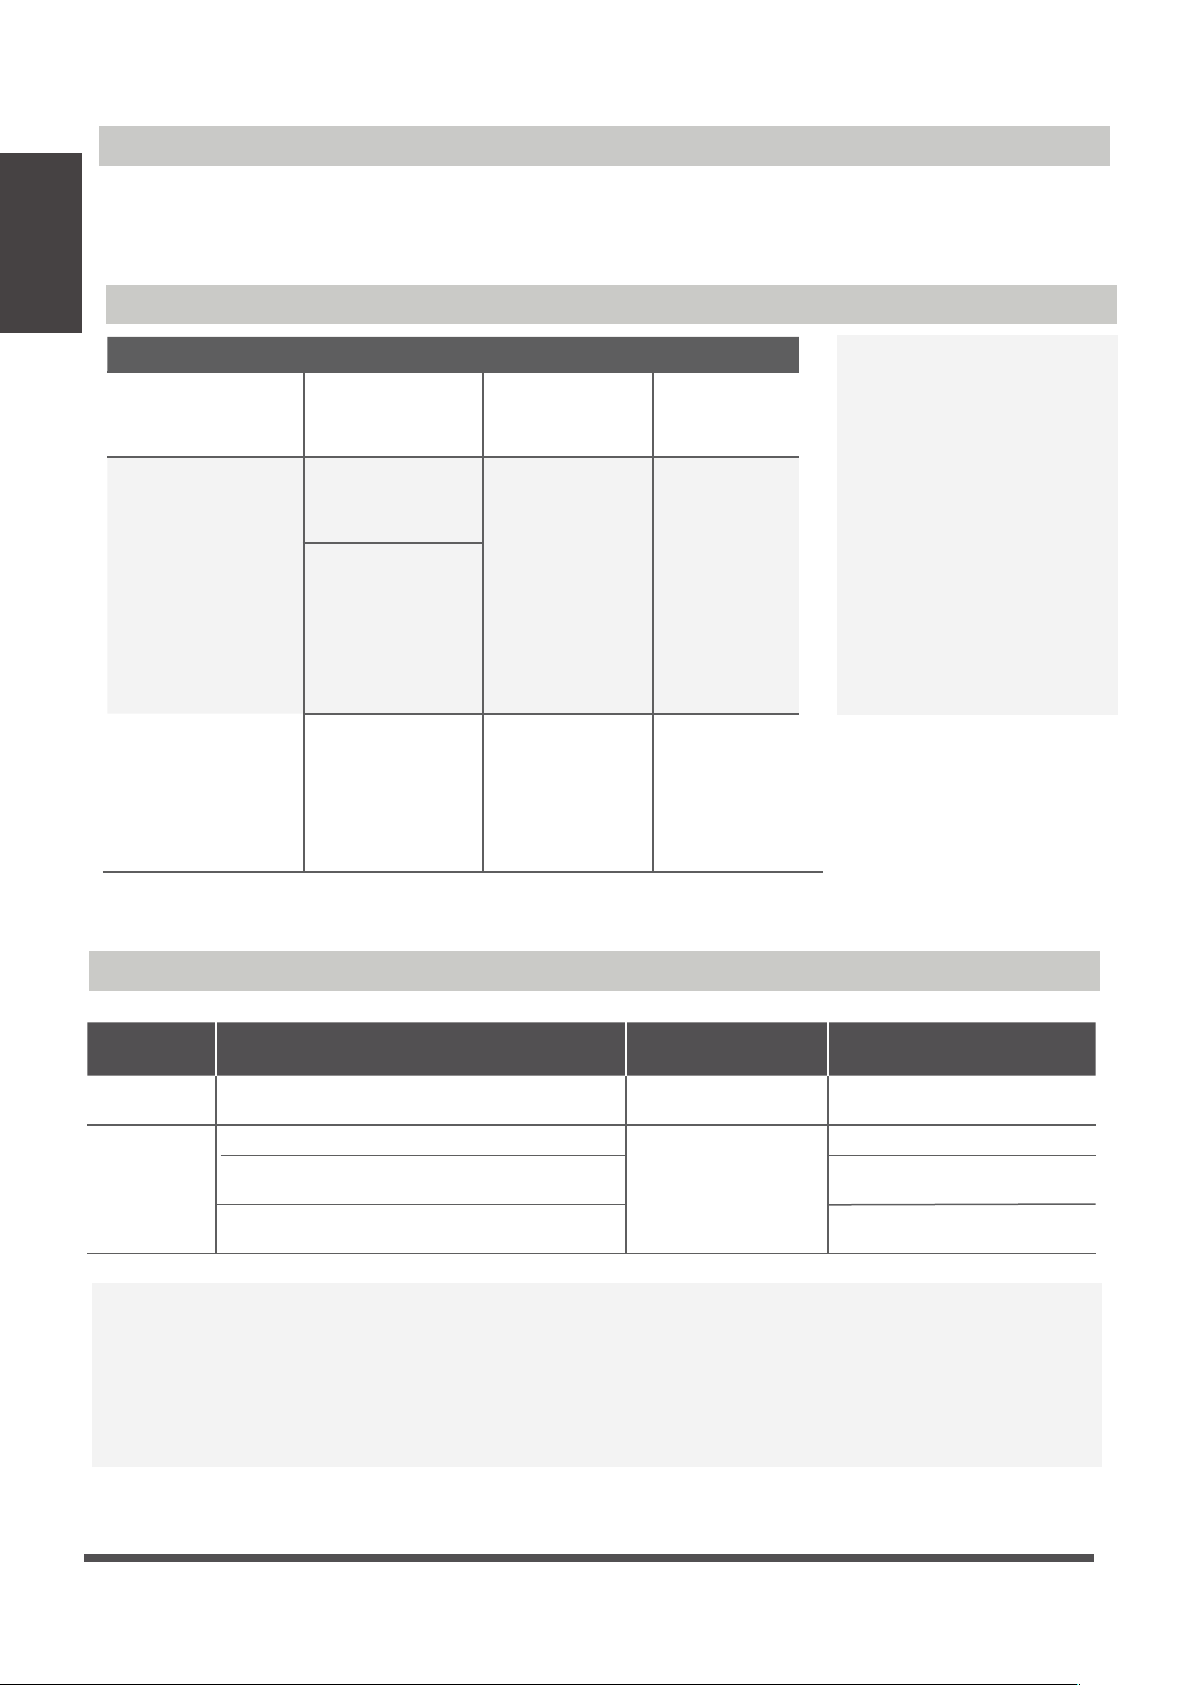
Achieving Optimal Performance
Optimal performance for the COOL, HEAT, and DRY modes can be achieved in the following
temperature ranges. When your air conditioner is used outside of these ranges, certain safety
protection features will activate and cause the unit to perform less than optimally.
Room
Temperature 63° - 90°F (17° - 32°C) 32° - 86°F (0° - 30°C) 50° - 90°F (10° - 32°C)
Outdoor
Temperature
64° - 109°F (18° - 43°C)
19° - 75°F (-7° - 24°C)
52° - 109°F (11° - 43°C)
19° - 109°F (-7° - 43°C)
(For models with low temp cooling systems) 64° - 109°F (18° - 43°C)
64° - 129°F (18° - 54°C)
(For special tropical models) 64° - 129°F (18° - 54°C)
(For special tropical models)
COOL mode HEAT mode DRY mode
COOL mode HEAT mode DRY mode
Room Temperature (17°C - 32°C)
63°F - 90°F
(0°C - 30°C)
32°F - 86°F
(10°C - 32°C)
50°F - 90°F
Outdoor
Temperature
(0°C - 50°C)
32°F - 122°F
(-15°C - 30°C)
5°F - 86°F
(0°C - 50°C)
32°F - 122°F
(0°C - 60°C)
32°F - 140°F
(For special
tropical models)
(0°C - 60°C)
32°F - 140°F
(For special
tropical models)
(-15°C - 50°C)
5°F - 122°F
(For models with
low temp. cooling
systems)
To further optimize the performance of your unit, do the following:
• Keep doors and windows closed.
• Limit energy usage by using the TIMER ON and TIMER OFF functions.
• Do not block air inlets or outlets.
• Regularly inspect and clean the air lters.
FOR OUTDOOR UNITS
WITH AUXILIARY
ELECTRIC HEATER
Inverter Split Type
Fixed-Speed Type
When the outside
temperature is below 32°F
(0°C), we strongly
recommend keeping the
unit plugged in at all
times to ensure smooth
ongoing performance.

Unit
Specifications
and Features
Page 8
For a detailed explanation of each function,
refer to the Remote Control Manual.
Other Features
•
•
Auto-Restart
If the unit loses power, it will automatically
restart with the prior settings once power has
been restored.
• Anti-Mildew (some units)
When turning o the unit from COOL, AUTO
(COOL), or DRY modes, the air conditioner will
continue to operate at very low power to dry up
condensed water and prevent mildew growth.
• Wi-Fi Control (some units)
Wi-Fi control allows you to control your air
conditioner using your mobile phone and a
Wi-Fi connection.
• Louver Angle Memory (some units)
When turning on your unit, the louver will
automatically resume its former angle.
• Refrigerant Leakage Detection (some
units)
The indoor unit will automatically display “EC”
For a detailed explanation of your unit’s
advanced functionality (such as TURBO
mode and the self-cleaning functions),
refer to the Remote Control Manual.
Air Filter Reminders (some units)
The “timer” indicator light turns o and
the “run” indicator light ashes 7 times
when the unit detects refrigerant leakage.
Air Filter Cleaning Reminder
Air Filter Replacement Reminder
After 240 hours of use, the “run” and
“timer” indicator lamps on the indoor
unit will ash simultaneously and the
display window on the indoor unit will
ash “CL” (if applicable). This is a
reminder to clean your lter. After 15
seconds, the unit will revert to its
previous display.
To reset the reminder, press the LED
button on your remote control 4 times,
or press the MANUAL CONTROL botton
3 times. If you don’t reset the reminder,
the “CL”, “run” and “timer” indicator
lamps will ash again when you restart
the unit.
After 2,880 hours of use, the “run” and
“timer” indicator lamps will ash
simultaneously 10 times, then will
remain on for ve seconds, and the
display window on the indoor unit will
ash “nF” (if applicable). This is a reminder
to replace your lter. After that, the unit
will revert to its previous display.
To reset the reminder, press the LED
button on
your remote control 4 times,
or press the
MANUAL CONTROL botton
3 times. If you don’t reset the reminder,
the “nF”, “run” and “timer” indicator
lamps will ash again when you restart
the unit.
Page 9
Setting the Vertical Angle of Airow
While the unit is on, use the SWING/DIRECT
button to set the direction (vertical angle) of
airflow.
1.
Press the SWING/DIRECT button once to
activate the louver. Each time you press
the button, it will adjust the louver by 6°.
Press the button until the direction you
prefer is reached.
2.
To make the louver swing up and down
continuously, press and hold the SWING/
DIRECT button for 3 seconds. Press it
again to stop the automatic function.
The horizontal angle of the airow must be set
manually. Grip the deector rod (See Fig.B)
and manually adjust it to your preferred direction.
For some units, the horizontal angle of the airow
can be set by remote control. Please refer to the
Remote Control Manual.
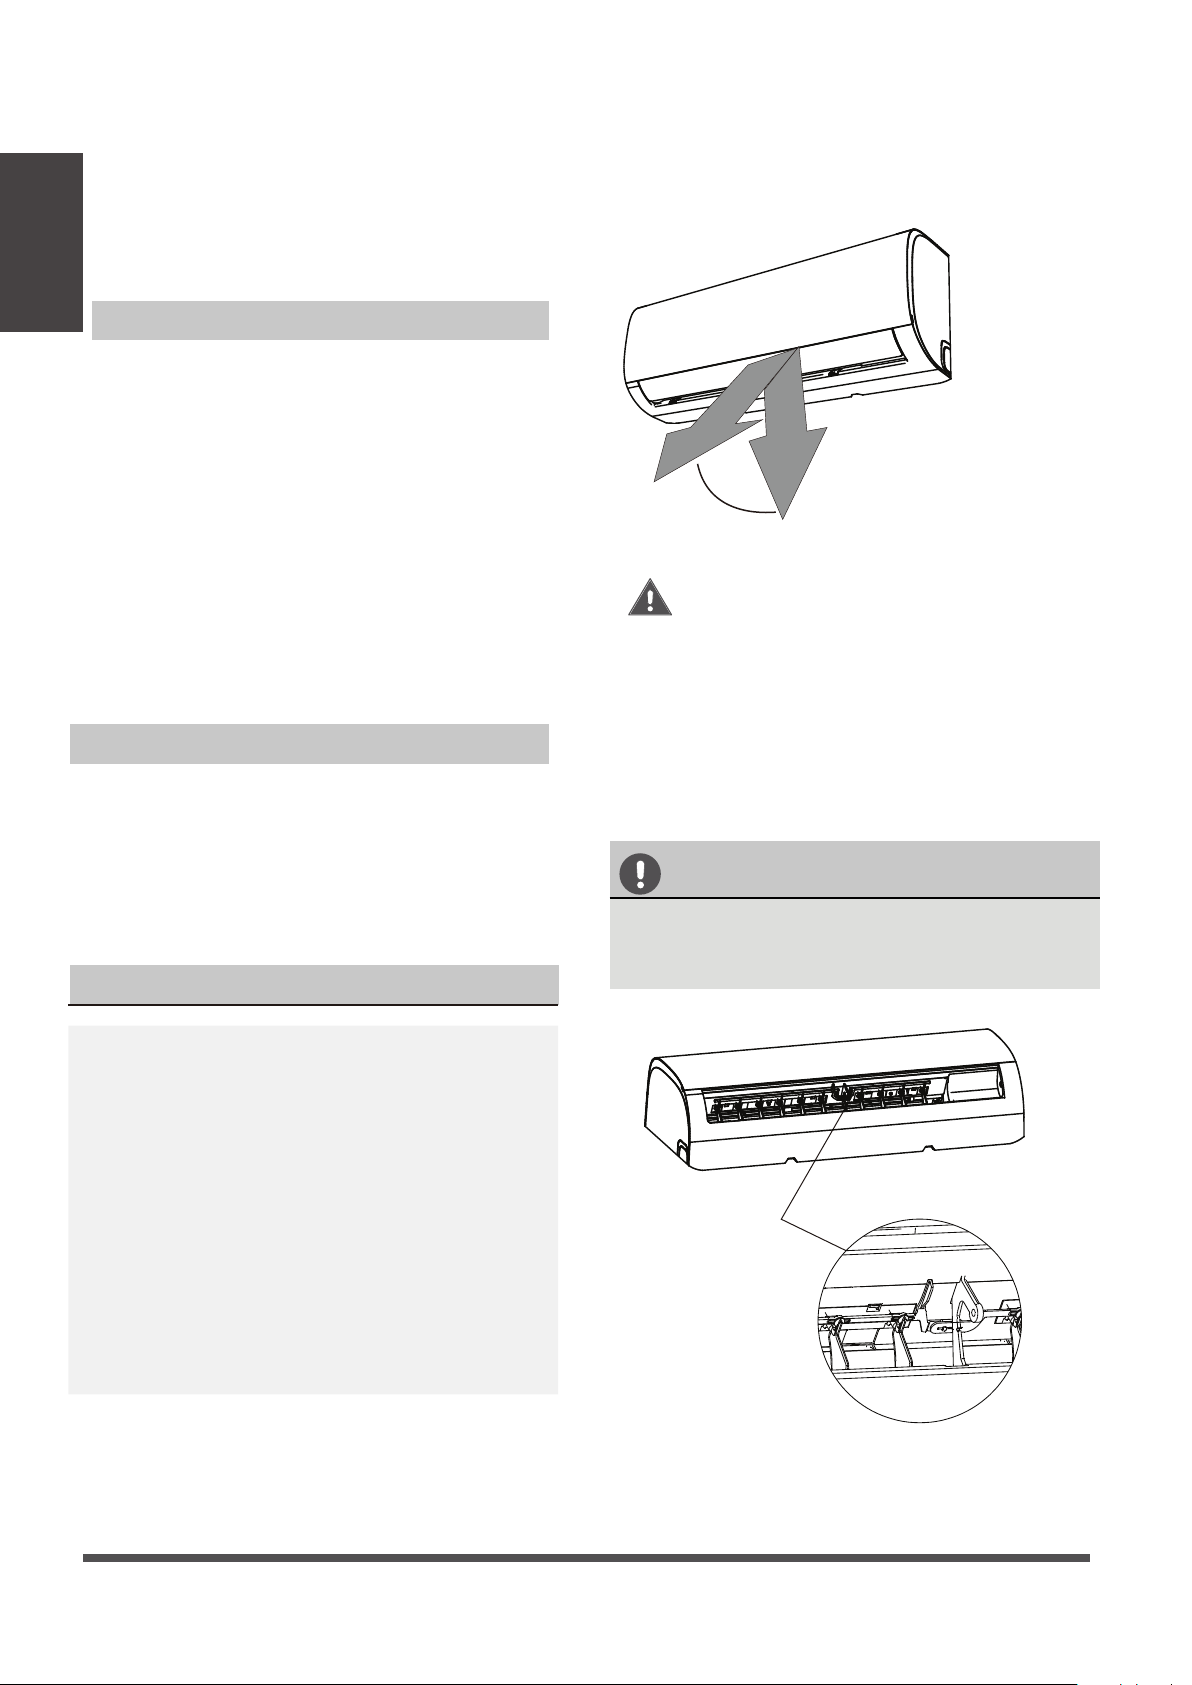
NOTE ON LOUVER ANGLES
When using COOL or DRY mode, do not set the
louver at too vertical an angle for long periods
of time. This can cause water to condense on
the louver blade, which will drop on your floor
or furnishings. (See Fig. A)
When using COOL or HEAT mode, setting the
louver at too vertical an angle can reduce the
performance of the unit due to restricted airflow.
Do not move the louver by hand. This will cause the
louver to become out of sync. If this occurs, turn
o the unit and unplug it for a few seconds,
then restart the unit. This will reset the louver.
Fig. A
CAUTION
Do not put your ngers in or near the blower
and suction side of the unit. The high-speed
fan inside the unit may cause injury.
Fig. B
Setting Angle of Airow
Setting the Horizontal Angle of Airow
•
Unit
Specifications
and Features
Range
Caution: Do not keep the louver at too
vertical an angle for long periods of
time. This can cause water condensation
to drip on your furnishings.
Deector rod
This manual suits for next models
2
Table of contents
Other Olmo Air Conditioner manuals


Popular Air Conditioner manuals by other brands


Fujitsu
Fujitsu Inverter ASBA30JFC operating manual

Toshiba
Toshiba RAS-M10SMUV-E installation manual

Daikin
Daikin FXLQ20MAVE Operation manual

Hitachi
Hitachi RAS-E24CAK instruction manual

CIAT
CIAT Magister 2 Series Installation, Operation, Commissioning, Maintenance

Bestron
Bestron AAC6000 instruction manual


