Oce im4512 User manual

For Océ and Imagistics Models
Océ Facsimile Operations Manual
im4512/im3512/im4511 / im3511
1
Thank you for purchasing an ZB3500590 Facsimile Expansion Kit. The Facsimile Operation Manual that is included
in the kit explains the procedures for using the fax function on im4511/im3511, and thus some sections do not apply
to the im4512/im3512. This guide explains those sections, and should be used together with the Facsimile
Operation Manual.
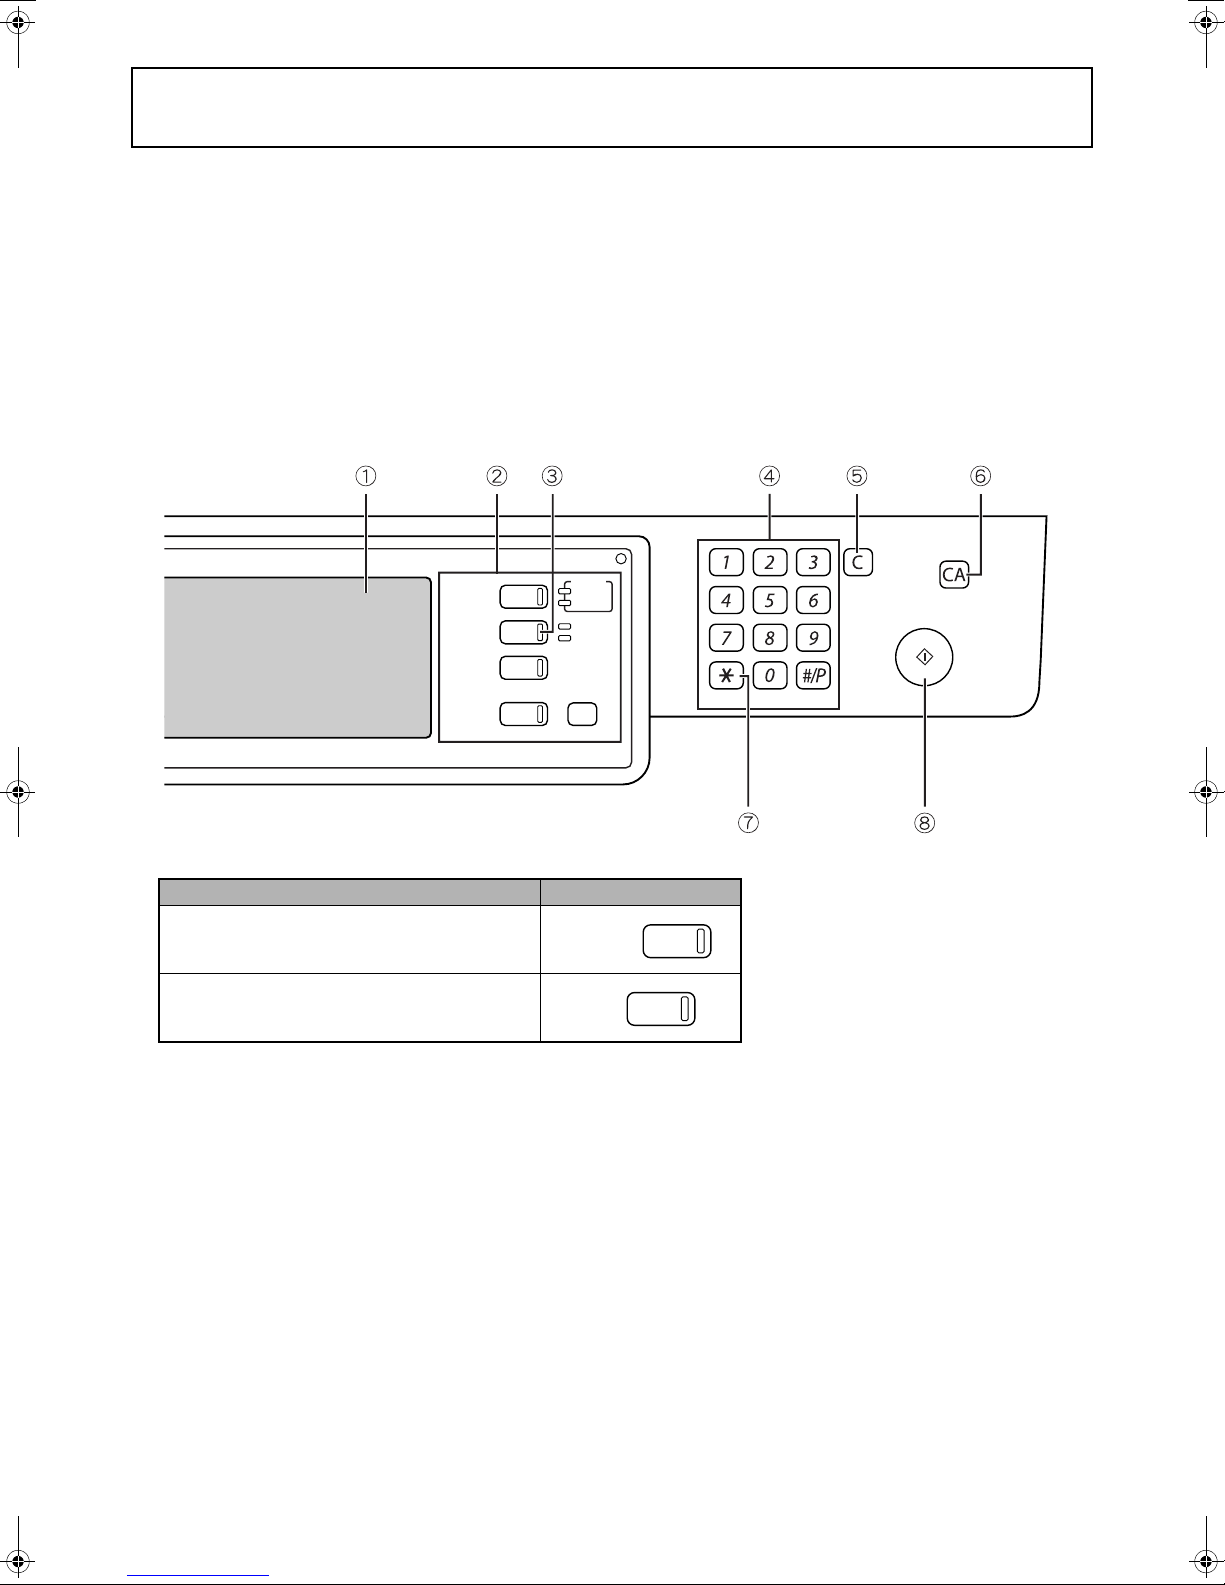
1. OPERATION PANEL
The operation panel of the im4512/im3512 is different from the panel described in the Facsimile Operation Manual.
When reading explanations that use an illustration of the operation panel, refer to the illustration below. For the
names and functions of the keys, see "A LOOK AT THE OPERATION PANEL" in the Facsimile Operation Manual
(page 1-3). (The numbers in the illustration correspond to the explanations.)
TO USERS OF THE im4512/im3512
LOGOUT
DOCUMENT
FILING
IMAGE SEND
COPY
JOB STATUS SYSTEM
SETTINGS
LINE
DATA
PRINT
READY
DATA
Model Key name
The im4512/im3512 with the document filing
function added
The im4512/im3512 without the document filing
function
DOCUMENT
FILING
PRINT
Jupiter2_IGI_Fax_Sheet(ZB3500590).fm 1 ページ 2007年7月4日 水曜日 午前8時14分

2
[SYSTEM SETTINGS] Key
The [SYSTEM SETTINGS] key on the operation panel is called the [CUSTOM SETTINGS] key in the Facsimile
Operation Manual. When configuring system settings, refer to the illustration below. At other places in the Operation
manual that refer to the "Custom Settings", substitute "System Settings".
* With respect to the administrator settings, see the following.
2. ADMINISTRATOR SETTINGS
The "Administrator Settings" in the system settings are referred to as "Key Operator Programs" in the Facsimile
Operation Manual. For explanations of the administrator settings for the fax function, see chapter 8, "KEY
OPERATOR PROGRAMS", in the Facsimile Operation Manual.
At places in the Facsimile Operation Manual that refer to the "Key Operator Programs", substitute "Administrator
Settings".
Due to this change, steps 1 to 3 on pages 8-3 and 8-11 are as follows.
1Press the [SYSTEM SETTINGS] key.
2Touch the [ADMINISTRATOR SETTINGS]
key.
3Enter the administrator password (5-digit
number) with the numeric keys.
The factory default
administrator password
is indicated on page 2 of
Administrator settings
guide.
For the steps that follow, see pages 8-3 and 8-11 of the
Facsimile Operation Manual.
Location in
Facsimile Operation Manual
When using the
im4512/im3512 Applicable function Operation manual page
(chapter)
USING THE TRANSFER
FUNCTION
Page 3-18
Changes in the fax reception
function
Page 5-2
STORING, EDITING, AND
DELETING AUTO DIAL
KEYS AND PROGRAMS
Page 6-2
STORING A GROUP INDEX
Page 6-9
PROGRAMMING,
EDITING, AND DELETING
FCODE MEMORY BOXES
Page 6-10
EDITING AND DELETING
A MEMORY BOX
Page 6-14
PRINTING PROGRAMMED
INFORMATION
Page 6-14
ADMINISTRATOR
SETTINGS*
Chapter 8
SSYSTEM
SETTINGS
B STATUS SYSTEM
SETTINGS
B STATUS SYSTEM
SETTINGS
ADMINISTRATOR SETTINGS
SENDER CONTROL FAX DATA
RECEIVE/FORWARD
ADMINISTRATOR PASSWORD
Jupiter2_IGI_Fax_Sheet(ZB3500590).fm 2 ページ 2007年7月4日 水曜日 午前8時14分

3
3. INBOUND ROUTING SETTINGS
Received faxes can be automatically forwarded to an e-mail address. This function can be used to forward received
faxes directly to an e-mail address without printing the faxes.
Configuring Inbound Routing Settings
Inbound routing settings are configured in the Web pages. For the procedure for accessing the Web pages, see
"ACCESSING WEB PAGES" in the Operation Manual For Image Send Functions. After configuring the settings, be
sure to click [Submit] to save them.
■Enabling inbound routing
Enable this function before configuring the inbound
routing settings.
1Click "Administration Settings" in
"Inbound Routing Settings" in the menu
frame.
Administrator rights are required to access the
"Administration Settings".
2Enable "Inbound Routing".
This enables the inbound routing settings.
3Click [Submit].
■Store sender numbers
Create a list of sender fax numbers. The list created
here will be selected in "Sender Number/Address
Registration" when a forwarding table is stored in
step 9. Up to 500 sender fax numbers can be stored.
4Click "Sender Number/Address
Registration" in "Inbound Routing
Settings" in the menu frame.
The "Sender Number/Address Registration"
screen will appear.
5Enter a fax number and click [Add to List].
To delete an entered fax number, select the fax
number that you wish to delete from "Address to be
Entered" and click [Delete].
6Click [Submit].
Forwarding
Received fax
The machine
NOTES
●To use the inbound routing function for received faxes, the network scanner expansion kit must be installed.*1
*1 The im4512/im3512 require the network expansion kit (ZB3500980).
●The file format of forwarded faxes is TIFF.
Jupiter2_IGI_Fax_Sheet(ZB3500590).fm 3 ページ 2007年7月4日 水曜日 午前8時14分

4
■Storing a forwarding table
Specify a sender and a forwarding destination to create a table (list) that combines the sender and the
forwarding address to which faxes from that sender are sent. The table will be added to the list of tables in the
"Inbound Routing Settings" screen. Up to 50 tables can be stored.
7Click "Inbound Routing Settings" in the
menu frame.
The "Inbound Routing Settings" screen appears.
8Click [Add].
The "Table Registration" screen appears.
9Enter a table.
●Table Registration
Table Name:
The name that appears as the "Table Name" in
the "Inbound Routing Settings" screen.
Sender Number/Address Setting:
If you wish to have received faxes from all
senders forwarded, select "Forward All Received
Data". If you wish to forward the faxes of specified
senders, select "Forward Received Data from
Below Sender" and select the sender whose
faxes you wish to forward from the addresses
shown in "Sender Number/Address". Multiple
addresses can be selected using the Shift key or
the Ctrl key. Only an address that was stored in
steps 4 to 6 can be selected here.
●Forwarding Destination Settings
Forwarding Destination Setting:
Specify the destination to which received faxes
will be forwarded. Select the forwarding address
from one-touch keys or group keys stored in the
machine. Up to 1000 forwarding destinations can
be stored.
10
Click [Submit].
Jupiter2_IGI_Fax_Sheet(ZB3500590).fm 4 ページ 2007年7月4日 水曜日 午前8時14分

5
■Activate the table
Activate the stored table to use it for forwarding.
11
Click "Inbound Routing Settings" in the
menu frame.
The "Inbound Routing Settings" screen appears.
12
Select the [Forward Activated] checkbox of
the table that you wish to activate.
To delete a table, select the checkbox of the table
and click [Delete].
13
Click [Submit].
■Configuring advanced inbound
routing settings
Advanced inbound routing settings can be
configured for such purposes as prohibiting the
storing of tables and prohibiting changes to the
table activation settings. Administrator rights are
required for these settings.
14
Click "Administration Settings" in
"Inbound Routing Settings" in the menu
frame.
Administrator rights are required to access the
"Administration Settings".
15
Configuring administrator settings.
●Administration Settings
Inbound Routing:
Enable or disable inbound routing.
Disable Registration of Forward Table:
To prohibit the storing of tables, select this
checkbox.
Disable Change/Delete of Forward Table:
To prohibit the changing and deleting of tables,
select this checkbox.
Disable Change of Forward Approval:
To prohibit changes to the activation settings of
tables, select this checkbox.
Print Style Setting:
Set the condition for printing received faxes.
To print out all received faxes when they are
forwarded, select [Print Out All Report]. To print
out received faxes only when a forwarding error
occurs, select [Print at Error].
16
Click [Submit].
Jupiter2_IGI_Fax_Sheet(ZB3500590).fm 5 ページ 2007年7月4日 水曜日 午前8時14分
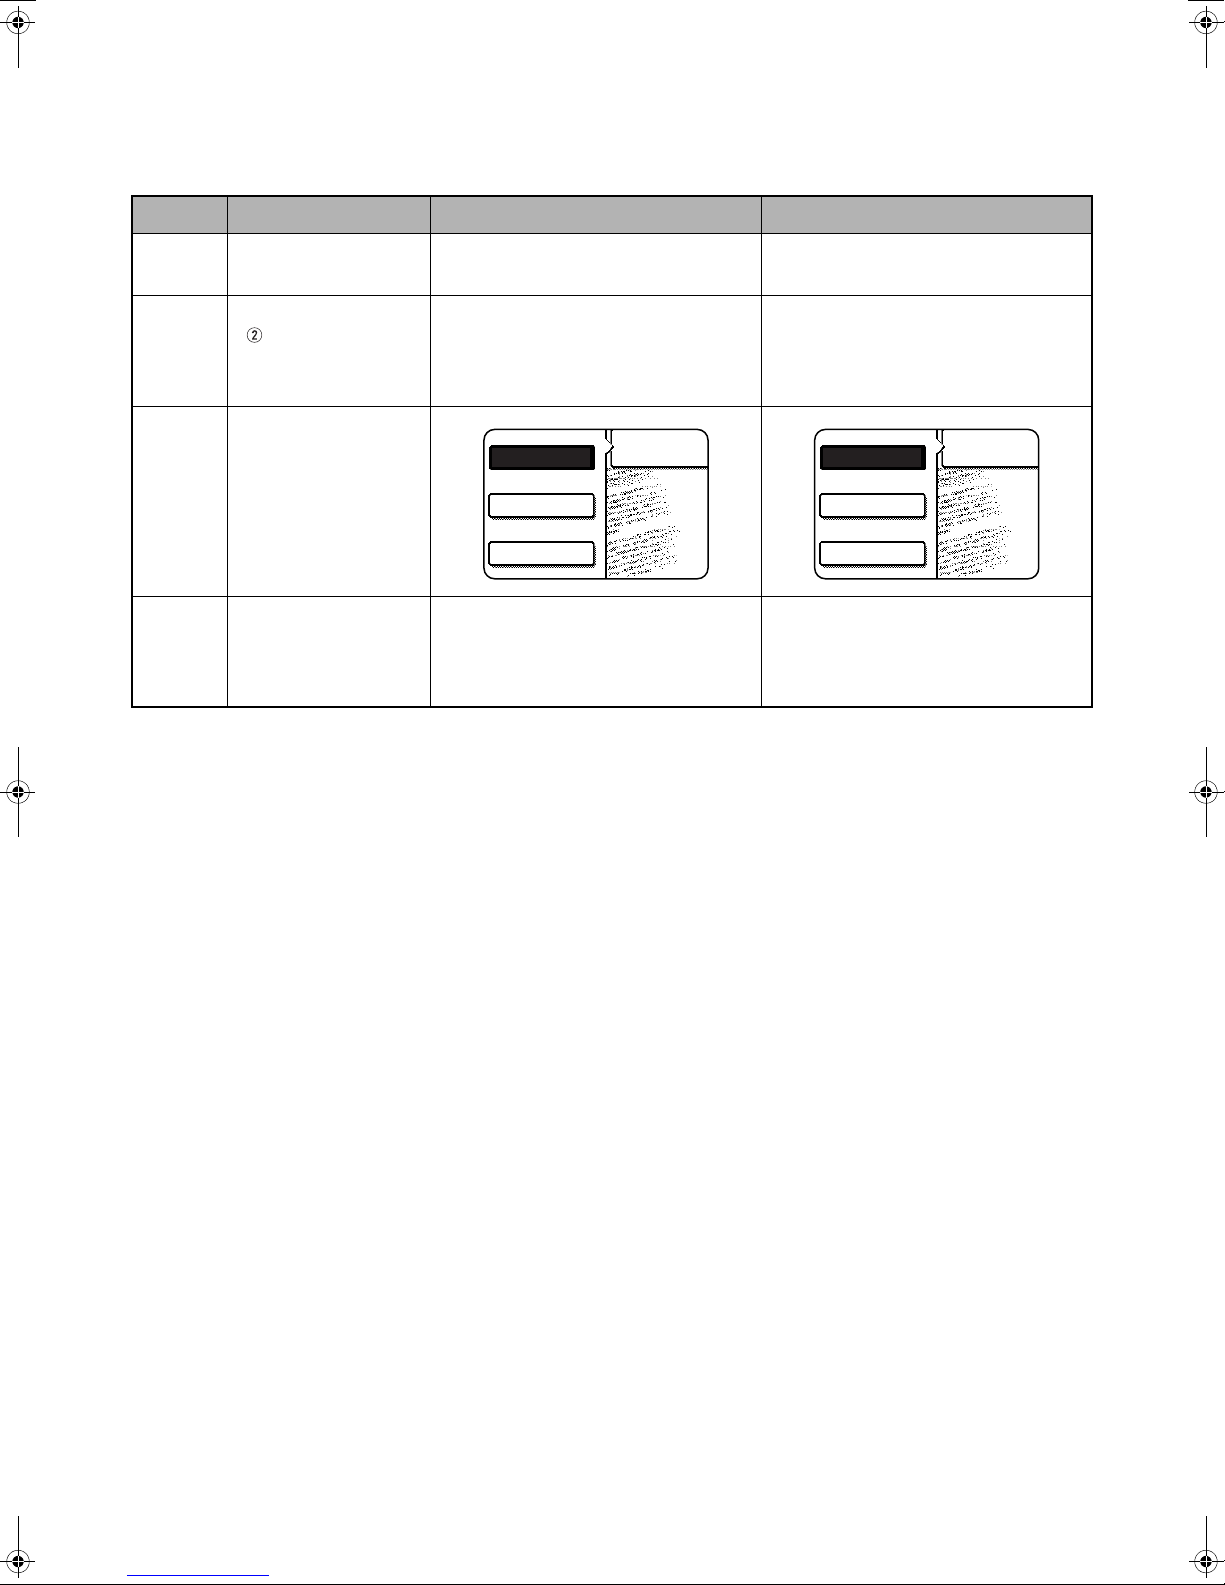
6
4. OTHER CHANGES
When using the fax function on the im4512/im3512, make the following substitutions in the Facsimile Operation
Manual.
Page Changes Location in Facsimile Operation Manual When using the im4512/im3512
0-1 "INTRODUCTION" Network Scanning Operation Manual Operation Manual For Image Send
Functions
1-4
" " in the "Condition
settings screen"
Use this key when the network scanner
option is installed to switch between the
"E-MAIL/FTP" and "INTERNET FAX"
screens
Use this key when the network scanner
option is installed to switch between the
"SCAN" and "INTERNET FAX" screens
2-2, 2-6
2-7
Step 1
8-4
"Default display settings"
●[E-MAIL/FTP] (when the network
scanner option is installed)
●[INTERNET-FAX] (when the network
scanner option is installed)
●[SCAN] (when the network scanner
option is installed)
●[INTERNET-FAX] (when the Internet
fax option is installed)
FAX
E-MAIL/FTP
MODE SWITCH
INTERNET FAX
FAX
SCAN
MODE SWITCH
INTERNET FAX
Jupiter2_IGI_Fax_Sheet(ZB3500590).fm 6 ページ 2007年7月4日 水曜日 午前8時14分

Jupiter2_IGI_Fax_Sheet(ZB3500590).fm 7 ページ 2007年7月4日 水曜日 午前8時14分

This manual has been printed using a vegetable-based soy oil ink
to help protect the environment.
Printed on 100% post-consumer recycled paper
PRINTED IN CHINA
2007J KS1
TINSE3942FCZZ
Jupiter2_IGI_Fax_Sheet(ZB3500590).fm 8 ページ 2007年7月4日 水曜日 午前8時14分

■
■■
■CAUTION:
To reduce the risk of fire, use only UL-Listed No.26 AWG or larger telecommunication line cord.
■
■■
■WARNING:
FCC Regulations state that any unauthorized changes or modifications to this equipment not expressly
approved by the manufacturer could void the user's authority to operate this equipment.
■
■■
■FAX interface cable and Line cable:
These special accessories must be used with the device.
■
■■
■NOTE:
This equipment has been tested and found to comply with the limits for a Class A digital device, pursuant to
part 15 of the FCC Rules.
These limits are designed to provide reasonable protection against harmful interference when the equipment is
operated in a commercial environment.
This equipment generates, uses, and can radiate radio frequency energy and, if not installed and used in
accordance with the instruction manual, may cause harmful interference to radio communications.
Operation of this equipment in a residential area is likely to cause harmful interference in which case the user
will be required to correct the interference at his own expense.
Tiger2_fax_sec.book 2 ページ 2004年12月15日 水曜日 午前11時4分
Other manuals for im4512
5
This manual suits for next models
3
Table of contents
Other Oce All In One Printer manuals