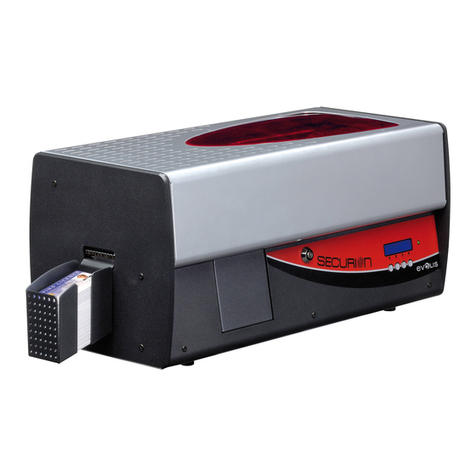
Evolis Securion User manual

USER GUIDE
Evolis Card Printer © 2009. All rights reserved. August 2014.
Ref. KU08E B1

Copyright
Evolis Card Printer © August 2014. All rights reserved.
Copyright notice
Users must observe the copyright regulations applicable in their country. This manual must not be photocopied, translated, reproduced
or transmitted, in whole or in part, for any reason and by any electronic or mechanical means whatsoever without the express written
consent of the Evolis Card Printer company.
All the information contained in this document is subject to change without prior notice.
Evolis Card Printer cannot be held liable for any errors that may be found in this manual, or for any loss or damage arising accidentally or
as a result of dissemination or use of this manual.
Trademarks
is a trademark of Evolis Card Printer. All other trademarks belong to their respective holders.
Warranty
Refer to the warranty notice supplied with your printer for warranty terms and conditions and limitations.
Environmental information – recycling of end-of-life products
The manufacture of the equipment that you have purchased required the extraction and use of natural resources. It may contain
materials that are hazardous to health and the environment.
To prevent the dispersal of such materials into our environment and reduce the pressure on our natural resources, we recommend that
you use existing collection systems. These systems will appropriately re-use or recycle most of the materials in your end-of-life equipment.
The crossed-out dustbin symbol on your device is a reminder to use these systems.
If you need further information on collection, re-use and recycling systems, contact your local or regional waste management body.
Do not hesitate to contact us to nd out more by visiting our website at www.evolis.com or by emailing the following address:
1

About your new printer
Thank you for choosing an Evolis printer.
Using your new printer, you will be able to create a wide variety of high-quality cards and badges which can be printed in various
thicknesses, colours and styles. This printer uses consumables and accessories available from Evolis. For further details, visit our website at
www.evolis.com.
Warranty registration
Please register on line at www.evolis.com to receive our special offers and general information.
Once on the website, click on Drivers and Support and ll in all the elds, giving in particular the model and serial number found on your
printer.
Getting started
The purpose of this user guide is to guide you, step by step, through your printer and how it works. Take some time to read it in order to
better understand your printer and its features, and to save time during installation and use.
As with all Evolis products, a great deal of care has been taken over this manual. Should you nd an error, however, please let us know by
Contents
The bookmarks found top left of your screen can be used to navigate between the various sections in this user guide.
Icons
The following icons are used in this manual to highlight important information:
Information providing further details or depth about certain points in the main text.
Indicates that failing to take the recommended action is liable to damage your printer.
This symbol indicates that a video showing the procedure is available on the www.evolis.com website.
2

Getting started
1-1 Unpacking
Your printer is supplied with several accessories that we ask you to look at closely.
This list may vary depending on your location.
The printer is shipped in special packaging designed to prevent any damage in transit. If you notice any visible damage, do not hesitate
to contact the shipper and immediately inform your Evolis dealer, who will tell you the procedure to follow.
Evolis takes great care over the quality of its packaging and we ask that you keep this packaging somewhere clean and dry.
You will be asked for the full original packaging (outer box, inner wedges and protective bags) in the event that
the printer is returned. If the printer is returned without its original packaging and components are damaged in
transit, these components will no longer be covered by the warranty. You will be charged for new packaging
for shipping the printer back to you.
Accessories supplied with your printer:
lPower supply unit - VP ELECTRONIQUE Type PAC150M or PROTEK POWER Type PUP150N-14.
lMains power cable.
lUSB cable.
lInstallation and documentation CD-ROM.
lStarter cleaning kit.
lQuick installation guide.
lWarranty notice.
lCompliance statement documentation.
If any of these components is missing, please contact your Evolis dealer.
Use only the power supply unit supplied with your Evolis printer.
VP ELECTRONIQUE Type PAC150M or PROTEK POWER Type PUP150N-14.
Use only the USB cable supplied with your Evolis printer.
The Evolis printer must be placed in a dry location, protected from dust and draughts but well-ventilated. Take
care to keep your printer on a at, sturdy surface able to bear its weight.
1
3

1-2 Description of the printer and its functions
1
4
1- 100-card input feeder
2- Encoding and printing area
3- Card turnover area
4- Defective card reject hopper
5- Card lamination module
6- 100-card capacity output hopper
7- 4-button control panel and 2-line LCD
display
8- LED indicator showing printer activity
9- Centralised cover lock to secure all
internal components
10 - Power supply socket
11 - Computer USB socket
12 - RJ45 Ethernet socket
13 - DB9 connector(s) (option)
14 - Power supply switch
15 - Position for Kensington®lock
16 - Serial number label
17 - 300-dpi colour thermal print head
18 - Cleaning roller
19 - Card thickness adjustment gauge
20 - Magnetic encoding head option
21 - Smartcard contact station
22 - Antenna for contactless card
encoding (RFID)

1-3 Installation
1-3a CONNECTING THE PRINTER
äConnection to the power supply
The printer must be connected to a properly protected and earthed electrical installation.
FI: Laite on liitettävä suojamaadoitus koskettimilla varustettuun pistorasiaan.
NO: Apparatet må tilkoples jordet stikkontakt.
SE: Apparaten skall anslutas till jordat uttag.
This is a Class A device. Operation of this equipment in a residential area may cause interference to radio communications.
Should this occur, the user may be asked to take appropriate measures.
ÊConnect the power cable to the power supply unit, then plug the power
cable connector into the printer.
ËNext, plug the end of the power cable into an earthed power socket.
ÌPower up the printer by switching the switch to ON.
ÍThe display on the control panel lights up and the message
‘INITIALISATION’ is displayed. Once the start-up sequence has nished,
the screen displays ‘READY’ and the LED is a steady green light. Should
this not be the case, then either installation has not been carried out
correctly or the printer is not working properly. Check the installation.
Before attempting any maintenance, always ensure that the power switch is in the OFF position and that the
power cable is unplugged. For your personal safety, ensure that both the switch and cable remain easy to
access, especially in the event of an emergency.
To save energy, the printer will automatically switch itself to standby mode after 10 minutes of inactivity.
äConnecting the USB cable
Under no circumstances should you connect the USB data cable before installation of the printer driver is
complete.
Refer to the section on printer driver installation for further details, and follow the instructions carefully.
1
5

1-3b RIBBONS
Evolis original ribbons optimise your printer’s operation and avoid causing damage to it. The use of ribbons from other suppliers is liable to
damage your printer and voids the manufacturer’s warranty for the printer.
For optimum print quality, Evolis recommends that the printer is fully cleaned every time the ribbon is changed. See the Servicing and
Maintenance section of this manual.
äFitting the ribbon
Ensure that the appropriate ribbon type is selected in the print driver.
The Securion printer accepts two types of ribbon:
lColour or monochrome ribbons intended for the printing module, identiable from their core tted with a toothed wheel
lSpecial lms intended for the lamination module, identiable from their hollow core
For optimum print and lamination quality, Evolis recommends that the printer is fully cleaned every time the
ribbon is changed. This is left to the judgement of users, who will nonetheless take care to comply with the
mandatory cleaning cycles in order to keep the equipment in full working condition (see the Maintenance
section). Validity of the manufacturer’s warranty is dependent on adherence to cleaning cycles.
1
6

Monochrome or colour ribbon
To t a monochrome or colour ribbon in the printing module, please proceed as follows:
ÊOpen the printer cover.
ËPress down on the latch to unlock the print head bracket and tilt it to the right until it reaches the vertical position.
Remove any ribbon that may be tted.
ÌFit the new ribbon in the position shown.
ÍLower the print head bracket and lock it in position.
ÎClose the printer cover again.
1
7
Ê Ë
Í Î
Ì

Laminating lm
The lamination unit includes parts heated to high temperatures. Be careful not to put your ngers inside the
module. Follow the safety instructions.
Appropriate conguration of the print driver should be carried out before tting laminating lm.
ÊOpen the printer cover.
ËCheck that there is no lm in the lamination module. If there is, remove the lm carefully, taking care not to fold or twist it.
ÌTake the lm installation guide cartridge.
ÍPlace an empty reel in the right-hand position, and a new lm in the left-hand position, being careful of the direction
that the lm winds.
ÎPeel off the label on the new lm, and unwind the lm following the directions to guide it between the lugs, then stick
the label onto the empty reel.
ÏStretch the lm slightly by turning the reels.
1
8
ÊË
Í ÏÌ Î

ÐInsert the cartridge into the lamination module, pushing it until it locks into place with a click once it comes to stop in
the holder.
ÑRelease the cartridge from the lamination module.
ÒThen check that the lm runs smoothly between the sensor forks, without creasing.
ÓClose the printer cover again.
1
9
Ó
ÐÑÒ
Other manuals for Securion
1
Table of contents
Other Evolis Printer manuals

Evolis
Evolis Dualys 3 User manual

Evolis
Evolis Avansia User manual

Evolis
Evolis QUANTUM User manual

Evolis
Evolis Primacy User manual

Evolis
Evolis badgy 100 User manual

Evolis
Evolis Tattoo 2 User manual

Evolis
Evolis AGILIA User manual

Evolis
Evolis A5405 User manual

Evolis
Evolis Badgy User manual

Evolis
Evolis Primacy 2 SE User manual

Evolis
Evolis EDIKIO ACCESS User manual

Evolis
Evolis KU10E User manual

Evolis
Evolis Pebble User manual

Evolis
Evolis Dualys User manual

Evolis
Evolis Avansia Instruction Manual

Evolis
Evolis Dualys User manual

Evolis
Evolis Dualys User manual

Evolis
Evolis KC PRIME User manual

Evolis
Evolis Tattoo User manual

Evolis
Evolis KC200 User manual