AJAX Hub 2 Plus User manual

Hub 2 Plus User Manual
Updated March 23, 2021
Hub 2 Plus is a central device in the Ajax security system, which controls the operation of all
connected devices and interacts with the user and the security company.
The hub reports the opening of doors, breaking of windows, threat of re or ood, and
automates routine actions using scenarios. If outsiders enter the secure room, Hub 2 Plus will
send photos from motion detectors and notify a security company patrol.
Hub 2 Plus central unit must be installed indoors only.
Hub 2 Plus needs Internet access to connect to the Ajax Cloud service. The central unit is
connected to the Internet via Ethernet, Wi-Fi, and two SIM cards (2G/3G/4G).
Connecting to Ajax Cloud is necessary for conguring and managing the system through Ajax
apps, transmitting notications about alarms and events, as well as for updating .
All data on Ajax Cloud is stored under multilevel protection, information is exchanged with the
hub via an encrypted channel.
Connect all communication channels to ensure a more reliable connection with Ajax Cloud and to secure
against interruptions in the work of telecom operators.
You can manage the security system and quickly respond to alarms and notications through
for iOS, Android, macOS, and Windows. The system allows you to choose of what events
and how to notify the user: by push notications, SMS, or calls.
If the system is connected to a security company, events and alarms will be transmitted to the
monitoring station — .
Functional elements
MotionCam
OS Malevich
apps
How to set up push notications on iOS
How to set up push notications on Android
directly and/or through Ajax Cloud
Buy Hub 2 Plus central unit
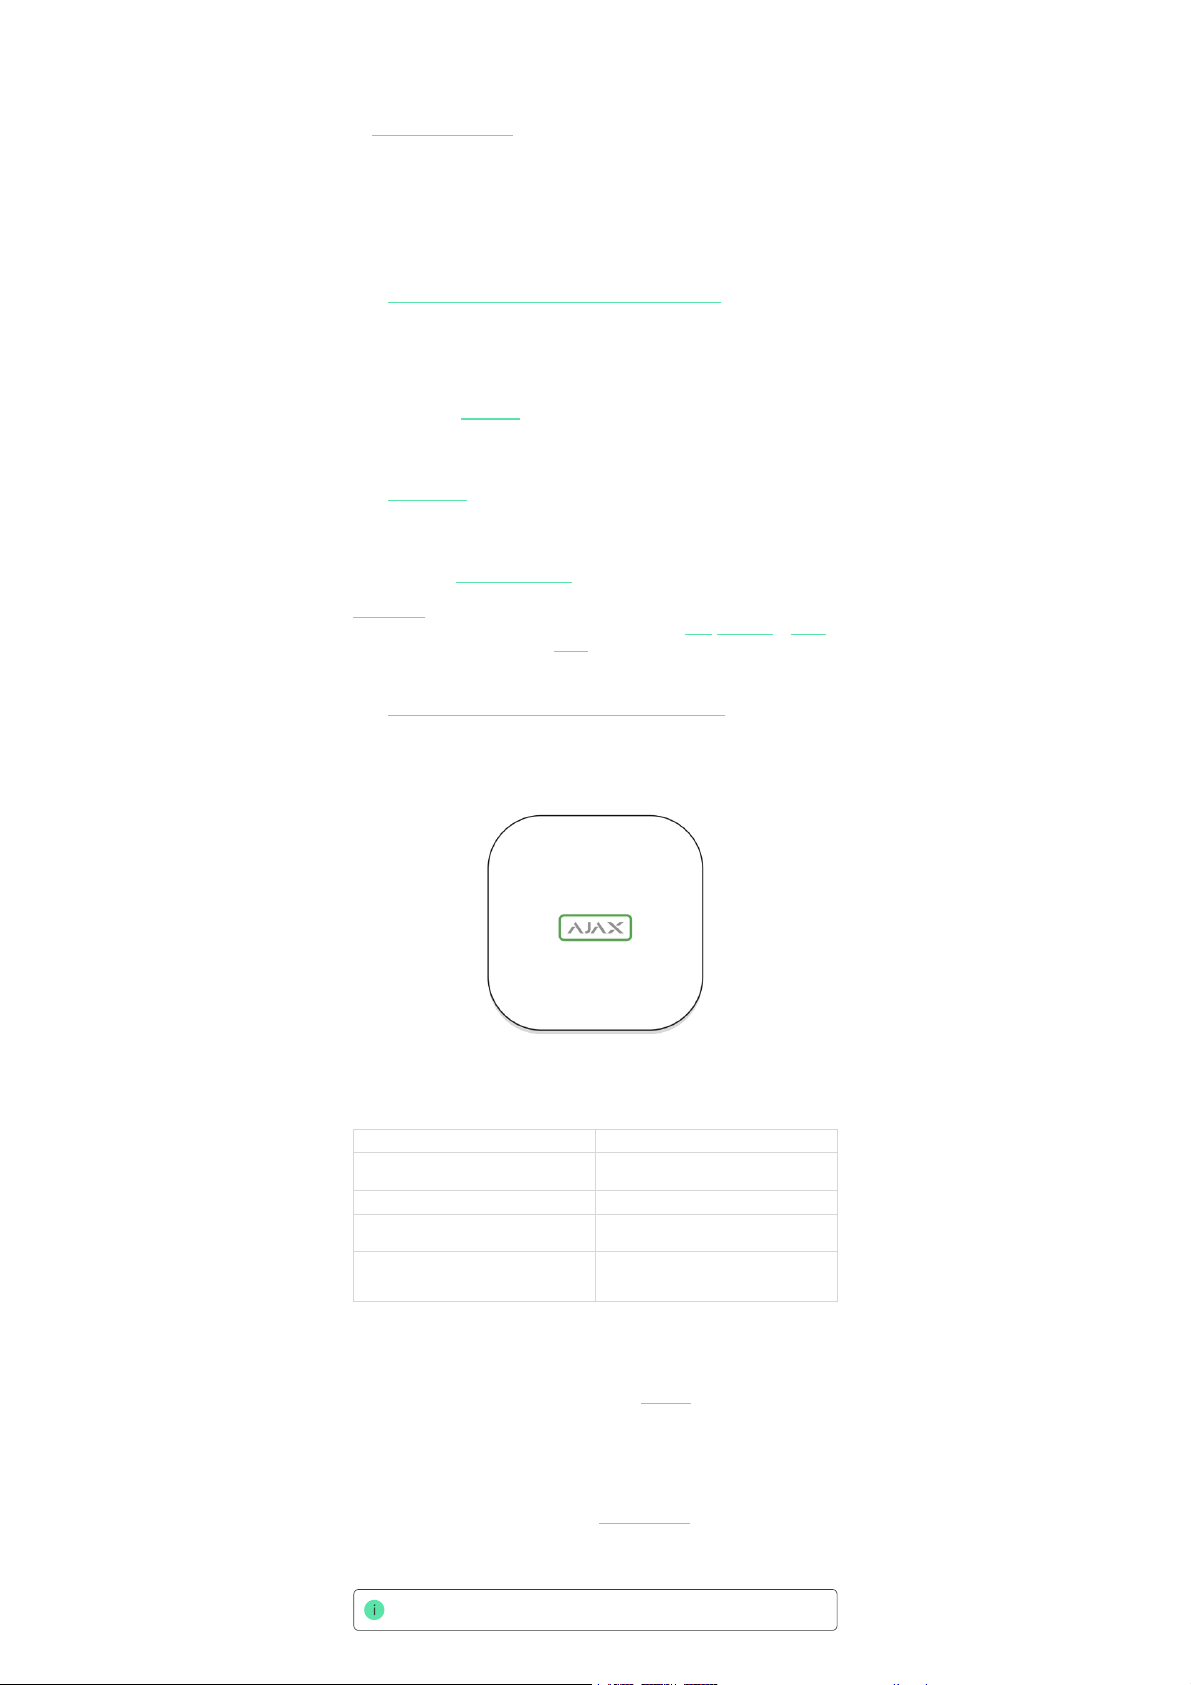
1. Ajax logo featuring LED indicator
2. SmartBracket mounting panel. Slide it down with force to open
Perforated part is required for actuating the tamper in case of any attempt to dismantle the hub. Do not
break it off!
3. Power cable socket
4. Ethernet cable socket
5. Slot for micro SIM 2
6. Slot for micro SIM 1
7. QR Code
8. Tamper button

Operating principle
The hub monitors the security system operation by communicating with connected devices via
the . The communication range is up to 2000 m without obstacles
(for example, walls, doors, inter-oor constructions). If the detector is triggered, the system
raises the alarm in 0.15 seconds, activates the sirens, and noties the central monitoring station
of the security organization and the users.
If there is interference at the operating frequencies or when jamming is attempted, Ajax
switches to a free radio frequency and sends notications to the central monitoring station of
the security organization and to system users.
Hub 2 Plus supports up to 200 Ajax devices connected, which protect against intrusion, re, and
ooding, as well as control electrical appliances automatically according to scenarios or
manually from an app.
To send photos from motion detector, a separate Wings radio protocol and a
dedicated antenna are used. This ensures the delivery of visual alarm verication even with an
unstable signal level and interruptions in communication.
Hub 2 Plus is running under a real-time operating system OS Malevich. Similar OS control
spacecraft systems, ballistic missiles, and car brakes. OS Malevich expands the capabilities of
the security system, by air without user intervention.
to automate the security system and decrease the number of routine actions. Set
up the security schedule, program actions of automation devices ( , , or )
in response to an alarm, pressing of the or by schedule. A scenario can be created
remotely in the Ajax app.
LED indication
The Ajax logo on the hub front lights up red, white, or green depending on the status of the
power supply and Internet connection.
Event LED indicator
At least two communication channels — Wi-Fi, Ethernet, or
SIM card — are connected Lights up white
A single communication channel is connected Lights up green
The hub is not connected to the Internet or there is no
connection with the Ajax Cloud server Lights up red
No power
Lights up for 3 minutes, then blinks every 10 seconds. The
color of the indicator depends on the number of the
connected communication channels
Ajax account
The security system is congured and controlled through . Ajax applications are
available to professionals and users on iOS, Android, macOS, and Windows.
The settings of Ajax security system users and the parameters of connected devices are stored
locally on the hub and are inextricably linked with it. Changing the hub administrator does not
reset the settings of the connected devices.
To congure the system, install the Ajax app and . One phone number and
email address may be used to create only one Ajax account! There is no need to create a new
account for each hub — one account can manage multiple hubs.
Your account can combine two roles: the administrator of one hub and the user of another hub.
9. Power button
Jeweller encrypted protocol
What jamming of a wireless security system is and how to resist it
MotionCam
All Ajax devices
automatically updating
Use scenarios
Relay WallSwitch Socket
Button
How to create and congure a scenario in the Ajax security system
Ajax apps
create an account


Security requirements
When installing and using Hub 2 Plus, strictly adhere to the general electrical safety regulations
for using electrical appliances, as well as the requirements of regulatory legal acts on electrical
safety.
It is strictly forbidden to disassemble the device under voltage! Also, do not use the device with
a damaged power cable.
Connecting to the network
Adding a hub to the Ajax app
After adding a hub to your account, you become the administrator of the device. Administrators
can invite other users to the security system and determine their rights. Hub 2 Plus central unit
can have up to 200 users.
1. Remove the SmartBracket mounting panel by sliding it down with force. Avoid damaging the
perforated part — it’s essential for the tamper activation in case of hub dismantling!
2. Connect the power supply and Ethernet cables to the appropriate sockets, install SIM cards.
1 — Power socket
2 — Ethernet socket
3, 4 — Slots for installing micro-SIM cards
3. Press and hold the power button for 3 seconds until the Ajax logo lights up. It takes about 2
minutes for the hub to upgrade to the latest rmware and connect to the Internet. The green
or white logo color indicates that the hub is running and connected to Ajax Cloud.
If the Ethernet connection is not established automatically, disable proxy and MAC address ltration and
activate DHCP in the router settings. The hub will automatically receive an IP address. After that, you will
be able to set up a static IP address of the hub in the Ajax app.
4. To connect to the cellular network, you need a micro SIM card with a disabled PIN code
request (you can disable it using a mobile phone) and a sucient amount on your account
to pay for the services at your operator’s rates. If the hub does not connect to the cellular
network, use Ethernet to congure the network parameters: roaming, APN access point,
username, and password. Contact your telecom operator for support to nd out these
options.
1. Turn on the hub and wait until the logo lights up green or white.
2. Open the Ajax app. Give access to the requested system functions to fully use the capabilities of the Ajax app and not
to miss alerts about alarms or events.
How to set up notications on iOS
How to set up notications on Android
3. Open the Add hub menu Select the way of registering: manually or step-by-step guidance. If you are setting the system
up for the rst time, use step-by-step guidance.
4. Specify the name of the hub and scan the QR code located under the SmartBracket mounting panel or enter it
manually.
5. Wait until the hub is added. The linked hub will be displayed in the Devices tab .

Changing or removing the administrator does not reset the settings of the hub or connected
devices.
Hub statuses
Icons
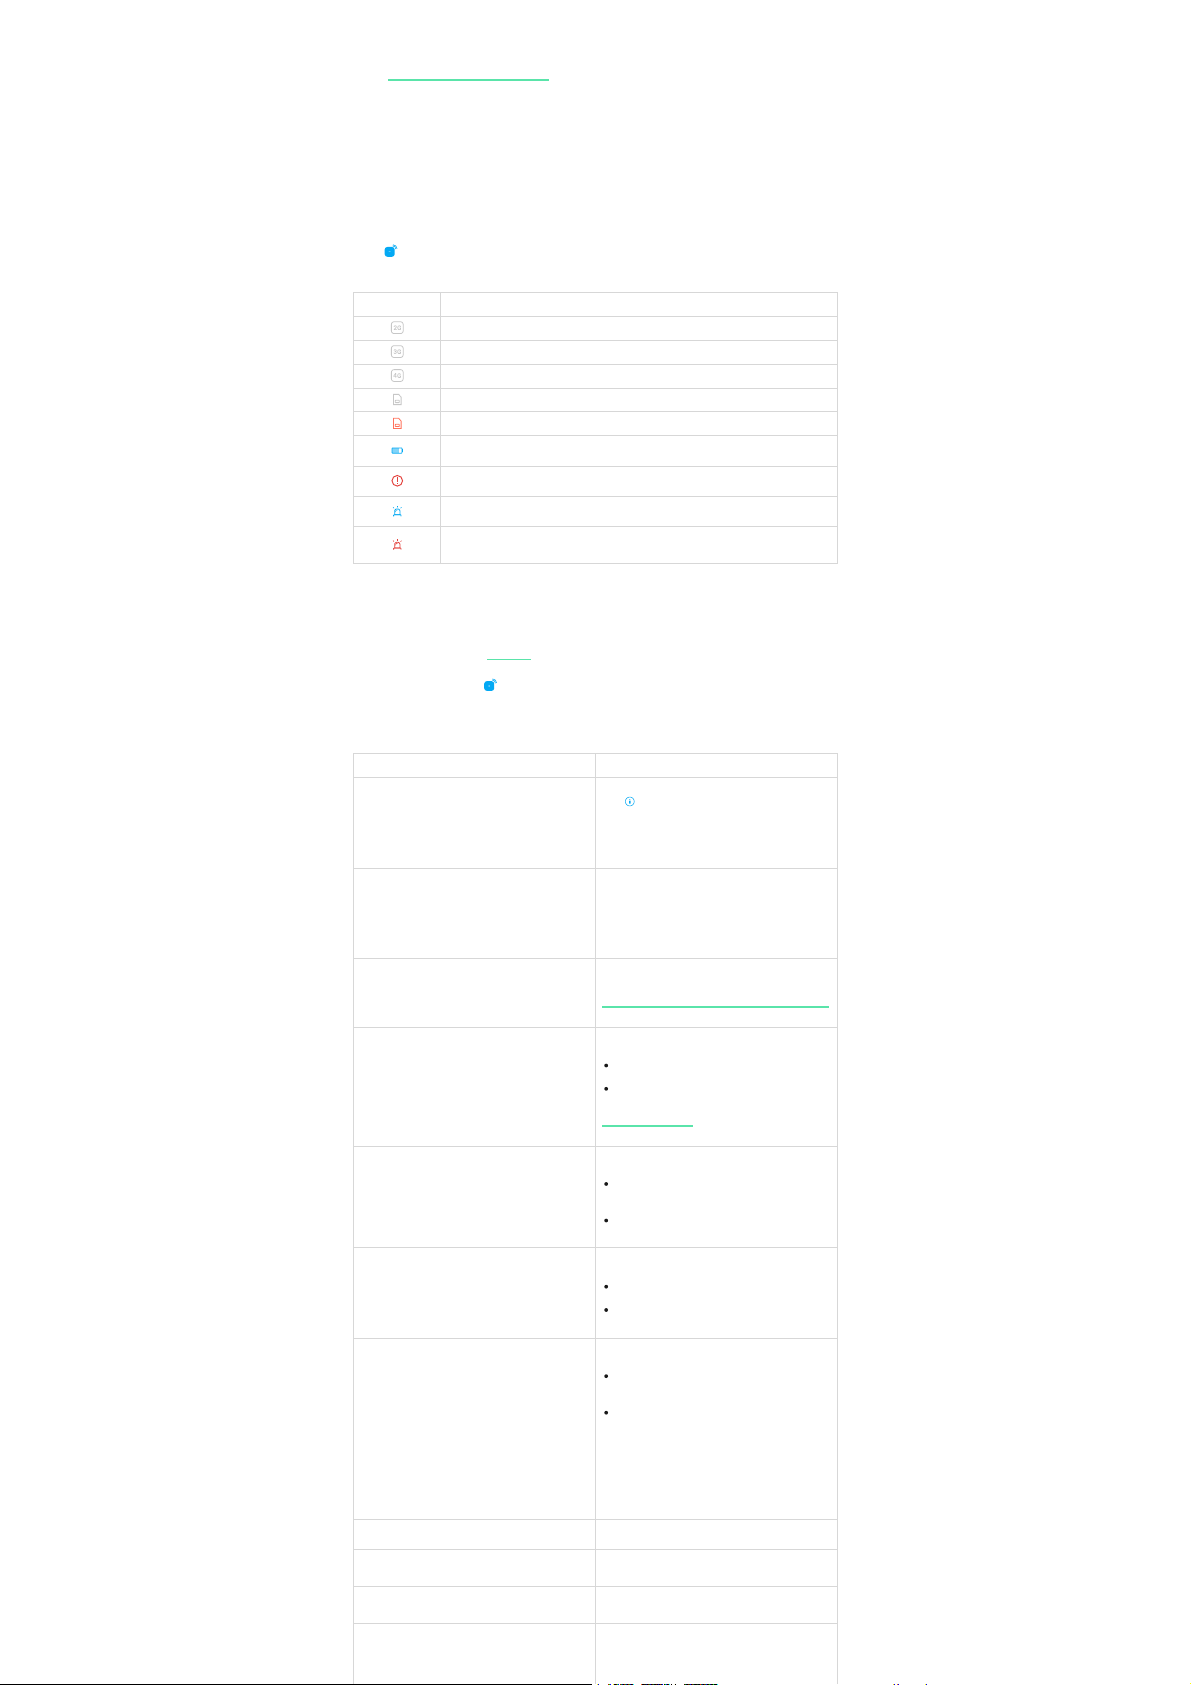
Icons display some of Hub 2 Plus statuses. You can see them in the Ajax app, in the Devices
menu .
Icons Meaning
2G connected
3G connected
LTE connected
SIM card is not installed
The SIM-card is defective or has a PIN-code on it
Hub 2 Plus battery charge level. Displayed in 5% increments
Hub 2 Plus malfunction is detected. The list is available in hub states list
The hub is directly connected to the central monitoring station of the security organization
The hub have lost connection with the central monitoring station of the security organization via
direct connection
States
States can be found in the :
Parameter Meaning
Malfunction
Click to open the list of Hub 2 Plus malfunctions.
The eld appears only if a malfunction is detected
Cellular Signal Strength
Shows the signal strength of the mobile network for the
active SIM card. We recommend installing the hub in
places with the signal strength of 2-3 bars. If the signal
strength is weak, the hub will not be able to dial-up or send
an SMS about an event or alarm
Battery Charge
Battery level of the device. Displayed as a percentage
Lid
Status of the tamper that responds to hub dismantling:
External power
External power supply connection status:
Connection
Connection status between the hub and Ajax Cloud:
Cellular Data
The hub connection status to the mobile Internet:
If the hub has enough funds on the account or has bonus
SMS/calls, it will be able to make calls and send SMS
messages even if the Not connected status is displayed in
this eld
Active SIM Displays the active SIM card: SIM card 1 or SIM card 2
SIM 1 The number of the SIM card installed in the rst slot. Copy
the number by clicking it
SIM 2 The number of the SIM card installed in the second slot.
Copy the number by clicking it
Wi-Fi Internet connection status of the hub via Wi-Fi.
For greater reliability, it is recommended to install the hub
in places with the signal strength of 2-3 bars
Ajax security system user rights
Ajax app
1. Go to the Devices tab .
2. Select Hub 2 Plus from the list.
How battery charge is displayed in Ajax apps
Closed — the hub lid is closed
Opened — the hub removed from SmartBracket holder
What is a tamper?
Connected — the hub is connected to external power
supply
Disconnected — no external power supply
Online — the hub is connected to Ajax Cloud
Oine — the hub is not connected to Ajax Cloud
Connected — the hub is connected to Ajax Cloud via
mobile Internet
Disconnected — the hub is not connected to Ajax
Cloud via mobile Internet

Ethernet
Internet connection status of the hub via Ethernet:
Average Noise (dBm)
Noise power level at the hub installation site. The rst two
values show the level at Jeweller frequencies, and the
third — at Wings frequencies.
The acceptable value is -80 dBm or lower
Monitoring Station
The status of direct connection of the hub to the central
monitoring station of the security organization:
If this eld is displayed, the security company uses a
direct connection to receive events and security system
alarms
Hub model Hub model name
Hardware version Hardware version. Unable to update
Firmware Firmware version. Can be updated remotely
ID
ID/serial number. Also located on the device box, on the
device circuit board, and on the QR code under the
SmartBracket panel
Rooms
Prior to linking a detector or device to a hub, create at least one room. Rooms are used to group
detectors and devices, as well as to increase the information content of notications. The name
of the device and room will be displayed in the text of the event or alarm of the security system.
To create a room in the Ajax app:
To delete the room or change its avatar or name, go to Room settings by pressing .
Connection of detectors and devices
The hub doesn’t support and integration modules.
When adding a hub to your account using the step-by-step guidance, you will be prompted to
connect devices to the hub. However, you can refuse and return to this step later.
To add a device to the hub, in the Ajax app:
Please note that in order to link to the hub, the device must be located within the hub’s radio
communication range (at the same protected object).
Hub settings
Connected — the hub is connected to Ajax Cloud via
Ethernet
Disconnected — the hub is not connected to Ajax
Cloud via Ethernet
Connected — the hub is directly connected to the
central monitoring station of the security organization
Disconnected — the hub is not directly connected to
the central monitoring station of the security
organization
What is a direct connection?
1. Go to the Rooms tab .
2. Click Add Room.
3. Assign a name for the room, and optionally attach or take a photo: it helps to nd the
needed room in the list quickly.
4. Click Save.
uartBridge ocBridge Plus
1. Open the room and select Add device.
2. Name the device, scan its QR code (or enter it manually), select a group (if group mode is enabled).
3. Click Add – the countdown for adding a device will begin.
4. Follow the instructions in the app to connect the device.

Settings can be changed in the :
Note that after changing the settings, you should click the Back button to save them.
Ajax app
1. Go to the Devices tab .
2. Select Hub 2 Plus from the list.
3. Go to Settings by clicking on the icon .
Avatar is a customized title image for Ajax security system. It is displayed in the hub
selection menu and helps to identify the required object.
To change or set an avatar, click on the camera icon and set up the desired picture.
Hub name. Is displayed in the SMS and push notication text. The name can contain up to
12 Cyrillic characters or up to 24 Latin characters.
To change it, click on the pencil icon and enter the desired hub name.
Users — user settings for a security system: what rights are granted to users and how the
security system noties them of events and alarms.
To change the user settings, click on opposite the user name.
How the Ajax security system noties users of alerts
How to add new users to the hub
Ethernet — settings for wired Internet connection.
Ethernet — allows you to enable and disable Ethernet on the hub
DHCP / Static — selection of the type of the hub IP address to receive: dynamic or static
IP Address — hub IP Address
Subnet mask — subnet mask in which the hub operates
Router — gateway used by the hub
DNS — DNS of the hub
Wi-Fi — settings for Wi-Fi Internet connection. The general list displays all networks
available to the hub.
Wi-Fi — allows you to enable and disable Wi-Fi on the hub. After pressing the [i] button,
the network settings are opened:
DHCP / Static — selection of the type of the hub IP address to receive: dynamic or
static
IP Address — hub IP Address
Subnet mask — subnet mask in which the hub operates
Router — gateway used by the hub
DNS — DNS of the hub
Forget this network — after pressing, the hub deletes the network settings and no
longer connects to it
GSM — enabling/disabling cellular communication, conguring connections, and checking
account.
Cellular Data — disables and enables SIM cards on the hub
Roaming — if it is activated, the SIM cards installed in the hub can work in roaming

SIM card settings
Connection settings
Mobile data usage
Keep in mind that data is counting on the hub and may differ from your operator’s statistics.
Reset statistics — resets statistics on incoming and outgoing trac.
Check balance
Ignore Network Registration Error — when this setting is activated, the hub ignores
errors when trying to connect via a SIM card. Activate this option if the SIM card cannot
connect to the network
Disable communication check with operator — when this setting is activated, the hub
ignores operator communication errors. Activate this option if the SIM card cannot
connect to the network
SIM card 1 — displays the number of the SIM card installed. Click on the eld to go to
the SIM card settings
SIM card 2 — displays the number of the SIM card installed. Click on the eld to go to
the SIM card settings
APN, User name, and Password — settings for connecting to the Internet via a SIM
card. To nd out the settings of your cellular operator, contact your provider’s support
service.
How to set or change APN settings in the hub
Incoming — the amount of data received by the hub. Displayed in KB or MB.
Outgoing — the amount of data sent by the hub. Displayed in KB or MB.

USSD code — enter the code that is used to check the balance in this eld. For example,
*111#. After that, click Check balance to send a request. The result will be displayed
under the button.
Geofence — conguring reminders for arming/disarming the security system when
crossing a specied area. The user location is determined using the smartphone GPS
module.
What geofences are and how they function
Groups — group mode conguration. This allows you to:
Manage the security modes for separate premises or groups of detectors.
For example, the oce is armed while the cleaner works in the kitchen.
Delimit access to control of security modes.
For example, the marketing department employees do not have access to the law
oce.
OS Malevich 2.6: a new level of security
Security Schedule — arming/disarming the security system by the schedule.
How to create and congure a scenario in the Ajax security system
Detection Zone Test — running the detection zone test for the connected detectors. The
test determines the sucient distance for the detectors to register alarms.
What is Detection Zone Test

Jeweller — conguring the hub-detector ping interval. The settings determine how
frequently the hub communicates with devices and how quickly the loss of connection is
detected.
The time before raising the alarm by the communication loss between hub and device is
calculated with the following formula:
Ping interval * (number of undelivered packets + 1 correction packet).
The shorter ping interval (in seconds) means faster delivery of the events between the hub
and the connected devices; however, a short ping interval reduces the battery life. At the
same time, alarms are transmitted immediately regardless of the ping interval.
We do not recommend reducing the default settings of the ping period and interval.
Note that the interval limits the maximum number of connected devices:
Interval Connection limit
12 s 39 devices
24 s 79 devices
36 s 119 devices
48 s 159 devices
72 s 200 devices
Regardless of settings, the hub supports 10 connected sirens maximum!
Learn more
Detector Ping Interval — the frequency of connected devices polling by the hub is
setting in the range of 12 to 300 s (36 s by default)
Number of undelivered packets to determine connection failure — a counter of
undelivered packets (8 packets by default).
Service is a group of hub service settings. These are divided into 2 groups: general settings
and advanced settings.
General settings
Time Zone
Selecting the time zone in which the hub operates. It is used for scenarios by schedule.
Therefore, before creating scenarios, set the correct time zone.
LED Brightness
Adjustment of the hub logo LED backlight brightness . Set in the range of 1 to 10. The
default value is 10.
Firmware Auto-Update
Conguring automatic OS Malevich rmware updates.
Hub System Logging
Logs are les containing information about system operation. They can help sort out the problem in
case of errors or failures.
The setting allows you to select the transmission channel for the hub logs or disable their
recording:
Learn more about scenarios
If enabled, the rmware is automatically updated when a new version is available, when
the system is not armed, and external power is connected.
If disabled, the system does not update automatically. If a new rmware version is
available, the app will offer to update the OS Malevich.
How OS Malevich updates
Ethernet
Wi-Fi
No — logging is disabled

We do not recommend disabling logs as this information may be helpful in the event of errors in the
operation of the system!
Advanced settings
The list of advanced hub settings depends on the type of application: standard or PRO.
Ajax Security System Ajax PRO
Server connection
Sirens settings
Fire detectors settings
System integrity check
PD 6662 Setting Wizard
Server Connection
Sirens settings
Fire detectors settings
System Integrity Check
Alarm Conrmation
Restoration After Alarm
Arming/Disarming Process
Devices Auto Deactivation
PD 6662 Setting Wizard
Opens a step-by-step guide on how to set up your system to comply with the British security
standard PD 6662:2017.
Server Connection
The menu contains settings for communication between the hub and the Ajax Cloud:
The time to generate a message regarding the loss of communication between the hub and
the Ajax Cloud server is calculated using the following formula:
(Ping interval * 4) + Time lter
With the default settings, Ajax Cloud reports the hub loss in 9 minutes:
(60 s * 4) + 300 s = 9 min
Sirens settings
The menu contains two groups of siren settings: siren activation parameters and siren
after-alarm indication.
Siren activation parameters
If the hub or detector lid is open. If enabled, the hub activates the connected if the
body of the hub, detector, or any other Ajax device is open.
If in-app panic button is pressed. When the function is active, the hub activates the
connected sirens if the panic button was pressed in the Ajax app.
You can disable the sirens reaction when pressing the panic button on the SpaceControl key fob in the
key fob settings (Devices → SpaceContol → Settings ).
Settings of siren after-alarm indication
This setting is only available in
The siren can inform about triggering in armed system by means of LED indication. Thanks
to this feature, system users and passing security companies patrols can see that the
system was triggered.
How to send an error report
Learn more about PD 6662:2017
How to congure the system to comply with PD 6662:2017
Server Ping Interval(sec).Frequency of sending pings from the hub to Ajax Cloud
server. It is set in the range of 10 to 300 s. The recommended default value is 60 s.
Connection Failure Alarm Delay(sec).It is a delay to reduce the risk of a false alarm
associated with the Ajax Cloud server connection loss. It is activated after 3
unsuccessful hub-server polls. The delay is set in the range of 30 to 600 s. The
recommended default value is 300 s.
Disable alerts when the connection with the server is lost. Ajax apps can notify about
the hub-server communication loss in two ways: with a standard push notication
signal or with a siren sound (enabled by default). When the option is active, the
notication comes with a standard push notication signal.
sirens
PRO Ajax apps
Feature implementation in HomeSiren
Feature implementation in StreetSiren
Feature implementation in StreetSiren DoubleDeck

Fire detectors settings
Settings menu of FireProtect and FireProtect Plus re detectors. Allows conguring
interconnected FireProtect alarms of re detectors.
The feature is recommended by European re standards, which require, in the event of a
re, a warning signal power of at least 85 dB at 3 meters from the sound source. Such
sound power wakes up even a soundly sleeping person during a re. And you can quickly
disable triggered re detectors using the Ajax app, Button, or KeyPad.
System Integrity Check
The System integrity check is a parameter that is responsible for checking the status of all
security detectors and devices before arming. Checking is disabled by default.
Alarm Conrmation
This setting is only available in
Alarm conrmation is a special event that the hub sends to the CMS and system users if
several certain devices have triggered within a specied period of time. By responding to
conrmed alarms only, the security company and the police reduce the number of visits on
false alarms.
Restoration After Alarm
This setting is only available in
The feature does not allow arming the system if an alarm has been registered previously.
For arming, the system should be restored by an authorized user or PRO user. The types of
alarms that require system restore are dened when conguring the function.
The function eliminates situations when the user arms the system with detectors that
generate false alarms.
Arming/Disarming Process
This setting is only available in
The menu allows to enable arming in two stages, as well as set Alarm Transmission Delay
for security system disarming process.
Devices Auto Deactivation
This setting is only available in
The Ajax security system can ignore alarms or other events of devices without removing
them from the system. Under certain settings, notications about events of a specic
device will not be sent to the CMS and security system users.
There are two types of Devices Auto Deactivation: by the timer and by the number of
alarms.
It is also possible to manually disable a specic device. Learn more about deactivating
devices manually .
Clear notications history
Clicking the button deletes all notications in the hub events feed.
Learn more
Learn more
PRO Ajax apps
Learn more
PRO Ajax apps
Learn more
PRO Ajax apps
What is Two-Stage Arming and why is it needed
What is Alarm Transmission Delay and why is it needed
PRO Ajax apps
What is Devices Auto Deactivation
here
Other manuals for Hub 2 Plus
5
Table of contents
Other AJAX Security System manuals

AJAX
AJAX vhfBridge User manual

AJAX
AJAX HomeSiren User manual

AJAX
AJAX MotionProtect User manual

AJAX
AJAX StreetSiren User manual

AJAX
AJAX HomeSiren User manual

AJAX
AJAX StreetSiren User manual

AJAX
AJAX StreetSiren User manual

AJAX
AJAX StreetSiren User manual

AJAX
AJAX Button User manual

AJAX
AJAX HomeSiren User manual