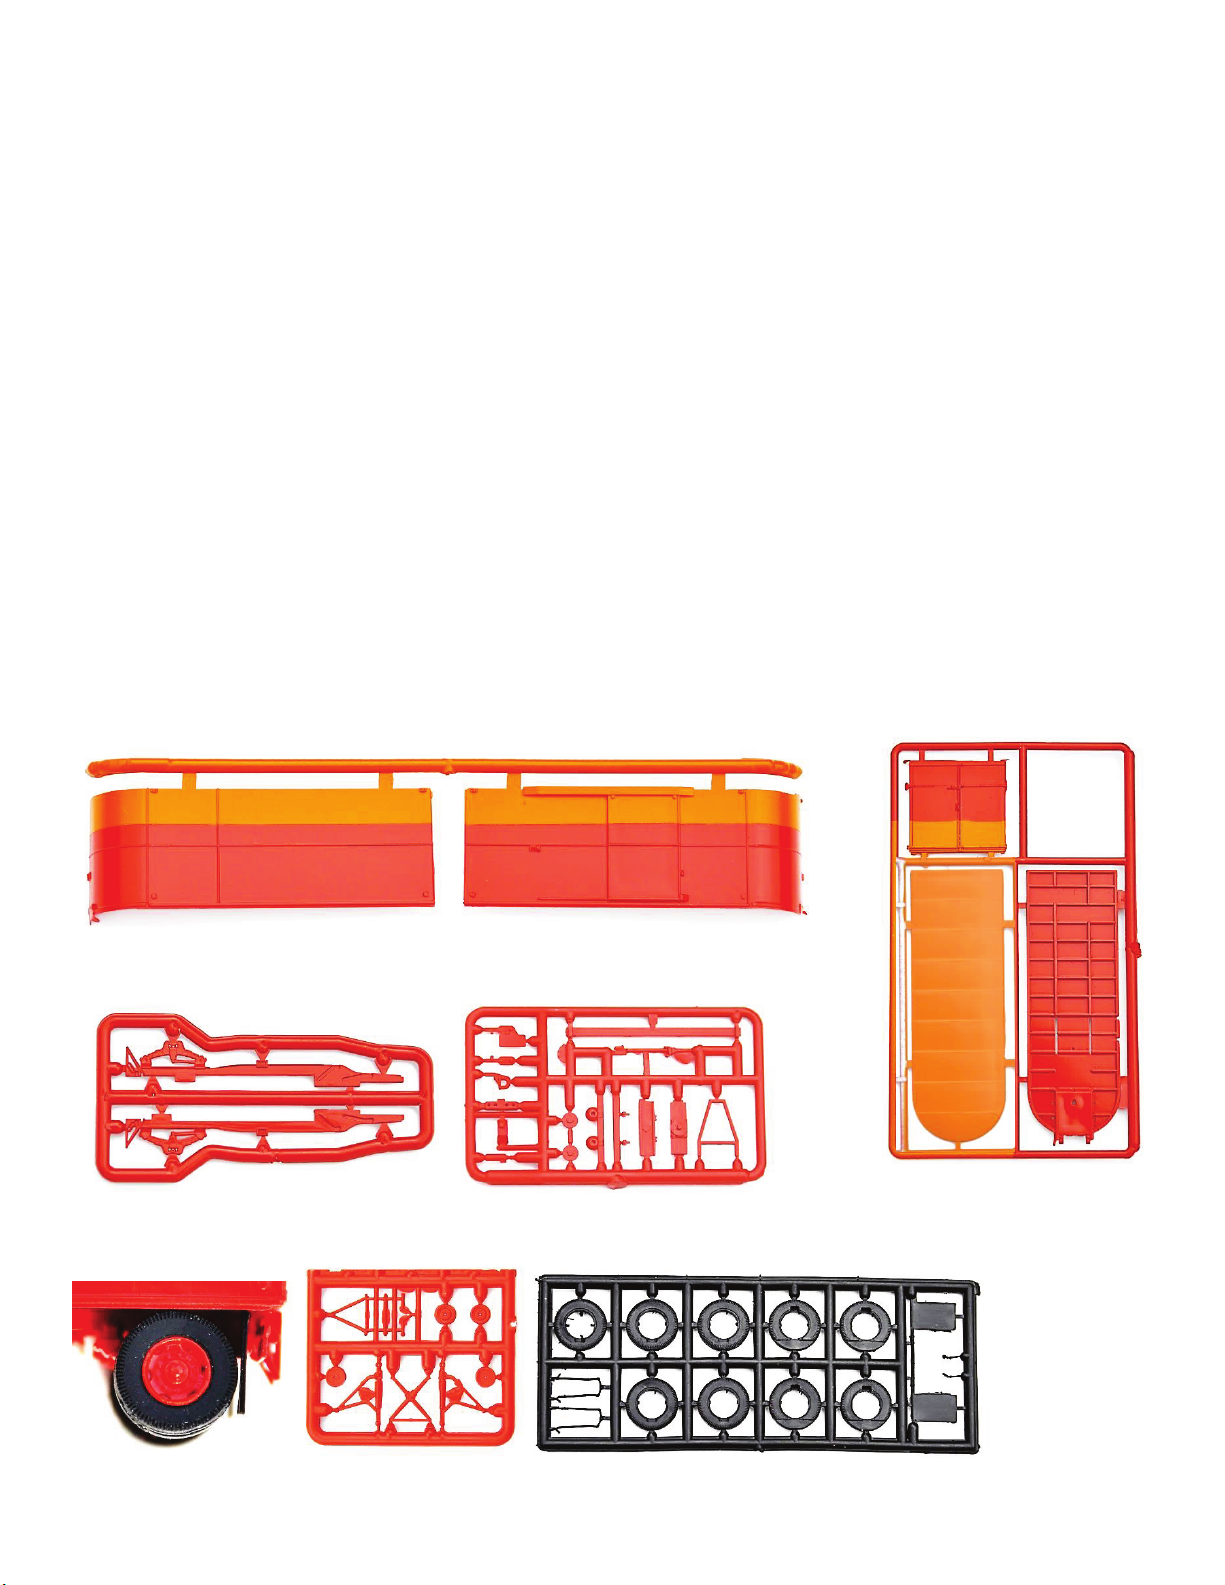
1. To begin, look over each sprue and remove any flashing from the injection process. A new No. 11 blade
can be carefully used to remove flashing. A file may be used, but be careful not to remove paint from the
surface. If needed, the correct matching paint is available from P-B-L, P.O. Box 769, Ukiah, CA 95482,
or call 707-462-7680. Ask for SP Daylight Red and Daylight Orange.
2. Remove sides, roof, frame, and rear door from the sprue using a fresh X-Acto blade. Cut each piece
carefully to avoid damaging the painted surfaces.
3. Place roof upside down on your modeling table. Fit the two side pieces to the roof before gluing to
insure proper fitment. Then glue the side pieces to the roof with liquid cement on the inside of the
trailer. Then fit the frame to the model. Apply liquid cement inside the trailer to secure the frame.
Once the shell of the trailer is dry, you may add weight if you desire (weight not included).
4. Note the rear door is keyed to fit onto the back of the shell. Place liquid cement around the rear surfaces
being careful not to damage the surrounding paint. Place the rear door to the model and let dry.
5. Cut out frame rails from their sprue, but do not attach
them to the trailer frame yet. You will note each frame
rail is keyed specific to the slots in the frame to allow
proper placement. Before inserting the frame rails to the
frame, remove the following parts from the detail sprue;
brake actuator covers, brake cylinder front crossbar, brake
cylinder rear crossbar, rear hitch I-beam, and spare tire
brace. Note in assembly that the tip on the brake actuator
covers faces upward toward the brake beam.
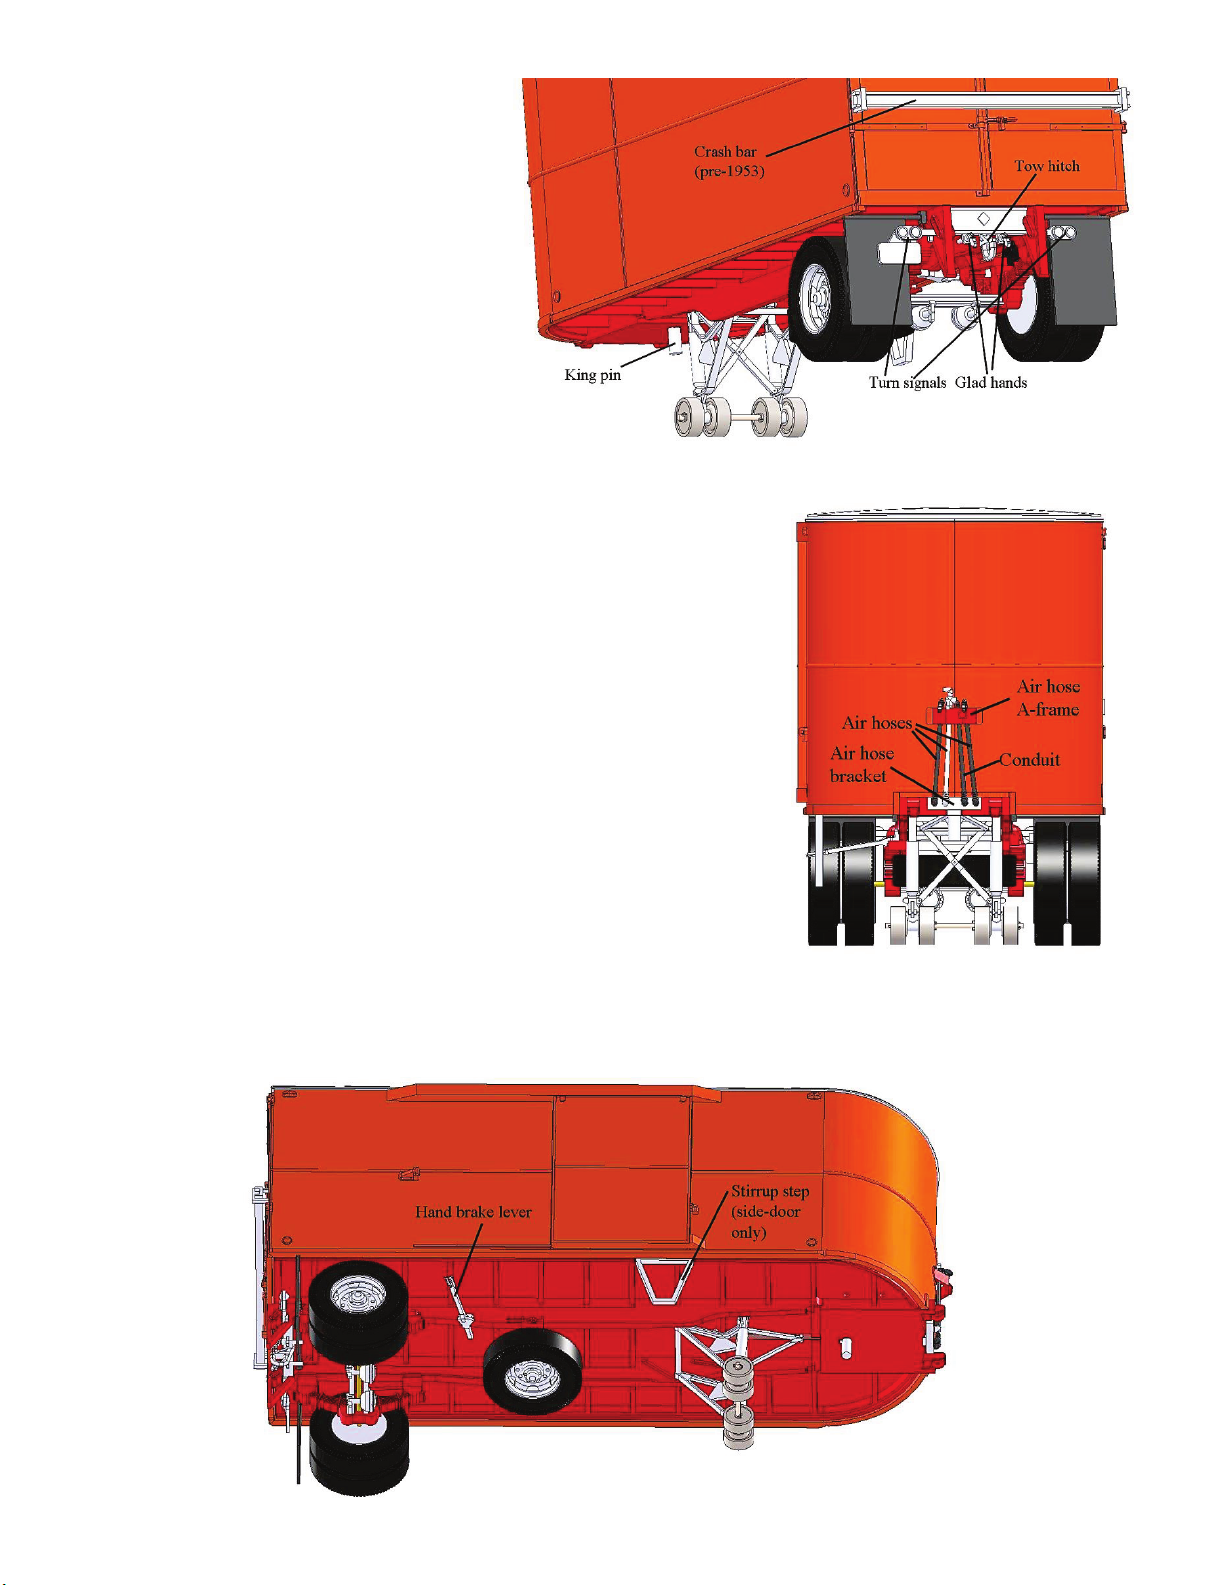
6. Glue the brake cylinder front and rear crossbars into one
side of the frame rails. Note the inside of the frame rails
have the slots for detail. Then glue the rear I-beam to the
same frame rail. Note the diamond-shaped detail
represents the electrical conduit cover plate and faces the
rear of the trailer. There are also two nubs on the rear I-
beam that face toward the ground. These will be used
later.
7. Next, glue the other frame rail into each detail part, carefully fitting the two
sides to eachother. Then glue the brake actuator covers onto the cylinders
with the tip facing upwards toward the frame.
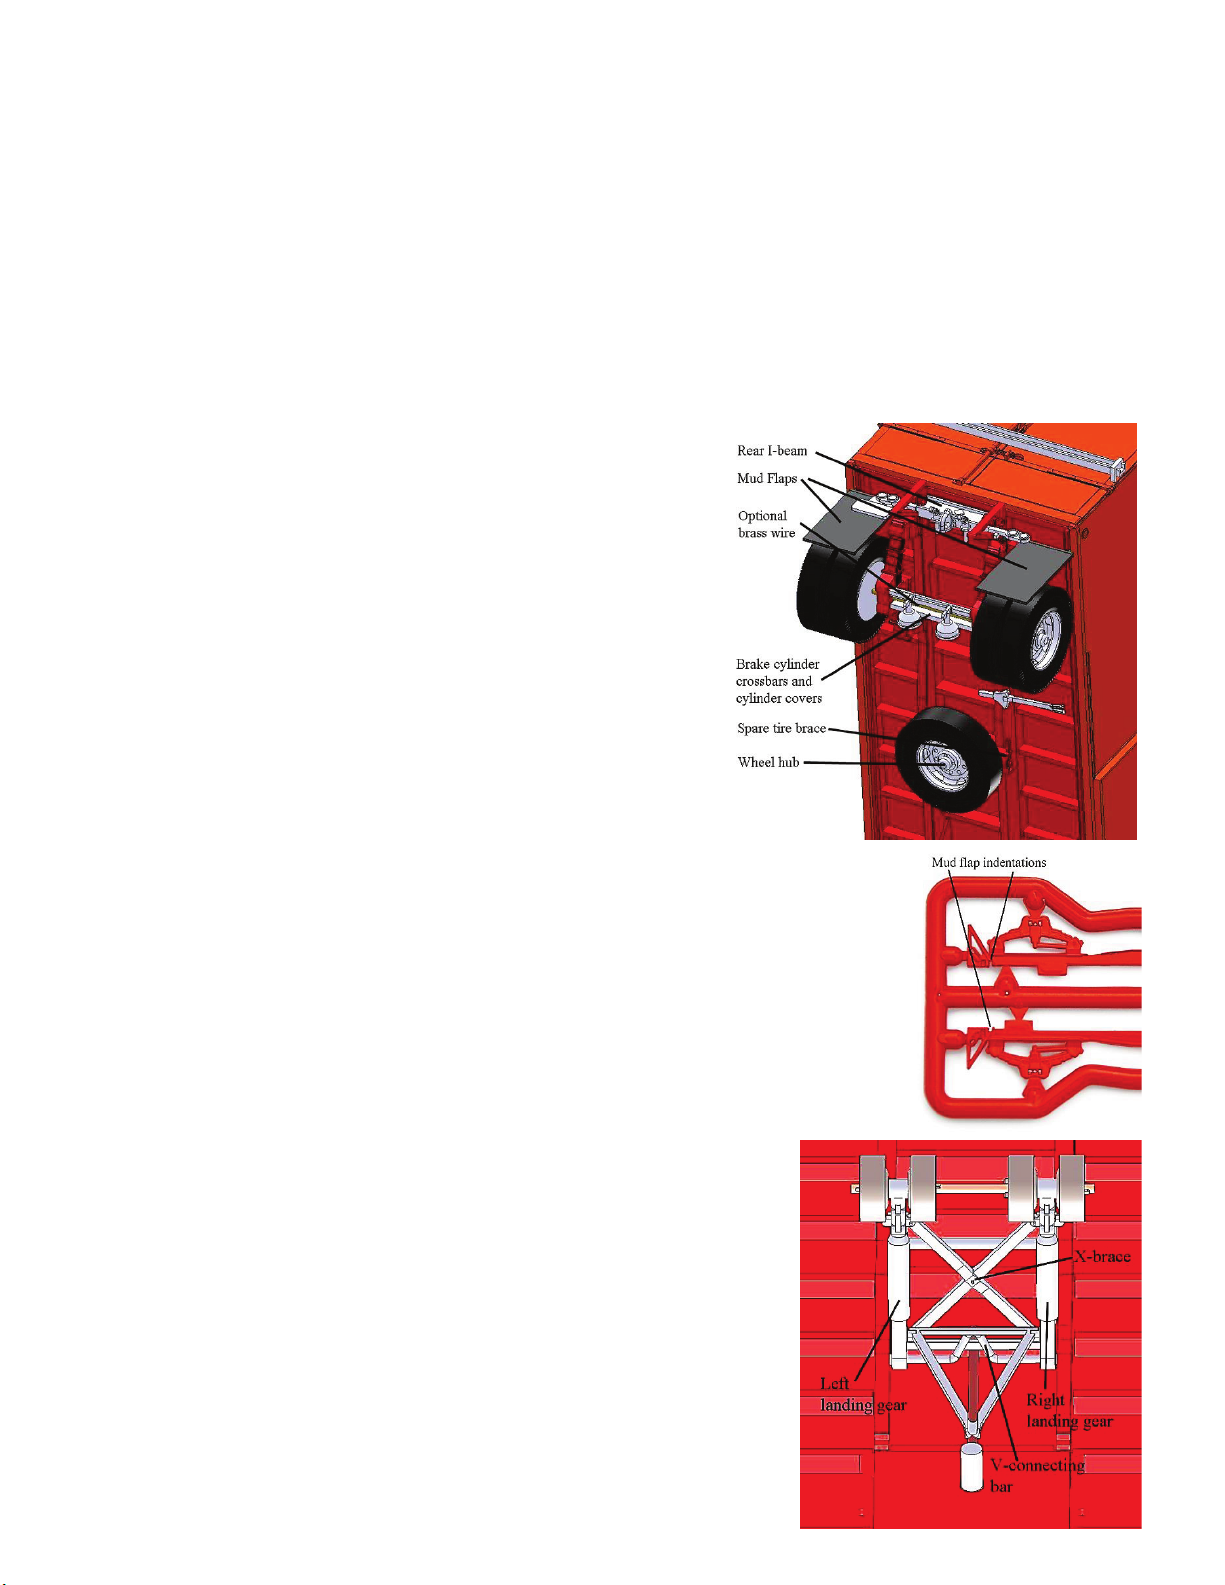
8. Remove the mud flaps from the rubber sprue, removing any flashing with
caution because the rubber will slice easily. Now that the frame rails are
partially assembled and ready to be inserted into the frame, note the mud
flap indentations located above the triangular brace. Glue the mud flaps
into the indentations facing down.
9. Glue the frame rails into the frame with the mud flaps attached. Apply
liquid cement to the slots in the frame and the tabs on the frame
rails for a secure joint.
10. Apply the spare tire brace across the two frame rails and glue in
place. Remove the spare tire hub from the wheel spue and glue
on the spare tire brace.
11. You have the option to use brass wire for your wheel axle (not
supplied). At this time, attach the wheel hubs using brass wire or
gluing them to the leaf springs. The locating tab on the wheel hub
faces in the upward position to allow the slotted rubber tires to fit
over the wheel chalks on your Espee Models Piggyback Flatcar
(sold separately).
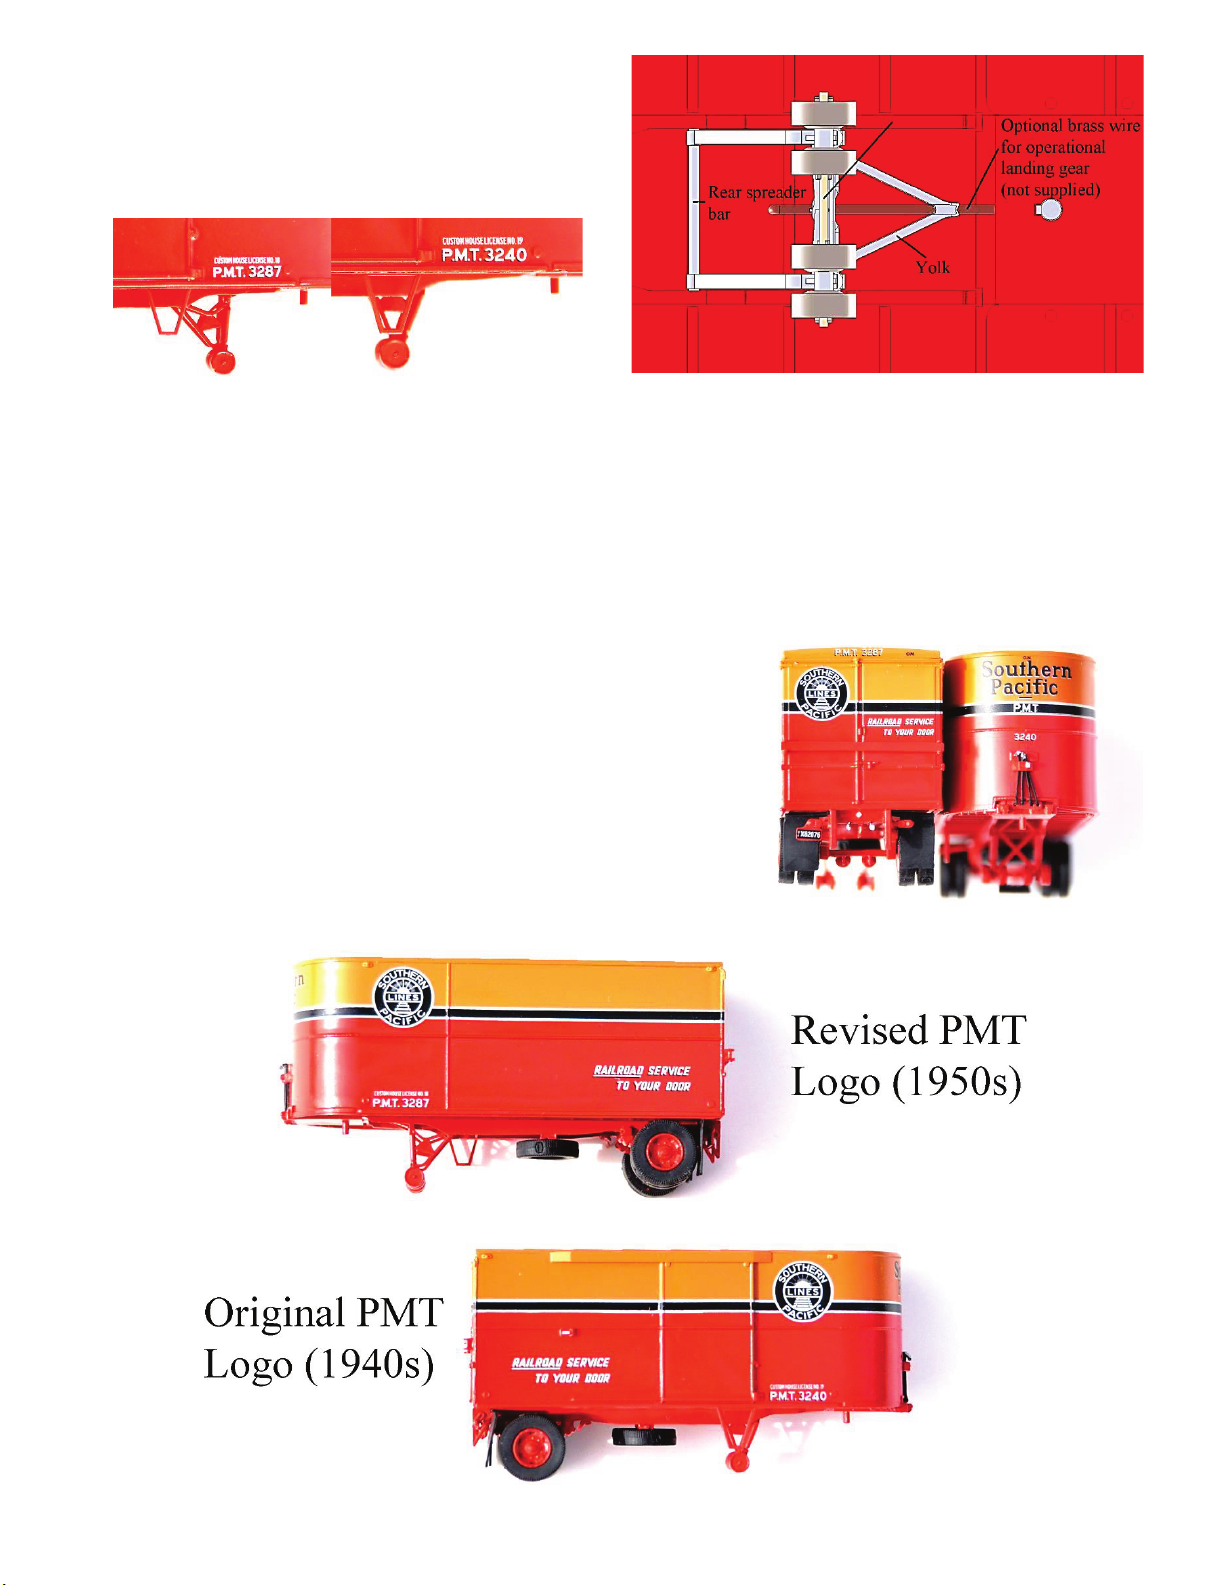
12. Turn attention to the landing gear sprue and remove the following
parts; right landing gear, left landing gear, yolk, rear spreader bar,
V-connecting bar, and X-brace.