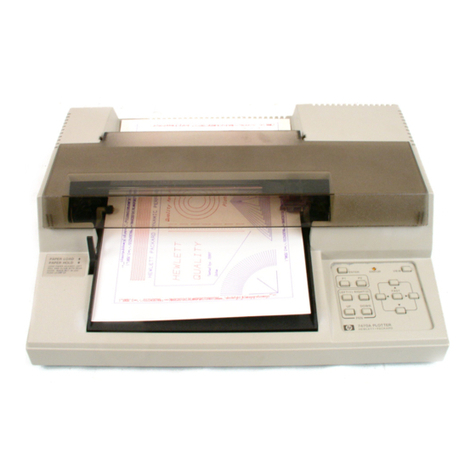
SINO 361 User manual

Operation manual
1
Operation manual
Thanks very much for purchasing our cutting
plotter.
For ensuring you to make best use of your machine,
Please reading this manual carefully and
thorughtly before starting to use it.
Please ruen off the power quickly if you
encounter any problems, and refer to this manual
or contact your dealer.
Special Declaration
1.
Manufacturer keeps the right of changing
product specification without prior notice;
2.
Manufacturer only takes the legal duty of
product.

Operation manual
2
Contents
Chap1. Attention---------------------------------------------------------(3)
Chap2. Installation-------------------------------------------------------(4)
2-1 Packing box-------------------------------------------------(4)
2-2 Accessories--------------------------------------------------(4)
2-3 Parts of stand------------------------------------------------(4)
2-4 Assembly of machine stand-------------------------------(5)
Chap3 Basic Operation--------------------------------------------------(6)
3-1 Installation and connection--------------------------------(6)
3-2 Installation of tool------------------------------------------(6)
Chap4 USB port Setting-------------------------------------------------(8)
Chap5 Operating Instruction-------------------------------------------(12)
5-1 Names and functions of the parts------------------------(16)
5-2 Basic operation---------------------------------------------(15)
5-3Operationg instructions------------------------------------(18)
5-4 Parameters Table-------------------------------------------(23)
Chap. 6 Troubleshooting------------------------------------------------(25)

Operation manual
3
Chap. 1 Attention
Please read the attention carefully before operating the machine.
1. No magnetic devices should be placed in the vicinity of the plotter,
specifically the carriage.
2. Prevent from dropping foreign matters into cracks such as pins, little
screws, etc.
3. Please pull out the power plug if not using during a long time.
4. Don’t plug or unplug serial/parallel/usb cables on plotter while the power
is on
5. Don’t leave pinch rollers pressed down while machine is not in use.
6. Always connect the power cord to a grounded outlet.
7. Don’t move the carriage manually.
8. Don’t touch carriage, metal roller, cutter and all moving devices when the
machine is working.
9. Place machine in a stable area that is free of strong vibrations,
electromagnetic field, dust, moisture and /or direct sunlight.
10. Don’t press top beam or lift up black rail.
Chap.2 Installation

Operation manual
4
2-1 Packing-box
Please carefully check up the goods after opening the packing box, and in
every box there should be as following:
1. A main machine.
2. A packet of accessories.
3. A set of parts of machine stand.
2-2 Accessories
NO.
Item
Quantity
1
Power cord
1
2
Operation manual
1
3
Cutter holder
1
4
Cutter
3
5
Plotter holder
1
6
Allen wrench
1
7
Serial cable
1
8
Parallel cable(optional)
1
9
USB cable (optional)
1
10
Plotter protective cover
1
11
Driver disk for CorelDraw and USB port
1
12
Artcut 2009 CD (optional)
1
2-3 Parts of stand
NO.
Item
Quantity
NO.
Item
Quantity
1
Left column
1
6
Paper roller
2
2
Right column
1
7
Paper hanger
2
3
Crossbeam
1
8
Connection board
2
4
Pillar-bars
2
9
Screw M4×20
10/12
5
Pillars/wheels
4
10
Screw M4×8
8

Operation manual
5
2-4 Assembly of machine stand
Referring to the following drawing:
(Available to the type with minimum width 780mm only)
Step 1: Connect the pillar bars to left and right columns with screws
respectively.
Step 2: Connect the crossbeam to left and right columns with screws.
Step 3: Join the paper hanger to the inside of the left and right columns with
screws.
Step 4: Join the connection board to the top of the left and right columns with
screws.
Step 5: Lay down the four pillars of main machine, place the machine on the
connection board, and then insert the pillars into the connection board to
connect to the main machine.
Step 6: Place the paper-roller on the roller of paper hanger.
Chap.3 Basicoperation

Operation manual
6
3-1 Installationandconnction
1 Placethemachineinaplaneandroomyplace
2 ConnectthesignalcabletotheCOM1,COM2/USBportofthecomputer
3 Checkvoltageofthepowersourceandwhetheritisgrounded,donotconnectthepowerutill
allareinagoodcondition
3-2 Installation of tool
3-2.1 Structure of cutter holder and items of components
Rotate the cutter ajusting screw to adjust the
out-stretching length of the cutter as to ensure that
it doesn’t cut off the bottom layer of stickiness.
1.
Cutter (diameter is 2mm)
2. Cutter holder shell
3. Cutter ajusting screw
4. Cutter holder body
3-2.2 Installation and adjustment of blade
1.
Before installing the cutter, you must carefully clean the cutter holder body,
the cutter and your hands. Even very slight dirt can affect the performance of
the cutter. Use a flexible plastic or rubber grip to hold the blade in your hand.
Carefully insert the blade into the cutter holder body and it should
magnetically attach.
2 Rotate the shell of the cutter holder and make the out-stretching length of
the blade tip not longer than the thickness of the sticker
3. Don't touch the blade top with your finger to prevent injury
3-2.3 Structure of Plotter holder and items of components

Operation manual
7
Fit the the ball pen into the plotter holder , the structure is as
shows in the following drawing .
1. Rotate the lid.
2. Insert a ballpoint pen and let the pen tip out of proper length.
3. Cover the pen with the lid then rotate them into the shell
3-2.4 Installation
1. Turn off the power
2. Loosen the locking screw of the tool carrier , then put the cutter holder or
plotter holder in the tool carrier When the tool are in appropriate .position ,
fasten the locking screw clockwise at last.
3-2.5 Using life of the cutter
Cutter’s using life is limited, but you can use it as long as possible.
Note:
1. More longer the out-stretching length of the cutter, more shorter the using
life. Please avoid cutting off the bottom layer during the process of cutting.
2. The more cutting force, the shorter the using life.
3. As for different materials, the requirement to the cutter sharpness is
different.
4. Set the cutting force as little as possible; only increase it when the cutter
feels blunt.
5. As for the cutters from different factories, the using life is also very different.
6. Renew the cutter timely when it is blunt in case of affecting the machine
performance. As an urgent method, a piece of leather can be used to sharpen
the blade tip just like sharpening a razor.
Chap.4 USBPortSetting

Operation manual
8
340 USB Driver Setting
1. Install USB port:
Attention: Before install the CD, don't coneect cutting plotter with
computer
Insert Driver CD into your CD ROM of computer, Find this file in the CD.
Double click this file
Click the “NEXT”, driver program will be installed automatically.
Click “OK”, the driver program is installed well

Operation manual
9
Now connect USB cable of the cutting plotter with USB port of computer . The
USB device will be found as “COM3”from “Device Manager”. It testifies that
the machine is connected with computer successfully
2. Set port in Artcut software

Operation manual
10
Please choose COM 3 for USB port in “Link to “
This manual suits for next models
4
Table of contents