
RIOT PLANES Sea Monkey Instruction Manual

1
R I O T P L A N E S
Sea Monkey
Slow Flier Seaplane
A Riot R/C kit
Building Instructions
2013 Riot Planes
www.riotplanes.com
Toll Free (866) 922-9477
Take the time to read this entire manual, so that you are familiar with all the building
steps and their proper order. Take your time; make sure you understand everything
before you do it and you will be rewarded with an impressive flying plane…
The manufacturer assumes no liability for damages or other loss in the use of this product, as
we have no control over the construction or end use of this product.

2
Specifications
Wingspan 35 inches
Wing Area 290 square inches
Weight 8 ounces
Wing Loading 4 oz./sq. foot
Tools and supplies needed to build
Sanding block with 220 grit paper
Pins
Square
FLAT Workbench
Hot glue gun with glue stick (low or high temp)
Gorilla brand polyurethane glue (white 2x type)
Pins
(Optional) Foam safe medium CA glue and foam safe accelerator
Razor blade or X-Acto knife
Blue masking tape
Hinge Tape (Blenderm)
Waxed paper
18-24 inch long 1-1/2 to 3 inch diameter object (1-1/2 PVC pipe is ideal)
(Optional) Foam safe paint

3
Additional items needed to complete
80-130 watt brushless motor (Riot 502 combo)
Minimum 3 channel radio with small receiver
8x4.3 Slow Fly Propeller
ESC to match motor
2S 800-1000 mah LiPo battery
5 to 9 gram servos (2) (Riot 5002)
Do an inventory of all the parts, to be sure that everything is there. If anything is missing
or damaged, contact us as soon as possible, so that we can get replacements to you quickly.
We strongly recommend the use of polyurethane glue for the construction of this plane.
We have found it to be very strong, waterproof and it allows a few minutes to position parts.
Some areas can be done with medium foam safe CA glue. We will specify where we used each
type of glue.
If you use any CA, you should also use foam safe accelerator. Don’t risk destroying your plane
before you ever fly it!
We will present these instructions in a specific order, mainly to help you get used to using tiny
amounts of poly glue. If you use more than recommended, the glue will expand uncontrollably
and while this does not incur any structural disadvantages, it sure looks ugly.
Take your time and really pay attention to how much glue you are using.
Let’s identify the parts so that we can easily find them when needed.
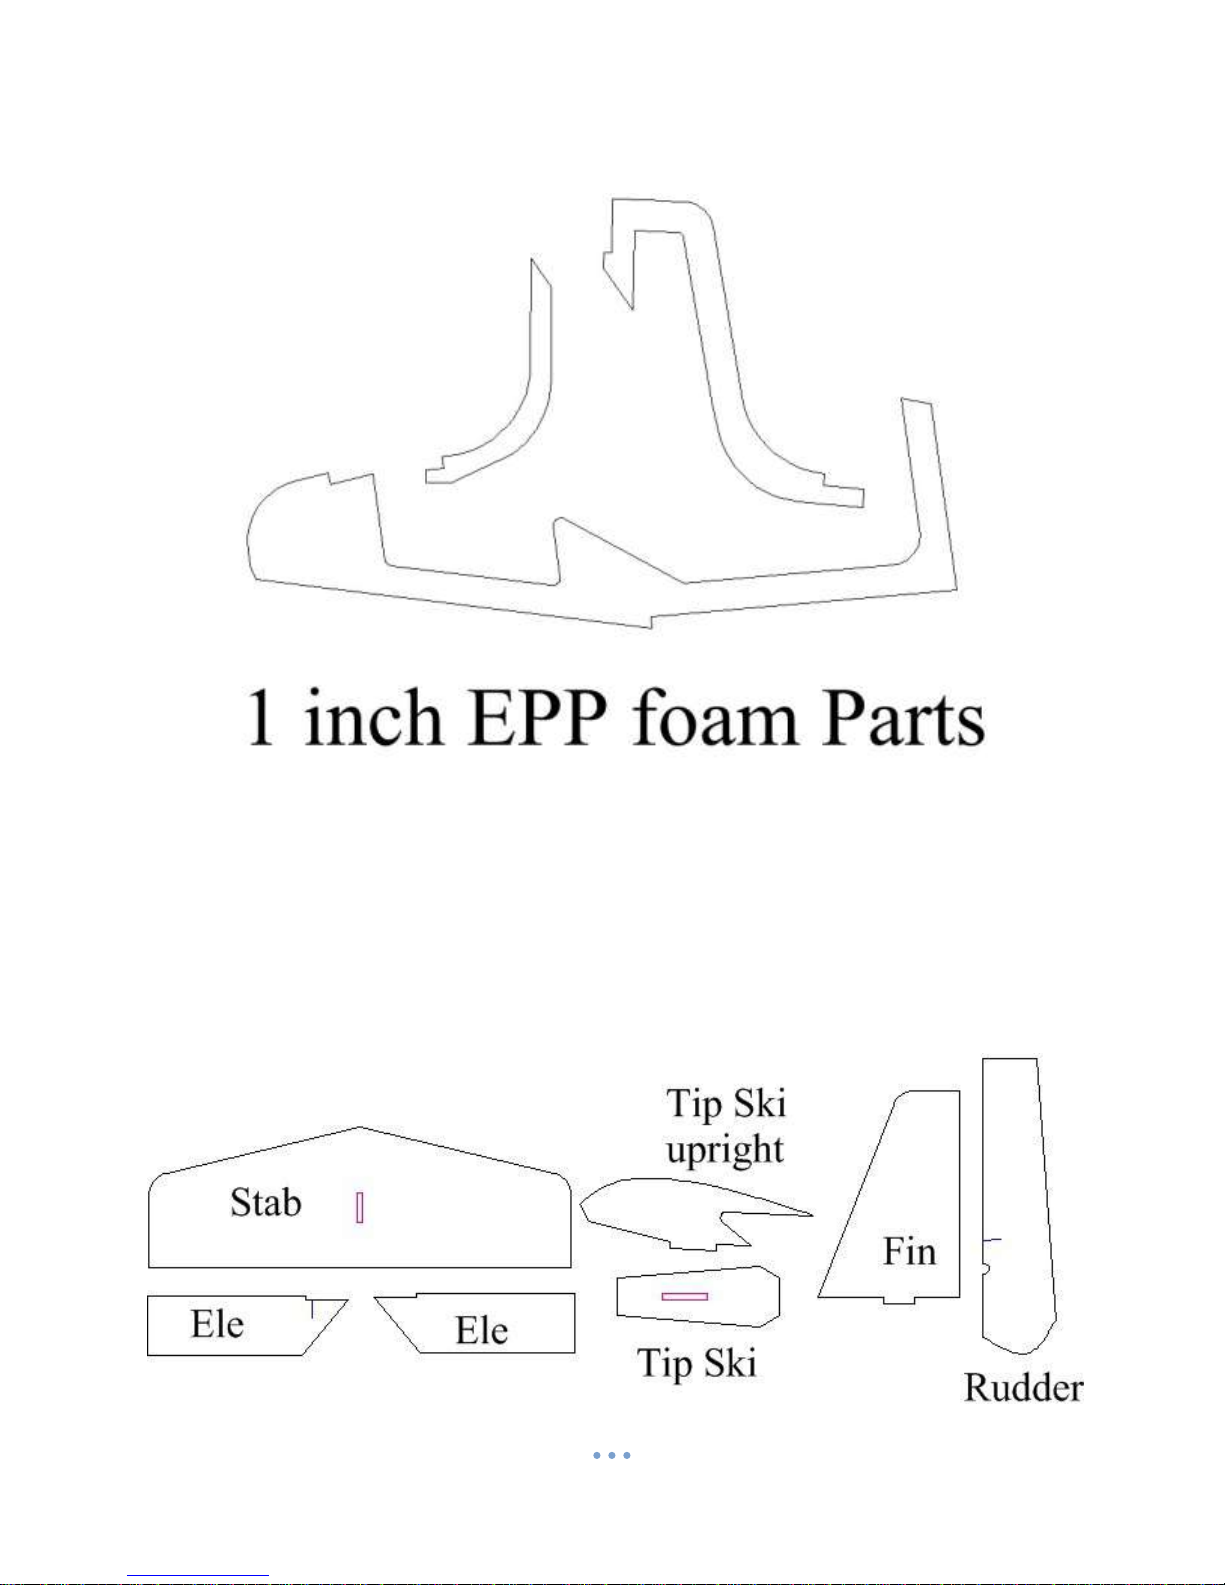
4
5mm ESP foam parts
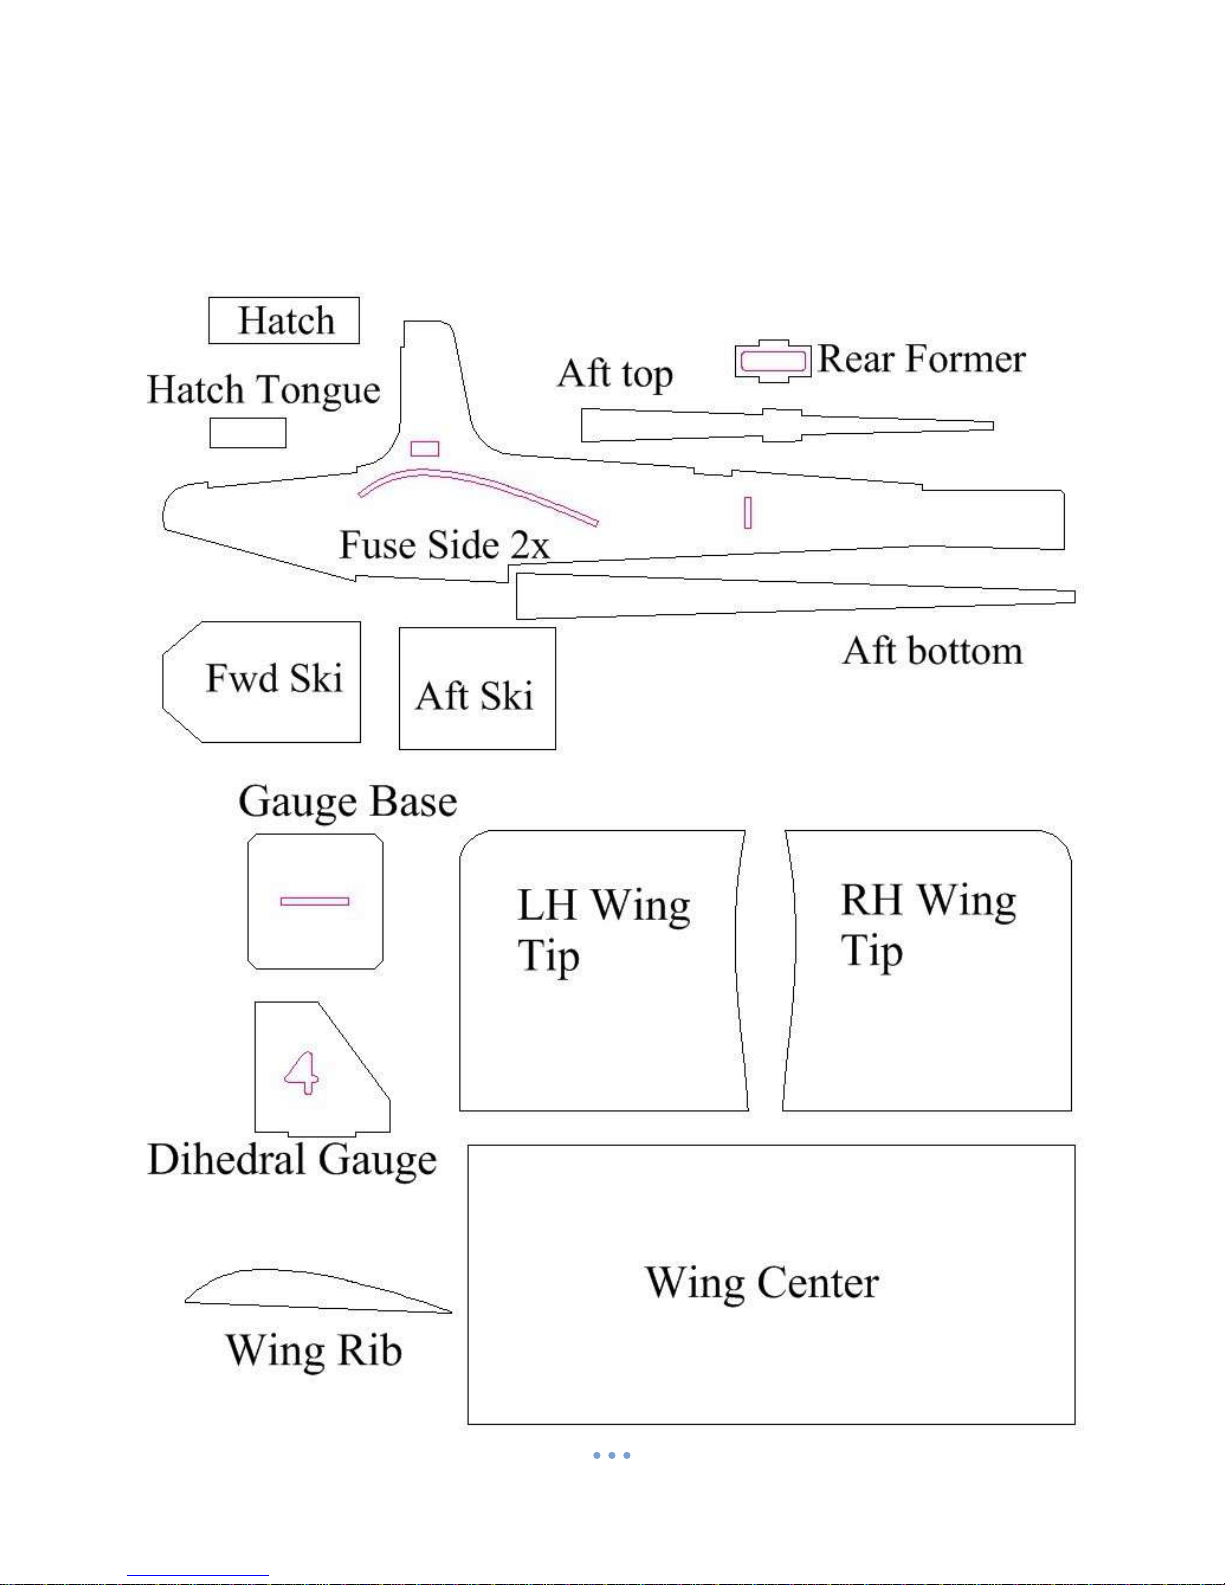
5
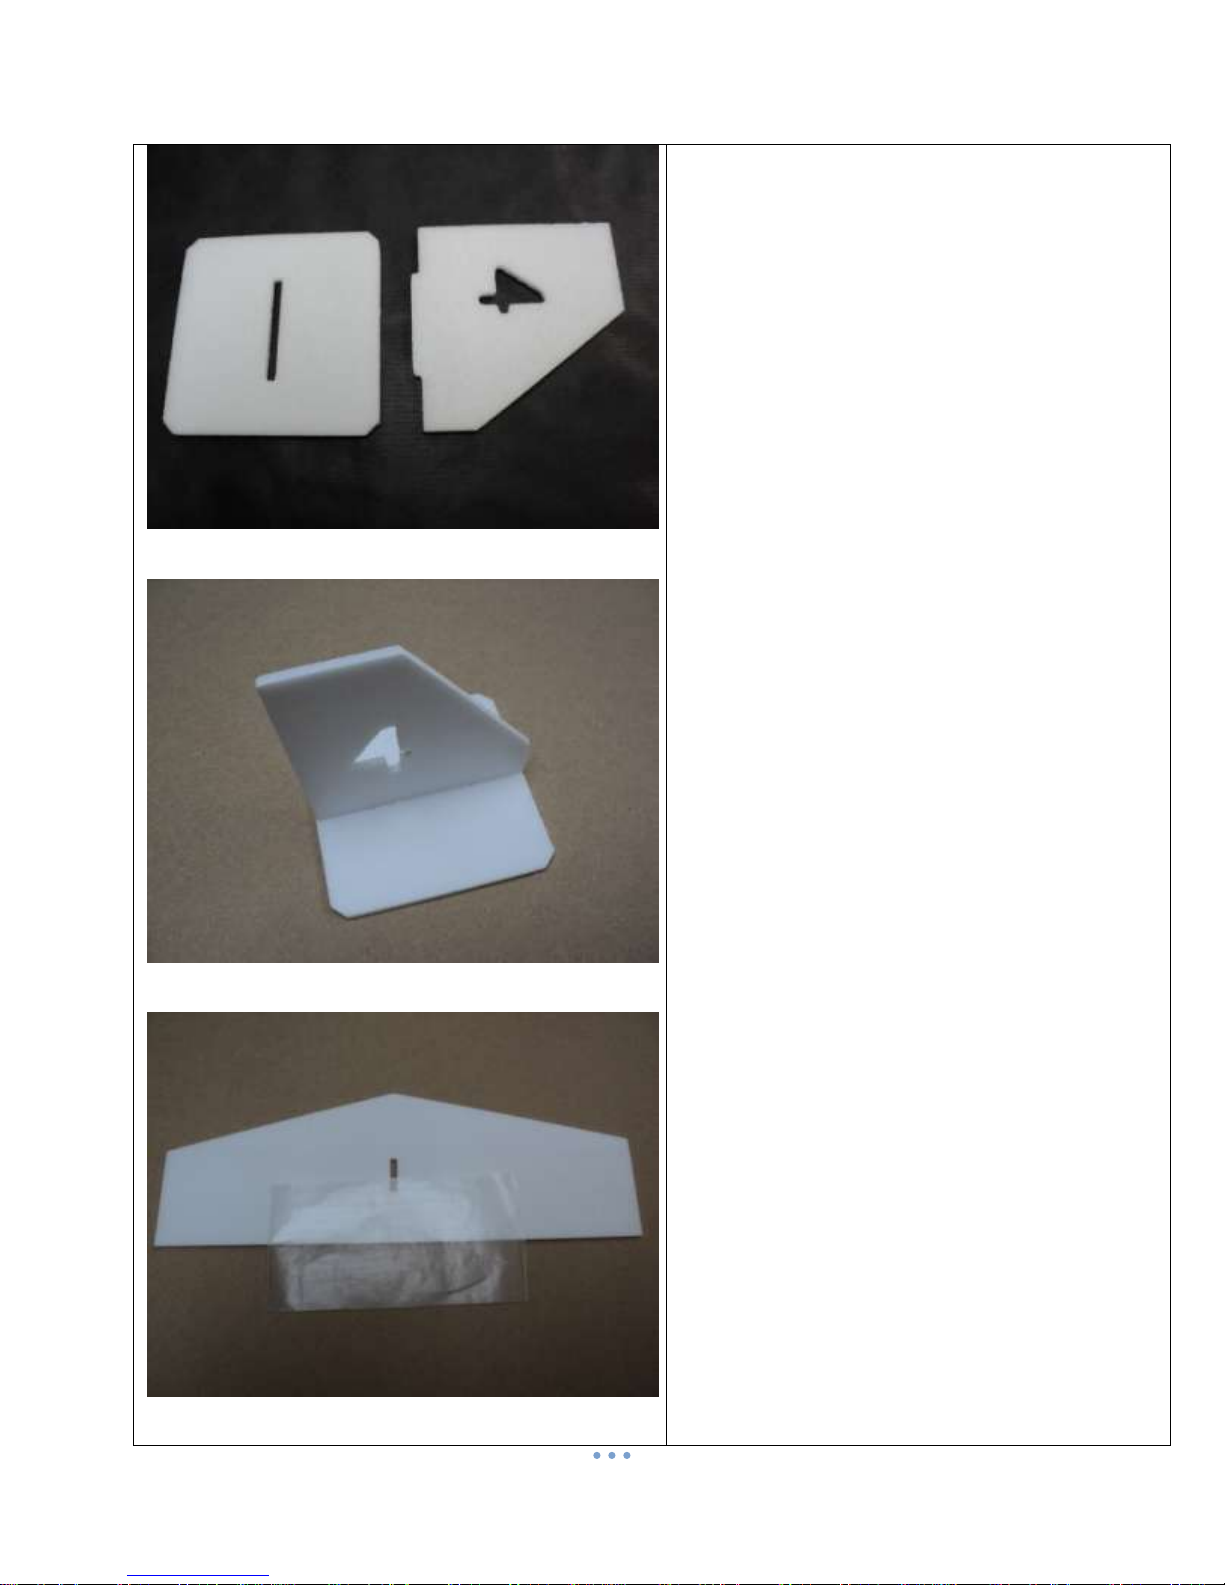
6
Dihedral Gauge
Let’s build the dihedral gauge.
This will be practice for using a tiny amount of
glue.
Gather the two parts for the gauge and lightly
sand the edges to remove the small tabs left from
the machining process.
Using poly glue, apply a tiny bead on each side
of the tab.
Use the smallest bead of glue you possibly can.
a 1/16 inch diameter bead is too large.
Put the tab in the slot and set aside on a piece of
waxed paper.
Once this begins to cure, you will see how well
you did in keeping with a tiny bead of glue.
Elevators
Gather the two elevator halves, the horizontal
stabilizer and the short balsa stick (elevator
joiner).
Use pins or weight to keep the horizontal stab in
position on the bench.
Put a piece of waxed paper over the rear of the
stab.
Push the two elevator halves against the stab,
align the tips and pin in place.
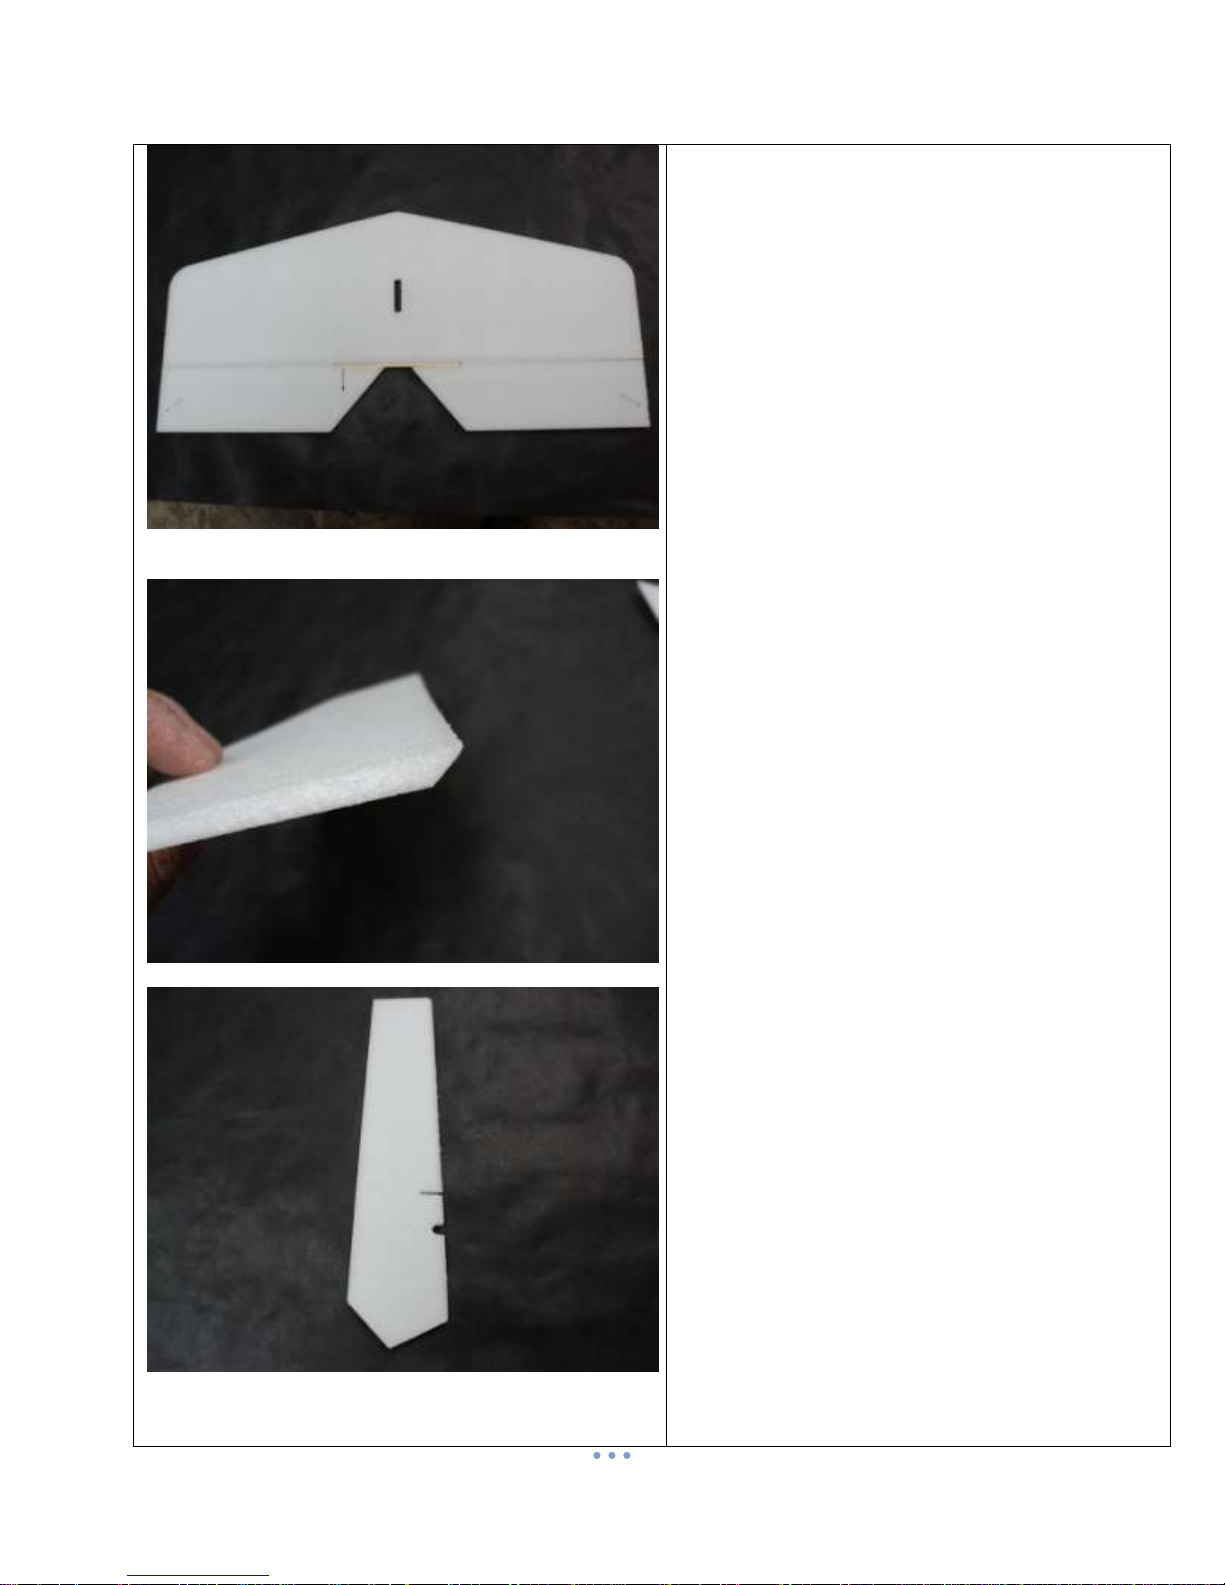
7
Be sure the elevator with the control horn slot is
on the left hand side.
Check the fit of the elevator joiner. It should fit in
the slots provided and not cause any space
between the elevators and stab.
If all is well, use poly glue to attach it to the
elevator halves.
Allow to cure.
When cured, sand a 45 degree bevel on the
trailing edge of the stabilizer.
Leave the front of the elevators square.
Rudder
Sand a 45 degree bevel on the leading edge of
the rudder, on each side to form a “V”.

8
Tip Skis
Gather the two parts for each tip ski and send the
edges smooth. Using medium CA, glue the ski
bottom to the upright. Note that the wide part of
the ski faces forward.
Spray the ski lightly with foam safe accelerator
and use glue on the upright for an instant bond.
Be sure that the ski bottom is centered on the
upright.
Glue the rear portion, allow a few seconds to
cure then glue the forward section, bending the
ski bottom to conform.
Repeat for the other tip ski.
Fuselage
This is the most important part of the build. Take
your time and build square and straight.
The fuse is made of two outer sides and an inner
core of EPP foam.
We recommend using poly glue for all fuse
construction as it allows you a few minutes to
correctly position everything prior to curing.
Gather the two fuse sides and the three EPP
parts.

9
Set the EPP parts in place on a fuse side as
shown to see where they go.
Lay the other fuse side in place.
Tape the tail end of the fuse sides together so
that they stay aligned.
When all is okay, use a medium bead (1/16 inch
or so) of poly glue in the middle of the EPP foam.
Do both sides.
Use a square to make sure that the parts align
perfectly. Check all the way around.
When satisfied with the alignment, use pins to
keep everything in place until cured. You can use
small weights as well, just double check with your
square before you walk away.
Allow to cure completely.
Once cured we can finish up the fuse.
Glue the aft fuse former in place. You can use
CA or poly glue.
Using a tiny bead of poly glue, attach the aft fuse
top and bottom. Note that the top goes between
the sides and the bottom goes on top of the
sides.
Use pins to hold the top and bottom in exact
position until cured.
Use sandpaper to rough up the plastic hinge, and
flex it a few dozen times to “break it in”.
Use a teeny bead of poly glue to glue the fuse at
the tail.
Glue the hinge in place, between the sides about
¼ inch from the bottom. Make sure that the joint
on the hinge is right at the surface.
Only glue the last 1/8 inch or so of the fuse sides.
Pin until cured.
10
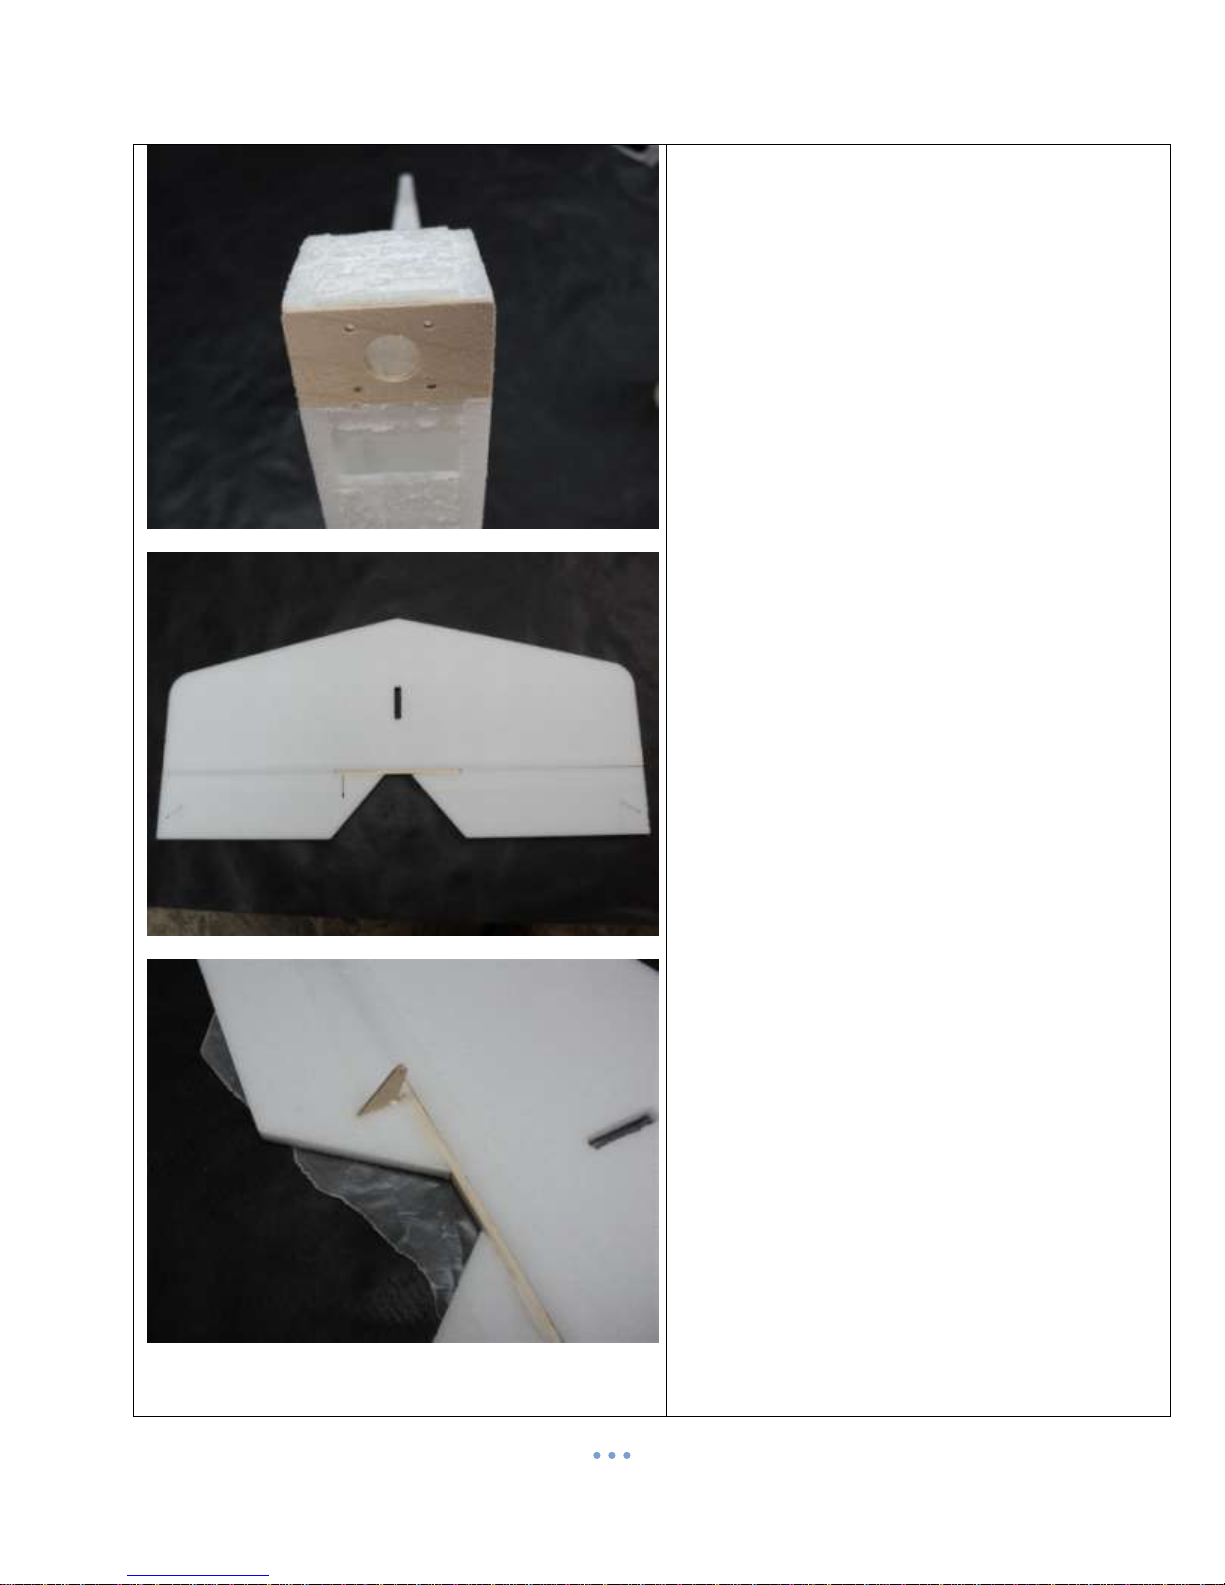
Glue the 1/16 ply motor plate in place with poly
glue. Tape in place until cured.
Tail
Using Hinge tape, attach the elevator to the
stabilizer. Be sure that the tips are aligned.
The elevator control horn slot should be facing
up, and the bevel in the stabilizer should be down
when you tape the elevator in place.
Trim the tape near the joiner, but don’t cut into it.
Cut the tape where it covers the slot for the
control horn.
Use poly to glue the 1/16 ply elevator control
horn in place.
Note that the ply control horns for the elevator
and rudder are different. The rudder horn has a
“V” in the front.
Table of contents






