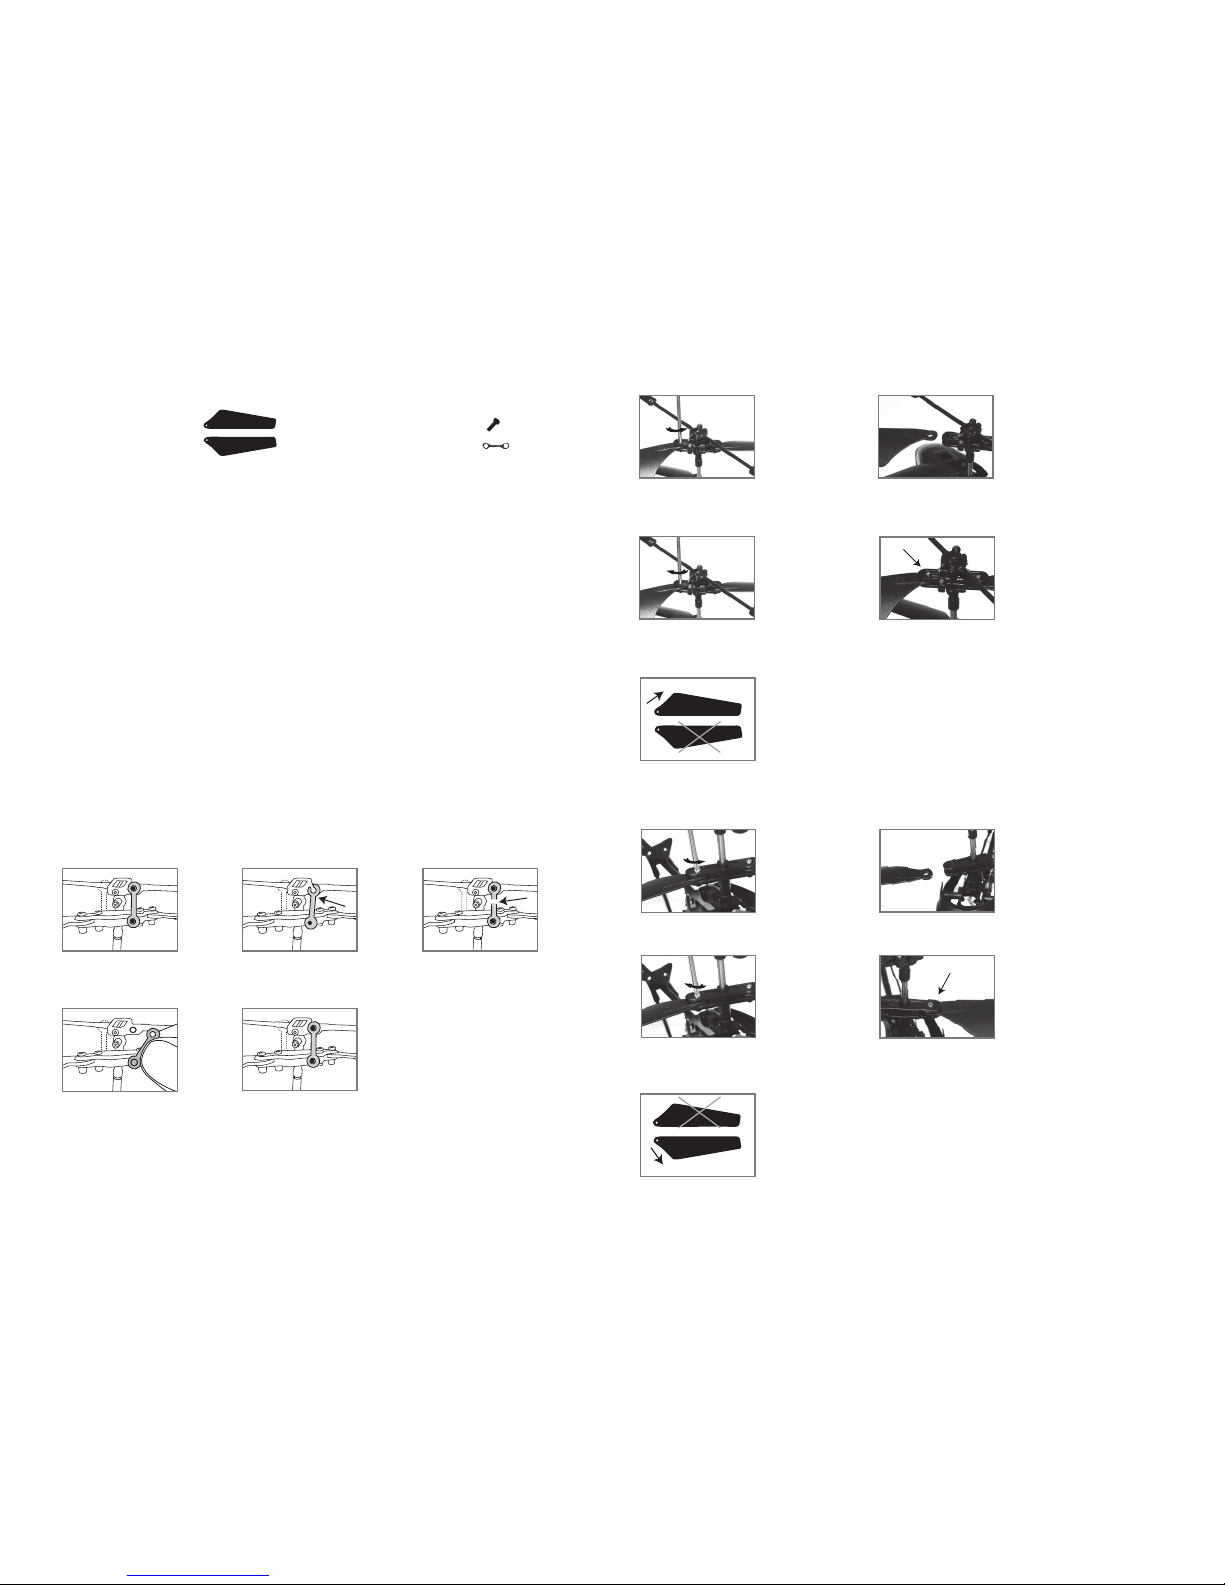
7 8
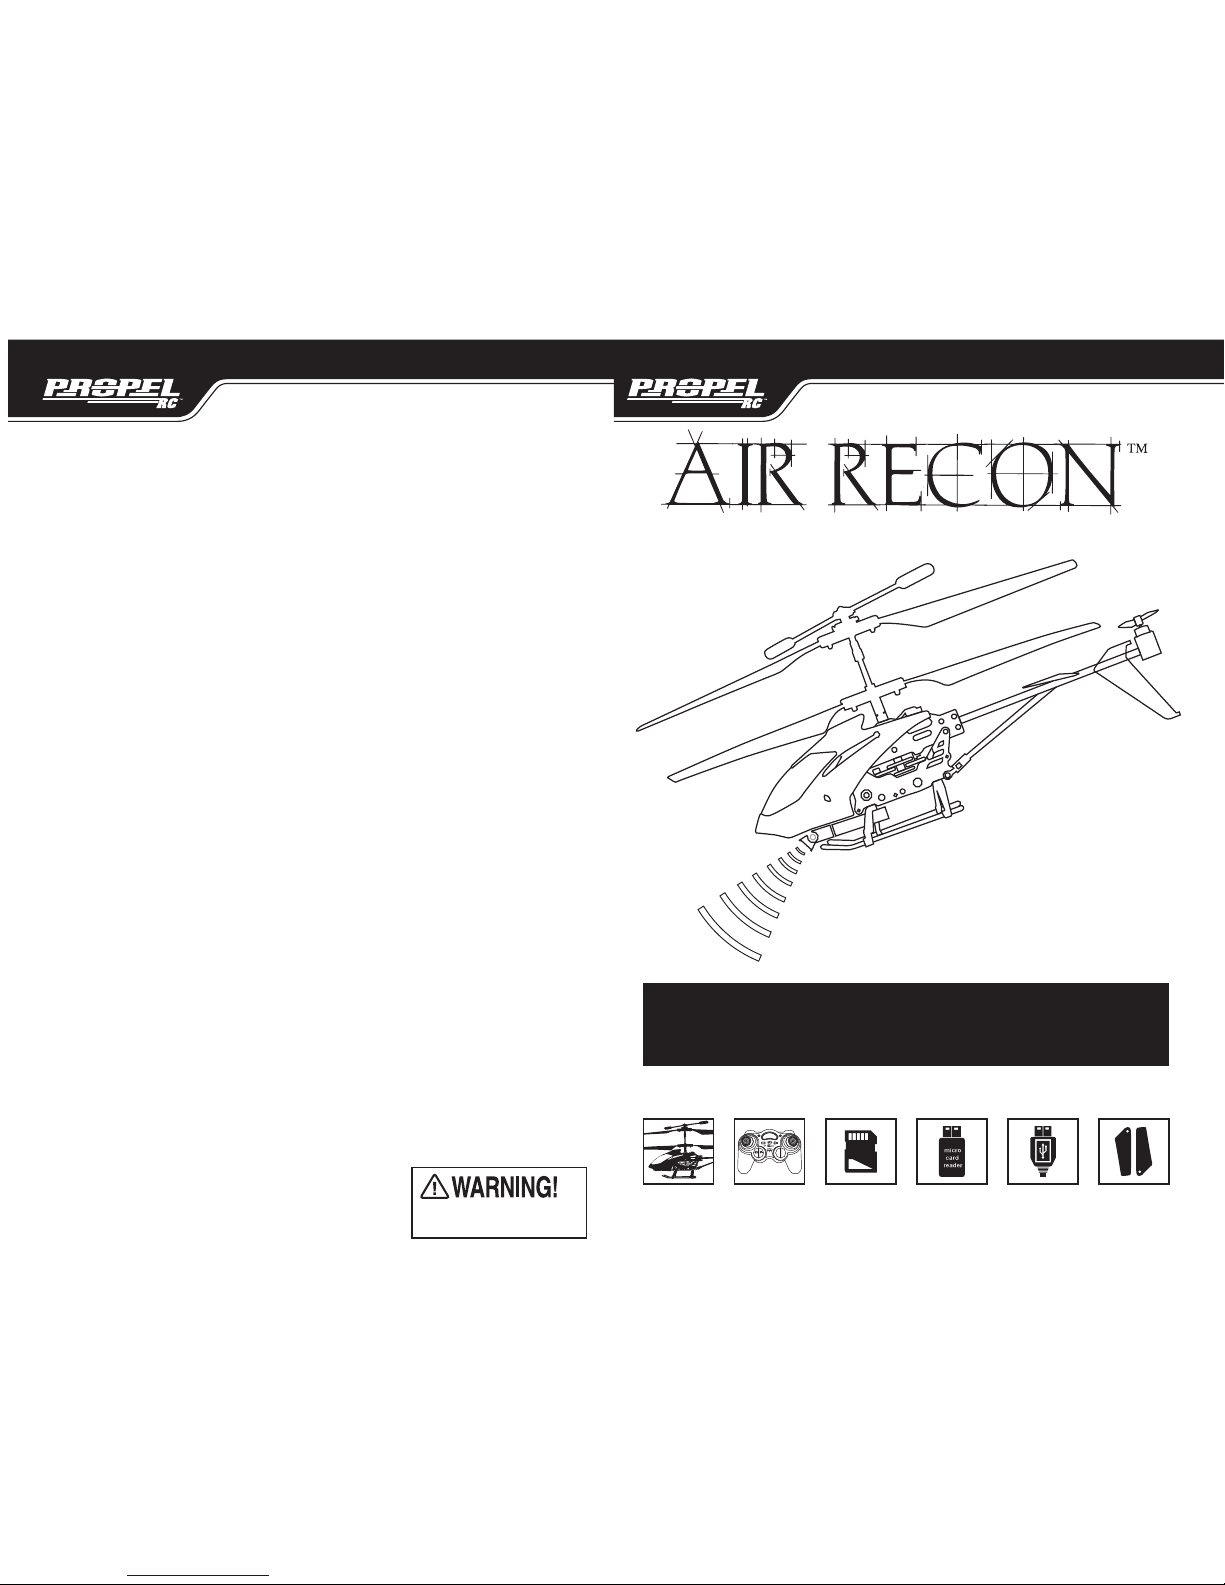
Your AIR RECON
TM
Indoor wireless helicopter comes equipped with an onboard digital camera that takes both Video
and still Photographs. Now you can have hours of fun creating aerial photography and videos for family and friends.
WHAT YOU WILL NEED TO GET STARTED USING YOUR CAMERA
1. One Micro SD card (included)
2. One Micro SD card reader (included)
3. One Computer with USB port and Windows Media Player or other Media player that can play AVI files (not included).
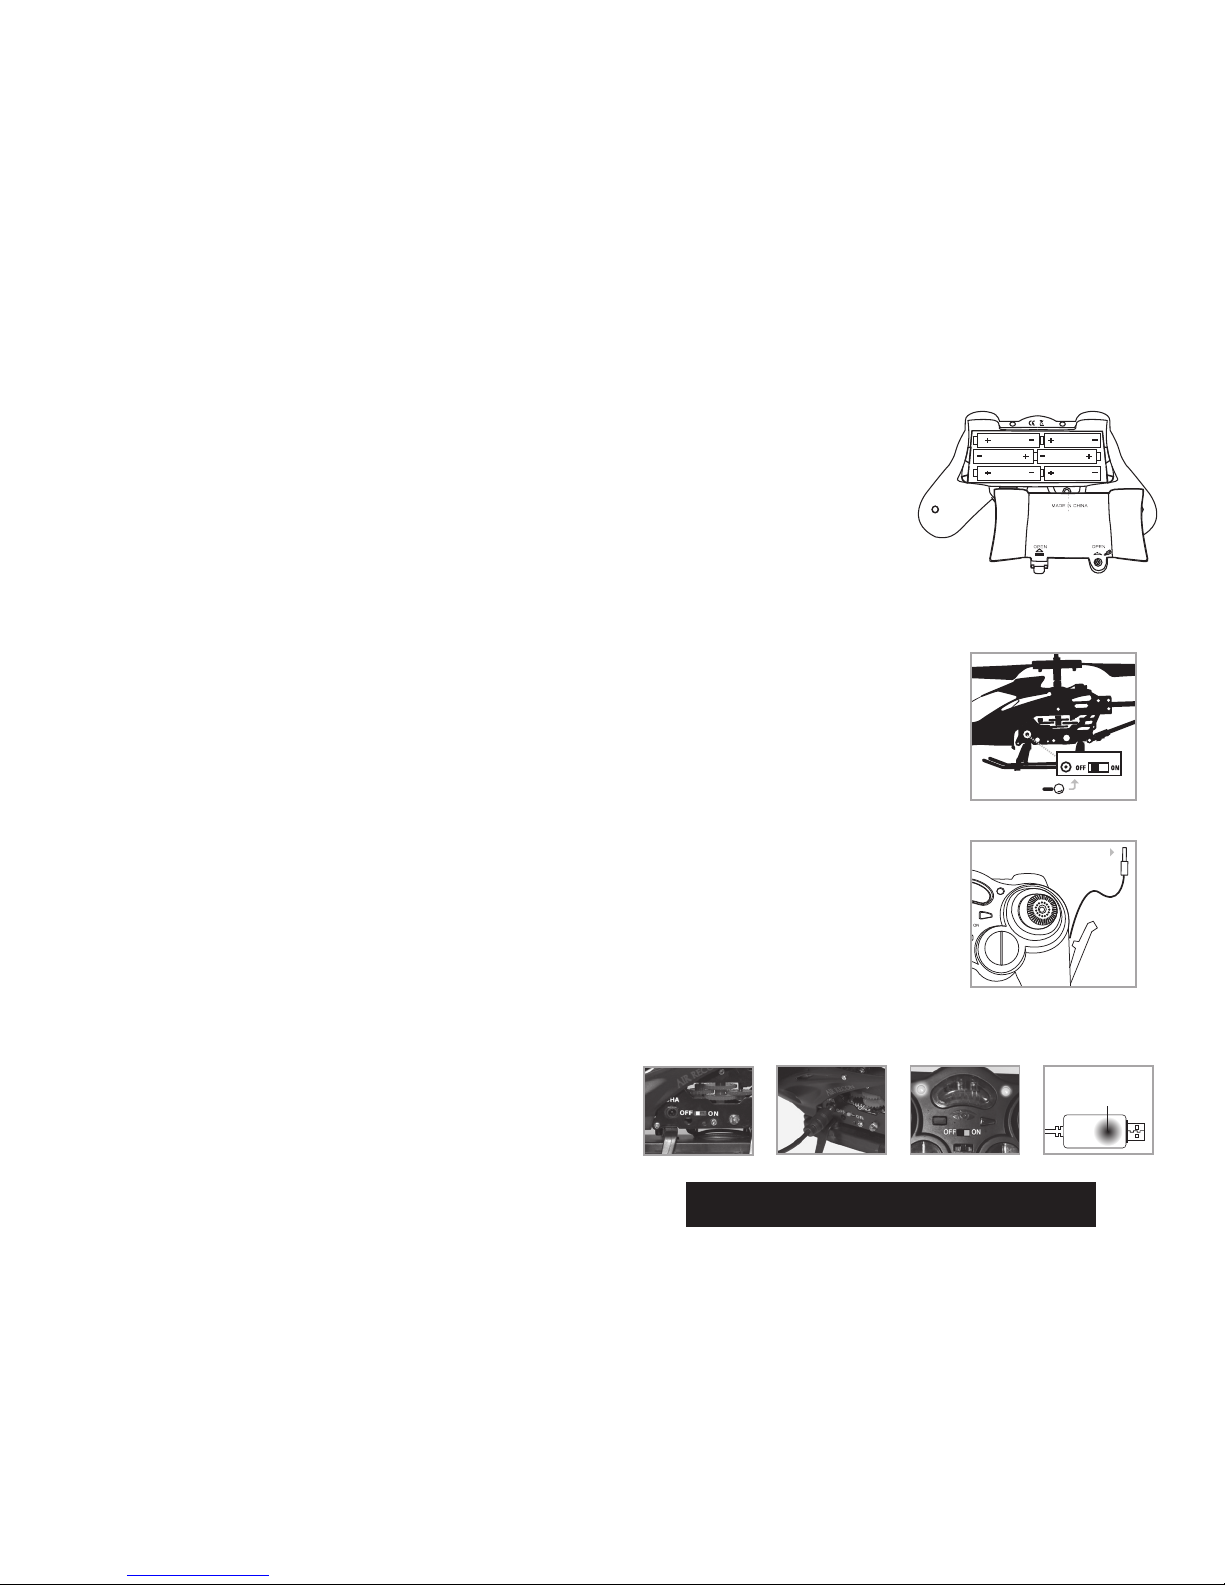
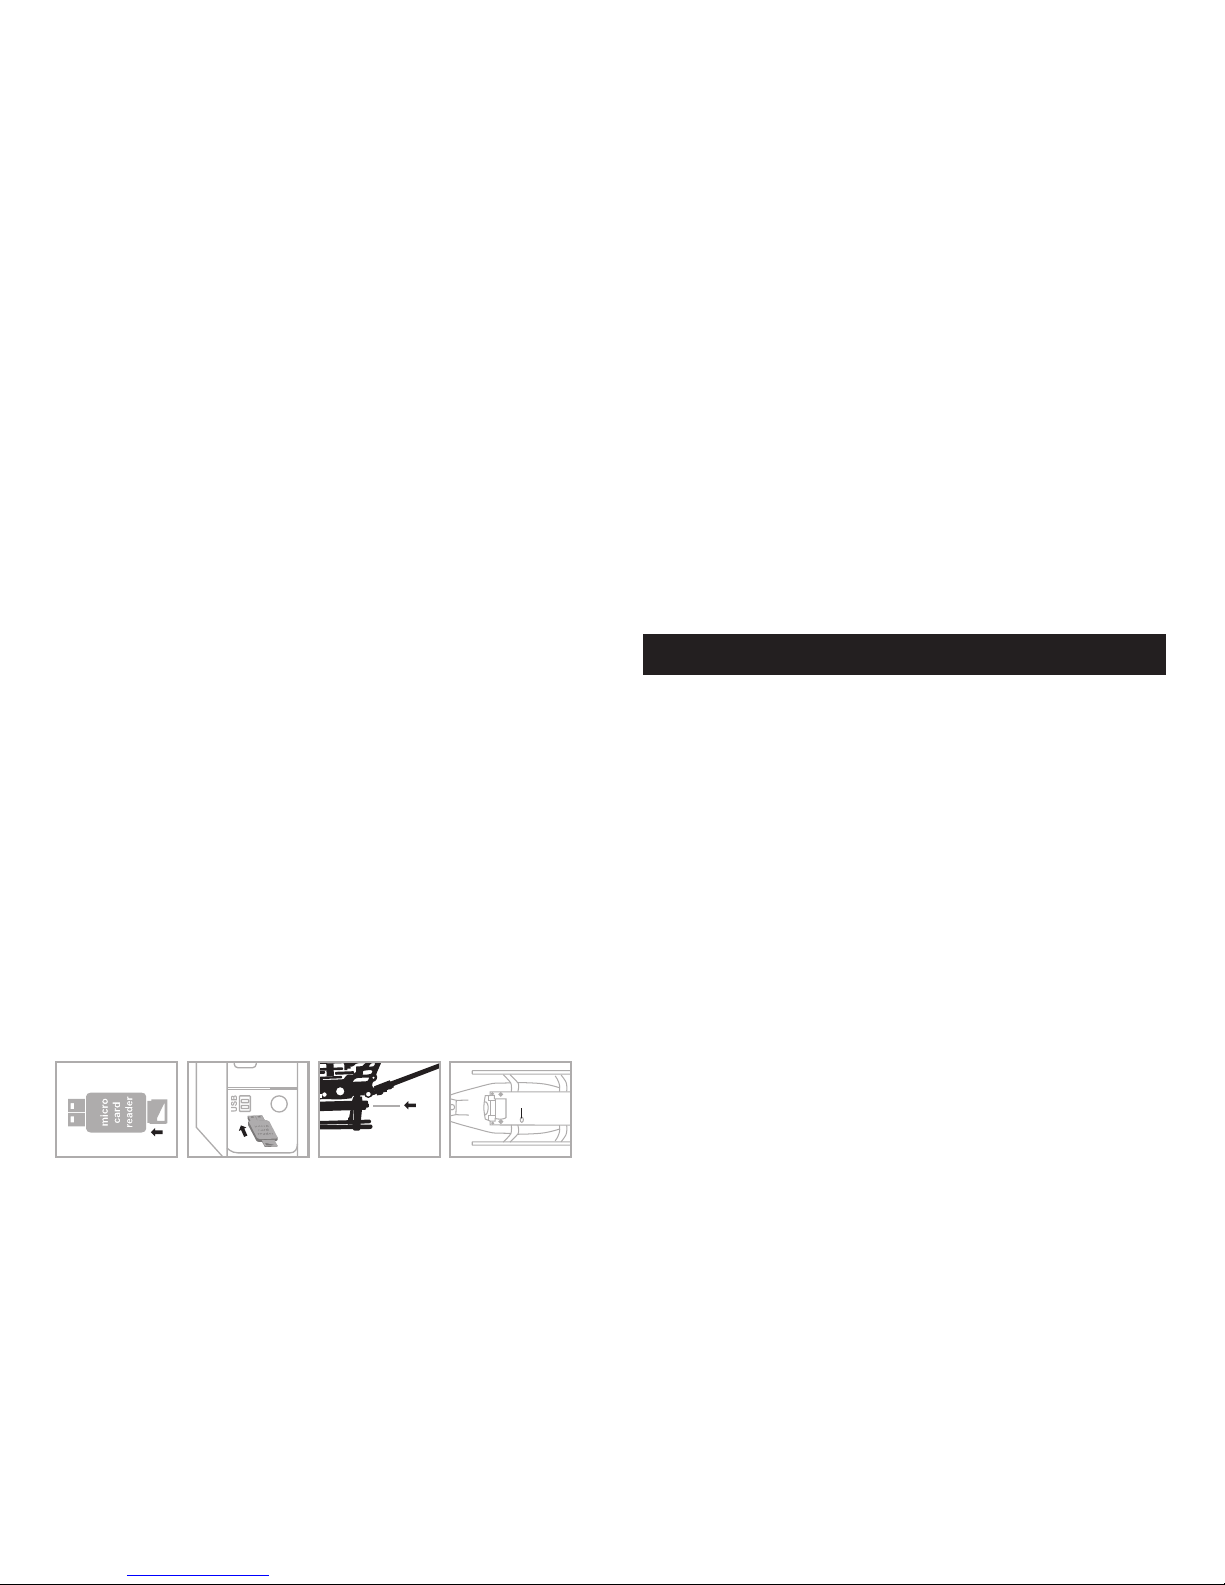
FORMATTING YOUR MICRO SD CARD
Before you can begin to take videos or digital photographs you must first format your Micro SD card. To format your
Micro SD card simply place the Micro SD card into the included USB SD card reader and plug it into your computers USB
port (See diagram 1 and 2 below). After a few moments an icon will appear on your Desktop. Right click on the Icon
and follow instructions to format your Micro SD card.
INSTALLING THE MICRO SD CARD IN YOUR AIR RECON TM HELICOPTER
• Make sure helicopter is in the power “OFF” position.
• Place the formatted SD card into the back of the helicopters digital camera port. ( see diagram 3 below) Push gently
and consistently until you hear and feel the micro SD card “click” into the digital camera slot.
• Turn the helicopter on and make sure that it is both fully charged and properly synced to the Controller (see HOW TO
SYNC YOUR HELICOPTER on page 4 ).
• When you have successfully installed your micro SD card and your helicopter is in the power “ON” position, you will
see a solid green light on the helicopter cameras belly. This green light is accompanied by a separate flashing red light
on its side. This red led light should flash 5 times and then go off. This indicates you are ready to take both
photographs and videos. (see camera indicator light diagram 4 below). NOTE: If you see a continuous flashing red
light this means you have not installed your Micro SD card correctly or there is a problem with your SD card. If this
happens first make sure that the product is not in Video Record mode and if not, then please reformat and try again. If
you continue to encounter problems call our customers service line at 949.566.9573 Ext 1 for assistance.
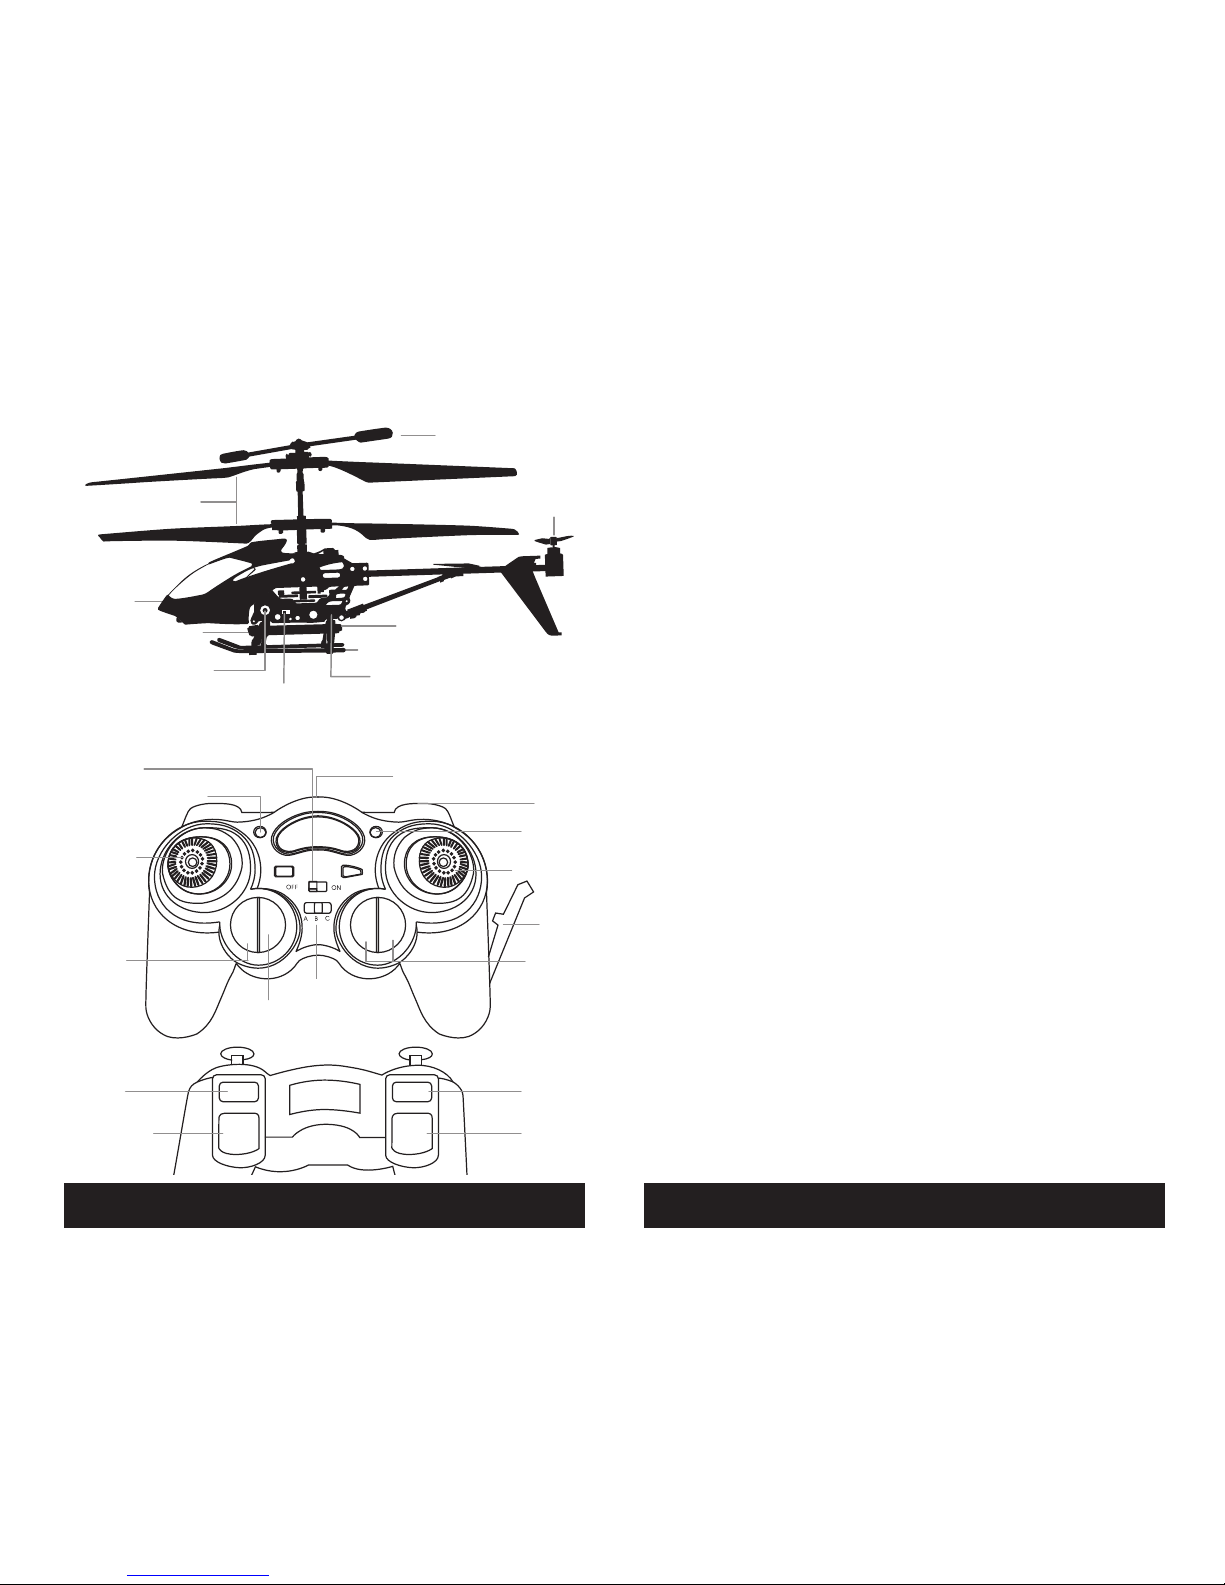
TAKING DIGITAL PHOTOS
To take photographs simply press the PHOTO button on the face of the controller (refer to CONTROLLER DIAGRAM on pg
3) the red light on the belly of the camera will flash RED 3x. As this red light is flashing it is taking one still photo. When
the camera ready light becomes green again you are ready for your next photograph.
RECORDING VIDEOS
To record a video first make sure that your helicopter is fully charged and that you have correctly installed the micro SD
card in the Helicopters camera port. Begin recording a video by pressing the VIDEO RECORD button on the front left side
of the controller (see CONTROLLER DIAGRAM on page 3). The red indicator light will continuously flash RED indicating
that VIDEO recording is in progress. To stop the video recording, press the RECORD button a second time. The red
indicator light on the belly of the camera will turn OFF indicating that video recording has stopped and the Camera is in
ready mode again.
REMOVING YOUR MICRO SD CARD
To remove your Micro SD Card push in gently on the back of the SD card with your thumb or forefinger until you hear
and feel a “clicking sound”. The Micro SD card will “pop out” slightly and is ready for removal. Simply grab and pull
gently away from the helicopter camera port to remove the card. Always store your Micro SD card in a clean, safe and
cool environment
DOWNLOADING AND CLEARING SPACE ON YOUR MICRO SD CARD
Plug your micro SD card into micro SD card reader and connect to your computer. It is best to always download all your
videos and pictures on to your computer and not store this data on your Micro SD card.
After downloading your photos and videos , follow your computers instructions to “delete” files on your Micro SD card.
IMPORTANT NOTICE: When your Micro SD card is full the indicator light on the bottom of your helicopter will become
solid RED. This indicates that its time put a new SD card in your helicopter or download files and clear space for future
photos and videos.
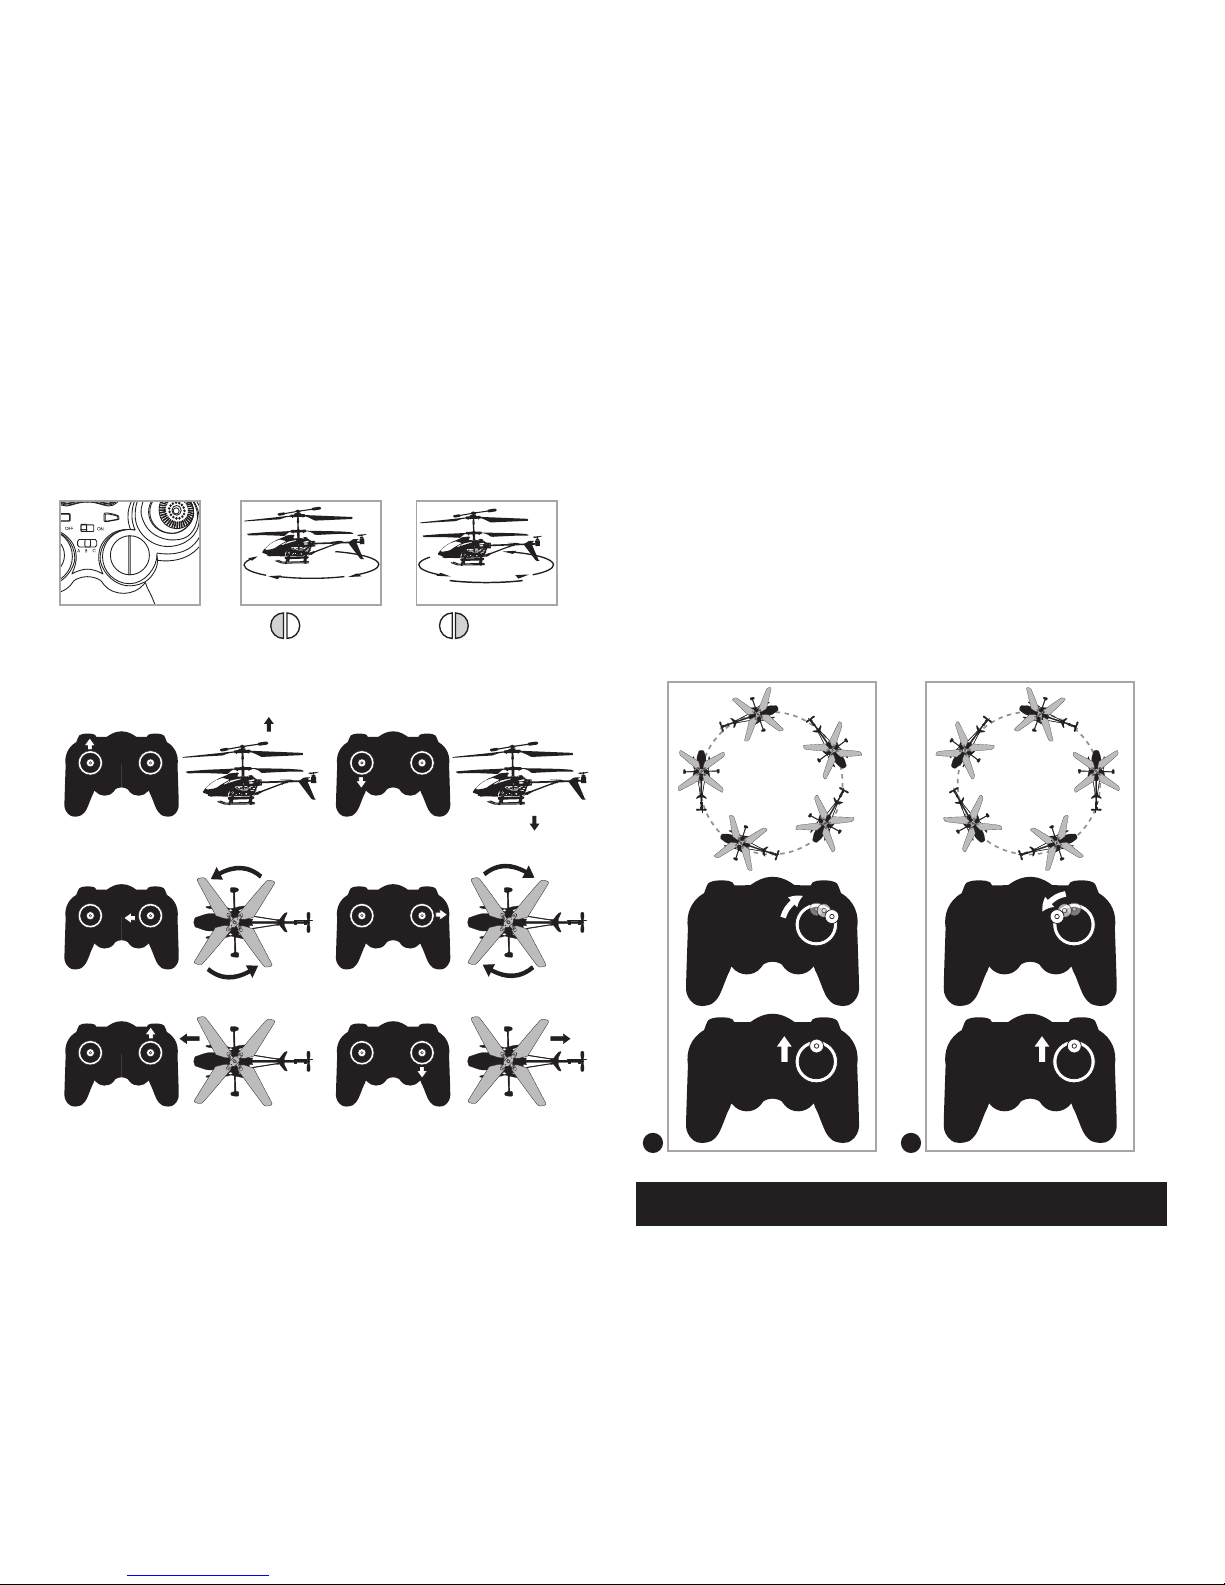
HELICOPTER WARNING AND SAFETY PRECAUTIONS
The helicopter blades revolve at high speeds and can cause damage to the user, spectators and animals. Stand
away from the helicopter to reduce the risk of getting into the flight path. Warn spectators that you will be flying
your helicopter so that they are aware of its position. Before flight, inspect the rotor blades to make certain that the
blades are securely fastened to the helicopter.
WARNINGS
• Choking/Cutting Hazard. Small Parts/Sharp Rotor Blades.
• Keep hands, hair and loose clothing away from the propeller when the power switch is turned to the ON position.
• Turn off the transmitter and helicopter power switches when not in use.
• The remote control charger is built specifically for the helicopters Li-Poly battery. Do not use it to charge any other
battery.
• New alkaline batteries are recommended for maximum performance.
• Parental supervision recommended when flying helicopter.
IMPORTANT: ALWAYS DISCONNECT CHARGER CORD AFTER CHARGING. NEVER LEAVE CHARGER CONNECTED TO
HELICOPTER OVERNIGHT OR FOR EXTENDED PERIODS OF TIME. INFRARED MULTI CHANNEL CONTROL SYSTEM
USING YOUR ON BOARD CAMERA AND VIDEO RECORDER
Camera LED Light
micro SD card
facing up
micro SD card
goes in back slot
Diagram 4Diagram 3Diagram 2Diagram 1
NOTICE: When recording video footage the AIR RECON
TM
helicopter automatically goes into slow-motion mode
this allows steady controlled recording of video footage that would not be possible in faster flying modes.