
Printrex C930 Bulldog User manual

USER GUIDE
Color Printer/Plotter for Well Logging
Model C930 Bulldog
Publication #1028-0094

Color Printer/Plotter
Introduction 2
Power and Data
Connections
The power cable, USB cable and ethernet cable are included in the shipping carton
with the printer. Locations of the connectors on the printer are shown in Figure 1.
The C930 contains a personal computer running Windows CE so on power up, it
goes through a “boot” cycle like any personal computer.
All front panel indicators areinitially turned on. Near the end of the boot cycle, the
indicators will cycle once and then the READY light will be lit if paper and ribbons
areproperly loaded and no errors exist. Any print jobs in the printer are deleted on
power up initialization.
Figure 1. Rear panel connections and IP address switches
Power Up
IP Address
Most Significant Digit
Rotary BCD Switch
IP Address
Least Significant Digit
Rotary BCD Switch
IP Subnet Address Pushbutton SwitchIP Subnet Address Status LED
AC Power Input
USB Connector
Ethernet Connector
Rear Panel with Cover Removed Rear Panel with Cover Installed
Color Printer/Plotter
3
Install Paper
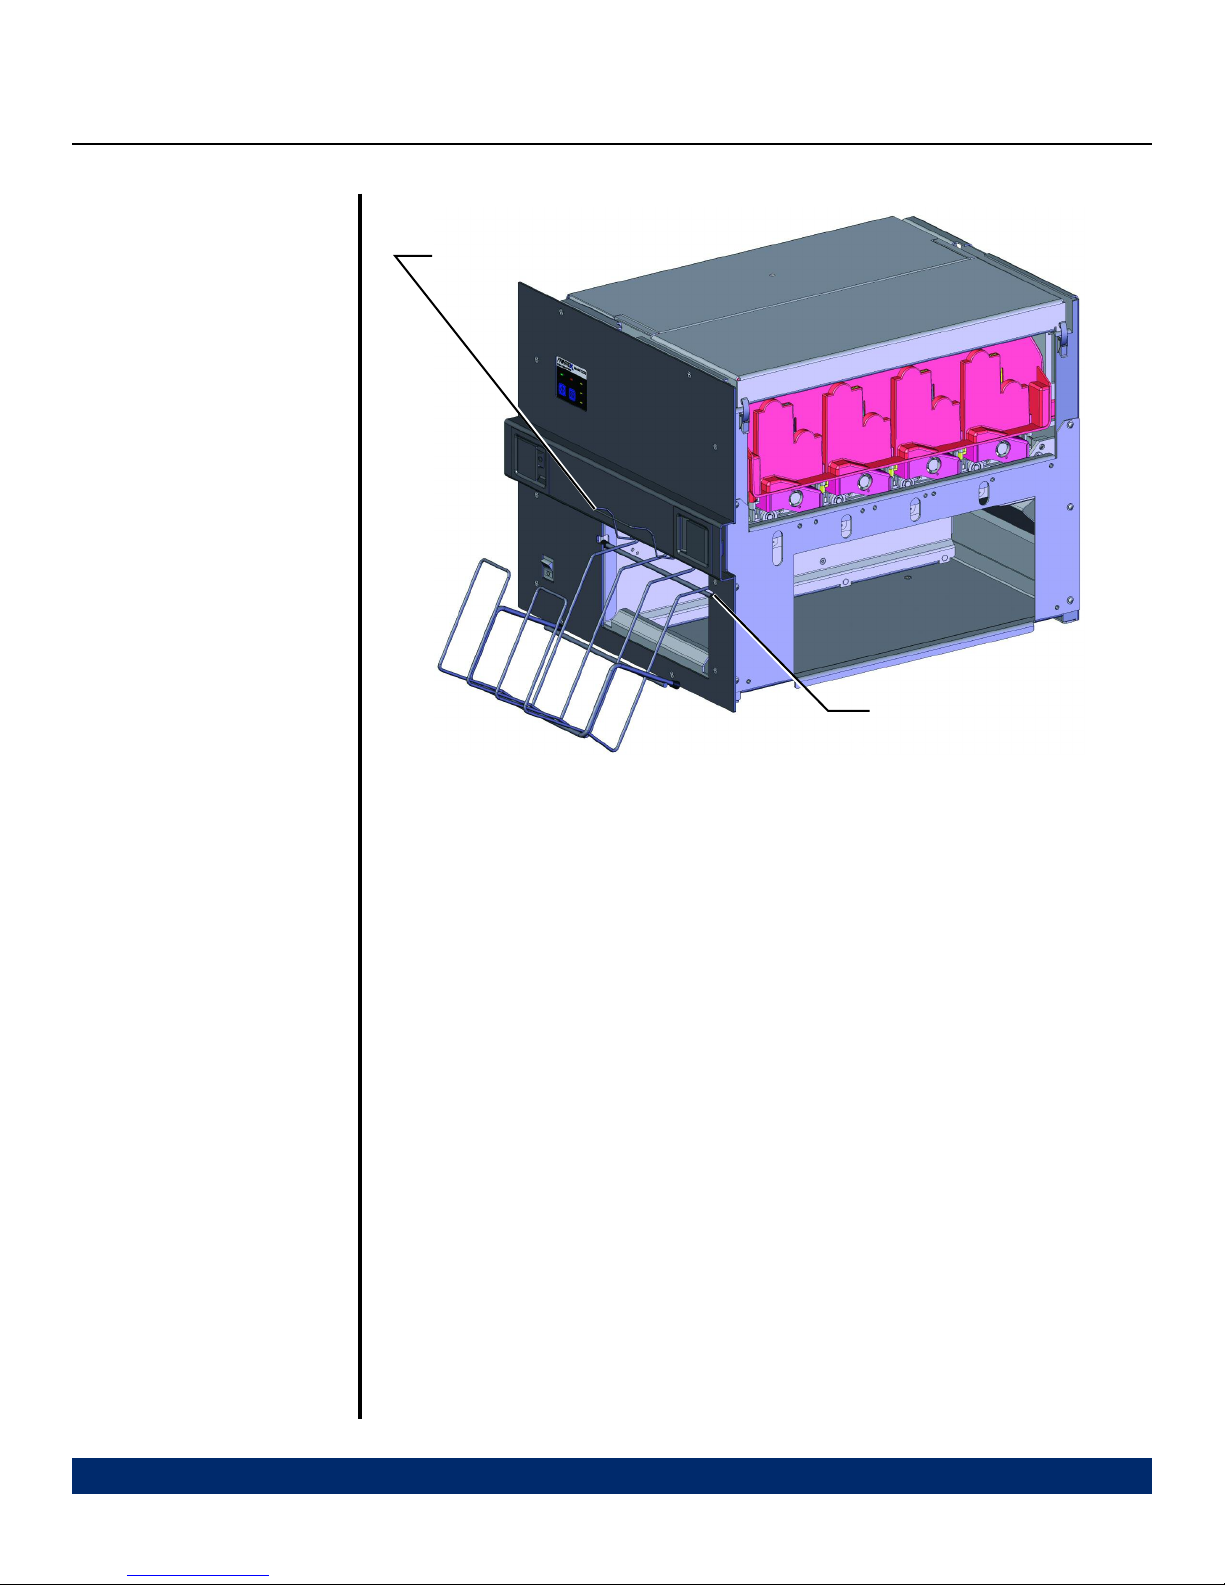
Output Stacker
Figure 2. Mount Paper Basket
Setting the IP
Address
The IP address is set at the factory to 192.168.168.54. The subnet mask is set to
255.255.255.0, and the Default Gateway is set to 192.168.1.1. These can be reset
with the procedures below.
The C930 IP address and subnet mask are set using a bank of 12 rotary switches
grouped in four sets of three each on the back of the printer. See Figure 1. The port
number is set at 90.
Configuring the Subnet mask and Default Gateway must be done over a network
using an HTTP browser (Internet Explorer, Firefox, etc.) The printer should be con-
nected to a subnet local to the host machine being used, and have its IP set so that
it is different from the host IP only in the last number.
Configure the Subnet mask by browsing to <printer IP>/webconfig. For example,
with the above default settings and a host IP set to 192.168.168.53, browse to:
http://192.168.168.54/webconfig. This page contains the Subnet mask value, and
the Default Gateway value. Both may be set from this page.
The switches, Subnet mask and Default Gateway are set only on power up. All num-
bers are in decimal.
1. Lift flapper bar.
2. Tilt basket and hook into front
panel slots.
Let basket rotate down and rest
against the front panel.
Install Printer
Driver
Refer to the README.txt file on the driver disk.
See Figure 2.

Color Printer/Plotter
4
Load Paper and
Ribbons
It is required to have power on and the printer initialized when loading paper or
changing ribbons as the printer adjusts the ribbon drive settings when the printer is
closed.
See Figures 3, 4, 5 & 6. The C930 requires paper with registration marks on the
back (non printing) side. Printrex part number 2316-0017.
Alow ribbon condition (less than 200 feet) is indicated by flashing the front panel
Ribbon indicator. This is not treated as an error and operation continues.
Figure 3. Open printer
1. Open latches.
2. Lift handle with
both hands until
door clicks in up
position.

Color Printer/Plotter
5
Figure 4. Ribbons removed and installed
1. Pull out ribbon cartridge with
printer OPEN. Use handles to
start pull, then grasp cartridge at
both ends to finish removal.
3. Tilt ribbon cartridge up and slide
into printer using handles.
4. See PRINTER CLOSE
instructions.
2. Load ribbon cartridge by first
resting cartridge ears on chassis
supports.

Color Printer/Plotter
6
Figure 5. Paper loading
1. Start with printer OPEN.
2. Fold top sheet over rear box edge.
Position box with black marks
nearest to the printer as shown.
3. Slide paper box
into printer.
4. Grasp top sheet
and pull it forward
over the rubber
rollers.
5. Thread paper into output basket.
6. Next CLOSE printer.

Color Printer/Plotter
7
Figure6. Close printer
Paper Feed–
Front Panel
The front panel contains two switches (Feed/Resume and Cancel) and five LED indi-
cators ( Ready,Error, Paper, Ribbon and Open).
Pressing the Feed/Resume button when the printer is ready but is not printing will
advance paper until the button is released.
See the section on Error Handling for more information on the switches and indica-
tors.
1. Printer should be turned on and show “OPEN” light on
and “ERROR” light flashing.
3. Close latches.
4. Prepare for printing by pressing either “FFED/RESUME” button or “CANCEL” button. — If a plot
didn’t finish, then that plot can be reprinted from the begining by pressing “FEED/RESUME” or
can be cleared by pressing “CANCEL”.
2. Lower handle slowly. Paper will
advance while closing door.

Color Printer/Plotter
8
Self Test Self test is initiated by pressing and holding the Cancel switch and then pressing the
Feed/Resume switch. The switches may be released after the self test begins. The
test printout contains various printer status and configuration information.
Figure 7. Front Control Panel
Printer
Calibration
Printer calibration is accomplished through the Color Registration Adjustment tab in
the Printer Driver.
Operation The C930 can be set to print at 1.5 inches/second or 3 inches/second through the
print driver.Printing will begin if the printer is ready and a print job is sent through
either the ethernet or USB interface. It can spool up to 250 print jobs but will inhibit
receipt of a new job if memory space is less than required to hold a 300 foot plot. If
the job is larger than available memory space, it will be received until memory is full.
The partial job will be printed after which the printer will indicate an error
Sequential print jobs with the same print speed will begin at the next top of form. If
print speed is changed, the first job will be completed beforethe second is started.
If a job is completed without another job in the queue, the paper will advance to per-
mit tear offat the TOF perforation. This enhances stacking capability because the
TOF is positioned to match the “natural” fold of the stack.

Color Printer/Plotter
9
Error Handling If an error occurs, the printer will stop, the Ready indicator will go dark and the Error
indicator will flash the appropriate error code. If the error was caused by Paper,
Ribbon or Open, the associated indicator will also be lit.
The Error Codes are two digit numbers represented by a long flash(es) (tens digit)
and a short flash(es) (ones digit).
Paper Empty 11
Printer Open 12
Top of Form Error 45
Head Error 46
PCI Error 47
Ribbon Error 48
System Error 49
Starvation 51
Forced Abort 52
Error Recovery If the printer is opened to correct a problem, the Paper and Ribbon indicators will
turn off and the Open indicator will be lit. After the problem is corrected and the
printer is closed, the Open indicator will go dark and the Error indicator will be lit.
Pressing the Feed/Resume switch causes the printer to recheck for error conditions,
set the ribbon drive parameters and resume printing any unfinished jobs including
the interrupted job which is restarted from the beginning.
Pressing the cancel switch causes the printer to delete the job that was interrupted
and continue printing as described in the paragraph above.
Abort Printing Pressing the Cancel button during printing will stop printing immediately and an error
is indicated.
Table of contents
Other Printrex Printer manuals










