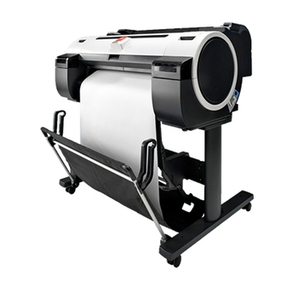
Oce TCS500 Installation instructions

Océ TCS500
Océ TCS500 Self support guide
Océ Self support guide

Océ-Technologies B.V.
© 2005 Océ.
All rights reserved. No part of this work may be reproduced, copied, adapted, or transmitted
in any form or by any means without written permission from Océ.
Océ makes no representation or warranties with respect to the contents hereof and specifi-
cally disclaims any implied warranties of merchantability or fitness for any particular purpose.
Further, Océ reserves the right to revise this publication and to make changes from time
to time in the content hereof without obligation to notify any person of such revision or
changes.
Edition: 2005-08

Safety information
This manual contains the following safety information.
■Instructions for safe use.
You are advised to read this information before you start to actually use the system.
Technical safety information such as safety data sheets can also be found in this
chapter.
■Where applicable, attentions are used throughout this guide to point out safety pre-
cautions to be taken.
3
Safety information

Contents
Chapter 1
Self support tips (GB).........................................................................................5
What to do when a problem occurs.........................................................6
Correct a problem.................................................................................6
What to do when you are not satisfied with the output quality.............7
Achieve optimal output quality...........................................................7
Define the correct job settings for optimal output quality................9
Use the wizards to achieve optimal output quality.........................13
What to do when the system indicates a defective printhead.............15
Use the Replace printhead wizard to change a defective print-
head.....................................................................................................15
What to do when you have problems with the sending of print jobs..17
Important points for the sending of print jobs.................................17
Chapter 2
Safety information (GB)...................................................................................19
Instructions for safe use..........................................................................20
Safety data sheets....................................................................................22
EPA Energy Star®....................................................................................24
4
Contents

Chapter 1
Self support tips (GB)

What to do when a problem occurs
Correct a problem
When a problem occurs, there are two options.
■Use the wizards. Use the on-line / off-line key (key 4 on the folded cover) on the
printer operator panel to go off-line to the wizard selection screen.
■Use the user manual on the documentation CD-ROM for detailed descriptions about
how to correct problems.
Use the wizards to correct problems
Use the wizards to do one of the following.
■Use the 'Feed & cut' wizard to cut the output or to clean cut a roll of media. Chapter
7 of the user manual includes complete information about how to use this wizard.
■Use the 'Change media type' wizard to change the media type defined on the system.
‘Define the correct job settings for optimal output quality’ on page 9
■Use the 'Optimize print quality' wizard as a final option to correct the problems with
the print quality. ‘’ on page 13
■Use the 'Replace printhead' wizard to replace a defective printhead. ‘’ on page 15
■Use the 'Replace cassette' wizard to replace the maintenance cassette. Chapter 10 of
the user manual includes complete information about this wizard.
■Use the 'Configure system' wizard to check the network settings. When you do not
have a keyboard, mouse and monitor with your controller, you can also use the
'Configure system' wizard to clear the set memory. Chapter 4 of the user manual in-
cludes complete information about this wizard.
Use the user manual on the documentation CD-ROM to correct problems
When the information in this guide does not completely support you while you use the
Océ TCS500, refer to the user manual on the user documentation CD-ROM for more
information.
Chapter 1 - Self support tips (GB)6
Correct a problem

What to do when you are not satisfied
with the output quality
Achieve optimal output quality
Introduction
The Océ TCS500 offers 2 methods to check the print quality.
■Make a quality check print
■Make a demo print.
On the system information card on the on-line screen of the printer, use the lower softkey
for 'Demo print' (key 6 on the folded cover) to enter the menu with the quality check
print and the demo print.
Chapter 8 of the user manual includes a section about how to check the print quality.
When you are not satisfied with the output quality, use the following procedure
1. Make sure that you load and define the correct media type on the printer.
Load a media roll and use the 'Change media type' wizard to change the media type defined
on the system.
2. Make sure you define the correct media type for your job.
The following problems are never connected to media. Ignore the above steps for these
problems and directly continue with step 3. ‘Important points for the sending of print jobs’
on page 17
The length and width measurements are different from the original
The colored lines are not well aligned
Missing sections in lines or stepped lines
Missing parts of characters
Drop-out caused by nozzle problems.
Make sure you defined the correct print mode for your job. ‘Use the wizards to achieve
optimal output quality’ on page 13.
3. When you have defined the correct media and the correct print mode, and you are still
not satisfied with the output quality, use the wizards to achieve optimal output quality.
‘Use the wizards to achieve optimal output quality’ on page 13.
Note:
Chapter 8 of the user manual includes a table with recommended media types and print
modes for the different types of jobs.
Chapter 1 - Self support tips (GB) 7
Achieve optimal output quality

Note:
Chapter 8 of the user manual includes a table with a complete overview of the settings
and the methods to correct specific problems with the output quality.
Chapter 1 - Self support tips (GB)8
Achieve optimal output quality

Define the correct job settings for optimal output quality
Introduction
To get optimal output quality, define the correct print modes.
Use the following order to define the print modes.
1. Define the correct media settings.
The website http://supplies.oce.com includes information about the correct media settings
for your jobs.
2. Define the correct 'Color mode'.
3. Define the correct 'Print quality'.
Chapter 8 of the user manual includes information about the recommended job settings
for your jobs.
Definition
Define the correct color mode
Define the correct color mode#
ThenWhen
set the 'Color mode' to 'Color'The original is in color and the printed
output requirement is color
set the 'Color mode' to 'Grayscale'The original is in color and the printed
output requirement is grayscale
set the 'Color mode' to 'Grayscale'The original is grayscale
Define the correct print quality
Define the correct print quality mode#
ExampleThenWhen
Use this mode, for exam-
ple, to check if all the in-
formation is visible on the
printed output.
Set the 'Print quality' to
'Check'
Speed is the most impor-
tant requirement.
Use this mode, for exam-
ple, to approve bid-sets or
for internal releases of
drawings
Set the 'Print quality' to
'Release'.
The speed requirement
and the print quality re-
quirement are balanced.
Chapter 1 - Self support tips (GB) 9
Define the correct job settings for optimal output quality

ExampleThenWhen
Use this mode, for exam-
ple, to present drawings to
the customers.
Set the 'Print quality' to
'Presentation'
The quality is the most
important requirement.
How to correct typical inkjet artifacts
Use the print modes to correct typical inkjet artifacts#
ThenWhen
■Use coated media.
■Use the default drying time.
■Remove the printer from areas of high
humidity.
Ink saturation causes the media to cockle
■The media type defined on the printer
must be the same as media roll avail-
able on the printer. When the media
type defined on the printer is not the
same as the media available on the
printer, use the 'Change media type'
wizard to change the media type
■Use the 'Presentation' quality mode
■Use the 'Optimize print quality' wiz-
ard to correct the problem.
The print contains regular horizontal light
or dark bands
■Use the 'Presentation' quality mode
■Use the 'Optimize print quality' wiz-
ard to correct the problem.
The filled areas contain white stripes
■Use the 'Presentation' quality mode
■Use the 'Optimize print quality' wiz-
ard to correct the problem.
■When failing printheads cause this
problem, use the 'Replace printhead'
wizard to replace the failing print-
heads.
The colored lines are not well aligned or
blurred
Chapter 1 - Self support tips (GB)10
Define the correct job settings for optimal output quality
Other manuals for TCS500
2
Table of contents
Other Oce Printer manuals
Oce
Oce TCS400 Installation instructions

Oce
Oce ColorWave 600 User manual

Oce
Oce VarioPrint 2045-65 NC User manual

Oce
Oce PlotWave 300 User manual

Oce
Oce Colorado 1640 User manual

Oce
Oce ColorWave 300 User manual

Oce
Oce ColorWave 600 User manual

Oce
Oce TCS400 Installation instructions

Oce
Oce VarioPrint i Series User manual

Oce
Oce 9800 User manual