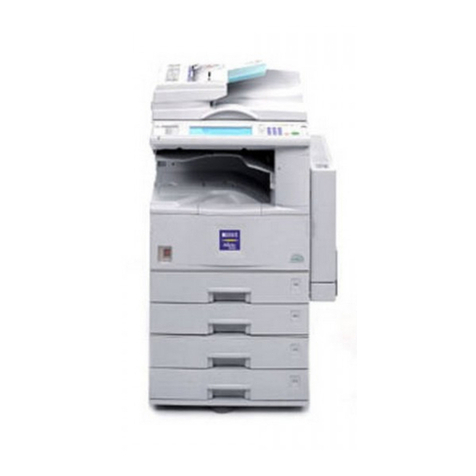
Oce im4512 User manual


INTRODUCTION
This manual explains the scanner function, the Internet fax function, and the metadata send function of the machine.
To use these functions, the following expansion kits must be installed.
Network scanner function: The network expansion kit and network scanner expansion kit must be installed.
Internet fax function: The network expansion kit (with hard drive), network scanner expansion kit and
Internet fax expansion kit must be installed.
Metadata send function:
The
network expansion kit (with hard drive),
network scanner expansion kit and
application integration module must be installed.
For other functions, see the following manuals.
Operation manual (general information and copier operation):
This contains safety precautions and general information such as the
procedures for loading paper, removing misfeeds, and using peripheral
equipment. It also provides detailed explanations of the procedures for using
the copy function.
Administrator settings guide: This explains the "administrator settings", which are used to configure a variety
of machine parameters to suit the aims and the needs of your workplace.
Operation manual for printer functions:
This provides detailed explanations of the procedures for using the printer
function.
NOTES
●For information on installing the drivers and software cited in this manual, please refer to the software setup
guide and the manuals that are provided with the expansion kits.
●Before using the network scanner feature, several settings must be established from the Web page. These
settings are explained from page 1-4 on. The settings must be established by the network administrator. Such
settings must be effected by the system administrator who has the special network related backgrounds.
●The explanations in this manual assume that the person who will install the product and the users of the product
have a working knowledge of Microsoft Windows.
●The explanations of screens and procedures in this manual are for Windows XP. The screens may vary
depending on your Windows version and settings.
●For information on the operating system, please refer to your operating system manual or the online Help
function.
●This manual assumes that several options have been installed.
●This manual assumes that the document filing function can be used. The document filing function can only be
used when the network expansion kit (with hard drive) is installed.
The display screens, messages, and key names shown in the manual may differ from those on the actual
machine due to product improvements and modifications.

0-1
TABLE OF CONTENTS
CHAPTER 1
BEFORE USING THE MACHINE AS
A NETWORK SCANNER
ABOUT THE NETWORK SCANNER FUNCTION...... 1-2
SETTINGS AND PROGRAMMING REQUIRED FOR
THE NETWORK SCANNER FEATURE..................... 1-4
●ACCESSING WEB PAGES ................................ 1-4
●ABOUT THE WEB PAGES (FOR USERS) ........ 1-5
●ABOUT THE WEB PAGES (FOR THE
ADMINISTRATOR) ............................................. 1-6
●BASIC SETTINGS FOR NETWORK SCANNING 1-7
●SETTING UP DESTINATION INFORMATION ... 1-8
●STORING SENDER INFORMATION
(Scan to E-mail) .................................................. 1-10
●SETTING UP INTERNET-FAX PARAMETERS . 1-10
●SETTING UP SERVERS .................................... 1-10
●PROTECTING INFORMATION PROGRAMMED
IN THE WEB PAGE ("Passwords") .................... 1-10
BASE SCREEN .......................................................... 1-11
CHAPTER 2
TRANSMISSION PROCEDURES
SENDING AN IMAGE................................................. 2-2
●SENDING AN IMAGE IN SCAN MODE.............. 2-2
●SENDING A FAX IN INTERNET FAX MODE..... 2-6
●SENDING AN INTERNET FAX FROM A
COMPUTER (PC-I-Fax)...................................... 2-10
DESTINATION INPUT METHODS ............................. 2-11
●SCANNING AND TRANSMITTING
A TWO-SIDED ORIGINAL.................................. 2-14
SCANNING SETTINGS (ORIGINAL SIZE,
EXPOSURE, RESOLUTION AND FILE FORMAT) .... 2-15
●MANUALLY SETTING THE SCANNING SIZE... 2-15
●STORING, DELETING, AND USING ORIGINAL
SIZES.................................................................. 2-16
●ENLARGEMENT TRANSMISSION .................... 2-17
●SELECTING THE EXPOSURE .......................... 2-18
●SELECTING THE RESOLUTION ....................... 2-18
●SELECTING THE FILE FORMAT....................... 2-19
CHAPTER 3
CONVENIENT SCANNER FUNCTIONS
SPECIAL MODES....................................................... 3-2
●PROGRAMMING FREQUENTLY USED
OPERATIONS (PROGRAM)............................... 3-3
●ERASING EDGE SHADOWS (ERASE).............. 3-4
●TRANSMITTING A DIVIDED ORIGINAL (DUAL
PAGE SCAN) ...................................................... 3-5
●AUTOMATIC TRANSMISSION AT A
SPECIFIED TIME (TIMER TRANSMISSION)..... 3-6
●TRANSMITTING TWO ORIGINAL PAGES AS A
SINGLE PAGE (2IN1) ......................................... 3-7
●TRANSMITTING THE FRONT AND BACK
SIDES OF A CARD ON ONE SHEET OF
PAPER (CARD SHOT)........................................ 3-8
●TRANSMITTING A LARGE NUMBER OF
PAGES (JOB BUILD).......................................... 3-10
●CHANGING THE PRINT SETTINGS FOR THE
TRANSACTION REPORT (TRANSACTION
REPORT) ............................................................ 3-11
PRIORITY TRANSMISSION OF A STORED JOB...... 3-12
CANCELING AN SCAN TRANSMISSION.................. 3-13
CHAPTER 4
INTERNET FAX RECEPTION FUNCTION
RECEIVING AN INTERNET FAX................................ 4-2
●MANUALLY RECEIVING INTERNET FAXES .... 4-3
TRANSFERRING RECEIVED INTERNET-FAXES
TO ANOTHER MACHINE WHEN PRINTING IS NOT
POSSIBLE (FORWARDING FUNCTION)................... 4-4
●USING THE TRANSFER FUNCTION................. 4-4
FORWARDING RECEIVED INTERNET FAXES TO AN
E-MAIL ADDRESS (INBOUND ROUTING SETTINGS)
4-5
●
CONFIGURING INBOUND ROUTING SETTINGS
4-5

TABLE OF CONTENTS
0-2
CHAPTER 5
METADATA DELIVERY
METADATA DELIVERY (DATA ENTRY) ................... 5-2
PREPARATIONS FOR METADATA TRANSMISSION.
5-3
●SETTINGS REQUIRED IN THE WEB PAGES... 5-3
●METADATA TRANSMISSION FOR SCAN TO
DESKTOP........................................................... 5-3
TRANSMITTING METADATA .................................... 5-4
●METADATA FIELDS........................................... 5-6
CHAPTER 6
STORING DESTINATION INFORMATION
FROM THE OPERATION PANEL
STORING FROM THE OPERATION PANEL............. 6-2
●STORING ONE-TOUCH KEYS (only addresses
for Scan to E-mail and Internet-Fax)................... 6-2
●EDITING AND DELETING ONE-TOUCH KEYS 6-4
●PROGRAMMING A GROUP KEY ...................... 6-5
●EDITING AND DELETING GROUP KEYS ......... 6-6
●STORING SENDER INFORMATION ................. 6-7
●EDITING AND DELETING SENDER
INFORMATION................................................... 6-9
●STORING A GROUP INDEX .............................. 6-10
●PRINTING PROGRAMMED INFORMATION ..... 6-10
●STORING A PROGRAM..................................... 6-11
●EDITING AND DELETING PROGRAMS............ 6-12
CHAPTER 7
TROUBLESHOOTING
TROUBLESHOOTING ................................................ 7-2
●IF YOUR E-MAIL IS RETURNED ....................... 7-3
●IF A TRANSMISSION ERROR OCCURS........... 7-3
●CHECKING THE IP ADDRESS .......................... 7-4
●IMPORTANT POINTS WHEN USING SCAN TO
E-MAIL ................................................................ 7-5
CHAPTER 8
ADMINISTRATOR SETTINGS
ADMINISTRATOR SETTINGS.................................... 8-2
●ADMINISTRATOR SETTING LIST ..................... 8-2
●USING THE ADMINISTRATOR SETTINGS....... 8-2
●ABOUT THE SETTINGS..................................... 8-4
●PRINTING OUT SETTINGS................................ 8-10
CHAPTER 9
APPENDIX
NETWORK SCANNER / INTERNET FAX
SPECIFICATIONS ......................................................
9-2
NUMBER OF ITEMS THAT CAN BE STORED
WHEN A HARD DRIVE IS INSTALLED, AND WHEN
NOT INSTALLED ........................................................
9-3

1-1
CHAPTER 1
BEFORE USING THE
MACHINE AS A NETWORK
SCANNER
This chapter provides information that you should know before using the
machine as a network scanner. Be sure to read this chapter before using
the network scanner function.
Page
ABOUT THE NETWORK SCANNER FUNCTION.........................................1-2
SETTINGS AND PROGRAMMING REQUIRED FOR THE NETWORK
SCANNER FEATURE....................................................................................1-4
●ACCESSING WEB PAGES ...................................................................1-4
●ABOUT THE WEB PAGES (FOR USERS)............................................1-5
●ABOUT THE WEB PAGES (FOR THE ADMINISTRATOR) ..................1-6
●BASIC SETTINGS FOR NETWORK SCANNING .................................1-7
●SETTING UP DESTINATION INFORMATION ......................................1-8
●STORING SENDER INFORMATION (Scan to E-mail)........................1-10
●SETTING UP INTERNET-FAX PARAMETERS...................................1-10
●SETTING UP SERVERS .....................................................................1-10
●PROTECTING INFORMATION PROGRAMMED IN THE WEB
PAGE ("Passwords")............................................................................1-10
BASE SCREEN ...........................................................................................1-11

1-2
ABOUT THE NETWORK SCANNER FUNCTION
The network scanner expansion kit adds network scanner functionality to your machine. A machine with the network
scanner functionality can scan a paper document, photograph, or other printed information into a data file, and send
the file to a file server or personal computer over a corporate network (intranet) or the Internet.
The network scanner function provides the following scanning modes.
☞SENDING AN IMAGE IN SCAN MODE (page 2-2)
Scan to E-mail
The scanned file is sent to an e-mail address.
Scan to FTP
The scanned file is sent to a specified directory of an FTP server.
When the file is sent, it is also possible to send an e-mail to a previously stored e-mail
address to inform the recipient of the location of the file. (This is called "Scan to FTP
(Hyperlink)".).
Scan to Desktop
The scanned file is sent to a specified folder on your computer.
To use Scan to Desktop, software must be installed from the "Desktop Document
Manager/Network Scanner Utilities" CD-ROM that accompanies the network scanner
expansion kit. For the system requirements of the software, see the manual (PDF format)
or the Readme file on the CD-ROM. For the procedures for installing the software, see
the "Desktop Document Manager Installation Guide".
Scan to Desktop can only be used with computers that are running Windows 98 Second
Edition/Me/2000 Professional/XP Professional/XP Home Edition/Vista.
Scan to Network Folder
The scanned file is sent to a shared folder on a Windows computer on the same network
as the machine.
Transmission is possible to computers running the following operating systems:
Windows 98/Me/NT 4.0/2000/XP/Server 2003/Vista
Scan modes

ABOUT THE NETWORK SCANNER FUNCTION
1-3
☞SENDING A FAX IN INTERNET FAX MODE (page 2-6)
Internet fax transmission
The scanned file is sent as an Internet fax. Reception of Internet faxes is also possible.
☞METADATA DELIVERY (page 5-1)
Metadata delivery
The application integration module can be combined with the network scanner function to append a metadata* file
to a scanned image file. (This is called metadata delivery.)
Information entered using the touch panel or automatically generated by the machine can be sent to a directory on
an FTP server or an application on a computer as a metadata file in XML format.
* Metadata is information about a file, how it is to be processed, and its relation to other objects.
Internet fax mode
Data entry mode

1-4
SETTINGS AND PROGRAMMING REQUIRED
FOR THE NETWORK SCANNER FEATURE
To use the Network Scanner feature, settings for the SMTP server, DNS server, and destination addresses must be
established.
To establish the settings, use a computer that is connected to the same network as the machine to access the
machine's Web page. The Web page can be displayed with your Web browser (Internet Explorer 6.0 or higher
(Windows), Netscape Navigator 7.0 or higher, or Safari 1.2 or higher (Macintosh)).
ACCESSING WEB PAGES
Use the following procedure to access the Web pages.
1Open the Web browser on your computer.
Supported browsers:
Internet Explorer 6.0 or higher (Windows)
Netscape Navigator 7.0 or higher
Safari 1.2 or higher (Macintosh)
2
In the "Address" field of your Web browser,
enter the IP address of the machine as a
URL.
Input the IP address
previously specified in
this product.
If you do not know the IP
address, see page 7-4.
When the connection is completed, the following
Web page will appear in your Web browser.

SETTINGS AND PROGRAMMING REQUIRED FOR THE NETWORK SCANNER FEATURE
1-5
ABOUT THE WEB PAGES (FOR USERS)
When you access the user Web pages in the machine, the following page will appear in your browser.
A menu frame appears on the left side of the page. When you click an item in the menu, a screen appears in the right
frame that allows you to configure settings for that item.
When you have finished configuring settings, be sure to click [Submit] to save them. For explanations of the settings,
click [General] under [Help] in the menu frame.
(1) Menu frame
Click a setting in the menu to configure it.
(2) Destination
Store, edit and delete transmission destinations.
(3) Sender
Store, edit and delete senders.
(4) Admin Mode
To open the Web pages for the administrator, click
here and then enter the administrator's user name
and password.
●ABOUT THE WEB PAGES (FOR THE
ADMINISTRATOR) (next page)
●PROTECTING INFORMATION PROGRAMMED
IN THE WEB PAGE ("Passwords") (page 1-10)
To use the network scanner function, you must store transmission destinations (pages 1-8 - 1-9) and program your
sender's name (page 1-10).
(1)
(2)
(3)
(4)

SETTINGS AND PROGRAMMING REQUIRED FOR THE NETWORK SCANNER FEATURE
1-6
ABOUT THE WEB PAGES (FOR THE ADMINISTRATOR)
In addition to the menus that appear for users, other menus that can only be used by the administrator appear in the
administrator Web pages.
A menu frame appears on the left side of the page. When you click an item in the menu, a screen appears in the right
frame that allows you to configure settings for that item. Settings that can only be configured by the administrator are
explained here.
(1) Network scanning
Configure basic settings for the network scanner
function.
(2) i-Fax
This is used to configure settings for sending and
receiving Internet faxes.
(3) Quick Setup
This is used to configure basic settings for the
SMTP, DNS, and LDAP servers.
(4) Services
This is used to configure advanced SMTP and
DNS server settings as needed for each
transmission method.
(5) LDAP
This is used to configure advanced settings for
global address searches.
To use the network scanner function, you must configure basic network scanner settings (pages 1-7 - 1-8).
(1)
(2)
(3)
(4)
(5)
Other manuals for im4512
5
This manual suits for next models
1
Table of contents
Other Oce All In One Printer manuals

Oce
Oce VarioLink 2221 User manual

Oce
Oce CS7400 Series User manual

Oce
Oce Linium PRO C6500 User manual

Oce
Oce cm3521 User manual

Oce
Oce VarioLink 2650cp User manual

Oce
Oce cm3522 User manual

Oce
Oce fx2080 User manual

Oce
Oce VarioPrint 2090 User manual

Oce
Oce VarioLink 2221 User manual

Oce
Oce VarioLink 4522c User manual