OAKWORKS SISSEL Portal Pro User manual
I Gebrauchsanweisung
I Instructions for use
I Mode d’emploi
I Gebruiksaanwijzing
SISSEL®Portal Pro
Therapy Chair
by Oakworks
30950 GA Portal Pro_GA Hydrotemp 02.07.15 10:06 Seite 1
Product use description
The SISSE ®Portal Pro Therapy Chair is a multipurpose, portable chair use primarily for therapeutic
massage treatment. It is intended to be used by a therapist in a professional environment. No special
training is required to use this chair. The therapist should read and understand this entire manual before
use with a patient. There are no known contradictions to the use of this equipment.
Symbol identification
This symbol, when used in this manual and on product labels, represents a caution warning.
Be sure to read and comply with all precautions and warnings.
Important safety instructions – READ AND SAVE THESE INSTRUCTIONS
IWeight imit: (patient and accessories) 159 kg. Do not exceed.
IThe Chair is designed to be a stand-alone device. This chair must not be modified or incorporated
into any other equipment.
IAs with any folding mechanism, there are potential pinch points around the chair.
Be careful not to trap fingers when folding.
IDo not stand on this chair.
IUse this chair on level ground only.
IUse this furnishing only for its intended use as described in these instructions.
Do not use attachments not recommended by the manufacturer.
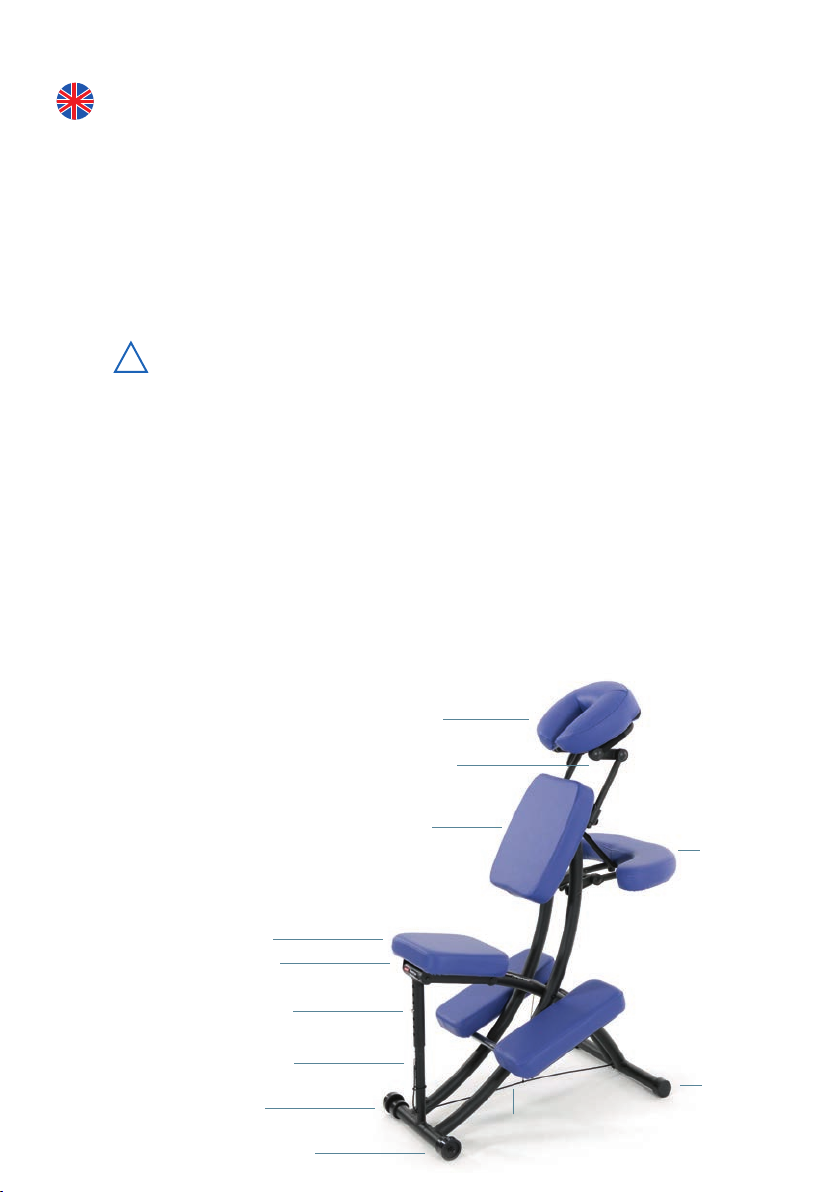
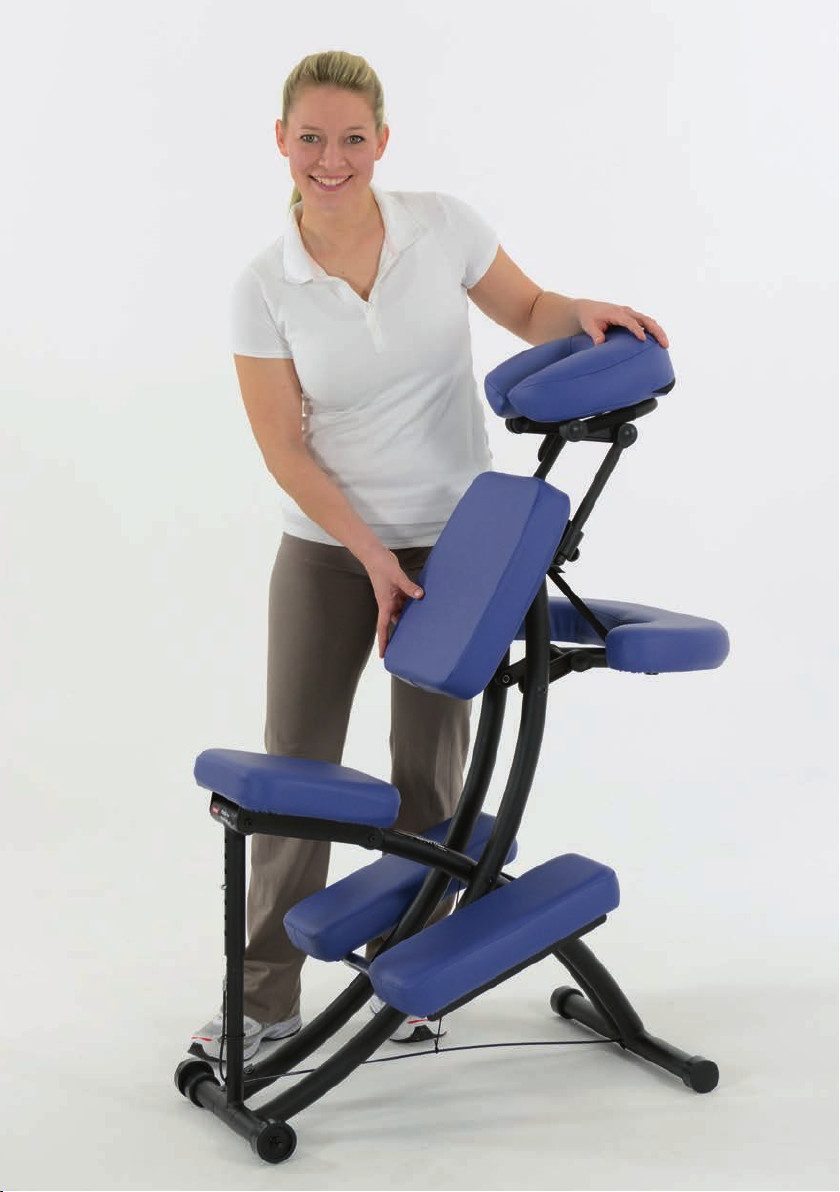
Product description
Accessories:
ISternum Pad
ICarry strap
ICarry bag
IVarious Face Rest Crescents
SISSEL®Portal Pro Therapy Chair
by Oakworks
cam locks
face rest
arm rest
front feet
cable
wheels
wheels
“Z“ clip
seat tube
seat support
seat
chest
pad
!
30950 GA Portal Pro_GA Hydrotemp 02.07.15 10:07 Seite 7
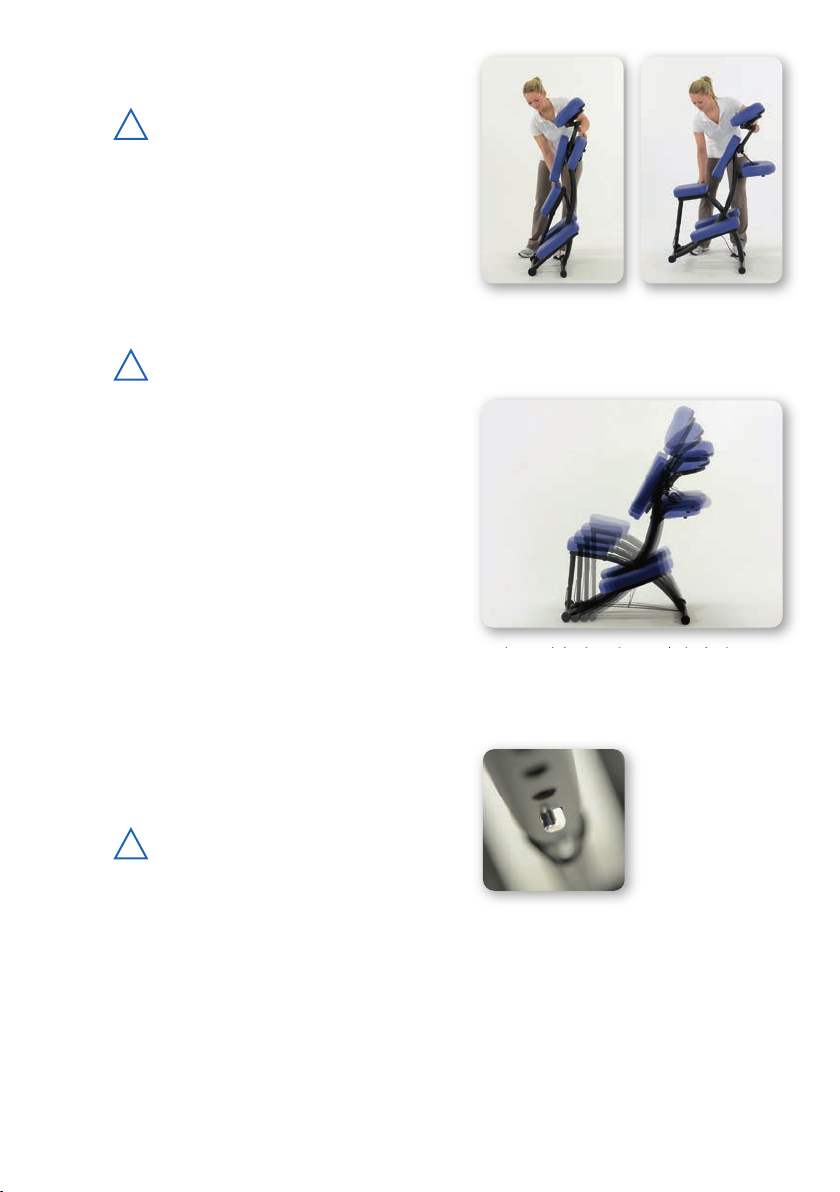
Setting up your chair
Make sure the cable is fully extended before
sitting on the chair.
1. ean your chair forward and lift the
back of the seat until fully open.
2. Remove the plastic covering from the wheels and feet.
Chair height, seat angle & height adjustment
These adjustments can only be made
when no one is on the chair.
Cable system changes the height of the chair.
To change cable setting:
1. ift seat to relax tension on the cable and remove the
“Z” clip from the seat hole.
2. Insert the “Z” clip into the correct hole and pull back on
seat tube until the cable is taut. The “Z” clip should lay
flat against the seat tube.
Raising and lowering the seat height
also changes the seat angle.
A good basic seat position is when the seat is angled downward toward the front feet, with the back
of the seat higher than the front. umbar strain can be reduced by raising the seat height one to two
holes.
To change the seat height
Push in button on seat tube while raising or lowering the
seat. Release button when proper height is achieved.
Be sure the push button is fully engaged and the
seat tube is not resting on “Z” clip before sitting on
the chair.
!
!
!
30950 GA Portal Pro_GA Hydrotemp 02.07.15 10:07 Seite 8
Arm rest adjustments
The arm rest is designed for the weight of your patients forearms. Do not allow your patients
to push against the arm rest to lift themselves out of the chair.
To change the arm rest position
1. Pull the buckle tab to lengthen the strap. Release the
cam lock. ift or lower arm rest until your patient’s
forearms rest comfortably on the pad and his/her
shoulders are comfortably rounded.
2. ock cam lock and tighten strap by pulling on it.
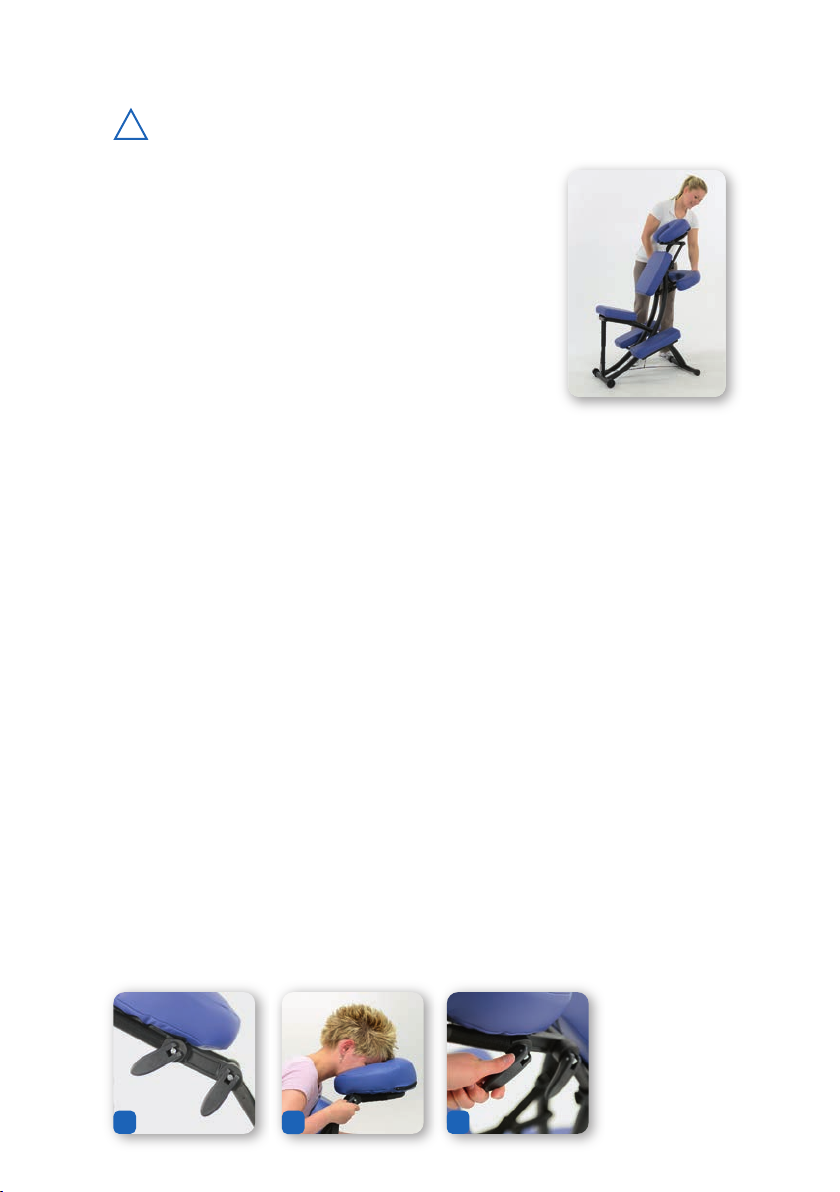
Helping your patient onto the chair
IHave your patient stand on the right side of the chair and grasp
the chair frame just above the chest pad for support.
IHave the patient straddle the seat and place left knee on the left
knee pad (farthest away from their body).
IYour patient can then gradually begin to sit down. Once seated,
the patient can put right knee on the right knee pad.
IYou can then make the proper adjustments to the face and arm
rests for proper patient comfort and positioning.
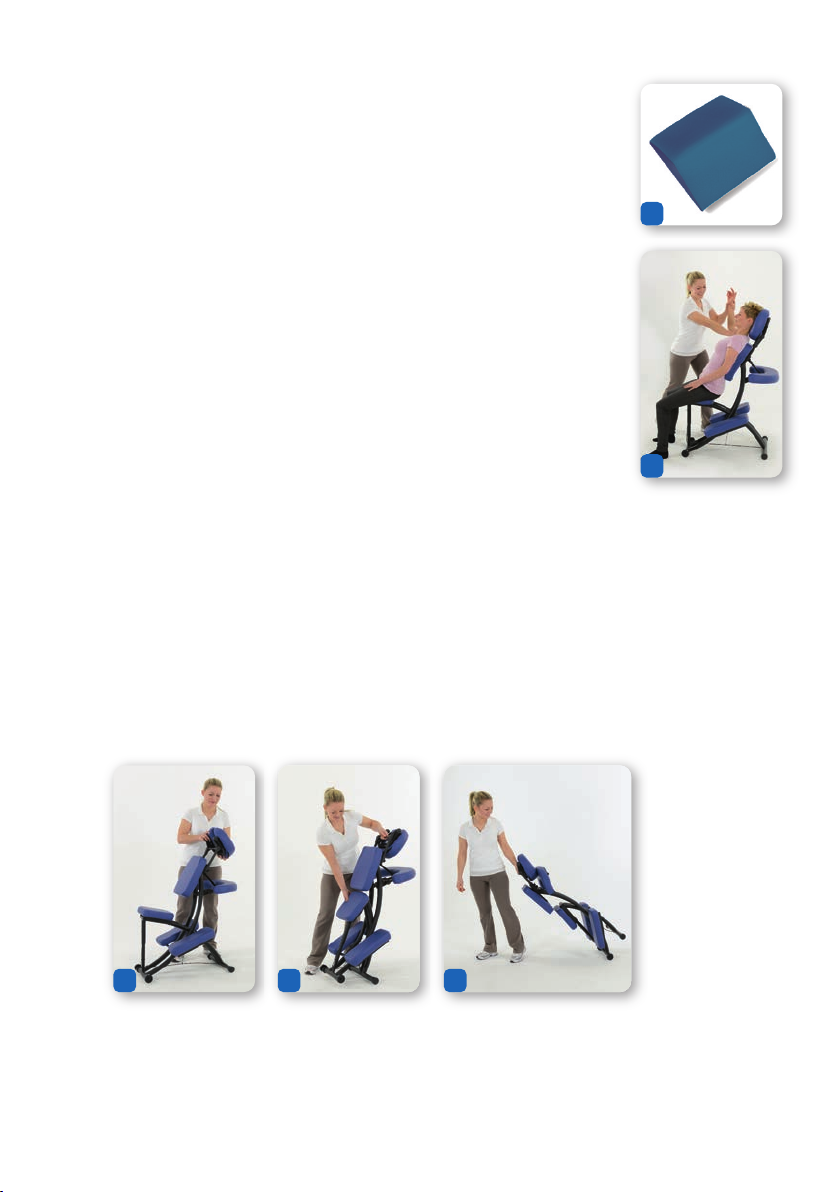
Face rest adjustments for optimal patient comfort
Oakworks Quick ock™ Face Rest has virtually unlimited positioning.
1. Show your patient how to get on the chair.
2. Release the cam locks and knobs on the face rest. (Fig.1)
3. Ask your patient to sit down and hold onto the face rest on the
hook and loop fastener on the sides of the “U” tube. (Fig.2)
4. Tell your patient to pull the face rest toward his/her forehead until it rests comfortably
on the pad.
5. Have your patient lean forward, letting the chair support his/her weight until in a relaxed position.
6. ock the cam locks first and then tighten the knobs.
• Do not over tighten the knobs - too much force may cause stripping. (Fig.3)
• The face rest can be moved up and down after loosening the knobs and angled after releasing the
cam locks.
• The face rest platform cam locks are reversible.
123
!
30950 GA Portal Pro_GA Hydrotemp 02.07.15 10:07 Seite 9
Tips for perfect positioning
• Adjust seat height higher for those short patients who are having trouble getting
comfortably into the face rest.
• Reduce knee flexion by raising the seat and the chair height. Some patients may
find it more comfortable to put their feet flat on the floor.
• Short, heavy or large-breasted patients will be more comfortable with the face
rest moved toward them, over the chest pad.
• The Sternum Pad (Fig. 1) helps you maximize the effects of treatments. Position
the sternum pad vertically when doing shoulder work or for large-breasted
patients. Position the sternum pad horizontally with the ridge just below the
breasts for pregnant women.
• Use the sternum pad for supporting the cervical region. Replace the face-rest
pad with the sternum pad. Release the cam locks and knobs, and move the
sternum pad so that the ridge of the sternum pad supports the cervical spine.
You may have to lower the seat or provide a foot stool for shorter patients.
• To seat patients backwards in chair, turn the face pad around so that the curve of
the “U” supports your patient’s neck and lower the seat so that it is parallel to
the floor. (Fig. 2)
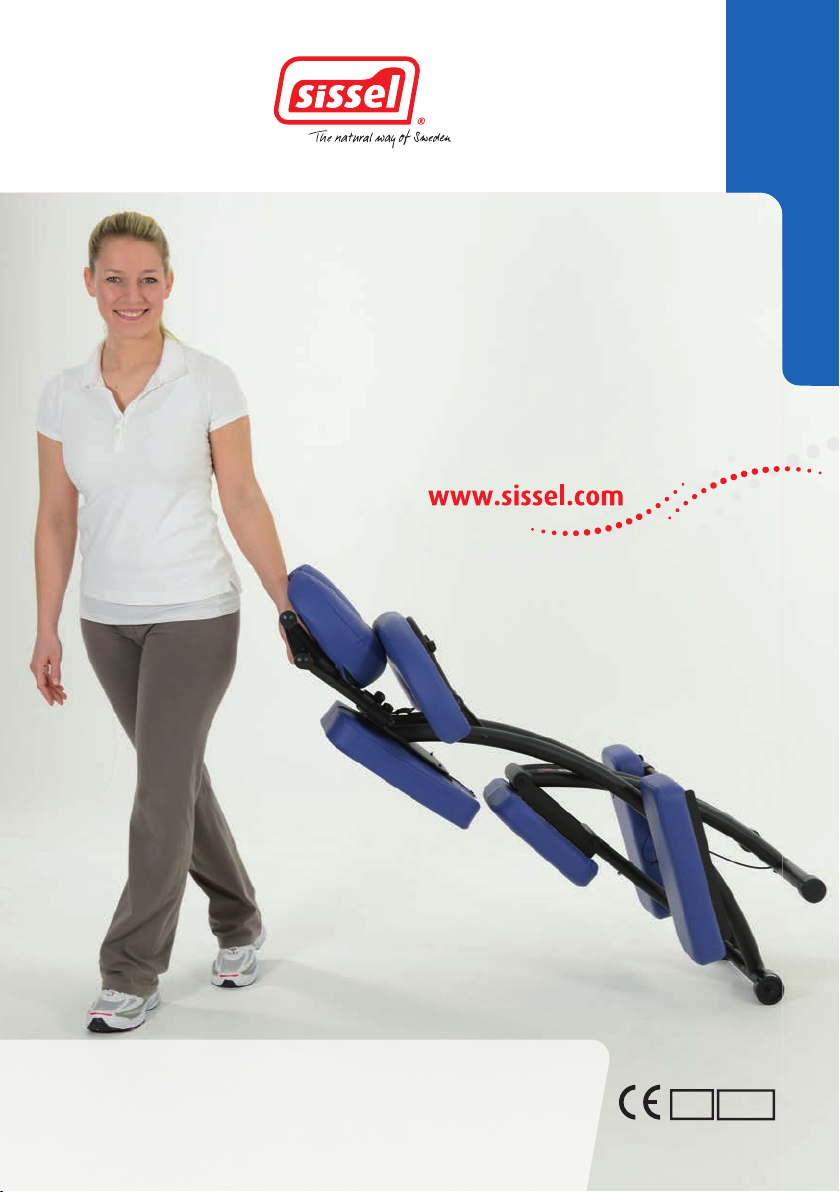
Folding your chair
1. Release the arm-rest cam lock and the strap to fold the arm rest. ock the cam.
2. Fold down the face rest and relock the cam locks and tighten the knobs (Fig.1).
3. Put the push button on the seat tube into the third hole from the bottom.
4. ean the chair forward and push in the seat. The chair will fold (Fig.2).
Push on the seat to lock it in the folded position.
5. The massage chair has wheels, so you can pull it along smooth surfaces by holding onto the face
rest. Use the spacer bar on the face rest as a handle for pulling your chair. Stand behind the seat
and grab the spacer bar. Pull it toward you.
6. Your chair is designed to protect the pads by keeping them far off the floor as you pull it (Fig.3).
The wheels will roll on any surface.
1
2
12 3
30950 GA Portal Pro_GA Hydrotemp 02.07.15 10:07 Seite 10
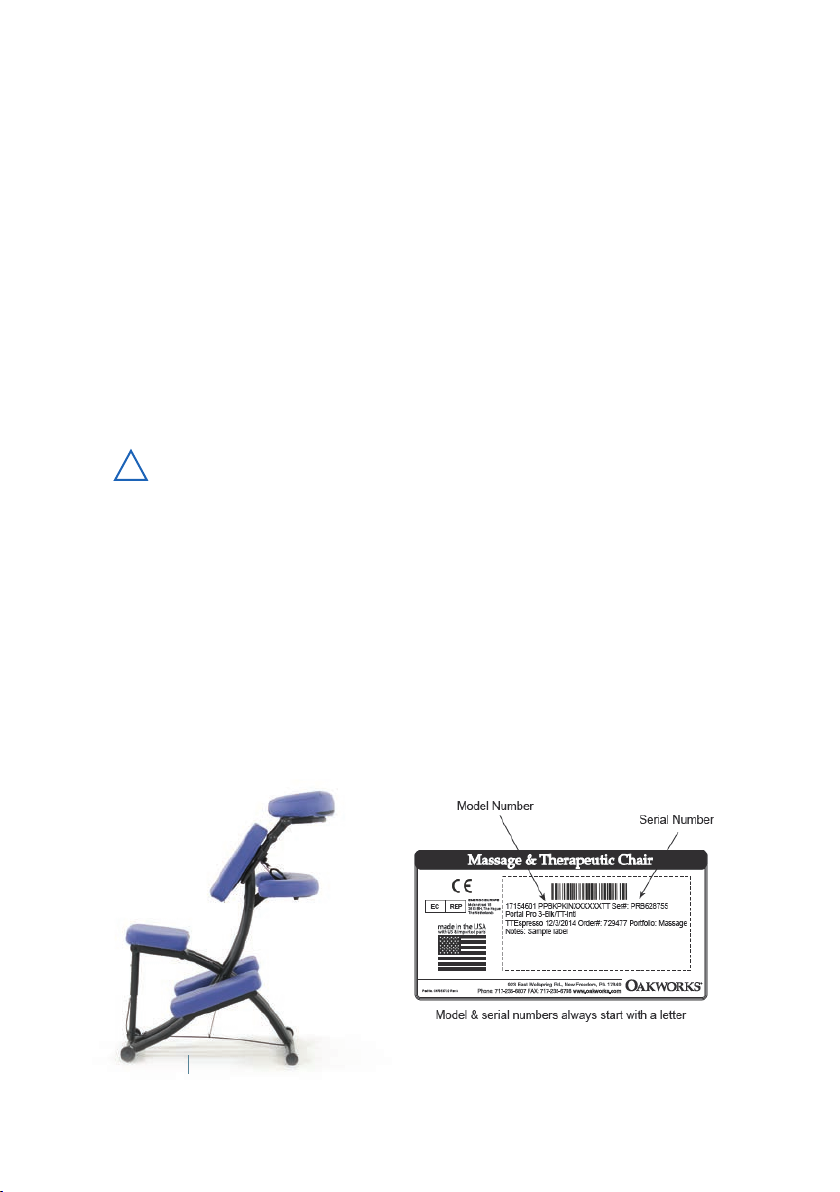
The model & serial numbers are located
on the underside of the leg rest section.
Cleaning & disinfection
Care of your chair
It is important to visually inspect your chair on a quarterly basis to make sure there are no missing
parts and that all parts are in good working order without excessive wear. Check all nuts, bolts and
screws. Over time they may work their way loose, leading to an unsafe condition. Tighten any of
these if they are loose. Inspect the cable that is used for adjusting the height of the chair for signs of
wear. Replace the cable if there are signs of fraying. The chair should not be used if any problems are
found until they are fixed.
The best way to protect your product is by using sheets, fleeces, and accessory covers that prevent oil
and body contact from occurring. Your table should be cleaned and/or disinfected only as needed.
We recommend cleaning your upholstery fabric to protect it against oil stains and dirt which will
cause cracking and permanent stains over time. Clean your upholstered items when needed using a
mild solution of 4:1 diluted non-alcohol cleaner or some other non-abrasive cleaner. For disinfecting
purposes you may use Protex, MadaCide, Accell TB, Virox (Canada) or a diluted 1/100 bleach solution.
Dry the table immediately after cleaning to remove excess cleaning solution.
Damage caused by cleaners will not
be covered under the warranty.
Using citrus based cleaners or other strong cleaners, such as alcohol, acetone, higher concentrations
of bleach or other products that contain high concentrations of these substances, can shorten the life
of your fabric, or discolor it.
Small rips are easily repaired with V P. Major vinyl damage may require pad replacement.
DO NOT store in temperatures below 0° C or above 35° C. Extreme hot and cold temperatures will
damage the upholstery fabric and may cause cold-cracking, brittleness and stretching. Always keep
your chair away from heaters, electrical appliances and direct sunlight.
!
30950 GA Portal Pro_GA Hydrotemp 02.07.15 10:07 Seite 11
30950 GA Portal Pro_GA Hydrotemp 02.07.15 10:08 Seite 22
Distributor
SISSE ®GmbH
Bruchstrasse 48
D-67098 Bad Dürkheim
Germany
AE 07 V1
Manufacturer
Oakworks®Inc.
923 East Wellspring Road New Freedom, PA 17349
www.oakworksmed.com
EC
REP
Emergo Europe
Molenstraat 15 • 2513 BH, The Hague
The Netherlands
30950 GA Portal Pro_GA Hydrotemp 02.07.15 10:08 Seite 24
Table of contents
Other OAKWORKS Massager manuals

OAKWORKS
OAKWORKS Marina User manual

OAKWORKS
OAKWORKS Antigua User manual

OAKWORKS
OAKWORKS ButterflyCushion User manual

OAKWORKS
OAKWORKS PORTAL PRO User manual

OAKWORKS
OAKWORKS PORTAL LIGHT User manual

OAKWORKS
OAKWORKS PORTAL LIGHT User manual

OAKWORKS
OAKWORKS Clodaghl User manual

OAKWORKS
OAKWORKS Celesta Gemini CLODAGH User manual

OAKWORKS
OAKWORKS PerformaLift Series User manual

OAKWORKS
OAKWORKS Portal Pro User manual


