Newco LCD-TCH Instruction Manual

Lcd Touch
Operating Instruction Manual
Model LCD-TCH
Including Touchless QR Code
Capabilities
1-800-325-7867
3650 NEW TOWN BLVD ST. CHARLES MO 63301
WWW.NEWCOCOFFEE.COM
PN 122117 REV.
2
-
25
-
22 DB

2
Table of Contents
Newco Warranty ..................................................... 4
Machine Dimensions & Specifications ................ 5
Machine Features .................................................. 6
Plumbing Connections .......................................... 7
Electrical Hook-Up ................................................. 7
Installation Instructions ........................................ 8
Product Installation Procedure ............................. 9
Machine Startup Instructions
.............................. 10
Brewing Drinks
..................................................... 11
Drink Submenu
.................................................... 12
Custom Logo-Wi-Fi Setup ................................... 17
Install Custom Logo (Sleep Screen) .................. 18
Programming QR Codes ..................................... 21
Cleaning & Sanitizing Instructions ..................... 26
Cleaning Instructions .......................................... 27
Weekly Sanitizing Instructions ........................... 28
Service Notes & Troubleshooting ...................... 29
Wiring Diagram 120 VAC ..................................... 31
Wiring Diagram 240 VAC ..................................... 32

3
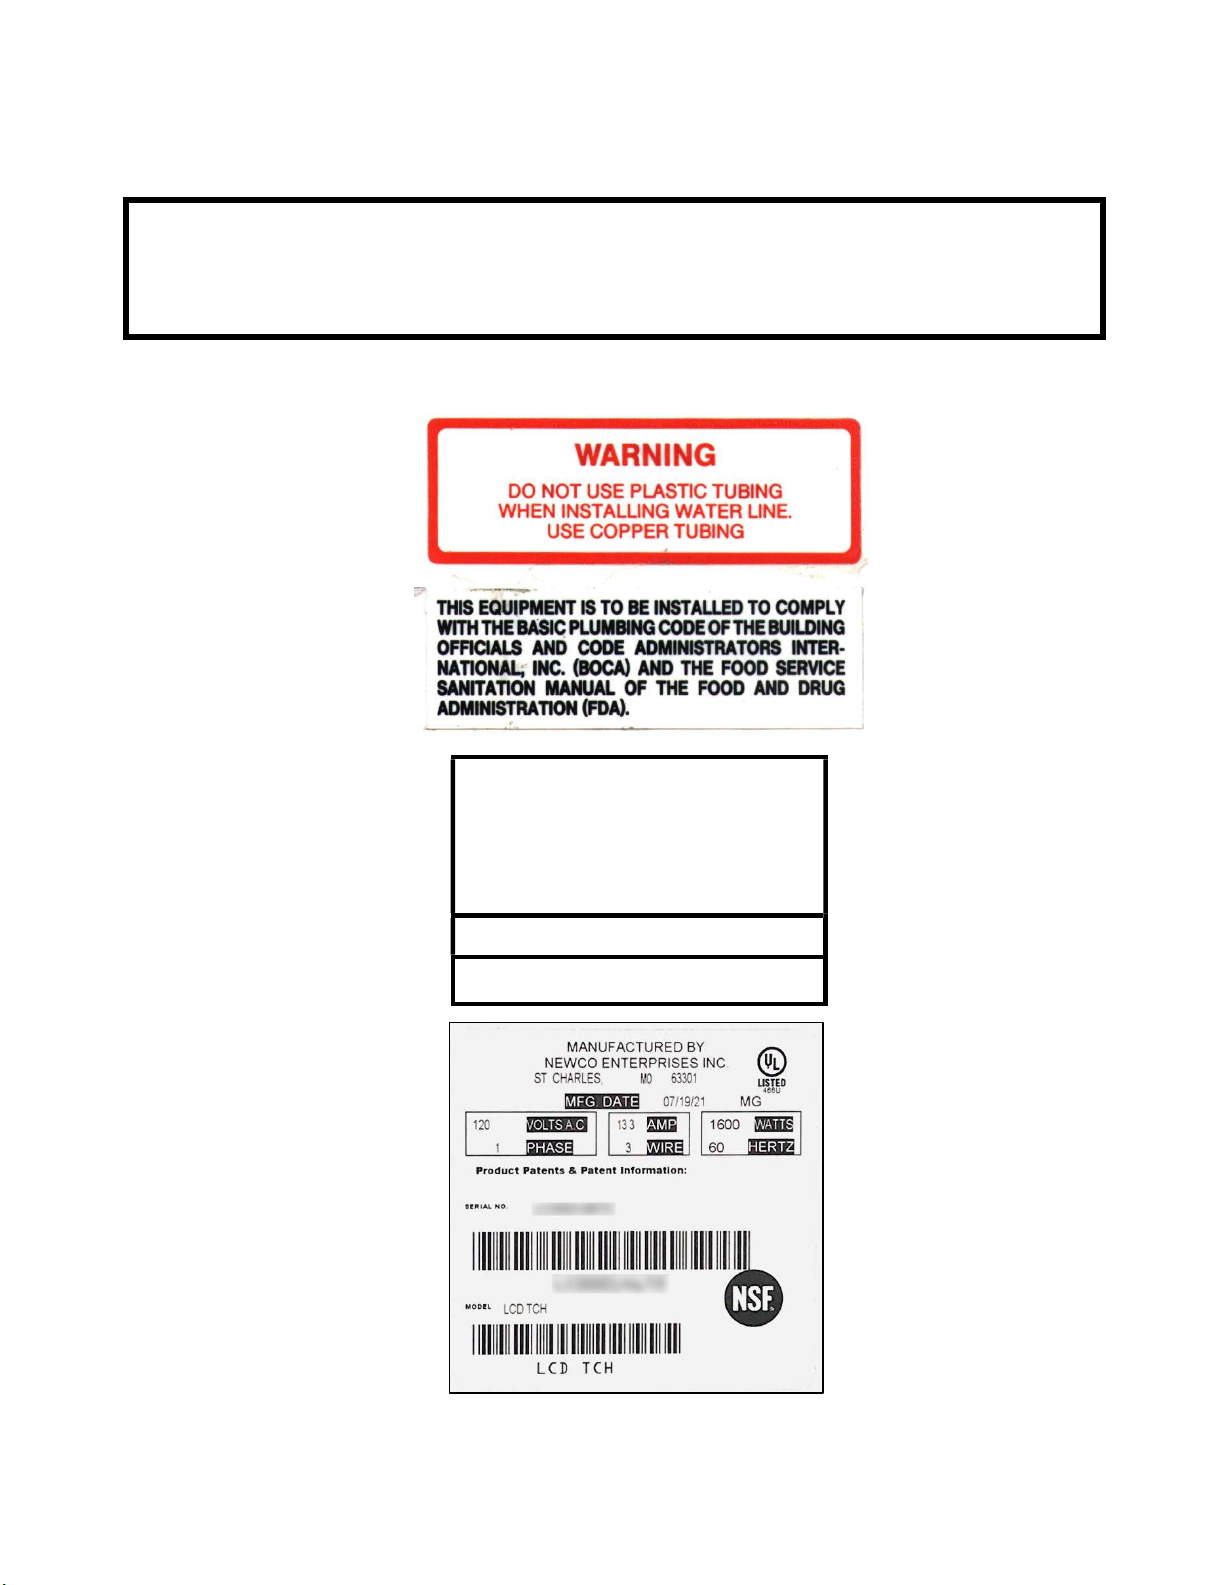
Warning Labels
NOTICE: Read and follow all notices posted on this machine.
Do not damage or destroy these notices as they are for your
protection
! WARNING
DO NOT OVERLOAD CIRCUIT.
ALWAYS ELECTRICALLY GROUND THE
CHASSIS OR ADAPTOR PLUG.
DO NOT DEFORM PLUG OR CORD.
FOLLOW NATIONAL AND LOCAL
ELECTRICAL CODES.
KEEP COMBUSTIBLES AWAY.
FAILURE TO COMPLY RISKS EQUIPMENT
DAMAGE, FIRE OR SHOCK HAZARD.
READ THE ENTIRE OPERATING
MANUALBEFORE USING THIS PRODUCT

4
Newco Warranty
WARRANTY
This warranty supersedes all other previous warranties that are currently in manuals.
Newco warrants equipment manufactured by it for 1 year parts and labor.
Accessories, Dispensers, and Display Tablets - 1 Year parts only.
Electronic Circuit and Control Boards- 3 years parts, 1 year labor.
Equipment manufactured by others and distributed by Newco-please see
original equipment manufacturers warranty, Newco will follow.
These warranty periods run from the date of sale Newco warrants that the equipment
manufactured by it will be commercially free of defects in material and workmanship
existing at the time of manufacture and appearing within the applicable warranty
period. This warranty does not apply to any equipment, component or part that was not
manufactured by Newco or that, in Newco’s judgment, has been affected by misuse,
neglect, alteration, improper installation or operation, relocation or reinstallation,
improper maintenance or repair, incorrect voltage applied to the unit at any time,
damage or casualty. This warranty does not apply to any equipment failures related to
poor water quality, excessive lime and chlorine and non periodic cleaning and
descaling. Warranty is null and void if muriatic or any other form of hydrochloric acid is
used for cleaning or deliming. In addition, this warranty does not apply to replacement
of items subject to normal use including but not limited to user replaceable parts such
as faucet seat cups, sight gauge tubes, washers, o-rings, tubing, seals and gaskets.
This warranty is conditioned on the Buyer 1) giving Newco prompt notice of any claim
to be made under this warranty by telephone at (800) 556-3926 or by writing to 3650
New Town Blvd, Saint Charles, MO 63301; 2) if requested by Newco, shipping the
defective equipment prepaid to an authorized Newco service location; and 3) receiving
prior authorization from Newco that the defective equipment is under warranty.
THE FOREGOING WARRANTY IS EXCLUSIVE AND IS IN LIEU OF ANY OTHER
WARRANTY, WRITTEN OR ORAL, EXPRESS OR IMPLIED, INCLUDING, BUT NOT
LIMITED TO, ANY IMPLIED WARRANTY OF EITHER MERCHANTABILITY OR
FITNESS FOR A PARTICULAR PURPOSE. The agents, dealers or employees of
Newco are not authorized to make modifications to this warranty or to make additional
warranties that are binding on Newco. Accordingly, statements by such individuals,
whether oral or written, do not constitute warranties and should not be relied upon.
If Newco determines in its sole discretion that the equipment does not conform to the
warranty, Newco, at its exclusive option while the equipment is under warranty, shall
either 1) provide at no charge replacement parts and/or labor (during the applicable
parts and labor warranty periods specified above) to repair the defective components,
provided that this repair is done by a Newco Authorized Service Representative; or 2)
shall replace the equipment or refund the purchase price for the equipment.
THE BUYER’S REMEDY AGAINST NEWCO FOR THE BREACH OF ANY OBLIGATION
ARISING OUT OF THE SALE OF THIS EQUIPMENT, WHETHER DERIVED FROM
WARRANTY OR OTHERWISE, SHALL BE LIMITED, AT NEWCO’S SOLE OPTION AS
SPECIFIED HEREIN, TO REPAIR, REPLACEMENT OR REFUND.

5
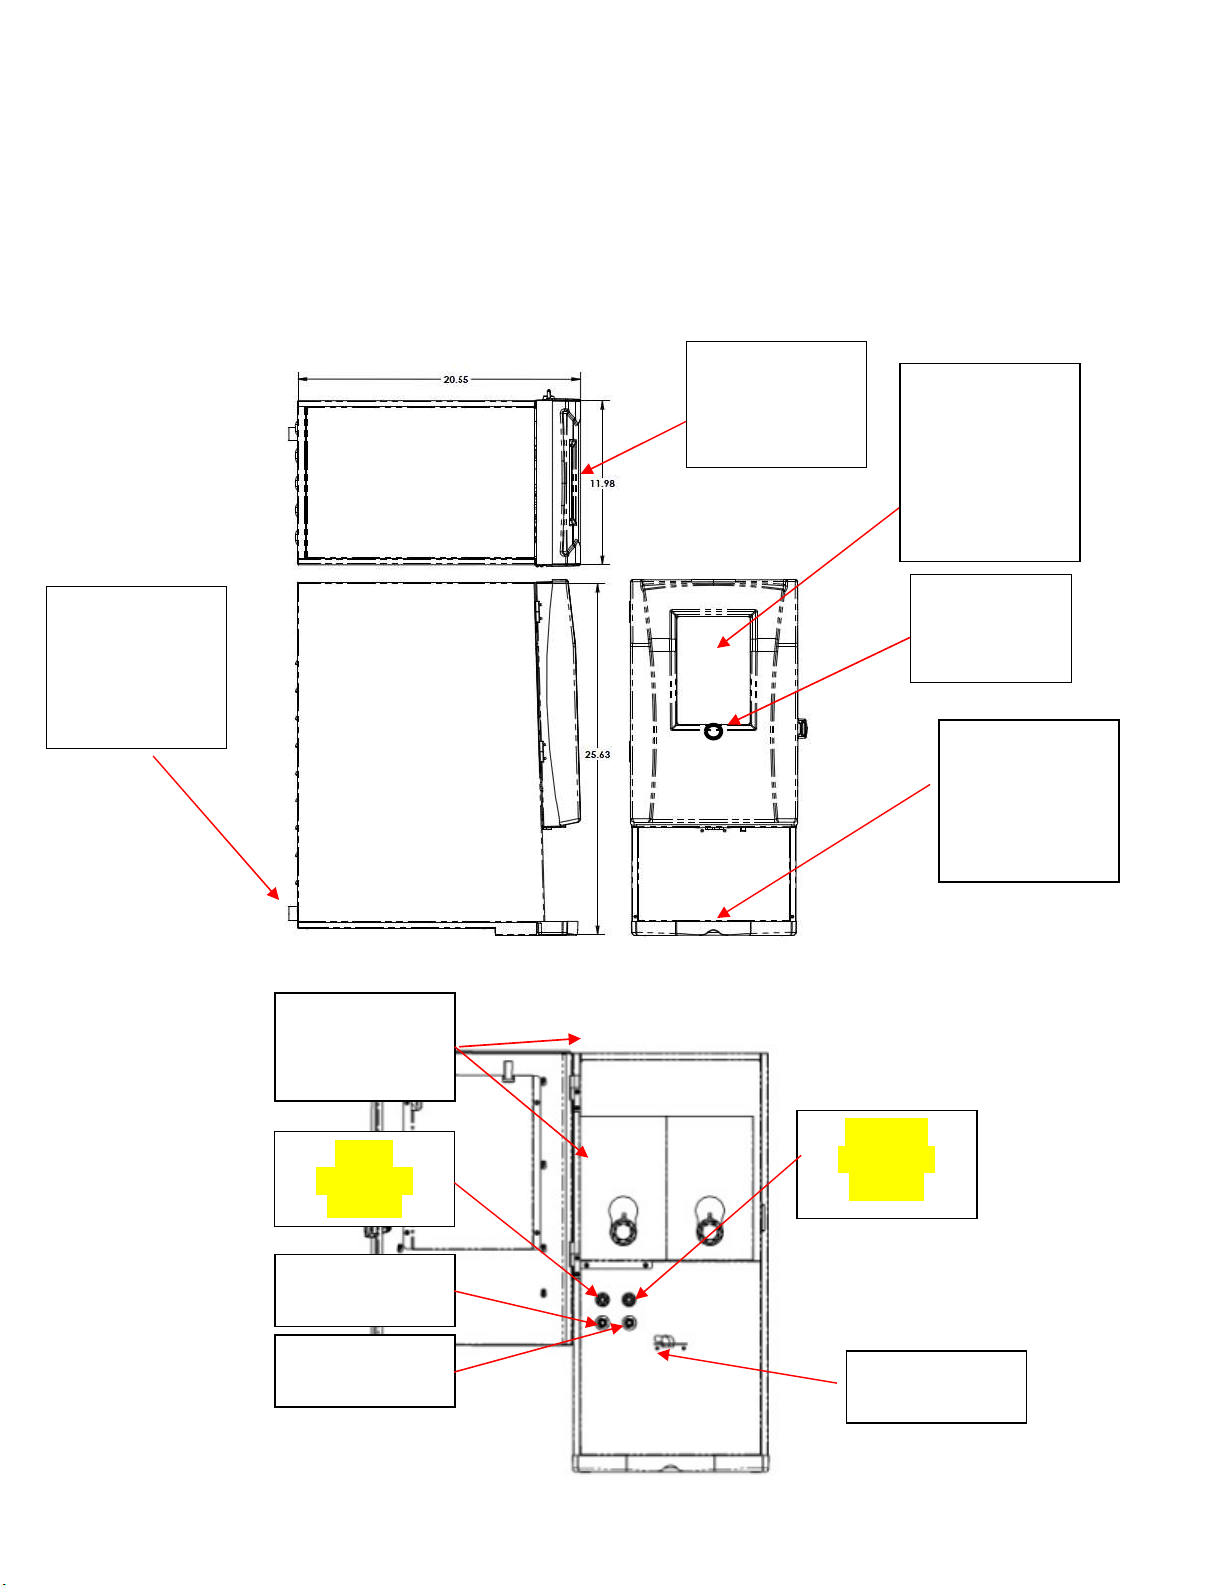
Machine Dimensions & Specifications
120 VAC-1600W HEATER-15A USA POWER SUPPLY
120 VAC-1400W HEATER-15A CANADIAN POWER SUPPLY
120/240VAC-3500W HEATER-15A POWER SUPPLY
6-20 OZ CUP SIZE
TEMPERATURE RANGE 140-205F
DRIP TRAY
&
DRIP TRAY
GRATE
WATER
INLET
&
POWER
SWITCH
PRODUCT
SELECTION
SWITCH
PAD
&
DISPLAY
PRODUCT
DISPENSE
AREA
6 5/8”
HEIGHT
HOT WATER
OUTLET
COFFEE
OUTLET
DISPENSE
NOZZLES
LIQUID
COFFEE
BIBS
REG
COFFEE
INLET
DECAF
COFFEE
INLET
QR
SCANNER/
READER

6
Machine Features
TOUCH SCREEN OPERATION
CUSTOMIZED LOGO SCREEN
DECAF BUTTON SWITCHES TO DECAF BIB
PRE-PROGRAMMED DRINK RECIPES
6-8-10-12-16-20 OUNCE DRINK CHOICES
CUP SELECTION MENU
CUSTOM CALL FOR SERVICE NUMBER
POWER SAVE & POWER DOWN OPTION
WATER FILTER MONITORING OPTIONS
PUSH & HOLD HOT WATER BUTTON
PUSH & HOLD HOT DRINK DISPENSE OPTION
SEMI-AUTOMATIC CLEANING CYCLE
QR CAPABILITY
ABILITY TO TURN ON/OFF DRINK OPTIONS
DISPLAY DRINKS IN OUNCES, OR SMALL-MED-
LARGE
THE MACHINE IS CONFIGURED AND READY TO DISPENSE
10-OUNCE DRINKS BY DEFAULT. TO CHANGE RECIPES,
SEE PROGRAMMING SECTION, MACHINE SET-UP.

7
Plumbing Connections
Plumber’s Installation Instructions
CAUTION: Disconnect Power to machine before proceeding with plumbing
installation.
1) Attach water line to water filter, rear of machine.
2) Flush water line before installing machine. Machine should be connected to COLD WATER
LINE ONLY.
3) Water pressure should be at least 40 lbs. For less than a 25 ft run, use 1/4" copper tubing and
connect to 1/2" or larger water line. For longer runs, use 3/8" copper tubing & connect to 1/2" or
larger water line and provide an adapter fitting for connection to the brewer. A dedicated
water line is necessary for this machine. Minimum flow rate is 1GPM.
4) If installed with saddle valve, the valve should have a minimum of 1/8" porthole for up to 25 ft
run, and 5/16" porthole for over 25 ft runs.
5) Manufacturer recommends connecting to copper tubing.
Electrical Hook-Up
WARNING
The Machine must be disconnected from the power source until specified in
Installation Instructions.
Determine the available on-site electrical requirements
Refer to Data Plate on the Machine, and local/national electrical codes to determine
circuit requirements.
CAUTION – Improper electrical installation will damage electronic components and
void warranty.

8
Installation Instructions
WARNING: - Read and follow installation instructions before plugging or wiring in machine to
electrical circuit. Warranty will be void if machine is connected to any voltage other than that
specified on the nameplate serial tag.
Machine must be on a flat and level surface. Plug or wire in machine to appropriate voltage as
noted on the brewer serial tag. Serial tag is located on inside of machine.
Brew water temperature is factory set at 180o F
Areas of high altitude will require lowering this temperature to
prevent boiling. This chart should be used as a guide when
readjusting the brew water temperature.
Altitude
(Feet)
Boiling point of
water o F o C
Recommended water
temperature o F o C
-1000 213.8 101.0 200 93.3
-500 212.9 100.5 200 93.3
0 212.0 100.0 200 93.3
500 211.1 99.5 200 93.3
1000 210.2 99.0 200 93.3
1500 209.3 98.5 200 93.3
2000 208.4 98.0 200 93.3
2500 207.4 97.4 200 93.3
3000 206.5 96.9 199 92.8
3500 205.6 96.4 198 92.2
4000 204.7 95.9 197 91.7
4500 203.8 95.4 196 91.1
5000 202.9 94.9 195 90.6
5500 201.9 94.4 195 90.6
6000 201.0 93.9 194 90.0
6500 200.1 93.4 193 89.4
7000 199.2 92.9 192 88.9
7500 198.3 92.4 191 88.3
8000 197.4 91.9 190 87.8
8500 196.5 91.4 189 87.2
9000 195.5 90.8 188 86.7
9500 194.6 90.3 187 86.1
10000 193.7 89.8 186 85.6

9
Product Installation Procedure
Open product box and remove the BIB outlet, Fig. 1. Remove
cardboard circle and seat coffee outlet in box cutout as shown
in Fig. 2.
Remove the plastic insert from the BIB fitment as and attach
product fitting shown in Fig 3. Using finger and thumb only to
prevent over-tightening, thread the BIB connector on to the
BIB fitment until it is fully seated .
Place the product in the storage compartment as shown in
Fig.4.
Repeat installation for 2nd product and position boxes and
hoses as shown in Fig. 5. Note: Regular Coffee BIB is
installed on the LH side of the product compartment and
Decaf Coffee BIB is installed on the RH side of the product
compartment
Fig. 1 Fig. 2
Fig. 4
Fig. 3
Fig. 5
Regular
Decaf

10
Ensure
that
there
is
a
proper
water
supply
connected
to
the
machine
and water is turned on. Ensure that the machine is plugged into a
proper power outlet and there is power supplied to the machine. Turn
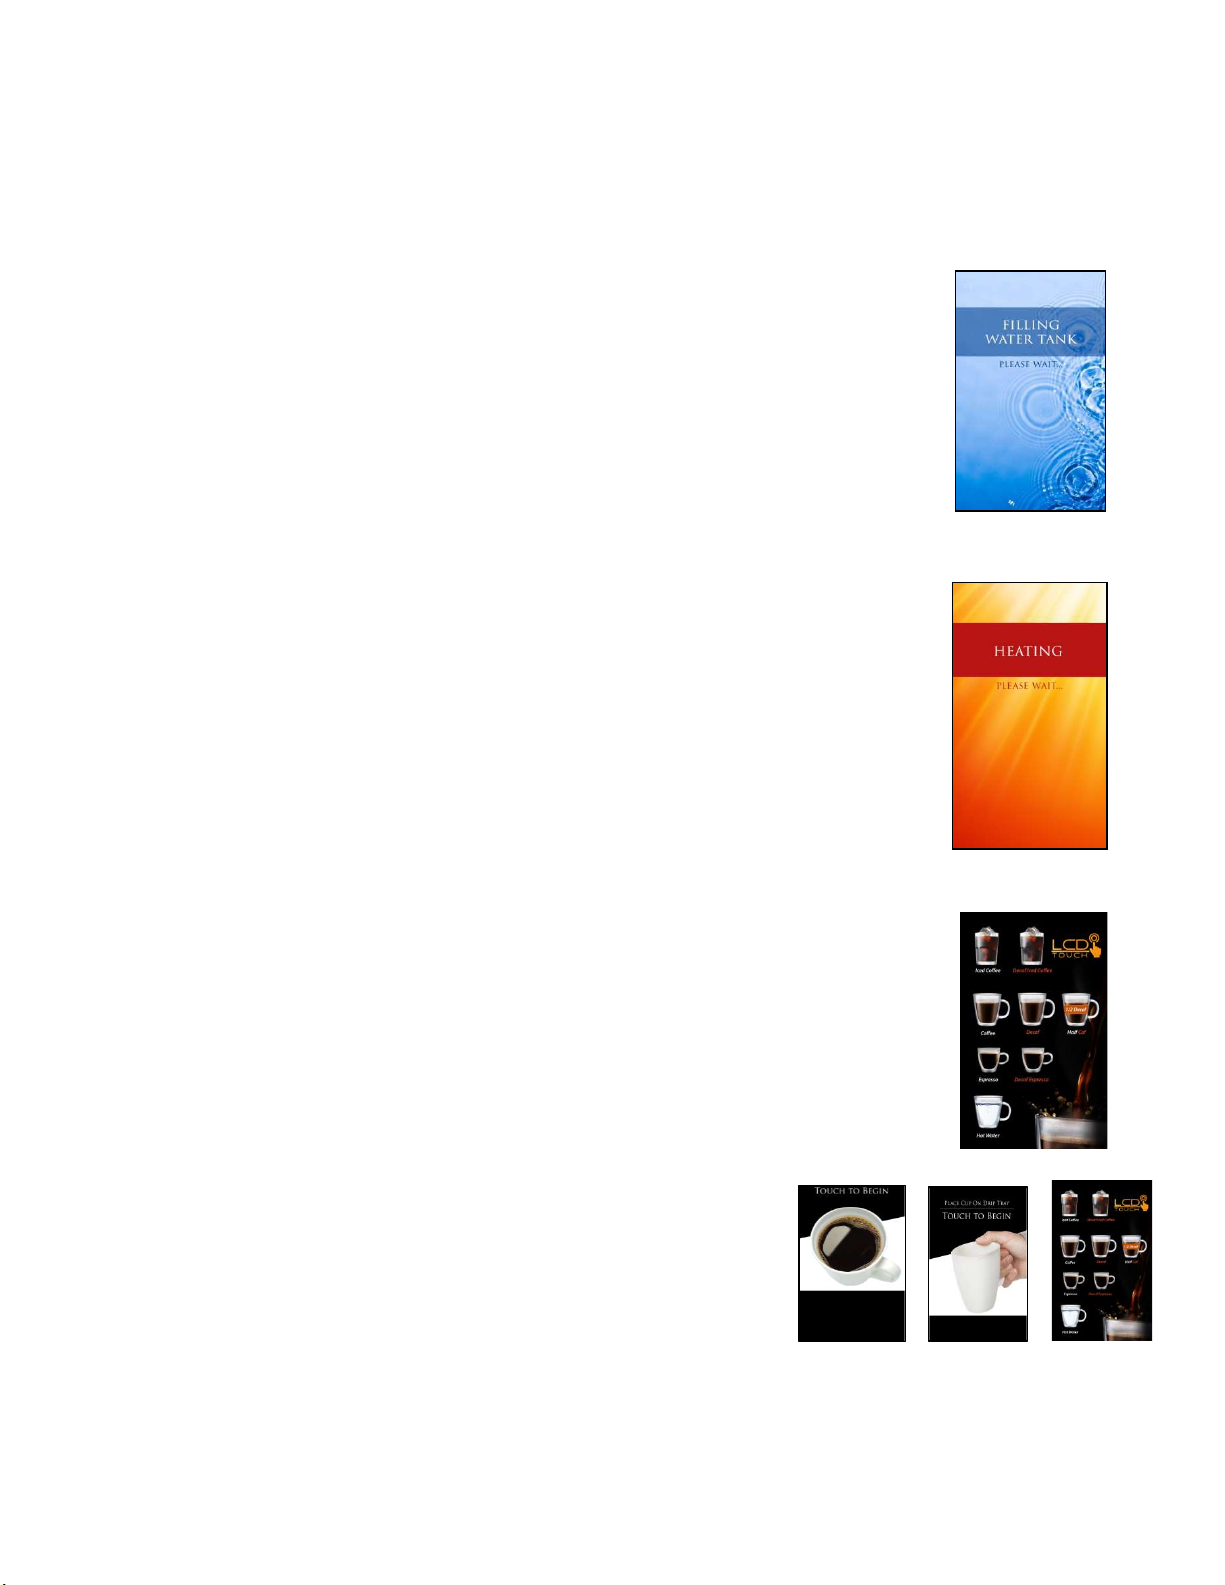
machine power switch on, machine should start filling, will shut off
when full. The Touch Screen Display will indicate when the machine is
filling.
Heater
will
turn
on
when
water
in
t
ank
is
at
probe
level
and
will
di
s
play
Heating: Please Wait. The heating process can take 10-15 minutes
before the machine is ready to brew.
When
machine
temperature
reaches
brew
temp,
display
will
change
to the Drink Selection Screen. The machine is now ready for
operation.
Machine Startup Instructions
Sleep screen appears when machine has been idle.
Touching the Sleep Screen will bring up the
Instruction Screen then the Drink Selection Menu
Other manuals for LCD-TCH
1
Table of contents
Other Newco Brewing System manuals

Newco
Newco KB-APF Setup guide

Newco
Newco CX-3 User manual

Newco
Newco BISTRO TOUCH LARGE CAPACITY User manual

Newco
Newco Bistro Touch BISTRO-TCH Instruction Manual

Newco
Newco LITTLE JOE COMPONENT ACCESS User manual

Newco
Newco CX-TOUCH User manual

Newco
Newco DB2A Installation instructions

Newco
Newco KB1 Setup guide

Newco
Newco KK airpot User manual

Newco
Newco KB Series Setup guide