Melaco Design Solutions 4 kitchen Quick setup guide
Design Solutions™ 4_kitchen
Wall system
more info:
www.melaco.com.pl www.flickandclick.eu
MELACO sp. z o.o.
Ciepielowska 9,
67-100 Nowa Sól, Poland
headquarters: +48 68 38 792 08
sales: +48 68 38 723 94
ASSEMBLY AND USE MANUAL
assembly
and use
manual
Patented 2G® click connection technology
licensed by Valinge Innovation AB
PRODUCT AND ASSEMBLY INFORMATION
1 Design Solutions™ 4_kitchen decorative panels can be
mounted on glue or on a frame.
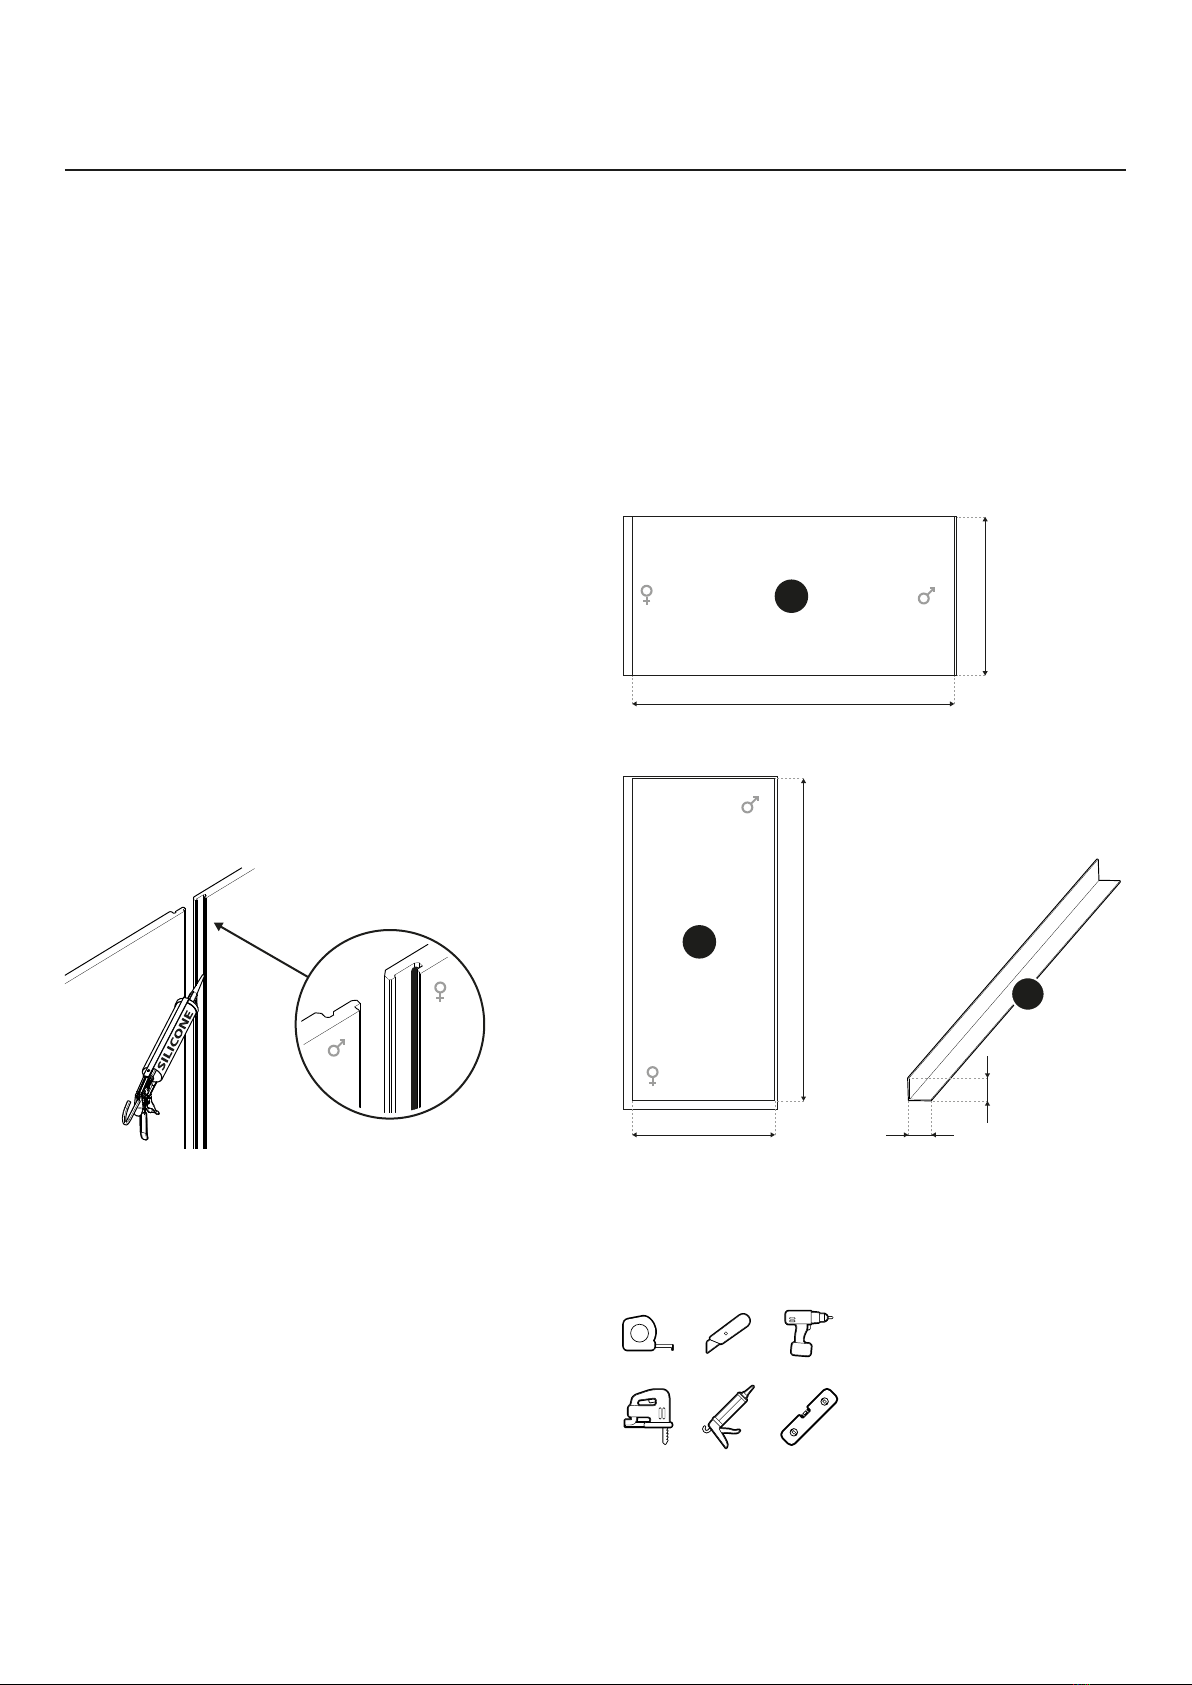
2 Panels with dimensions of 1300x620 mm (length x height)
are intended for horizontal installation in the kitchen in the
so-called inter-cabinet niche (A).
3 Panels with dimensions of 600x1300 mm (length x height)
are intended for installation in a recess under the kitchen
hood (B - option).
4 Installation should be performed by a person with basic
technical and safety knowledge.
5 After unpacking, check each panel for damage (scratches,
mechanical damage, colour dierences).
6 Before installation, the panels should be left in the room
where they are to be installed for 24 hours in order to
equalize the temperature and humidity.
7 Special finishing strips are used to finish the panels.
8 Due to the possibility of increased humidity and fogging,
transparent silicone should be used to seal the click joint.
A strip of silicone, approx. 1-2 mm thick, should be applied
to the profile on the 'female' side of the panel:
9 All edges that have been cut or punched should be
protected with silicone.
10 The panels cannot be installed in rooms such as
bathrooms or other places with direct contact with water.
11 The product may only be used indoors.
12 The product can be recycled.
13 Failure to follow the instructions may result in the loss of
the product warranty.
SET ELEMENTS
A Decorative panel for an inter-cabinet niche
B Decorative panel for the kitchen hood
C Aluminum end profile
REQUIRED TOOLS
600 mm
1300 mm
B
A
1300 mm
620 mm
C
15 mm
15 mm
- 1 -
Design Solutions™ 4_kitchen ASSEMBLY AND USE MANUAL
- 2 -
PREPARATION OF
CUT PANELS
We use a handsaw, jigsaw or circular saw to cut decorative
panels.
Attention!
All edges that have been cut or punched should be protected
with silicone.
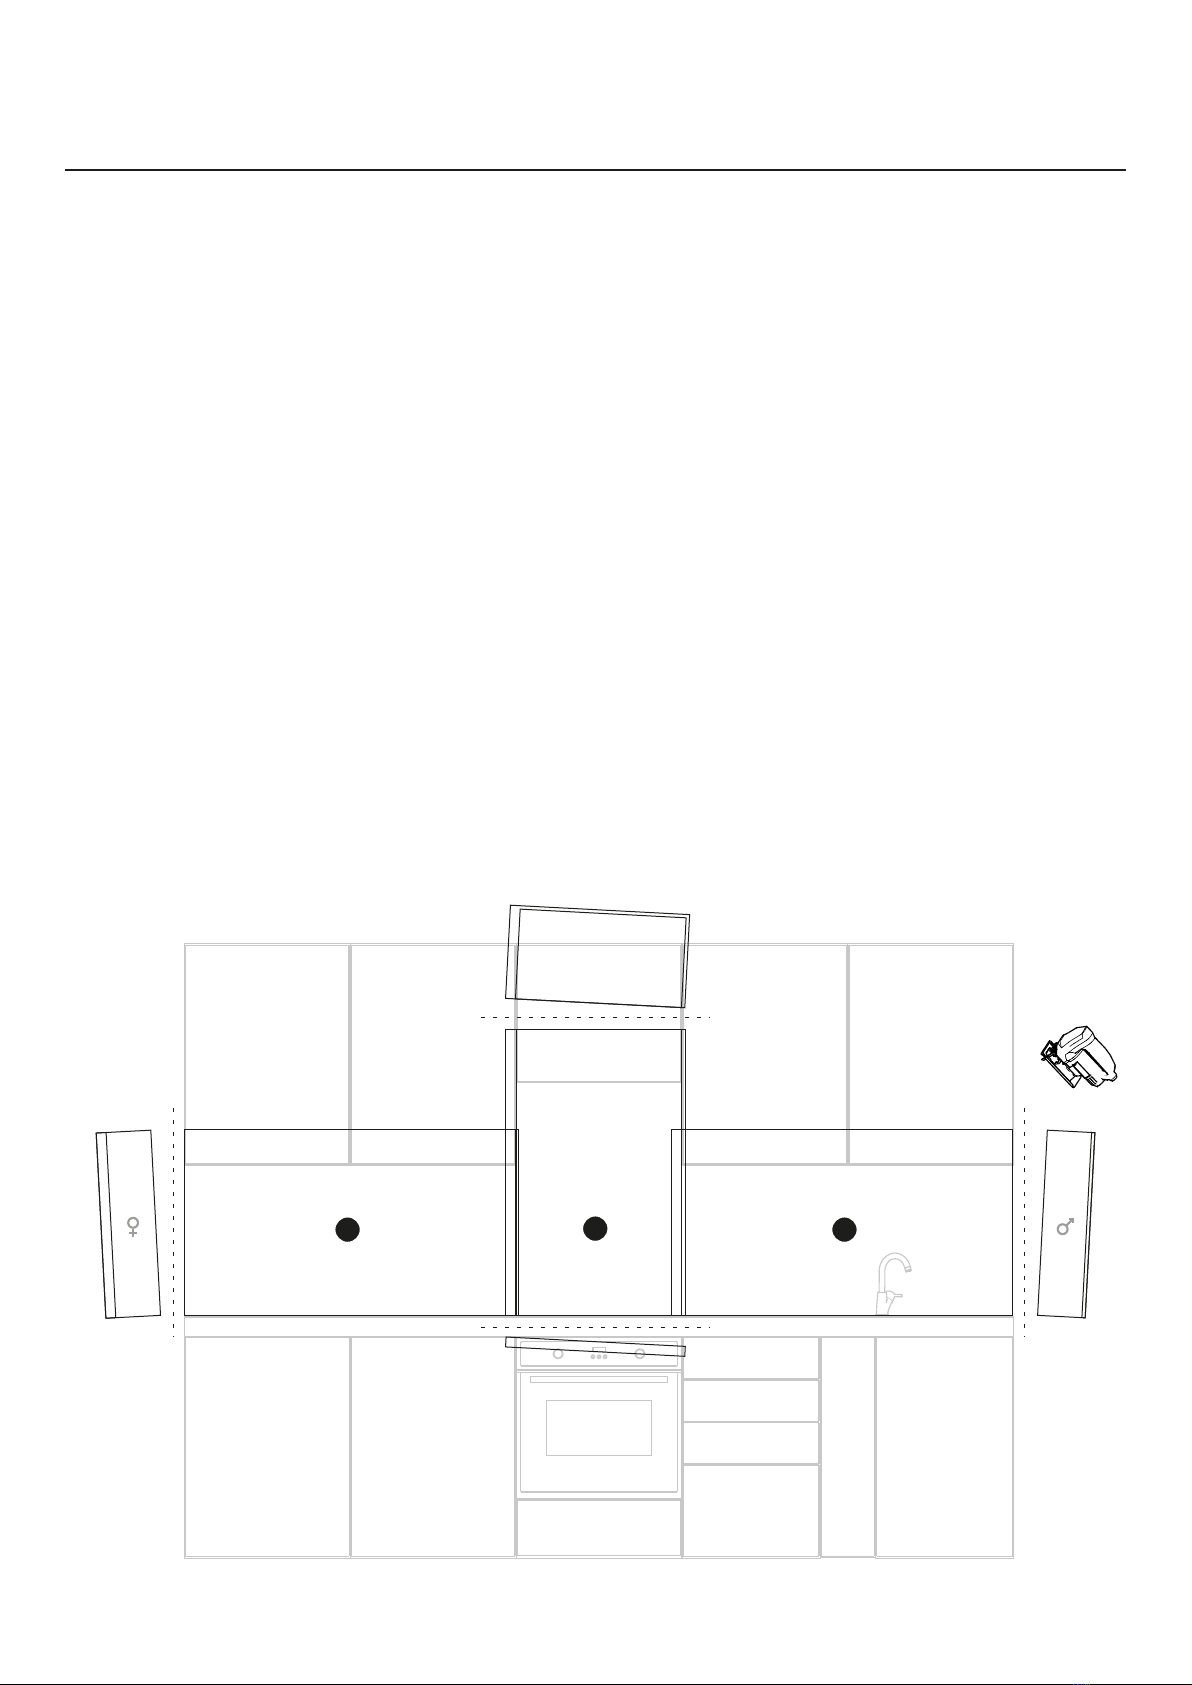
1 Carefully measure and plan the arrangement of
individual panels in the kitchen niche, paying attention to
joining the panels using the 'click' method.
2 Cut o the right part of the first panel - the 'male' profile.
3 Cut the upper part of the panel to be installed under the
cooker hood and the lower female joint to the required
length.
4 Cut o the left side of the next panel - the 'female' profile.
ADDITIONAL
INFORMATION
Hanging on panels:
▶ The panel should not be additionally loaded and cannot
fulfill structural functions.
▶ Do not directly screw shelves, hangers or other objects to
the panel.
▶ It is only possible to fix it on the ground under the panel
with appropriate screws or dowels designed for a given
type of surface. To do this, drill a suitable hole in the
panel.
Cleaning:
▶ Do not leave dirt to dry.
▶ Clean with a soft microfiber cloth and a solution of mild
detergent diluted with water.
▶ Do not use scouring agents, caustic agents, alcohol or
solvents for cleaning.
▶ Do not leave cleaning agents on the surface, rinse
immediately with water. Leaving the cleaning agents on
the surface may cause discolouration.
324
Design Solutions™ 4_kitchen ASSEMBLY AND USE MANUAL

- 3 -
2
1
5
3
5
6
MOUNTING PANELS
ON A FRAME
We start installing the panels after completing the
installation of the lower row of kitchen cabinets and the
worktop.
1 The frame should be made of dry, knot-free wooden
battens attached directly to the wall. The frame
should be securely attached to the ground, the
battens should be aligned using a spirit level to form
a plane. The distance between the battens is 40 cm.
For panels with dimensions of 300x620 mm
(length x height) intended for horizontal installation
in the kitchen in the so-called inter-cabinet niche the
batten must be positioned horizontally. We install the
panels on the grate after 24 hours in order to ensure
equalization of humidity and temperature.
2 Apply a 2-3 mm layer of silicone where the
decorative panels meet the kitchen worktop.
3 We put the first panel in its final position.
4 Screw the panel to the frame with screws using
a specially marked groove. The screw should hide
so that it does not get caught when inserting another
panel. Use 3x30 mm countersunk head screws.
5 Add the next panels to the preceding one, which is
facing the 'female' side, paying attention to the 'click'
connection method, and screw it to the frame.
6 If the finishing aluminum profile is used, it should be
pressed under the cut edge of the panel, after
securing the edge of the panel with transparent
silicone.
7 After completing the assembly of the panels, fill in the
silicone at the joint with the top, and then even out
and remove excess silicone from the surface of the
panels and the top. Clean and leave to dry for
24 hours.
4
Design Solutions™ 4_kitchen ASSEMBLY AND USE MANUAL

MOUNTING PANELS
ON GLUE
We start installing the panels after completing the
installation of the lower row of kitchen cabinets and the
worktop.
1 Apply a 2-3 mm layer of silicone where the
decorative panels meet the kitchen worktop.
2 Apply the S-shaped glue to the first panel and place
it on the silicone layer applied on the table top.
Attention!
The substrate should be smooth, non-sagging and
degreased, ensuring the required adhesion of the
glue. It is recommended to use the mounting glue
oered by MELACO, or similar adhesives
characterized by high pre-gluing strength. The glue
should be used in accordance with the instructions
in a room with ecient ventilation.
3 Place the panel with the glue on the countertop with
a previously applied layer of silicone and press it
against the wall.
4 We put glue on the remaining panels and put them
on the worktop with a previously applied layer of
silicone, paying attention to the 'click' connection.
5 If the finishing aluminum profile is used, it should be
pressed under the cut edge of the panel, after
securing the edge of the panel with transparent
silicone.
6 After completing the assembly of the panels, fill in the
silicone at the joint with the top, and then even out
and remove excess silicone from the surface of the
panels and the top. Clean and leave to dry for
24 hours.
4
5
4
3
2
GLUE
1
- 4 -
Design Solutions™ 4_kitchen ASSEMBLY AND USE MANUAL
Other Melaco Indoor Furnishing manuals


