Johnson Controls IN00-B02-WEB User manual

Web Server IN00-B02-WEB
CONTENUTO DELLA CONFEZIONE
La confezione di HORIZONE SERVER
contiene:
•Web server HORIZONE SERVER
•Connettore per alimentazione e bus
KNX
COLLEGAMENTI
Per utilizzare HORIZONE SERVER è
necessario predisporre i seguenti
collegamenti:
•Alimentazione 12/24 VDC
(assorbimento: 240mA a 12V) mediante
apposito connettore in dotazione
secondo indicazioni riportate sul
dispositivo (PIN 1 e 2 partendo da
sinistra, + e - rispettivamente)
•Bus KNX mediante apposito morsetto in
dotazione
•Rete LAN mediante cavo RJ45 (non in
dotazione) cat. 5 o superiore
HORIZONE SERVER è progettato per
essere montato su guida DIN (5 moduli).
PRIMO ACCESSO
Collegare HORIZONE SERVER al proprio
PC attraverso un cavo di rete “cross-over” (o
“incrociato”)
•Accedere alle impostazioni di rete del
proprio PC, come illustrato nella
documentazione del proprio sistema
operativo
•Modificare le impostazioni del protocollo
di comunicazione TCP/IP (versione 4)
relative alla porta LAN a cui è collegato
HORIZONE SERVER, ed impostare
manualmente i seguenti parametri:
oIndirizzo IP: 192.168.0.100
oMaschera di rete: 255.255.255.0
oGateway predefinito: 192.168.0.110
Salvare ed attendere che le nuove
impostazioni diventino effettive. Qualora
venga richiesto, riavviare il sistema.
Una volta effettuate le modifiche, aprire un
browser digitando il seguente indirizzo:
http://192.168.0.110
Dopo alcuni secondi, viene presentata la
finestra di login; inserire le seguenti
credenziali:
Username: admin
Password: admin
N.B. Si consiglia di utilizzare i seguenti
browser per una maggior compatibilità:
•Google Chrome
•Apple Safari
CAMBIO CONFIGURAZIONE DI RETE
Se la configurazione di rete di HORIZONE
SERVER non è adatta alla rete LAN in cui
andrà installato, procedere come segue:
•Aprire il MENU DI NAVIGAZIONE
laterale (se non è già aperto) premendo
il pulsante in alto a destra
•Premere il pulsante “ADMIN” comparso
nella TOOLBAR in basso a destra, e
attendere alcuni secondi il caricamento
dell'ambiente di CONFIGURAZIONE
•Dal MENU selezionare “SETUP” e
quindi “RETE”
•Inserire le nuove impostazioni per la
scheda di rete di HORIZONE SERVER
e confermare mediante il pulsante
“SALVA”
CONFIGURAZIONE IMPIANTO KNX
Per configurare la supervisione di un
impianto KNX:
•Esportare il progetto da ETS in formato
OPC
•Accedere al menu di configurazione di
HORIZONE SERVER premendo il
pulsante nell’angolo in basso a destra
•Selezionare la voce “TECNOLOGIE”
→“KNX” dal MENU dell'ambiente di
CONFIGURAZIONE di HORIZONE
SERVER
•Selezionare la voce “IMPORTAZIONE
DA ETS” e caricare il file
•Seguire le istruzioni a video, avendo
cura di specificare le informazioni
richieste per gli indirizzi KNX che non
rispondono alle “REGOLE ETS” già
presenti in HORIZONE SERVER,
eventualmente personalizzate
•Terminare la procedura con il pulsante
“SUCCESSIVO”
•Creare uno o più AMBIENTI attraverso
l'apposito pulsante in basso a sinistra
una volta scelta la voce “AMBIENTI”
nella sezione “SUPERVISIONE” del
menu di configurazione
•Personalizzare i nuovi AMBIENTI
compilando le informazioni richieste
nella sezione “PROPRIETA'
DELL'OGGETTO”
•Cercare gli oggetti KNX che si intende
inserire negli ambienti attraverso il
MOTORE DIICERCA disponibile in alto
a sinistra e selezionarli (usare tasto
CTRL per selezionare più elementi)
•Trascinare gli elementi selezionati nella
sezione “OGGETTI CONTENUTI”
Al termine, accedere alla sezione di
FRONTEND utilizzando l'apposito pulsante
in alto a destra, navigare negli AMBIENTI
(utilizzando l'omonimo pulsante nel MENU
DI NAVIGAZIONE e nella PAGINA HOME)
e provare a comandare gli oggetti KNX
importati.
CARATTERISTICHE HARDWARE
Alimentazione
12 … 24VDC
Assorbimento
180mA @12V ; 110mA @24V
Porte di
comunicazione
KNX Connettore standard TP
rosso/nero
RS232 (1x)
Connettore maschio D-SUB 9 poli
RS485 (1x)
Connettore con viti a serrare
USB 2.0 (2x)
LAN (1x)
Connettore RJ-45 standard (10/100
Mbps)
Reset
Pulsante hardware sul lato inferiore del
case
LED
Rosso (1x) Reset in corso/allarmi
Verde (1x) Power ON
Grado di
protezione
IP20 (secondo EN 60529)
Classe di
isolamento
II (secondo EN 60335-1)
Temperatura
operativa
0°C … +50°C
Dimensioni
88x90x62 mm ; 5 moduli DIN
Materiale case
Materiale termoplastico autoestinguente
SMALTIMENTO
Il simbolo del cassonetto barrato indica che il prodotto alla fine della
propria vita utile deve essere raccolto separatamente dagli altri rifiuti.
Al termine dell’utilizzo, l’utente dovrà farsi carico di conferire il prodotto
ad un idoneo centro di raccolta differenziata oppure di riconsegnarlo al
rivenditore all’atto dell’acquisto di un nuovo prodotto. L’adeguata
raccolta differenziata per l’avvio successivo dell’apparecchiatura
dimessa al riciclaggio contribuisce ad evitare possibili effetti negativi
sull’ambiente e sulla salute e favorisce il reimpiego e/o riciclo dei
materiali di cui e composta l’apparecchiatura.
Johnson Controls Systems and Service
Italy
Viale dell’Innovazione 3
20126 Milano, Italy
www.johnsoncontrols.com
Eelectron Web Server IN00-B02-WEB
Box content
HORIZONE SERVER Box contains:
•Web server HORIZONE SERVER
•Power supply connector
•KNX bus connector
Connections
To use HORIZONE SERVER, it’s necessary
to fix the following connections:
•Power supply 12/24VDC (240mA
12VDC through a special connector
provided in accordance with instructions
on the device (PIN 1 and 2 starting from
the left, + and -, respectively)
•Bus KNX using WAGO connector
•LAN network with ethernet cat.5 cable
(not supplied)
HORIZONE SERVER è designed to fit with
5 modules DIN rail.
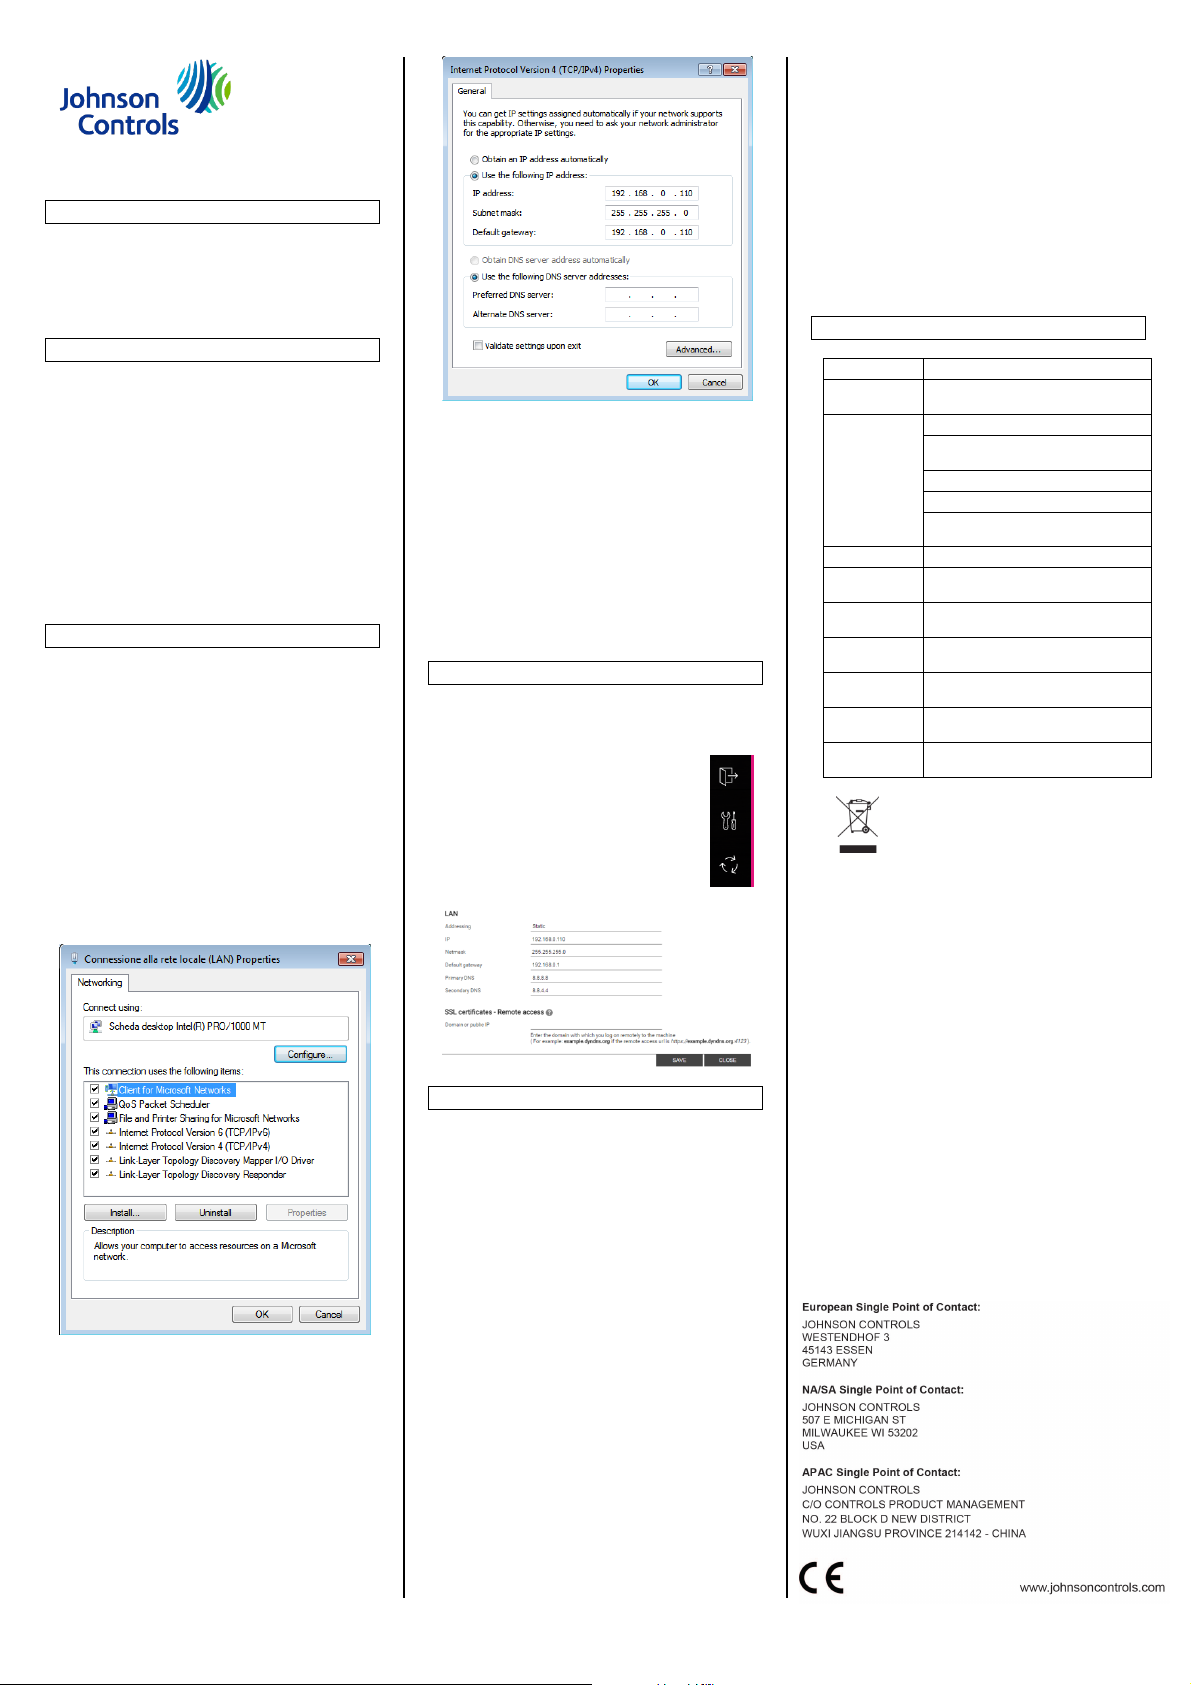
FIRST LOGIN
Connect HORIZONE SERVER to your PC
using a Ethernet crossover cable.
•Open network settings panel of your PC,
following the instructions of your OS
•Change the settings of TCP / IP
communication protocol (version 4) on
the LAN port that is connected
Horizonte's SERVER, and manually set
the following parameters:
oIP Address: 192.168.0.100
oSubnet mask: 255.255.255.0
oDefault gateway: 192.168.0.110
Save and wait for the new settings to take
effect. When requested, restart the OS.
After committing the changes, open a
browser typing the following address:
http://192.168.0.110
After few seconds, the system will show the
login form, enter the following credentials:
Username: admin
Password: admin
N.B. We recommend using the following
browsers for better compatibility:
•Google Chrome
•Apple Safari
CHANGE NETWORK CONFIGURATION
If the server's network configuration is not
suited to the LAN where will be installed,
follow these steps:
•Click on the Settings icon in
the lower right corner
•From Menu select “Setup”
and then “Network”
•Insert the new settings for the
network card and confirm
pressing the SAVE button
KNX CONFIGURATION
To configure the visualization of a KNX
installation:
•Export OPC file from ETS
•Select the configuration menu,
clicking on the lower right button
•Chose the menu “Technologies” ->
“KNX” from the main menu
•Select “ETS Import” and then load the
project file
•Follow the onscreen instructions,
making sure to specify the information
needed for KNX addresses that do not
meet the "ETS Rules" already defined
in Horizone Server.
•End the procedure with the “Next”
button
•Create one or more Rooms through
the appropriate button in the
"Visualization" -> "Rooms" of the
configuration menu
•Customize the new rooms filling in the
required information in the section
"OBJECT PROPERTIES'
•Look for KNX objects that you want to
insert in the rooms through the
"SEARCH ENGINE" available on the
top left and select them (use CTRL
key to select multiple items)
•Drag the selected items in the
"CONTAINED OBJECTS"
At the end, go to the FRONTEND section
using the appropriate button at the top right,
browse in rooms (using the button of the
same name in MENU NAVIGATION and
HOME PAGE) and try to control the
imported KNX objects.
HARDWARE SPECIFICATION
Supply
12 … 24VDC
Power
consumption
180mA @12V ; 110mA @24V
Porte di
comunicazione
KNX Standard bus connector red/black
RS232 (1x) 9 pin D-SUB male
connector
RS485 (1x) Screw connector
USB 2.0 (2x)
LAN (1x)
RJ-45 jack (10/100 Mbps)
Reset
Push button on the bottom of the case
LED
Red (1x) Reset in progress/alarms
Green (1x) Power ON
Grado di
protezione
IP20 (according to EN 60529)
Classe di
isolamento
II (according to EN 60335-1)
Temperatura
operativa
0°C … +50°C
Dimensioni
88x90x62 mm ; 5 DIN modules
Materiale case
Thermoplastic self-extinguishing
material
DISPOSAL
The crossed-out bin symbol on the equipment or packaging means the
product must not be included with other general waste at the end of its
working life. The user must take the worn product to a sorted waste
centre, or return it to the retailer when purchasing a new one. An
efficient sorted waste collection of the environmentally friendly disposal
of the useddevice, or its subsequent recycling, helps avoidthe potential
negative effects on the environment and people’s health, and
encourages the re-use and/or recycling of the construction materials.
Table of contents
Languages:
Other Johnson Controls Server manuals

Johnson Controls
Johnson Controls DVN 5000 Series User manual

Johnson Controls
Johnson Controls DVN 5000 Series User manual

Johnson Controls
Johnson Controls DVN 5000 Series User manual

Johnson Controls
Johnson Controls NIE55 Series User manual

Johnson Controls
Johnson Controls DVN 5000 Series User manual

Johnson Controls
Johnson Controls NAE55 Series User manual

Johnson Controls
Johnson Controls Rackmount 5000 Series User manual

Johnson Controls
Johnson Controls DVN 5000 Series Quick start guide

Johnson Controls
Johnson Controls P2000 User manual