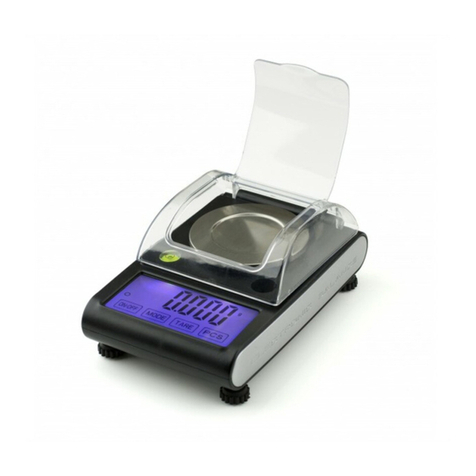
Jadever JCAII User manual

V03
JCAII
CONTENTS
1. Introduction........................................................................................................... 1
2. Precautions ........................................................................................................... 1
3. Before Using the Product..................................................................................... 1
3-1 Unpacking and Checking......................................................................................................... 1
3-2 Installing Components............................................................................................................. 1
3-3 Leveling the Scale.................................................................................................................... 1
4. Product Introduction ............................................................................................ 2
4-1 Display....................................................................................................................................... 2
4-2 Keypad ...................................................................................................................................... 3
5. Analog Section...................................................................................................... 4
6. Setting mode......................................................................................................... 4
7. Dual Channel......................................................................................................... 5
7-1 Diagram of sub channel connector......................................................................................... 5
7-2 Installation Process.................................................................................................................. 5
7-3 Setup ......................................................................................................................................... 6
7-4 Maximum Capacity & Division Setting & Unit........................................................................ 6
7-5 Calibration................................................................................................................................. 7
7-6 Set AD gain of remote platform............................................................................................... 8
7-7 Switch between Main scale and Remote platform................................................................. 8
8. Operation............................................................................................................... 8
8-1 Zero-point.................................................................................................................................. 8
8-2 Tare & Preset Tare.................................................................................................................... 9
8-2-1 Tare .................................................................................................................................. 9
8-2-2Preset Tare........................................................................................................................ 9
8-2-3 Auto-tare .......................................................................................................................... 9
8-3 Counting method.................................................................................................................... 10
8-3-1Key in a known unit value ............................................................................................... 10
8-3-2 Sample counting ............................................................................................................ 10
8-3-3 ACAI................................................................................................................................11
8-3-4 Simple Recipe Function……………………………………………………..……………….11
8-4 Accumulation.......................................................................................................................... 12
8-4-1 Choose Accumulation Mode .......................................................................................... 12
8-4-2 Set the Max Account of accumulation ............................................................................ 12
8-4-3 Manual Accumulation ..................................................................................................... 12
8-4-4 Accumulation display......................................................................................................13
8-4-5 Print while display of accumulation ................................................................................ 13
8-4-6 Delete accumulation.......................................................................................................13
8-5 Print......................................................................................................................................... 14

V03
JCAII
8-5-1 Set a Print form .............................................................................................................. 14
8-5-2 Set Print mode ............................................................................................................... 16
8-5-3 Select the Printer Model................................................................................................. 16
8-6 Serial number ......................................................................................................................... 17
8-6-1 Set Serial Number Mode................................................................................................ 17
8-6-2 Set Max Serial Number .................................................................................................. 17
8-6-3 Change the Current Serial Number................................................................................ 17
8-7Quantity check......................................................................................................................... 18
8-7-1 Set the high limit of quantity ........................................................................................... 18
8-7-2 Set the low limit of quantity ............................................................................................ 18
8-7-3Enable / Disable the quantity check function ............................................................... 18
8-8 Weight check .......................................................................................................................... 18
8-8-1Set the high limit of weight .............................................................................................. 18
8-8-2Set the low limit of weight................................................................................................19
8-8-3Enable / Disable the weight check function..................................................................... 19
8-9 Unit weight ID ......................................................................................................................... 19
8-9-1Saving ID method 1.........................................................................................................19
8-9-2Saving ID method 2.........................................................................................................20
8-9-3Call up ID ........................................................................................................................ 20
8-10Label....................................................................................................................................... 20
8-11Time Setting........................................................................................................................... 21
8-12 Error message ...................................................................................................................... 21
8-13 Problem & Solution.............................................................................................................. 22
9. Option .................................................................................................................. 23
10. Relay Module Diagram ..................................................................................... 28

V03
JCAII 1
1. Introduction
Thank you for deciding to purchase a JCAII counting scale. This goods has the excellent
performance and splendid properties under severe quality management .It is recommended to
read this manual in full before using it for good function application.
2. Precautions
Place the scale on a flat and stable surface.◎See 3-3 Leveling the Scale for details.
Verify that the input voltage and the plug type matches the local AC power supply.◎
War◎m up the scale for 15 minutes before using it the first time.
Keep the sca◎le away from EMI noise, strong wind and vibration, which might cause incorrect
reading.
◎Avoid sudden temperature changes (suitable operating temperature is between -5℃~ 40℃.)
Disconnect the power supply when cleaning the scale.◎
◎Do not immerse the scale in water or other liquids.
Service should be performed by authorized personnel only.◎
3. Before Using the Product
3-1 Unpacking and Checking
Open the package and check the instrument for transport damage. Immediately inform your
dealer if you have complaints or if parts are missing. The package should contain:
●Scalebody ●User manual
●Stainless steel pan ●Wire (power cord)
3-2 Installing Components
Cover the stainless steel pan on the top housing properly before using the scale.
Important:
Please find the delivery protection screw in the bottom of the scale. Loose it according to
the instruction sticker next to it
Before use the scale Loose the screw counter-clockwise to the end
Before move the scale Tighten the screw clockwise to the end
3-3 Leveling the Scale
To compensate for small irregularities or inclinations at the location, the scale can be leveled. The
scale is equipped with a level indicator at the front panel .Adjust the adjusting feet until the air
bubble in the indicator is centered as shown.
Note: The scale should be leveled each time its location is changed.

V03
JCAII 2
4. Product Introduction
4-1 Display
1) Weight Window: displays weight of object on weighing pan, or accumulated weight value.
2) Unit Weight Window: displays the average piece weight value, or number of weighments .
3) Total Count Window: displays the calculated number of pieces on the weighing pan, or
accumulated piece count value.
4) Tare or Preset Tare indication.
5) Center of Zero Indication, The zeroing range is ±2﹪of weighing capacity.
6)Symbol “ ” points at “PRESET TARE” when Tare value entered via numeric keys.
7)Under the sample counting mode, Symbol “ ” points at “SMPL” when calculated unit
weight is lower than 4/5 of scale division or the quantity of sample is less than 10 pieces.
8)“Accumulation” function is enabled under weighing mode.
9)Under entering a known unit weight mode, Symbol “ ” points at “UW” when entered unit
weight is lower than 4/5 of scale division. Unit weight is too small for ensuring accurate quantity
calculations.
10)Low Battery Indicator: When “ ” appears, the battery power requires recharging.
11)CHANGE Charge Lamp
Red--- battery is charging
Green---battery is fully charged
ACAI Symbol “ ” points at “ACAI” when Automatic counting accuracy improvement is
functioning.

V03
JCAII 3
STABLE Stable indication, Symbol “ ” appears at the top of “STABLE” when scale is in
stable condition.
NET Gross weight minus Tare. Symbol “ ” points at “NET” when manual Tare or preset are
actions are done.
4-2 Keypad
·Enters specific values for tare, unit weight and other data entries.
·Key can be also as a space key when edit label.
·Decimal point
·Initiates function setting
·Sets the weight to zero.
·Clears the indicated input values.
·Displays gross and net weight by turns
·Inputs unit weight and run its counting function
·Enters the sampling mode and change its scale choice(scale 1 or 2)
·Switches between main scale and remote platform
·Adds the indicated weight or piece count value into Accumulation
memory.
·Enters label editing mode
·Steps to next parameter

V03
JCAII 4
·Deletes accumulation records
·Display year, date, time
·Go back to previous parameter
·Recalls and displays the accumulated data
·Selects/ sets the Hi Value of weight or piece
·change the next content of parameter
·units switch for the pre-tare function
·Selects the Lo value of weight or piece
·Changes to previous content of parameter
·Tare
·Give up any setting and return to normal weighing
·Call up unit weight ID
·Enable / switch on relay output function under HI/LO setting.
·Print
·Disable/ switch off relay output function under HI/LO setting.
5. Analog Section
Input sensitivity 1~4mV/V
Zero adj. Range 20% FS
A/D conversion rate 10 times per second.
Load cell excitation 5V DC
Number of load cells. up to 4x350 ohm loadcells
Resolution. 1/30,000
6. Setting mode
1. Under the weighing mode, long press key for 3 seconds to enter basic parameter setting
mode.
2. Press or to switch between parameters from P-00 to P-07
3. Press key or to step through all the available setting options.

V03
JCAII 5
4. Press key to save the setting and return to weighing mode.
Parameter description
1. P-00 Power (default: off) Set the period of inactivity before the scale automatically turns off.
Options are Off =non power-off, 10, 20,30,40,50, 60, 70, 80 and 90 (minutes).
2. P-01 Backlight (default: auto)
=always off =always on =turn on when the weight is over 20e
3. P-02 Serial number display (default: off)
=never display =will display when price is zero
4. P-03 Beep sound (default: in)
= when check is OK = when check is Hi/Lo ( , = using scale’s buzzer)
-=when check is OK -=when check is Hi/Lo ( -, - =using light tower’s
buzzer)
5. P-04 ACAI (default: off)
Options: off/5/10/15/20/25/30/35/40/45
6. P-05 Printer model (default: normal)
Options: normal / EZ/ BP/SH/ZEBRA (normal as compatible printer)
7. P-06 Rs-232 Baud Rate (default: 9600)
Options: 19200 / 9600 / 4800 / 2400
8. P-07 Data (default: n81)
Options: n81 / o81 / e81 / n71 / o71 / e71
7. Dual Channel
7-1 Diagram of sub channel connector
7-2 Installation Process
1. Turn on the main scale
2. Connect the remote platform to JCAII main scale

V03
JCAII 6
7-3 Setup
1) Under the weighing mode, long press key for 3 seconds to enter basic parameter
setting mode.
2) Long press key to enter advance parameter setting mode.
3)Presskey or toselectparameterA-08.
4)Press key or to step through all the available setting items.
= Using main scale together with the remote platform
= Use the remote platform only
=Use the main scale only
5) Press key to save the setting and return to weighing mode.
7-4 Maximum Capacity & Division Setting & Unit
1) Press and hold while turning on the scale. Do not release till is
displayed in the Total Count window.
2) Use numeric keys together with to input the new capacity, press key to clears the
indicated input values.
3) Press key advance to division setting. Use numeric keys to input the new division.
4) Press key to advance to Maximum Capacity & Division Setting of the remote platform.
5) Repeat step 2-3 to complete the settings.

V03
JCAII 7
6) Press key to save the settings and return to weighing mode.
7)Press key to change its unit: kg, lb, g.
7-5 Calibration
= remote platform
= main scale
Note:
zPlease calibrate the main scale first.
zThe calibration steps of main scale and remote platform are the same. Press key to
switch the calibration for the main scale or remote platform before the zero point calibration.
zYou can only do the calibration for the remote platform after you have set the max. capacity
and division of the remote platform.
Here take JCAII-6K as an example.
1. Press key and hold while turning on the scale. Do not release till
is displayed in the Unit Weight window.
2. With no load on the weighing pan, press key to start the zero point calibration and wait
till is displayed in the Unit Weight window. Input the first calibration weight value by the
numeric key (6K model, 1/3 of full load is 2kg). And then put the corresponding weights on.
3... Press key and wait till is displayed in the Unit Weight window. And then
put the corresponding weights on.
4. Press key and wait till is displayed in the Unit Weight window. And then put
the corresponding weights on.

V03
JCAII 8
5. Press key and wait till is displayed in the Total Count window.
6. Press key to save the settings and return to weighing mode
7-6 Set AD gain of remote platform
1. Under normal weighing mode, press for 3 seconds to enter the basic parameter setting.
2. Press for 3 seconds to enter the advanced parameter setting.
3.Presskey or toselectparameterA-07
4.Press or toselect the AD gain. (Options: 1/2/4/8/16/32/64)
5. Press to save and return to normal weighing mode.
7-7 Switch between Main scale and Remote platform
1. Press to switch between main scale mode and sub channel mode (remote platform)
2. The flashed in the Weight Window.
3. When flashing disappear, means that you are in the sub channel mode (remote
platform). Now the remote platform could be used
4. To change back to the main scale mode just press , and will flash in the Weight
Window.
5. When flashing disappear, means that the scale have returned back to main scale
mode.
8. Operation
8-1 Zero-point
Press if you do not see “ ” but symbol “ ” appears
Other manuals for JCAII
1
Table of contents
Other Jadever Scale manuals

Jadever
Jadever JWA series User manual

Jadever
Jadever JWI-700W User manual

Jadever
Jadever NWTE User manual

Jadever
Jadever JWE User manual

Jadever
Jadever JCL User manual

Jadever
Jadever JCL-3K User manual

Jadever
Jadever JCL User manual

Jadever
Jadever JWI-501 Series User manual

Jadever
Jadever JC User manual

Jadever
Jadever IDS701-CTRUCK User manual

Jadever
Jadever Jadever SKY User manual

Jadever
Jadever JKH User manual

Jadever
Jadever JCN User manual

Jadever
Jadever JKD 250 User manual

Jadever
Jadever 1.5K User manual
Jadever
Jadever JCAII User manual

Jadever
Jadever LPWN-1530 User manual

Jadever
Jadever JWE User manual

Jadever
Jadever LGCN-3075 User manual

Jadever
Jadever JWE-3K User manual