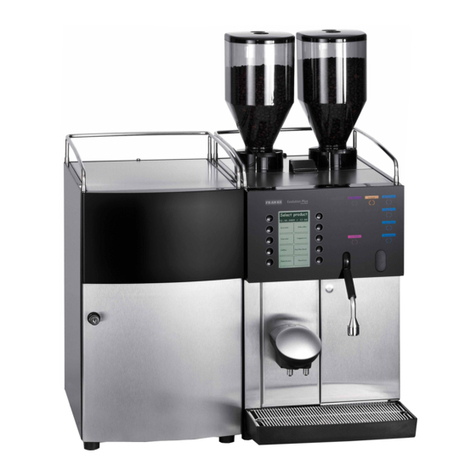
Franke bremer VIVA User manual

bremer VIVA
Operating Instructions
Franke Coffee Systems
Automatic Coffee & Cappuccino/Espresso Machine

Dear customer,
before putting your coffee machine into operation, please read the operating
instructions carefully. In this way, you protect yourself and you avoid damages to
the device.
They contain important information on the correct use of your machine and will
enable you to use the coffee machine with the necessary handling.
Always keep these operating instructions to hand.
The coffee machine enables you to prepare
− brewed coffee, coffee specialities without milk
− machine with milk frother as additional feature: for coffee products with milk
− special coffee by adding the ground coffee to the coffee chute
− tea / dispensing of hot water or steam depends on the unit type
− for the commercial use only.
Please use the coffee machine for the preparation of coffee only. Improper use can
result in damage to persons and objects.
How does the coffee machine work ?
After a button is pressed, the coffee machine fully automatically brews coffee or
coffee specialities cup for cup. The coffee beans are freshly ground for each brewing
operation.
After brewing, the dry coffee grounds are scraped off into the grounds container or
container ejector.
Key to symbols
.Activities to be carried out
Notes, functional sequences
Reference to other instructions

3
Contents Page
1. Notes on operating safety 5. . . . . . . . . . . . . . . . . . . . . . . . . . . . . .
2. Familiarise yourself with the bremer VIVA Coffee Machine 6. . .
2.1 Set the language for the menue 7. . . . . . . . . . . . . . . . . . . . . . . . .
3. Switch on the unit 8. . . . . . . . . . . . . . . . . . . . . . . . . . . . . . . . . . . .
3.1 Top up coffee beans 8. . . . . . . . . . . . . . . . . . . . . . . . . . . . . . . . . . .
3.2 Provide milk (bremer VIVA with milk frother) 10. . . . . . . . . . . . . . .
3.3 Prepare and take coffee 12. . . . . . . . . . . . . . . . . . . . . . . . . . . . . . . .
3.3.1 Preparing single portions (factory setting) 12. . . . . . . . . . . . . . . .
3.3.2 Set the number of portions − Multiple Selection 13. . . . . . . . . . . .
3.4 Manual ground coffee metering 14. . . . . . . . . . . . . . . . . . . . . . . . .
3.5 Manually add milk or milk froth (bremer VIVA with
milk frother) 15. . . . . . . . . . . . . . . . . . . . . . . . . . . . . . . . . . . . . . . . .
3.6 Emptying the grounds container 16. . . . . . . . . . . . . . . . . . . . . . . . .
4. Take hot water (additional Feature) 17. . . . . . . . . . . . . . . . . . . . . .
5. Take steam (additional feature) 18. . . . . . . . . . . . . . . . . . . . . . . . .
6. Cleaning and care 19. . . . . . . . . . . . . . . . . . . . . . . . . . . . . . . . . . . .
6.1 Cleaning the milk system (bremer VIVA with milk frother) 20. . . .
6.2 Cleaning the brewing unit 22. . . . . . . . . . . . . . . . . . . . . . . . . . . . . .
6.3 Cleaning the coffee dispenser 24. . . . . . . . . . . . . . . . . . . . . . . . . .
6.4 Deliming and cleaning the hot water / steam outlet
(add. feature) 27. . . . . . . . . . . . . . . . . . . . . . . . . . . . . . . . . . . . . . . .
6.5 Clean coffee bean container and housing 28. . . . . . . . . . . . . . . . .
7. Switch off / End of operation 29. . . . . . . . . . . . . . . . . . . . . . . . . . .

4
Contents Page
8. Adjustment, programming 30. . . . . . . . . . . . . . . . . . . . . . . . . . . . .
8.1 Overview of the adjustment possibilities 30. . . . . . . . . . . . . . . . .
8.2 Display or delete the summing counter 31. . . . . . . . . . . . . . . . . . .
8.3 Assigning bean container to the article key 32. . . . . . . . . . . . . . . .
8.4 Adjusting metering quantities for article 33. . . . . . . . . . . . . . . . . .
8.5 Adjusting the metering quantity hot water" 34. . . . . . . . . . . . . . .
8.6 Assigning article names to the article key or blocking a key 35. .
8.7 Adjusting article control (multiple selection) 36. . . . . . . . . . . . . .
8.8 Changing to turbo operation" 37. . . . . . . . . . . . . . . . . . . . . . . . . .
8.9 Enter a secret code (PIN) to change settings 38. . . . . . . . . . . . . . .
8.10 Setting the dispensing sequence 39. . . . . . . . . . . . . . . . . . . . . . . .
9. Faults and remedies 40. . . . . . . . . . . . . . . . . . . . . . . . . . . . . . . . . .
10. Technical data 43. . . . . . . . . . . . . . . . . . . . . . . . . . . . . . . . . . . . . . .
11. Setting up and connecting (customer service) 44. . . . . . . . . . . . .
11.1 Setting up 44. . . . . . . . . . . . . . . . . . . . . . . . . . . . . . . . . . . . . . . . . . .
11.2 Remove protection / Inserting beans container 46. . . . . . . . . . . .
11.3 Connecting the water supply 47. . . . . . . . . . . . . . . . . . . . . . . . . . .
11.4 Connecting the water outlet 47. . . . . . . . . . . . . . . . . . . . . . . . . . . .
11.5 Connecting the mains cable 48. . . . . . . . . . . . . . . . . . . . . . . . . . . .
12. Rating plate data / Maintenance 49. . . . . . . . . . . . . . . . . . . . . . . .
12.1 Maintenance notes 50. . . . . . . . . . . . . . . . . . . . . . . . . . . . . . . . . . .
13. Dismantling, disposal 54. . . . . . . . . . . . . . . . . . . . . . . . . . . . . . . . .
EU Conformity declaration 55. . . . . . . . . . . . . . . . . . . . . . . . . . . . . . . . . . . . . . .

5
1. Notes on operating safety
Operation
DThe unit is not a working substance in the sense of the regulations for operating
safety. The operator is responsible for the operation, the risk assessment, and
for the repeated tests by authorized persons.
Danger ! Risk of death by electric shock!
DDo not spray the unit with a water hose or high-pressure cleaner.
DDo not allow any liquids to flow into the ventilation slits and filling openings.
DIn the event of operating faults, refer chapter 9. "Faults, remedy" section.
Attention ! If the following notes are not observed, slight injuries or
property damage might result.
DThe unit may only be operated
− by trained staff (assigned personnel)
− under supervision
− for the purpose outlined in the operating instructions.
DDo not cover the ventilation vents !
DThe unit may only be operated outdoors if covered and if there is sufficient wind
protection. Protect the unit from moisture and direct sunlight.
DThe ambient temperature around the unit must not fall below freezing point.
This would cause the water to freeze inside the unit and damage it.
Inspection of the safety equipment in regular intervals
DAccording to the pressure vessel regulations 97/23/EG and to the regulations
for operating safety the operator is responsible for the careful maintenance and
for the inspection of the safety equipment in regular intervals.
DFor this reason, the unit should be inspected and serviced once a year by the
authorised Franke customer service.
Extended operating pauses or shut−down of the unit
DBefore extended shut−down periods, the cleaning program has to be carried out.
DIn order to avoid frost damages or in case of risk of freezing, the Franke
customer service has to empty the unit.

6
2. Familiarise yourself with the bremer VIVA Coffee
Machine
*Bean container, right
*Bean container, left
Bean container, center
Cover, bean container Cover for manual ground coffee metering
and cleaning agent metering (lockable)
*Steam
button
*Steam
outlet
Hot water button
Hot water outlet
Grounds drawer
with handle
Keypad cover (lockable)
Coffee dispenser:
Swivelable and
height-adjustable
Unit switch On / OFF (STANDBY)
Scroll backwards in the main menu
Start cleaning program
Confirm loading cleaning tablet /
dosage ground coffee
Article keys:
1 cup
Making the settings / *adding milk
froth / *clean the milk suction hose
Delete summing counters
Article keys:
2 cups
Scroll forwards in the main menu
Opening and closing menus
Display and Input Panel
Display panel
*Suction
hose for milk
Change settings / *adding milk
Drip tray
Drip grill
COFFEE
SCHÜMLI
ESPRESSO
CAPPUCCINO
Indicator lamps
*Air nozzle
*Milk cooling box
(add. feature)
* = Additional feature

7
2.1 Set the language for the menue
− before switching on
− in STANDBY Mode
− at the machine
Example: set the language to German
.Press the upper article key on the left hand
side continuously, press at the same time
key or till the requested country
code apears in the display panel
Country code Language
031 Dutch
033 French
044 English
049 German
081 Japanese
095 Russian (add. feature)
.Confirm set country code with key
DSubsequently the setted language is shown
(Summenzähler" = Summing counter) in
the display.
.Go to Menü verlassen" (= Exit menu) with
key
.Confirm the setting with key
DThe desired language is set.
DThe machine goes into the STANBY Mode
and stores the new setting.
DIn case of power failure or incorrect setting
procedure it is possible to loose applied
data.
!!! STANDBY !!!
START
START
081 STANDBY
Country code
Summenzähler
Menü
verlassen
!!! STANDBY !!!

8
3. Switch on the unit
.Open the water valve.
.Switch on the electrical mains switch.
D!!! STANDBY !!! appears in the display panel.
.Unlock and open keypad cover with key.
.Switch on the coffee machine by pressing
the on−off switch.
DRinsing process runs and boiler is heated up
(approx. 5 minutes).
DThe coffee machine is ready for operation
when the green indicator lamps on the
buttons light up and when "Ready" is
displayed in the display panel.
.Close the keypad cover and remove the key.
3.1 Top up coffee beans
DTop up with only the amount required for the day, because the coffee beans lose
their aroma if they are in the hopper for too long.
DEnsure that no foreign bodies enter the hopper.
!!! STANDBY !!!
lockkeypad
close
open

9
Top up coffee beans
.Unlock the hopper cover with the key and
open it.
.Fill the empty hopper with the required type
of coffee beans.
DIf the appliance is equipped with 2 grinders,
it will be possible to use two different sorts
of coffee beans.
.Close the hopper after filling it so that the
aroma is preserved.
Display when a hopper is empty
DIf the beans container becomes empty
during operation, this is indicated in the
display panel, e.g.: "Refil coffee container to
centre".
DThe corresponding article keys are
blocked.
DIf this message appears during a brewing
operation, it is possible that this brewing
operation took place without a sufficient
amount of ground coffee. Refill the bean
container with coffee beans and repeat the
brewing operation.
Confirmation of filling
.Press blocked article key for approx. 5
seconds.
DWhen the green indicator lamp lights up
again, the coffee machine is ready for
brewing.
Cover, beans container
Lock (option)
Refill centre
ground container
Example:
Beans container
left
(1 kg)
centre
(1.5 kg)
right
(1 kg)
Example:

CAUTION
NOTE
10
3.2 Provide milk (bremer VIVA with milk frother)
Food poisoning by bad milk!
If off milk is used, there will be the risk of food poisoning. For
hygienic reasons, the milk has to be replaced in time. Off milk has a
foul smell and must not be used.
Observe the hygienic instructions and use only pre−cooled long−life
milk.
Fresh milk has to be kept away from light, in cooled conditions at 4 to
8°C, and closed. The life of milk is guaranteed by the indication of
the consumption date on the packing.
Please observe that no foreign bodies must come into the milk tank.
Non−cooled milk will be very hot when being doses, this can result in
dosage fluctuations and form a skin (clogging). Moreover, there is a
risk of burning when tasting.
bremer VIVA with Milk Fridge (add. feature)
DMilk with a fat content of 3,5% is best suited
for frothing.
.Immerse the suction hose for milk into the
milk.
DMake sure that the suction nozzle at the
suction hose stands on the bottom of the
milk container. Do not bend the suction
hose.
.Close the cooling compartment.
DClean the suction hose two times a day, see
page 20.
Suction nozzle
Suction hose
Table of contents
Other Franke Coffee Maker manuals

Franke
Franke SU03 User manual

Franke
Franke SU12 User manual

Franke
Franke FCS4060 User manual

Franke
Franke A600 User manual

Franke
Franke Spectra S User manual

Franke
Franke Spectra S User manual

Franke
Franke S700 User manual

Franke
Franke A1000 User manual

Franke
Franke EVOLUTION PLUS User manual

Franke
Franke SB1200 User manual

Franke
Franke bremer VIVA au lait User manual

Franke
Franke MYTICO VARIO User manual

Franke
Franke Mythos FMY 45 CM XS User manual

Franke
Franke EVOLUTION PLUS User manual

Franke
Franke A300 Configuration guide

Franke
Franke SPECTRA X User manual

Franke
Franke Flair User manual

Franke
Franke A800 User manual

Franke
Franke SPECTRA I User manual

Franke
Franke Flair User manual