FMS RocHobby Super Viper 70MM User manual
REALISTIC RIGID
RETRACTS INSTALLED STRONG DURABLE EPO
STABLE
SMOOTH FLYING PERFORMANCE
FMSMODEL.COM
70MM
Super Viper

As the user of this product, you are solely responsible for operating in a manner that does not endanger yourself and
others or result in damage to the product or the property of others. This model is controlled by a radio signal subject
to interference from many sources outside your control. This interference can cause momentary loss of control so it
is advisable to always keep a safe distance in all directions around your model, as this margin will help avoid collisions
or injury.
Age Recommendation: Not for children under 14 years. This is not a toy.
·Never operate your model with low transmitter batteries.
·Always operate your model in an open area away from cars, traffic or people.
·Avoid operating your model in the street where injury or damage can occur.
·Never operate the model in populated areas for any reason.
·Carefully follow the directions and warnings for this and any optional support equipment you use (chargers,
rechargeable battery packs, etc.)
·Keep all chemicals, small parts and anything electrical out of the reach of children.
·Moisture causes damage to electronics. Avoid water exposure to all equipment not specifically designed and
protected for this purpose.
·Never lick or any place of any your model in your mouth as it could cause serious injury or even death.
Lithium Polymer (Li-Po) Battery Warning
CAUTION: Always follow the manufacturer’s instructions for safe use and disposal of batteries. Fire, property
damage, or serious injury can result from the mishandling of Li-Po batteries.
By handling, charging or using a Li-Po Battery you assume all risks associated with lithium batteries.
If at any time the batteries begin to swell or balloon, discontinue use immediately!
Always store the batteries at room temperature in a dry area to extend the life of the battery. Always transport
or temporarily store the battery in a temperature range of 40-120F. Do not store the battery or model in a car or in direct
sunlight. If stored in a hot car, the battery can be damaged or even catch fire.
Never use a Ni-Mh Charger to charge Li-Po Batteries. Failure to charge the battery with a Li-Po compatible charger
may cause fire resulting in personal injury and property damage.
Never discharge Li-Po Cells below 3V.
Never leave charging batteries unattended.
Never charge damaged batteries.
Charging the Flight Battery Warning
Use a battery charger that is designed to safely charge the Li-Po Battery. Read the charger instructions care
fully before use. When charging the battery, make certain the battery is on a heat resistant surface. It is also highly
recommended to place the Li-Po Battery inside a fire resistant charging bag readily available at hobby shops or
online.
WARNING: Read the ENTIRE instruction manual to become familiar with the features of the product before operating.
Failure to operate the product correctly can result in damage to the product,personal property and cause serious
injury.
This is a sophisticated hobby product and NOT a toy. It must be operated with caution and common sense and failure
to do so could result in injury or damage to the product or other property. This product is not intended for use by
children without direct adult supervision.
This manual contains instructions for safety operation and maintenance. It is essential to read and follow all the
instructions and warnings in the manual prior to assembly, setup or use, in order to operate and avoid damage or
serious injury.

Introductions
3
Building on engineering innovations seen in this popular jet model, ROCHOBBY(by FMS) has launched
a brand new 70mm EDF Super Viper onto the market!
In terms of appearance, the Super Viper has a scaled navy blue color scheme with bright yellow wingtips,
which highly distinguishes it for long distance viewing. The optimized fuselage shape decreases wind
resistance. The button-type canopy design lets you latch the canopy so you will not lose the cockpit during
extreme maneuvers.
In terms of performance, the Super Viper is equiped with a 70mm 12-blade Ducted Fan, innrunner
KV1850, and a Predator 70A ESC, this powerful system, when coupled with a 6S battery, resembles a
turbine engine sound.
This inexpensive fine trainer is excellent for edf jet beginners. To keep costs low, we offer the model as a
standard PNP with options to add flap servos.
Get yourself a Super Viper and bring new excitement to the flying field!
Key Features:
• High quality Predator 70A ESC, powerful KV1850 innrunner motor with the latest 70mm 12-blade EDF
• Screw-together construction
• Button type canopy hatch
• Pre-installed ball link style control horns provide precise surface control
• The finest Trainer EDF in the market
Introduction
Contents of Kit
Model Assembly
Battery installation
Connectors Diagram
Get your model ready to fly
Important ESC and model information
The transmitter and model setup
Check the control throws
Clevis Installation
Control Horn and Servo Arm Settings
Center of Gravity(CG)
Before flying the model
Flying Course
Troubleshooting
Spare parts list content
ESC instruction
Table of Contents
··························································································································3
························································································································4
······················································································································5
···················································································································9
···············································································································9
······································································································10
························································································10
·······························································································10
········································································································11
··················································································································12
························································································12
·············································································································13
···········································································································14
·················································································································15
····················································································································16
···········································································································17
·····················································································································18
Before assembly, please inspect the contents of the kit. The photo below details the contents of the kit and
labels. If any parts are missing or defective, please indentify the name or part number (refer to the spare
Contents of Kit
4
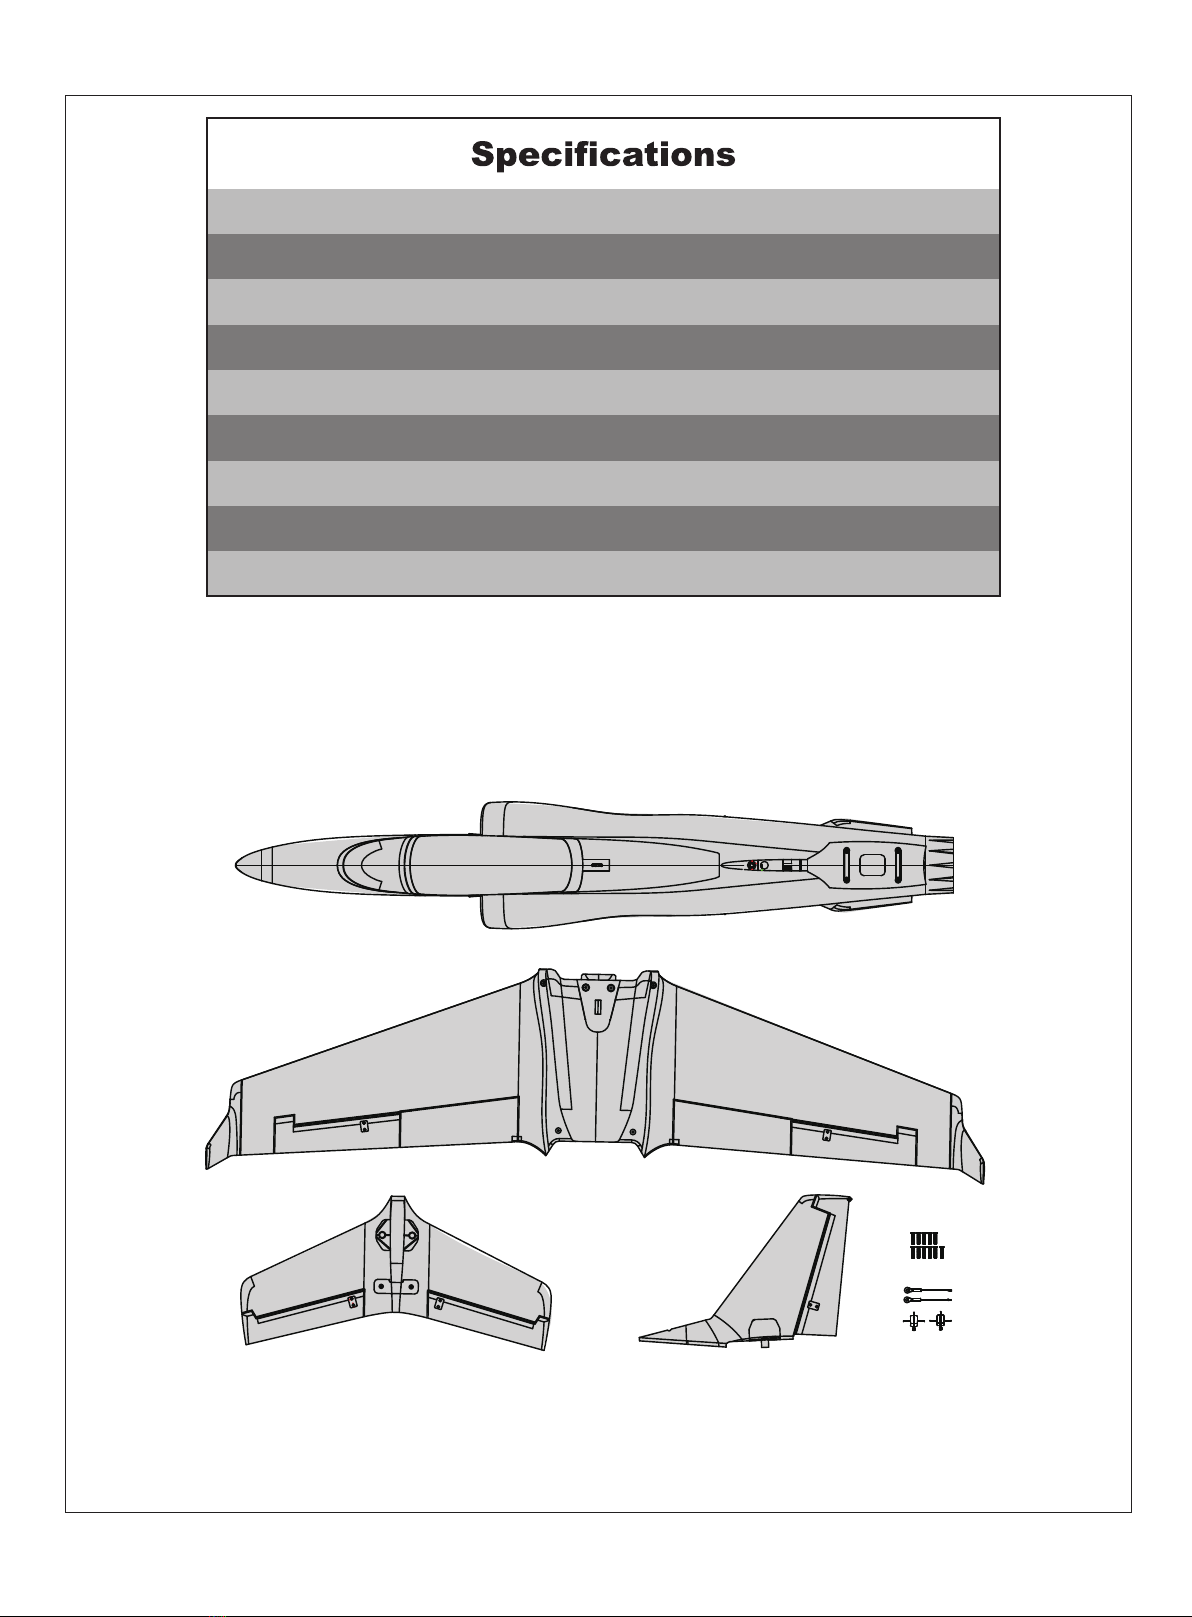
Wingspan: 1100mm(43.3in)
Overall Length: 1025mm(40.5in)
Flying Weight: Around 1795g(63.32oz)
Motor Size: Brushless 2860-KV1850
Wing Load: 93.5 g/dm²(0.21oz/in²)
Wing Area: 19.2 dm²(297.6sp.in)
ESC: 70A
Servo: 9g Servo x 6
Recommended Battery: 22.2V 3300mAh 35C
A.
C. D.
F.
E.
G.
A:Fuselage
B: Main Wing Set
C:Horizontal Stabilizer
D: Vertical Stabilizer
E: Screws (11-HKM3.0*16)
F: Linkage Rods for Flaps
G:Control Horns for Flaps
B.
5
fig1
fig2
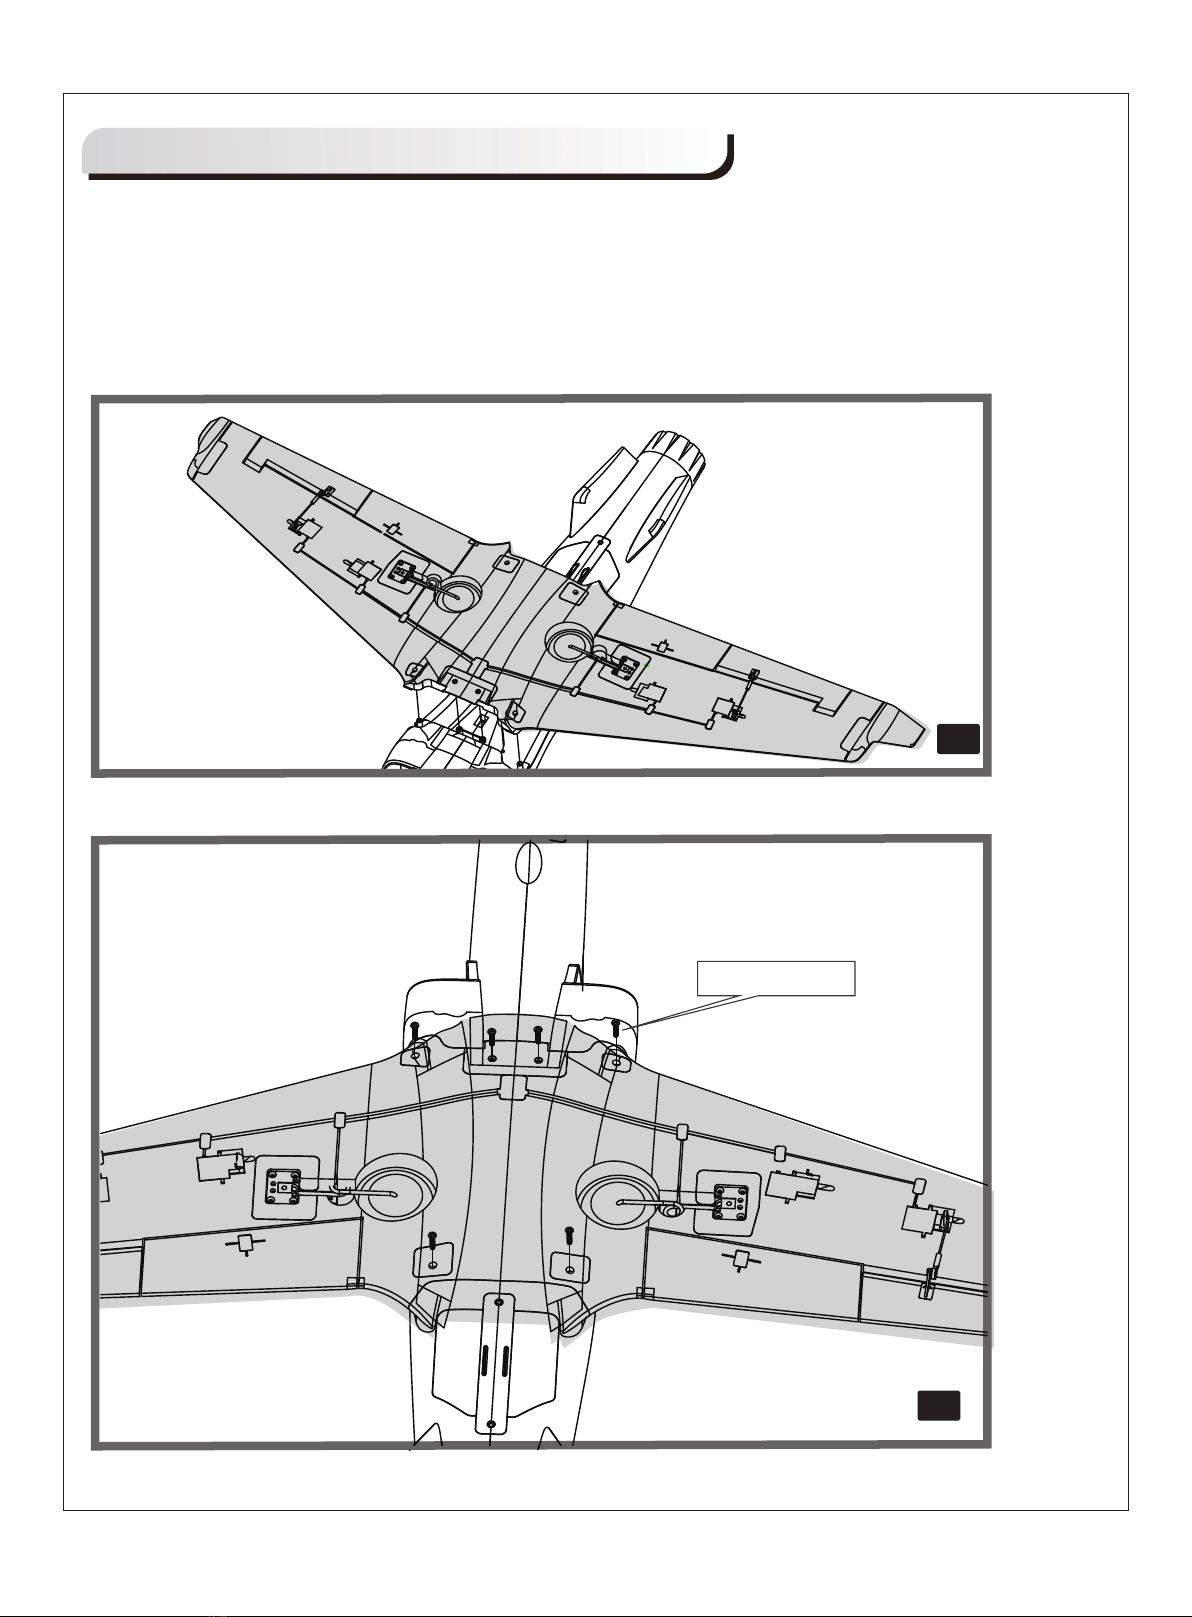
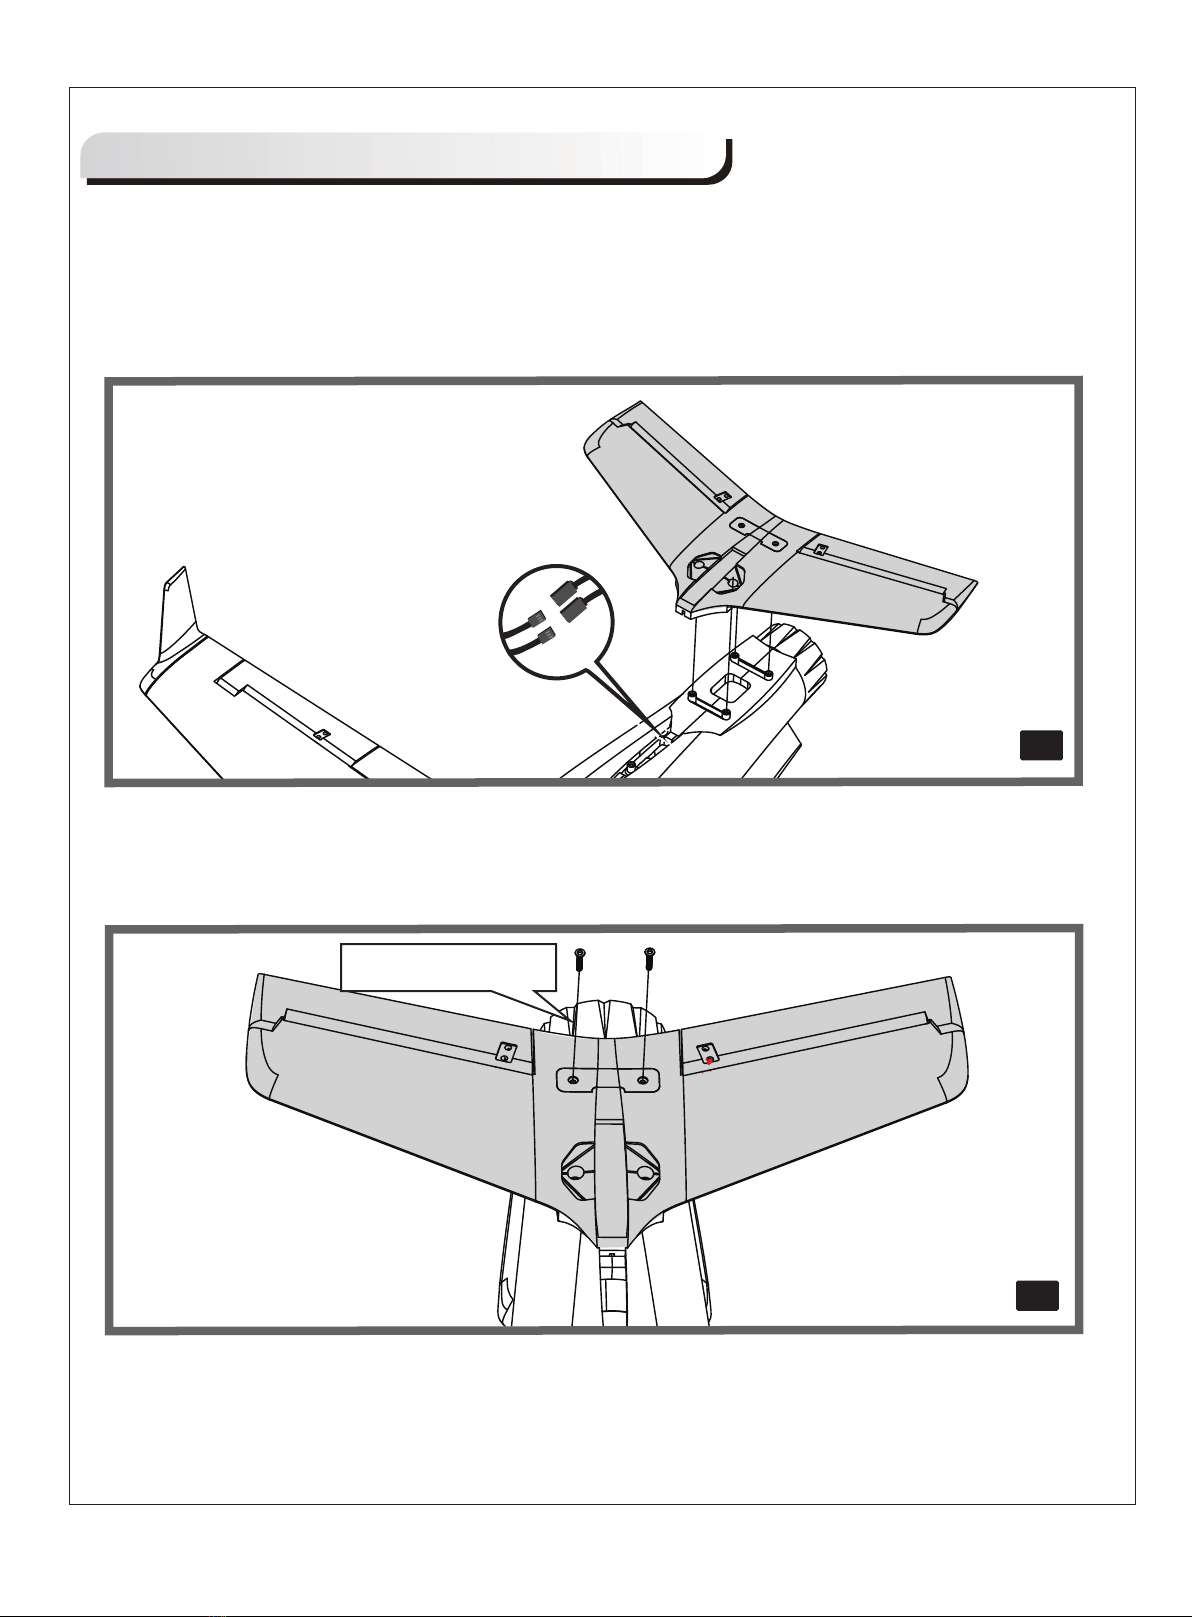
1. Remove the canopy hatch
2.Guide the Y-harnesses from main wing through the hole located in the bottom of the fuselage as shown (fig1)
3.Aligh the wing with the fuselage and secure into position using screws included as shown(fig2)
Main Wing Installation
Model Assembly
HKM
3.0*16
6
Model Assembly
fig3
fig4
Horizontal Stabilizer Installation:
1.Connect the elevator servo connectors to the servo extensions in the fuselage.
2.Install the horizontal tail in the rear of the fuselage. Ensure the control horn faces down as shown. (fig3)
3.Secure the horizontal tail in place using the included screws. (fig4)
HKM3.0*16
7
Model Assembly
fig5
fig6
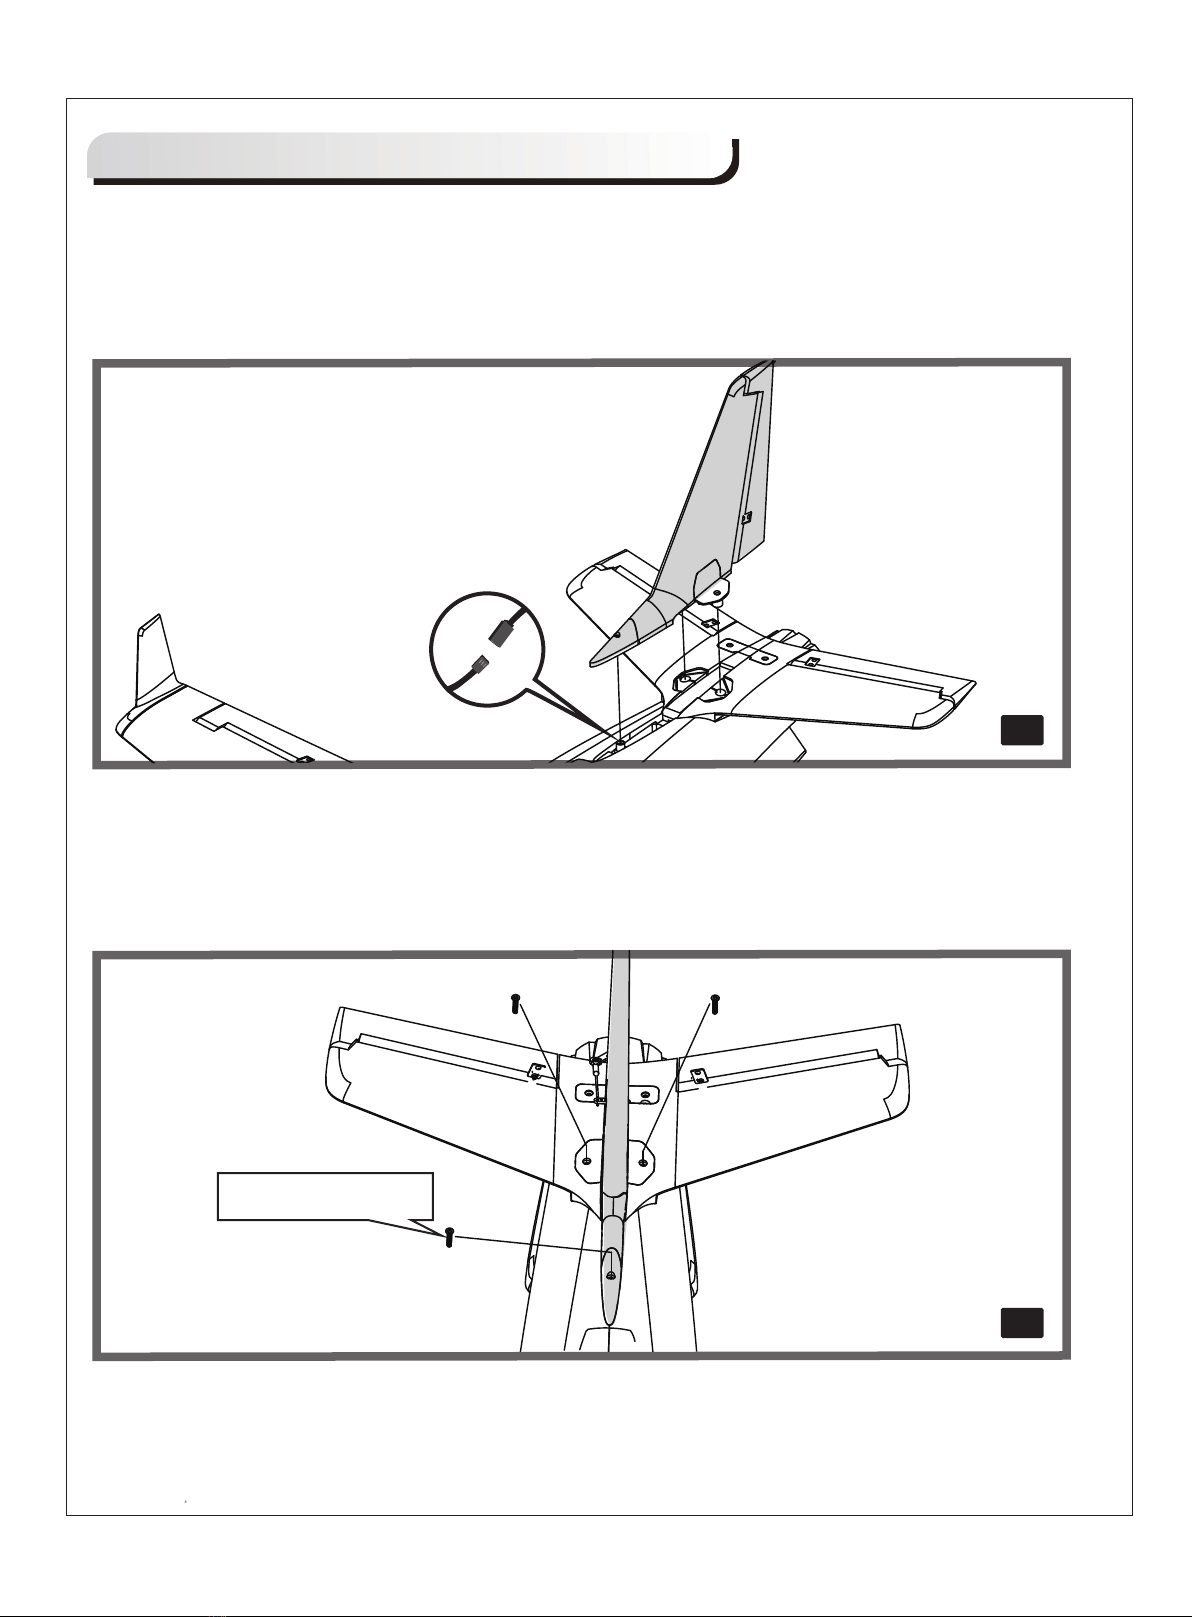
1.Connect the rudder servo connectors to the servo extensions in the fuselage.
2.Install the vertical tail into the slot in the fuselage. (fig5)
3.Secure the vertical tail in place using the included screws. (fig6)
Vertical Stabilizer Installation:
HKM3.0*16
8
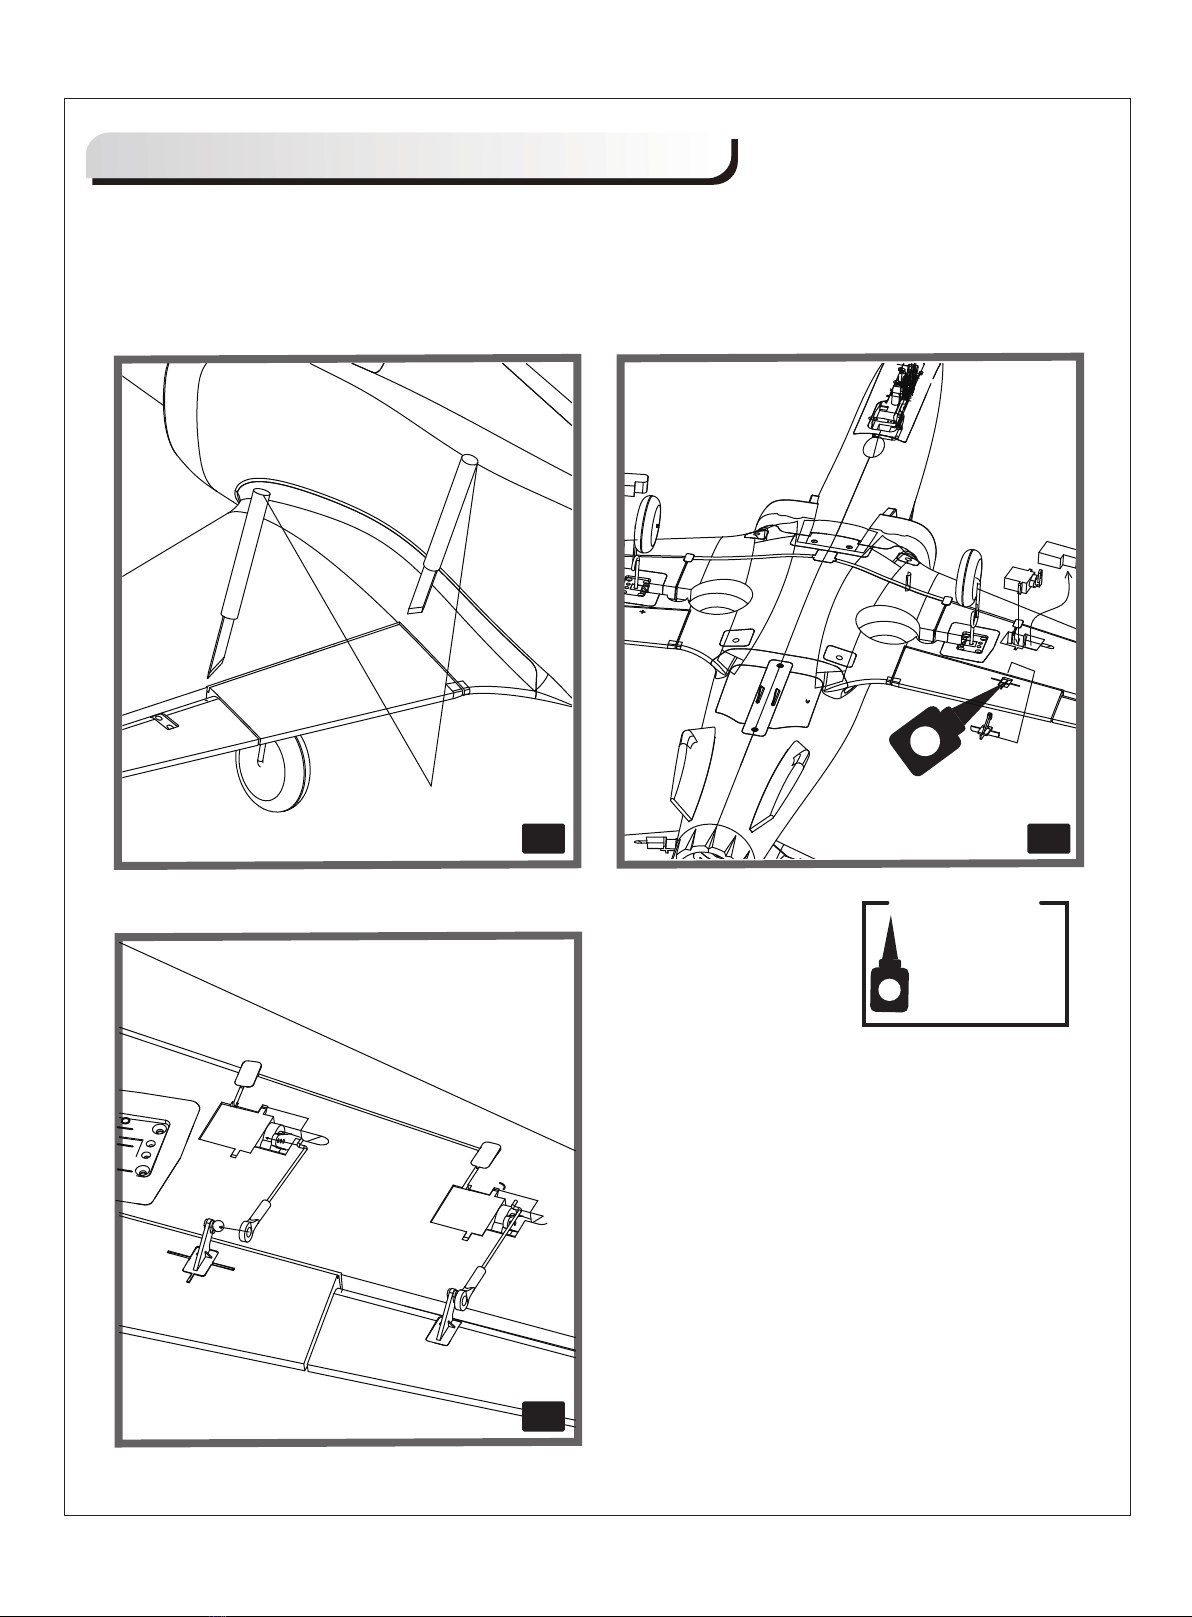
Flap Option
1. Cut apart the joints with a knife as shown(fig7).
2.Take out the foam blocks from the flap servo slots and put the flap servos in. (fig8)
3. Glue the control horns.
4. Install the linkage rods.(fig9)
fig8
Required Adhesives:
Foam Safe Medium CA
cut
fig9
fig7

Battery installation
9
Connectors Diagram
1. Apply the hook tape to the cable end of the battery.(fig 10)
2. Slide the battery into the battery hatch with the power supply cable toward the rear end of the plane and
the hook tape facing the bottom of the battery hatch.
Note: You may need to relocate the battery position to acheieve the correct CG for your model.
fig11
fig10
fig11
spare
This manual suits for next models
1
Table of contents
Other FMS Toy manuals


