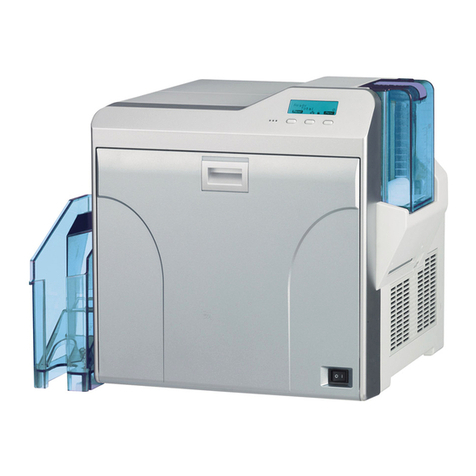
DNP DS-ID400 Service manual

PNG Export Tool
Setting Guide
This document describes how to use PNG Export Tool to convert
image files into template files for use with the DS-ID400.
Digital Photo Printer
DS-ID400
3-00D-056-11 (1)
© 2012 Dai Nippon Printing Co., Ltd.

2
Table of Contents
Table of Contents
Copyright Notice .........................................3
About the PNG Export Tool........................3
Preparation ..................................................3
Operating Environment ................................... 3
Installation ....................................................... 3
Parts of the Screen......................................4
Creating a Template ....................................5
Before Using a Template................................. 5
Creating Images............................................... 5
Starting the PNG Export Tool ......................... 5
Selecting the PNG File to Convert .................. 6
Saving a Template ........................................... 6
Printing Logos Using the Template Files........ 6
Created Folders and Files ..........................7
Trademarks
Microsoft and Windows are registered trademarks of
Microsoft Corporation in the United States and/or other
countries.
All other brands and product names are trademarks or
registered trademarks of their respective owners.

3
Copyright Notice / About the PNG Export Tool / Preparation
Copyright Notice
©2012 Dai Nippon Printing Co., Ltd. All rights reserved.
This manual may not be reproduced, translated or reduced
to any machine readable form in whole or in part, without
prior written approval from Dai Nippon Printing Co., Ltd.
DAI NIPPON PRINTING CO., LTD. PROVIDES NO
WARRANTY WITH REGARD TO THIS MANUAL OR
INFORMATION CONTAINED HEREIN AND
HEREBY EXPRESSLY DISCLAIMS ANY IMPLIED
WARRANTIES OF MERCHANTABILITY OR
FITNESS FOR ANY PARTICULAR PURPOSE WITH
REGARD TO THIS MANUAL OR SUCH
INFORMATION. IN NO EVENT SHALL DAI NIPPON
PRINTING CO., LTD. BE LIABLE FOR ANY
INCIDENTAL, CONSEQUENTIAL OR SPECIAL
DAMAGES, WHETHER BASED ON TORT,
CONTRACT, OR OTHERWISE, ARISING OUT OF OR
IN CONNECTION WITH THIS MANUAL OR
INFORMATION CONTAINED HEREIN OR THE USE
THEREOF.
Dai Nippon Printing Co., Ltd. reserves the right to make
any modification to this manual or the information
contained herein at any time without notice.
About the PNG Export
Tool
PNG Export Tool is a utility program used to convert PNG
(Portable Network Graphics) format logo data created with
commercial image creation software into a template file
structure usable with the DS-ID400 printer.
Templates files converted using PNG Export Tool can be
used with DS-ID400 printers on which firmware Ver. 1.00
or later is installed.
For the latest information on compatible printers, visit the
following Web site.
http://dnpphoto.net/support-e/
Preparation
Operating Environment
The PNG Export Tool requires an IBM PC/AT-compatible
personal computer with the following operating
environment.
Operating system
• Microsoft Windows XP
• Microsoft Windows Vista
• Microsoft Windows 7
Display monitor (recommended)
At least XGA (1024 ×768 pixels) and 24-bit color
For the latest information on compatible printers, visit the
following Web site.
http://dnpphoto.net/support-e/
Installation
1
Double-click the msi file.
2
Read the information in the displayed dialog, and click
the [Next] button as instructed.
The dialog will display a message indicating that
installation has been completed.
3
Click the [Close] button to close the dialog.

4
Parts of the Screen
Parts of the Screen
(1) [Target file] box
Shows the full path name of the currently selected
PNG file.
(2) Selected image box
Displays the currently selected PNG file image.
(3) [Brows...] button
Select the PNG file to be converted.
(4) [Name] Entry Box
Enter a name for the template to be exported.
(5) [Export] button
Saves the converted template file structure in the
specified folder.
(6) [Quit] button
Closes the PNG Export Tool.
Clicking the icon at the top left displays the following
menu.
(1) [Move] menu item
Allows repositioning the window.
(2) [Close] menu item
Closes the PNG Export Tool.
(3) [About PNG Export Tool ...] menu item
Displays PNG Export Tool version information.

5
Creating a Template
Creating a Template
These procedures describe how to create a template file
structure using the PNG Export Tool.
Before Using a Template
Creating Images
Create logo image design data as follows.
The size of images to be used for templates is determined
by print size. Create image data with the following sizes.
For the UPC-X34 series: 1512 (W) × 1112 (H) pixels
For the UPC-X46 series: 1664 (W) × 2440 (H) pixels
PNG Format
24-bit RGB + alpha channel (semi-transparent images are
supported)
Up to 52 pixels from the top, bottom, left and right edges
of the above image sizes may not be printed, so avoid
placing logos or text in these regions if you need them to
print.
Use guidelines in your image creating software to confirm
proper object placement.
Starting the PNG Export Tool
1
Double click (DSIDPhotoUtility.exe).
The [DS ID Photo Utility] screen appears.
2
Select the target printer from the [Printer] pull-down
menu.
3
Click the [Browse Folder] button, and select the save
destination.
The following folders are automatically created during
file saving:
For the DS-ID400
<folder specified as output destination>
DNP\DSID400
If you want to make the template directly available for
use, select the drive letter of the expansion SD card as
the save destination.
Create logo image design data
Run the PNG Export Tool to convert the template file
Save the template to an expansion SD card, and insert the
card in the printer
Select the logo you want to use using the printer’s menu
The created template is now ready for use
Note
Printable area
(example: 1560 ×2336)
Image size (example:
1664 ×2440)
Paper size (example:
102 ×152 mm (4 ×6
inches))
52 pixels 52 pixels
52 pixels
52 pixels

6
Creating a Template
CD/DVD drives cannot be specified as the save
destination.
4
Click the (PNG Export Tool) icon.
The PNG Export Tool starts.
Closing the PNG Export Tool
Close the program by clicking the button at the top
right corner of the window, or by clicking the icon at the
top left corner and then the [×Close] button in the menu
that appears, or by clicking the [Quit] button.
Selecting the PNG File to Convert
Click the [Brows...] button to display the Open dialog box,
and select the folder containing the PNG file to be
converted.
Select the file to be converted from the displayed file list,
and click [Open].
You can also select the file to convert by dragging and
dropping it from Windows Explorer.
The PNG Export Tool supports only the following PNG
file image color depth and image sizes. See “Creating
Images” on page 5 for details.
Saving a Template
Select the PNG file to be converted to template structure,
and after entering the template’s name in the [Name] entry
box (alphanumeric characters and symbols), click the
[Export] button to save to the specified folder.
The template file’s save destination should be specified
according to the print size of the template.
File names may not include invalid Windows file name
characters ( ?, *, <, >, |, \ or : ) or non-English Asian
characters.
Also, the following text strings cannot be used for template
names:
AUX, CON, NUL, PRN, CLOCK, COM0 to COM9, or
LPT0 to LPT9
Note that file names are not case-sensitive.
Printing Logos Using the Template
Files
Copying templates to expansion SD cards
If you saved the template to a drive other than the
expansion SD card, copy the template to the expansion SD
card before inserting it in the printer.
1
Create the following folder on the expansion SD card.
For the DS-ID400
DNP\DSID400\Template\none
2
Copy the folder of the size you want to use to the
expansion SD card.
Printing logos on the printer
1
Insert the expansion SD card on which the template is
saved in the SD card slot on the printer.
2
Select the template using the printer’s menu.
3
Shoot the photo and print it.
For details on printer operations, refer to the operating
instructions for the printer.
Note
Memo
Note
Note

7
Created Folders and Files
The PNG Export Tool creates the following folders and files on the save destination drive.
DNP
Te m p l ate
DSID400
none
3x4
Single
1112x1512
4x6
Single
1664x2440
(Template name 1).png
(Template name 1)_pv.png (not used)
(Template name 1)_th.bmp (not used)
(Template name 1)
(Template name 2).png
(Template name 2)_pv.png (not used)
(Template name 2)_th.bmp (not used)
(Template name 2)
(paper size)
Other manuals for DS-ID400
3
Table of contents
Other DNP Printer manuals