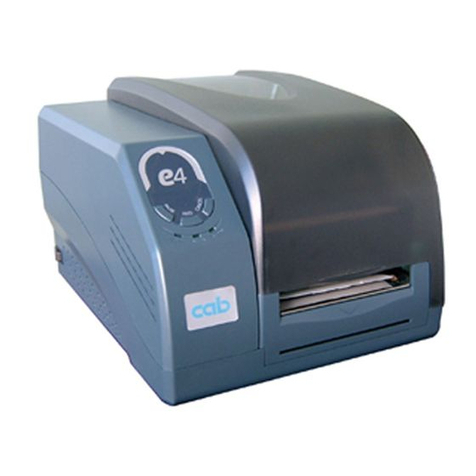
CAB XC Series User manual

Service Manual
Label Printer
XC Series

2 2
Family Type
XC XC4/300
XC6/300
Edition: 11/2012 - Part No. 9009285
Copyright
This documentation as well as translation hereof are property of
cab Produkttechnik GmbH & Co. KG.
The replication, conversion, duplication or divulgement of the
whole manual or parts of it for other intentions than its original
intended purpose demand the previous written authorization by
cab.
Editor
Regarding questions or comments please contact cab Produkt-
technik GmbH & Co. KG.
Topicality
Due to the constant further development of our products discrep-
ancies between documentation and product can occur.
Please check www.cab.de for the latest update.
Terms and conditions
Deliveries and performances are effected under the General
conditions of sale of cab.
Service Manual
for the following products
Germany
cab Produkttechnik
GmbH & Co KG
Postfach 1904
D-76007 Karlsruhe
Wilhelm-Schickard-Str. 14
D-76131 Karlsruhe
Telefon +49 721 6626-0
Telefax +49 721 6626-249
www.cab.de
France
cab technologies s.a.r.l.
F-67350 Niedermodern
Téléphone +33 388 722 501
www.cab.de/fr
USA
cab Technology Inc.
Tyngsboro MA, 01879
Phone +1 978 649 0293
www.cab.de/us
South Africa
cab Technology (Pty.) Ltd.
2125 Randburg
Phone +27 11-886-3580
www.cab.de/za
Asia
cab Technology Co., Ltd.
Junghe, Taipei, Taiwan
Phone +886 2 8227 3966
www.cab.de/tw
China
cab (Shanghai)Trading Co., Ltd.
Phone +86 21 6236-3161
www.cab.de/cn
Representatives in other countries on request

2
3
Table of Contents
1 Important Information ............................................................................................................................ 4
1.1 Instructions ............................................................................................................................................... 4
1.2 General Safety Instructions ...................................................................................................................... 4
1.3 Protective Devices ................................................................................................................................... 5
1.4 Handling Electricity .................................................................................................................................. 5
1.5 Procedure in Case of Accidents .............................................................................................................. 5
2 Preparation ............................................................................................................................................. 6
2.1 Tools ......................................................................................................................................................... 6
2.2 Removing and Installing the Rear Cover ................................................................................................. 6
3 Cleaning .................................................................................................................................................. 7
3.1 Cleaning by the Operator ......................................................................................................................... 7
3.2 Cleaning the Label Sensor ....................................................................................................................... 7
4 Replacing Assembly Units .................................................................................................................... 8
4.1 Replacing the Printhead ........................................................................................................................... 8
4.1.1 Replacing the Printhead XC4 ............................................................................................................. 8
4.1.2 Replacing the Printhead XC6 ........................................................................................................... 10
4.2 Replacing the Print Roller ...................................................................................................................... 12
4.3 Replacing the Slipping Clutches ............................................................................................................ 13
4.4 Replacing the Brake Block on the Roll Retainer .................................................................................... 15
4.5 Replacing the Label Sensor ................................................................................................................... 16
4.6 Replacing the CPU ................................................................................................................................. 17
4.7 Replacing the Power Supply Unit ........................................................................................................... 18
5 Adjustments ......................................................................................................................................... 19
5.1 Measuring and Adjusting the Winding Torques ...................................................................................... 19
5.1.1 Measuring the Winding Torques ....................................................................................................... 19
5.1.2 Adjusting the Slipping Clutches ........................................................................................................ 21
5.2 Adjusting the Printing Mechanism .......................................................................................................... 22
5.2.1 Preparing the Printer for Adjustment ................................................................................................ 22
5.2.2 Adjusting the Printhead Position....................................................................................................... 23
5.2.3 Adjusting the Printhead Pressure ..................................................................................................... 24
5.2.4 Adjusting the Transfer Ribbon Feed Path......................................................................................... 25
5.2.5 Final Test .......................................................................................................................................... 25
5.3 Adjusting the Label Feed Path ............................................................................................................... 26
5.4 Adjusting the Belt Tension ...................................................................................................................... 27
5.5 Adjusting the Head Switch ..................................................................................................................... 29
5.6 Adjusting the Magnetic Clutch ................................................................................................................ 30
5.7 Adjusting the Ribbon Saver Mechanics ................................................................................................. 31
6 Troubleshooting and Error Treatment ................................................................................................ 32
6.1 Failure of Device Functions .................................................................................................................... 32
6.2 Hardware Faults ..................................................................................................................................... 33
7 Block Diagram ...................................................................................................................................... 34
8 Layout Diagram CPU ........................................................................................................................... 35
9 Index ...................................................................................................................................................... 37

4 4
1.1 Instructions
Important information and instructions in this documentation are designated as follows:
Danger!
Draws your attention to an exceptionally grave, impending danger to your health or life.
!
Warning!
Indicates a hazardous situation that could lead to injuries or material damage.
!
Attention!
Draws attention to possible dangers, material damage or loss of quality.
i
Notice!
Gives you tips. They make a working sequence easier or draw attention to important working processes.
Environment!
Gives you tips on protecting the environment.
Handling instruction
Reference to section, position, illustration number or document.
Option (accessories, peripheral equipment, special ttings).
Time Information in the display.
1.2 General Safety Instructions
This service manual is intended for use by qualied service and maintenance personnel. For more operation and
conguration information, refer to the user or conguration manual.
Follow the general safety rules below:
• Keep the area around the device clean at all times!
• Work with safety in mind.
• Parts of device that are removed during the maintenance work must be put in a safe place.
• Avoid risks of tripping over.
Danger!
Danger to life and limb from increased current ow through metal parts in contact with the device.
Do not wear clothing with metal parts.
Do not wear jewelry.
!
Warning!
Items of clothing drawn into the device by moving parts can lead to injuries.
Do not wear any items of clothing which could get caught by moving parts.
1 Important Information

4
5
1 Important Information
1.3 Protective Devices
!
Warning!
There is a risk of injury if protective devices are missing or defective.
Replace all protective devices (covers, safety notices, grounding cables etc) after maintenance work
has been completed.
Replace parts that have become defective or unusable.
Wear protective goggles for:
• Knocking pins or similar parts in or out with a hammer.
• Using spring hooks.
• Inserting or removing springs, retaining rings or grip rings.
• Using solvents, cleansers or other chemicals.
1.4 Handling Electricity
The following work may only be done by trained and qualied electricians:
• Work on electrical components.
• Work on an open device still connected to the mains supply.
General precautions before starting maintenance work:
• Find out where the emergency and power switches are so that they can be quickly thrown in an emergency.
• Disconnect the current supply before carrying out the following work:
- Installing or removing power units.
- Working in the immediate vicinity of open power supply components.
- Mechanical check of power supply components.
- Modifying circuits in the device.
• Test the zero potential of the device parts.
• Check the working area for possible sources of danger, such as wet oors, defective extension cables, defective
protective conductor connections.
Additional precautions in the case of exposed voltages:
• Ask a second person to remain near the working site. This person must know where the emergency and power
switches are, and how to switch the current off if danger arises.
1.5 Procedure in Case of Accidents
• Act calmly and with great care.
• Avoid danger to yourself.
• Switch off power.
• Request medical assistance.
• Give rst aid, if necessary.

6 6
2 Preparation
2.1 Tools
Do not use any worn of damaged tools.
Only use tools and testing devices that are suitable for the task at hand.
cab special tools:
• Test collar for transfer ribbon winder (cab item number: 5534199)
• Distance caliber 0,1 mm (cab item number: 5961064)
Standard tools:
• Torx screwdriver TX 20
• Hexagon electronic screwdriver 1,5 mm
• Hexagon key 2,5 mm, 200 mm shaft (included in delivery)
• Phillips-head screwdriver, size 1
• Precision circlip pliers A0
• Precision circlip pliers A1
• Cylindrical dynamometer (spring scale), 0 - 10 N
• Digital multimeter
2.2 Removing and Installing the Rear Cover
1 2 3 2
4 43 55 6
Fig. 1 Removing and Installing the Rear Cover
Removing rear cover :
1. Open front cover (1).
2. Loosen screws (2).
3. Close front cover.
4. Lift and remove the rear cover (3).
Installing rear cover :
5. Close front cover.
6. Apply the rear cover to the frame (6) and push it downward.
The aps (4) at the inside of the rear cover must grasp into the slots (5) of the frame.
7. Open front cover.
8. Tighten the screws (2).

6
7
3 Cleaning
3.1 Cleaning by the Operator
The following cleaning work is described in the “Operator's Manual“:
• cleaning the device
• cleaning the printhead
• cleaning the print roller
3.2 Cleaning the Label Sensor
1 2
3 4 5 6
Fig. 2 Cleaning the label sensor
Danger!
Risk of death via electric shock!
Before opening the rear cover, disconnect the device from the mains supply and wait at lease one
minute until the power supply unit has discharged.
1. Remove the material from the printer.
2. Remove the rear cover.
3. Slide the label sensor assembly via the tab (5) toward the rear cover until it stops.
4. Unplug the cable (1) from the connector of the label sensor (2).
5. Press the latch (3) and slowly pull label sensor outward via the tab (5). That way at XC6 a distance plate (3) is
pushed out of label sensor guide.
6. Clean label sensor and sensor units (4) with brush or cotton swab soaked in pure alcohol.
7. Push label sensor back via tab (5) .
8. XC6 only : Press the latch (6) and push the distance plate (3) into the guide of the label sensor.
9. Connect the cable (1) to the label sensor (2).
10. Pull the label sensor (2) via the tab (5) as far as possible toward the front cover side.
This prevents the cable (1) from being pinched when installing the rear cover.
11. Install the rear cover.

8 8
4 Replacing Assembly Units
4.1 Replacing the Printhead
4.1.1 Replacing the Printhead XC4
The printhead of the label printer can be replaced without the need for ne adjustment. The printhead must be
replaced if worn.
1
2
3
4
6
4
6
5
1 Printhead
2 Plug connection
3 Plug connection
4 Screw
5 Printing line
6 Pins
Fig. 3 Structure of the printhead XC4
!
Attention!
The printhead assembly is precisely aligned at the factory.
Do not loosen the screws (4) under any circumstances.
!
Attention!
The printhead can be damaged by static electricity discharges and impacts!
Ground your body, e.g. by wearing a grounded wristband.
Do not touch contacts on the plug connections (2, 3).
Do not touch printing line (5) with hard objects or your hands.
7
66 1 2 3 8
Fig. 4 Replacing the printhead XC4

8
9
i
Notice!
The printhead replacement will be described for the upper printhead. The procedure applies for the lower
printhead in the same manner.
Removing the printhead
1. Lift the printhead.
2. Remove labels and transfer ribbon from the printer.
3. Lightly keep printhead mounting bracket (8) on the print roller with one nger and loosen screw (7).
4. Swivel printhead mounting bracket (8) upward.
5. Remove printhead (1) from the printhead mounting bracket (9) if necessary.
6. Loosen both plug connections (2, 3) on the printhead.
Installing the printhead
1. Attach plug connections (2, 3).
2. Position printhead in printhead mounting bracket (8) in such a way that the pins (6) are secured in the corre-
sponding holes in the printhead mounting bracket (8).
3. Lightly keep printhead mounting bracket (8) on the print roller with one nger and check for correct positioning of
the printhead in the mounting bracket (8).
4. Screw in screw (7) and tighten it.
5. Reload labels and transfer ribbon.
4 Replacing Assembly Units

10 10
4 Replacing Assembly Units
4.1.2 Replacing the Printhead XC6
2
3
5
4
1
4
1 Printhead
2 Plug connection
3 Plug connection
4 Threaded hole
5 Printing line
Fig. 5 Structure of the printhead XC6
!
Attention!
The printhead can be damaged by static electricity discharges and impacts!
Ground your body, e.g. by wearing a grounded wristband.
Do not touch contacts on the plug connections (2, 3).
Do not touch printing line (5) with hard objects or your hands.
iNotice!
The printhead replacement will be described for the upper printhead. The procedure applies for the lower
printhead in the same manner, but the print roller must be removed additionally.
7
44 12 3
6 6
Fig. 6 Replacing the upper printhead XC6
Removing the printhead
1. Lift the printhead.
2. Remove labels and transfer ribbon from the printer.
3. Lightly keep printhead mounting bracket (7) on the print roller with one nger and loosen screws (6)
4. Swivel printhead mounting bracket (7) upward.
5. Remove printhead from the printhead mounting bracket (7) if necessary.
Other manuals for XC Series
1
This manual suits for next models
2
Table of contents
Other CAB Label Maker manuals