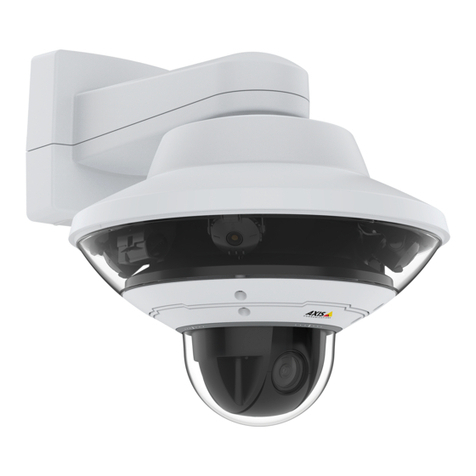
Axis AXIS M1011 User manual

ENGLISH DEUTSCH ITALIANO ESPAÑOL
INSTALLATION GUIDE
FRAN
Ç
AIS
AXIS M1011 Network Camera
AXIS M1011-W Network Camera
AXIS M1031-W Network Camera

About this Document
This document includes instructions for installing the
AXIS M1011/M1031 on your network. Previous
experience of networking will be beneficial when
installing the product.
Legal Considerations
Video and audio surveillance can be prohibited by laws
that vary from country to country. Check the laws in
your local region before using this product for
surveillance purposes.
This product includes one (1) H.264 decoder license and
(1) MPEG-4 decoder license. To purchase further
licenses, contact your reseller.
Electromagnetic Compatibility (EMC)
This equipment generates, uses and can radiate radio
frequency energy and, if not installed and used in
accordance with the instructions, may cause harmful
interference to radio communications. However, there is
no guarantee that interference will not occur in a
particular installation.
If this equipment does cause harmful interference to
radio or television reception, which can be determined
by turning the equipment off and on, the user is
encouraged to try to correct the interference by one or
more of the following measures: Re-orient or relocate
the receiving antenna. Increase the separation between
the equipment and receiver. Connect the equipment to
an outlet on a different circuit to the receiver. Consult
your dealer or an experienced radio/TV technician for
help. Shielded (STP) network cables must be used with
this unit to ensure compliance with EMC standards. See
Radio Transmission Regulatory Information & EMC,
on page 91 for more information on this product’s
compliance with radio frequency and safety
standards.
Equipment Modifications
This equipment must be installed and used in strict
accordance with the instructions given in the user
documentation. This equipment contains no
user-serviceable components. Unauthorized equipment
changes or modifications will invalidate all applicable
regulatory certifications and approvals.
Liability
Every care has been taken in the preparation of this
document. Please inform your local Axis office of any
inaccuracies or omissions. Axis Communications AB
cannot be held responsible for any technical or
typographical errors and reserves the right to make
changes to the product and documentation without
prior notice. Axis Communications AB makes no
warranty of any kind with regard to the material
contained within this document, including, but not
limited to, the implied warranties of merchantability
and fitness for a particular purpose. Axis
Communications AB shall not be liable nor responsible
for incidental or consequential damages in connection
with the furnishing, performance or use of this material.
RoHS
This product complies with both the European
RoHS directive, 2002/95/EC, and the Chinese
RoHS regulations, ACPEIP.
WEEE Directive
The European Union has enacted a Directive
2002/96/EC on Waste Electrical and Electronic
Equipment (WEEE Directive). This directive is
applicable in the European Union member
states.
The WEEE marking on this product (see right) or its
documentation indicates that the product must not be
disposed of together with household waste. To prevent
possible harm to human health and/or the environment,
the product must be disposed of in an approved and
environmentally safe recycling process. For further
information on how to dispose of this product correctly,
contact the product supplier, or the local authority
responsible for waste disposal in your area.
Business users should contact the product supplier for
information on how to dispose of this product correctly.
This product should not be mixed with other commercial
waste. For more information, visit
www.axis.com/techsup/.
Support
Should you require any technical assistance, please
contact your Axis reseller. If your questions cannot be
answered immediately, your reseller will forward your
queries through the appropriate channels to ensure a
rapid response. If you are connected to the Internet, you
can:
• download user documentation and firmware updates
• find answers to resolved problems in the FAQ database.
Search by product, category, or phrases
• report problems to Axis support by logging in to your
private support area.

AXIS M1011/M1011-W/M1031-W Installation Guide Page 3
ENGLISH
AXIS M1011/-W & AXIS M1031-W
Installation Guide
This installation guide provides instructions for installing the AXIS M1011/-W / AXIS M1031-W
Network Camera on your network. For all other aspects of using the product, please see the User’s
Manual, available on the CD included in this package, or from www.axis.com/techsup
Installation steps
1. Check the package contents against the list below.
2. Hardware overview. See page 4.
3. Install the hardware. See page 5.
4. Assign an IP address. See page 6.
5. Set the password. See page 9.
6. Configure the wireless connection. See page 11.
(AXIS M1011-W/M1031-W only)
Package contents
Item Models/variants/notes
Network Camera AXIS M1011
AXIS M1011-W
AXIS M1031-W
Indoor power adaptor
(country specific)
PS-H* or PS-V
Europe, UK, USA/Japan, Australia, Korea, Argentina, China
*power adaptor extension cable 1.8m (5.9ft), PS-H only
Camera stand Including fitted extension section and 4 mounting screws/plugs
Flexible clamp For shelf mounting
CD AXIS Network Video Product CD, including product documentation,
installation tools and other software
Printed Materials AXIS M1011/M1011-W/M1031-W Installation Guide (this document)
Axis Warranty Document
Important!
This product must be used in
compliance with local laws and
regulations.

Page 4 AXIS M1011/M1011-W/M1031-W Installation Guide
Hardware overview
Please refer to page 16 for details on the connectors and LED indicators.
Product number (P/N) &
The serial number may be
required during the installation.
Power connector
Control button
Network connector
Power Indicator LED
Network Indicator LED
Lock ring
Microphone
Light PIR
Wireless Indicator LED
(activated on wireless models only)
Lens with
Speaker
AXIS M1031-W AXIS M1011/-W
Rear view
Status Indicator
LED
Lens with
Status Indicator
LED
(both models)
Cable tie
Base plate
Rubber washer
Stand
Extension
section
Network camera
Front view
Assembly
sensor
(optional)
Serial number (S/N).

AXIS M1011/M1011-W/M1031-W Installation Guide Page 5
ENGLISH
Install the hardware
Mount the camera
AXIS M1011/M1011-W/M1031-W is shipped with the stand and extension section mounted.
Disassemble the stand and, depending on the intended installation, follow these instructions for
wall mounting or shelf mounting.
Wall mounting
1. Unscrew the extension section to release the base plate
from the stand.
2. Using the supplied screws, fix the base plate to a flat
(horizontal or vertical) surface.
3. Attach the stand and optionally the extension section.
4. Attach the camera, adjust the angle and tighten the lock
ring.
5. The stand is equipped with a cable tie to secure the cables
once connected.
Shelf mounting
1. Position the clamp and tighten the fixing screw securely.
2. Attach the lock ring on the camera to the clamp.
3. Adjust the camera angle and tighten the lock ring.
Connect the cables
1. Connect the camera to the network using a shielded net-
work cable.
AXIS M1011-W/M1031-W: If connecting to a wireless net-
work, the wired connection is temporary in order to config-
ure the camera’s wireless settings. See page 11 for more
information.
2. Connect the supplied indoor power adaptor to the power connector on the camera.
3. Check that the indicator LEDs indicate the correct conditions. See the table on page 16 for
further details. Note that some LEDs can be disabled and may be unlit.
4. Proceed to Assign an IP address, on page 6.
!IMPORTANT!
AXIS M1011/M1011-W/M1031-W is not approved for outdoor use - the product
may be installed in indoor environments only.
Lock
ring Extension
section
Stand
AXIS M1031-W Wall mount
AXIS M1031-W Shelf mount
Clamp
Lock
ring
Fixing screw
(optional)

Page 6 AXIS M1011/M1011-W/M1031-W Installation Guide
Assign an IP address
Most networks today have a DHCP server that automatically assigns IP addresses to connected
devices. If your network does not have a DHCP server the AXIS M1011/M1011-W/M1031-W will
use 192.168.0.90 as the default IP address.
If you would like to assign a static IP address, the recommended method in Windows is either AXIS
IP Utility or AXIS Camera Management. Depending on the number of cameras you wish to install,
use the method that best suits your purpose.
Both of these free applications are available on the Axis Network Video Product CD supplied with
this product, or they can be downloaded from www.axis.com/techsup
Notes:
• If assigning the IP address fails, check that there is no firewall blocking the operation.
• For other methods of assigning or discovering the IP address of the AXIS M1011/M1011-W/
M1031-W, e.g. in other operating systems, see page 15.
Method Recommended for Operating system
AXIS IP Utility
See page 7
Single camera
Small installations
Windows
AXIS Camera Management
See page 8
Multiple cameras
Large installations
Installation on a different subnet
Windows 2000
Windows XP Pro
Windows 2003 Server
Windows Vista

AXIS M1011/M1011-W/M1031-W Installation Guide Page 7
ENGLISH
AXIS IP Utility - single camera/small installation
AXIS IP Utility automatically discovers and displays Axis devices on your network. The application
can also be used to manually assign a static IP address
Note that the computer running AXIS IP Utility must be on the same network segment (physical
subnet) as the AXIS M1011/M1011-W/M1031-W.
Automatic discovery
1. Check that the camera is connected to the network and that power has been applied.
2. Start AXIS IP Utility.
3. When the camera appears in the window, double-click it to open its home page.
4. See page 9 for instructions on how to assign the password.
Assign the IP address manually (optional)
1. Acquire an unused IP address on the same network segment as your computer.
2. Select the camera in the list.
3. Click the button Assign new IP address to the selected device and enter the IP address.
4. Click the Assign button and follow the on-screen instructions. Note that the camera must be
restarted within 2 minutes for the new IP address to be set.
5. Click the Home Page button to access the camera’s web pages.
6. See page 9 for instructions on how to set the password.

Page 8 AXIS M1011/M1011-W/M1031-W Installation Guide
AXIS Camera Management - multiple cameras/large installations
AXIS Camera Management can automatically discover multiple Axis devices, show connection
status, manage firmware upgrades and set IP addresses.
Automatic discovery
1. Check that the camera is connected to the network and that power has been applied.
2. Start AXIS Camera Management. When the camera appears in the window, right-click the link
and select Live View Home Page.
3. See page 9 for instructions on how to set the password.
Assign an IP address in a single device
1. Select AXIS M1011 in AXIS Camera Management and click the
Assign IP button
2. Select Assign the following IP address and enter the IP
address, subnet mask and default router the device will use.
3. Click the OK button.
Assign IP addresses in multiple devices
AXIS Camera Management speeds up the process of assigning IP
addresses to multiple devices, by suggesting IP addresses from a
specified range.
1. Select the devices you wish to configure (different models can be
selected) and click the Assign IP button.
2. Select Assign the following IP address range and enter the
range of IP addresses, the subnet mask and default router the
devices will use.
3. Click the OK button.

AXIS M1011/M1011-W/M1031-W Installation Guide Page 9
ENGLISH
Set the password
To gain access to the product, the password for the default administrator user root must be set. This
is done in the ‘Configure Root Password’ dialog, which is displayed when the AXIS M1011/M1011-
W/M1031-W is accessed for the first time.
To prevent network eavesdropping when setting the root password, this can be done via an
encrypted HTTPS connection, which requires an HTTPS certificate (see note below).
To set the password via a standard HTTP connection, enter it directly in the first dialog shown
below.
To set the password via an encrypted HTTPS connection, follow these steps:
1. Click the Create self-signed certificate button.
2. Provide the requested information and click OK. The certificate is created and the password can
now be set securely. All traffic to and from the AXIS M1011/M1011-W/M1031-W is encrypted
from this point on.
3. Enter a password and then re-enter it to confirm the spelling. Click OK. The password has now
been configured.
4. To log in, enter the user name “root” in the dialog as requested
Note: The default administrator user name root cannot be deleted.
5. Enter the password as set above, and click OK.
To configure the password directly
via an unencrypted connection, enter
the password here.
To create an HTTPS connection,
start by clicking this button.

Page 10 AXIS M1011/M1011-W/M1031-W Installation Guide
Access the video stream
The Live View page of the network camera is displayed, with links to the Setup tools which allow
you to customize the camera.
If required, click Yes to install AMC (AXIS Media Control), which allows viewing of the video stream
in Internet Explorer. You will need administrator rights on the computer to do this.
Notes:
• HTTPS (Hypertext Transfer Protocol over Secure Socket Layer) is a protocol used to encrypt the traffic
between web browsers and servers. The HTTPS certificate controls the encrypted exchange of
information.
• The default administrator user root cannot be deleted.
• If the password for root is lost or forgotten, the network camera must be reset to the factory default
settings. See Resetting to the Factory Default Settings, on page 17.
AXIS M1011: The installation is now complete.
AXIS M1011-W/M1031-W: Proceed to Configure the wireless connection, on page 11.
Setup - Provides all the tools for configuring
the camera to requirements.
Help - Displays
online help on all
aspects of using
the camera.
Other manuals for AXIS M1011
2
This manual suits for next models
2
Table of contents
Languages:
Other Axis Security Camera manuals