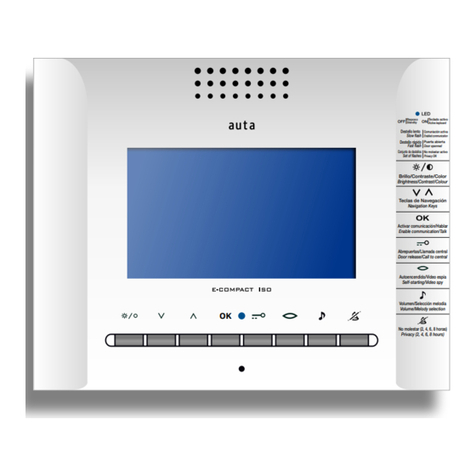
Auta 701805 User manual

HI / 251
04/14
TELÉFONO INTERCOM INTERIOR
SIN TECLADO
INTERNAL INTERCOM DIGITAL PHONE
WITHOUT KEYPAD
REF: 701805
sw7:
Sw8:
Sw1 al Sw3 Código de intercomunicación 0-6
Sw1 to Sw3 Intercom code 0-6
Activado el modo de solo recepción de llamadas
“Only reception” mode activated
Recepción de llamadas “a todos” NO permitida
Broadcast call reception disabled

DIMENSIONES - Dimensions (mm)
Teléfono para intercomunicación basado en tecnología digital. Permite instalar hasta 6 teléfonos intercomunicados. Función de llamada general.
No es compatible con placas ni conserjerias.
Intercom phone based on digital technology. Allows you to install up to 6 interconnected units. General call available.
Is not supported with boards or switchboards.
DESCRIPCIÓN - Description
79
217
50
A
B
D
E
F
G
Brazo telefónico - Telephonic handset
Indicador luminoso - Light indicator
Botón de llamada - Call button
Pulsador auxiliar - Auxiliary push-button
Ajuste del volumen - Volume adjust
D
G
F
E
A
C
B
AUX 1
CARACTERÍSTICAS - CHARACTERISTICS:
Instalación en superficie y con caja universal 60X60.
r X
Inyectado en plástico ABS -
€
Surface installation or with unive sal box 60 60
€Injected in ABS plastic
€
€ auxiliary push-button
€
Supplying 24 Vcc/0,2A
Ajuste del volumen. - Volume adjust
Un pulsador auxiliar. -One
Alimentación 24 Vcc / 0.2A
AUX 2
Teléfono INTERCOM
Sin función - No function
CAjuste multitonos - Melody adjust
INSTALACIÓN - INSTALLATION
AUX.
+
-
Bornes de conexión
Connection terminals
SALIDA PULSADOR AUXILIAR - OUTPUT AUXILIARY PUSH-BUTTON
MICRO - MICRO
ALTAVOZ - LOUDSPEAKER
POSITIVO - POSITIVE
4º
NEGATIVO - NEGATIVE
LLAMADA DESDE LA PUERTA DE LA VIVIENDA
THE HOUSING CALL
1º Descolgar el mango telefónico
2º Desatornillar el tornillo
3º Quitar la tapa estirando por donde indican las flechas.
4º Embornar los cables en la regleta de bornes de la tarjeta.
5º Configurar el teléfono con el codigo de llamada que le corresponda
6º Volver a colocar la tapa del teléfono, fijarla con el tornillo y colgar el mango.
5º
EXTENSION DE LLAMADA ELECTRONICA (SALIDA POLARIZADA)
ELECTRONIC CALL EXTENSION (POLARIZED OUTPUT)
1 Lift the handset up
2 Unscrew the screw
3 Remove the cover
4 Connect the wires
5 Set up the phone with the calling code (see Configuration)
6 Reinstall the cover, the screw and the handset
CONFIGURACION DEL TELEFONO - PHONE CONFIGURATION
Recepción de llamadas “a todos” permitida
Broadcast call reception enabled
Recepción de llamadas “a todos” NO permitida
Broadcast call reception disabled
1
J1
2
3
1
J1
2
3
Configuración - Configuration
ON
1 2 3 4 5 6 7 8
J1
ON
1 2 3 4 5 6 7 8
REPRESENTACIÓN-REPRESENTATION
1
J1
2
3
1 2 3 7 8
sw7:
Sw8: Activar modo
Sw1 al Sw3 Código de intercomunicación 0-6
Sw1 to Sw3 Intercom code 0-6
Activado el modo de solo recepción de llamadas
“Only reception” mode activated
Prioritario - Priority mode enable
sw7:
Sw8:
Sw1 al Sw3 Código de intercomunicación 0-6
Sw1 to Sw3 Intercom code 0-6
Activado el modo de solo recepción de llamadas
“Only reception” mode activated
Recepción de llamadas “a todos” NO permitida
Broadcast call reception disabled

Teléfono INTERCOM
TELÉFONO INTERCOM INTERIOR SIN TECLADO
Configuraciones:
- Configuración Llamada “A TODOS” (J1).
o La recepción de una llamada “A TODOS” será posible siempre que J1 esté en la posición 2-3. Si J1 no está o está en posición 1-2 la llamada
“A TODOS” será ignorada.
- Configuración “SÓLO RECIBIR” (SWITCH7).
o Si el switch 7 del dip-switch de configuración está activado (hacia abajo), este TFNO sólo podrá recibir llamadas. No podrá llamar a nadie.
- Configuración “PRIORITARIO” (SWITCH8).
o Si el switch 8 del dip-switch de configuración está activado (hacia abajo), este TFNO acabará con cualquier conversación en curso, liberando
inmediatamente la línea.
- Configuración MULTITONO (Hasta 7 melodías diferentes).
o Pulsando C con el mango colgado seleccionamos el tono de ll amada.
- Configuración VOLUMEN TIMBRAZO (2 niveles)
o Pulsando B seleccionamos el volumen del timbrazo.
- Configuración NUMERO TONOS y TIMBRE AUXILIAR (De 0 a 4 tonos).
o Consultar tabla 1.
- Configuración SALIDA AUX (Pulso de 1s y TOGGLE)
o Consultar tabla 1.
Características:
- Mango Estándar.
- Marcación en colgado con la tecla LLAVE.
- Hasta 6 TFNOS Máximo.
- Indicación acústica si intentamos configurar un TFNO mayor de 6.
- Duración de los tonos de llamada: 30s.
- Duración de la conversación: Tiempo mínimo 90s. A partir de estos 90 segundos, la conversación puede prolongarse indefinidamente, a no ser que un
tercero quiera hacer uso de la línea, lo cual provocará que ambos equipos se vayan a reposo a los pocos segundos. Esto se indicará con un breve tono
en el altavoz, durante el transcurso de la conversación.
- Código de ID = 0. Todos los TFNOS que tengan esta identificación, realizarán siempre una llamada A TODOS, con un solo toque de la tecla LLAVE +
Descolgar.
- Mango Descolgado. NO SE RECIBIRÁN LLAMADAS si el mango está descolgado.
Funcionamiento:
· Reposo:
o Mango colgado y LED AZUL encendido fijo.
· Hacer Llamada:
o Con el TFNO colgado, pulsar la LLAVE tantas veces como nº tenga el TFNO al que queremos llamar, y después descolgar el mango. (Ejemplo:
Llamar al TFNO 3).
§ Pulsar 3 veces la LLAVE con el TFNO colgado. Verificar que el LED AZUL da tres destellos cada 6s aproximadamente, y descolgar.
Si el TFNO 3 existe, el LED AZUL parpadeará rápidamente, y el TFNO comenzará a sonar. De lo contario, el led se apagará.
§ Si intentamos llamar a un código superior a 6, volverá al 1, y si la línea está ocupada, oiremos en el mango un tono de aviso y
el LED AZUL permanecerá en su posición de reposo (encendido fijo).
o LLAMADA A TODOS. Con el mango colgado, dejar pulsada la tecla LLAVE durante 2s. El LED AZUL parpadeará rápidamente. Al descolgar el
mango, se realiza una llamada a todos los teléfonos que tengan la llamada ‘A TODOS’ habilitada. Iniciaremos una conversación con el
primero que descuelgue.
o Si ya hemos pulsado la tecla LLAVE y queremos volver a la situación de reposo sin realizar ninguna llamada, podemos pulsar la tecla AUX 1, o
descolgar y colgar rápidamente o simplemente esperar 30s. El LED AZUL debe volver a su posición de encendido fijo.
· Recibir:
o Con el mango colgado, el TFNO podrá recibir llamadas. Sonarán los timbrazos durante un máximo de 30s y el LED AZUL parpadeará
rápidamente. Podremos interrumpir la llamada con la tecla AUX1 o descolgar para iniciar la conversación. Al descolgar el mango, el
LED_AZUL parpadeará más lentamente y tendremos al menos 90s de conversación. Este tiempo se prolongará indefinidamente, hasta que
un tercero trate de llamar. En ese momento oiremos un tono en la línea, que nos indicará que queda poco para que finalice nuestra
conversación.
sw7:
Sw8:
Sw1 al Sw3 Código de intercomunicación 0-6
Sw1 to Sw3 Intercom code 0-6
Activado el modo de solo recepción de llamadas
“Only reception” mode activated
Recepción de llamadas “a todos” NO permitida
Broadcast call reception disabled

Teléfono INTERCOM
INTERNAL INTERCOM TELEPHONE WITH STANDARD HANDSET
Settings:
- “General Call” Configuration (J1) .
o To receive a “General Call" the J1 jumper must be set in 2-3 position. If J1 jumper does not exist or it is set in position 1-2, the
"General Call” will be ignored.
- “Only receive” Configuration (SWITCH7) .
o If the SWITCH7 of the configuration dip-switch is activated (down), this TELEPHONE can ONLY receive calls. It will not be possible
to initiate a call from this TELEPHONE.
- “Priority” Configuration (SWITCH8) .
o If the SWITCH8 of the configuration dip-switch is activated (down), this TELEPHONE will end any current conversation, setting the
line free to perform any new call.
- MULTITONE Configuration (Up to 7 different melodies).
o Pressing C with the TELEPHONE hung up; we can select the desired ringtone.
- RINGTONES VOLUME Configuration (2 levels) .
o Pressing B we can select the ringtones volume.
- Setting The NUMBER OF RINGTONES and the ELECTRONIC CALL EXTENSION (0 to 4 ringtones)
o See Table 1.
- Setting AUXILIARY OUTPUT (1 second pulse or TOGGLE)
o See Table 1.
Features:
- STANDARD Handset.
- DIALING with (KEY button) and handset hung up.
- UP TO 6 TELEPHONE maximum.
- BEEP warning if trying to codify a TELEPHONE greater than 6.
- EVERY TELEPHONE CODIFY WITH ID=0, will always make a “General Call” with just one touch of the (KEY button) + pick the handset up.
- CONVERSATION LENGTH: Minimum 90s. From here, the conversation can continue indefinitely, unless a third party wants to use the
line, which will cause both devices return to its standby mode. This is indicated by a short tone in the speaker during the conversation.
- CALLS CANNOT BE RECEIVED if the handset is picked up.
Functioning:
· STANDBY:
o Handset hung up and blue led ON.
· Make a call:
o Keep the handset hung up, and press the KEY button as many times as indicate the TELEPHONE number you want to call.
Then, pick the handset up. (i.e., Call nº3)
§ Press three times de KEY button with the handset hung up. Verify the blue led gives you three flashes every 6
seconds. If the TELEPHONE nº3 exists, it will start to ring and the blue led will blink quickly.
§ When trying to call to codes greater than 6, the system will return to code 1 and, if the line is busy, we’ll heard a
beep in the handset, and the blue led will return to its original blue light.
o General Call. With the handset hung up, keep the KEY button pressed for 2s. The blue led will blink quickly and when lifting
the handset up, a call will be made to all the TELEPHONES that have the “General Call” enabled. A conversation will begin
with the first TELEPHONE that picks up.
o If we have already pressed the KEY button and we want to return to the standby mode without performing a call, we can
press the AUX1 button, or pick up and hang up quickly, or just wait 30s. The blue led should return to its original blue light.
· Receive a call:
o While the handset is hung up, the TELEPHONE can receive calls. It will start ringing for up to 30s and the blue led will flash
quickly. We may terminate the call pressing the AUX1 button, or just lift the handset up to start the conversation. At this
point, the blue led will flash slower and we will have audio at least for 90s (see “CONVERSATION LENGTH” in features).
sw7:
Sw8:
Sw1 al Sw3 Código de intercomunicación 0-6
Sw1 to Sw3 Intercom code 0-6
Activado el modo de solo recepción de llamadas
“Only reception” mode activated
Recepción de llamadas “a todos” NO permitida
Broadcast call reception disabled

INSTALACIÓN GENERAL - GENERAL INSTALLATION
Secciones de hilos
Wiring sections
Hasta 100 m.
Up to 100 m.
(+), (-) 1 mm² 2 mm²
0.5 mm² 1 mm²
Hasta 200 m.
Up to 200 m.
+
-
# 1
AUX
+
-
# 2 # 6
AUX
R: 1K5
7 8
ON
1 2 3 4 5 6
7 8
ON
123456
7 8
ON
1 2 3 4 5 6
# 3
7
7
8
8
ON
ON
1
1
2
2
3
3
4
4
5
5
6
6
# 4
# 5
7 8
ON
123456
+
-
ALIMENTADOR - POWER SUPPLY
ATF-98 / ALV 2.4
+
-
AUX
Poner R en el teléfono más alejado de la fuente de alimentación
Put R on the phone farthest from the power supply
AUX
2
1 3
5
4 6
8
7 9
0
COK
AUX
2
1 3
5
4 6
8
7 9
0
COK
REF: 702005
MODELOS COMPATIBLES
SUPPORTED MODELS
REF: 701905
Setting the number of tones
1 - Switch off the monitor.
2 - Put a shortcircuit wire between the te
the button pressed if it exists. rminals of the door button or keep
3 – Switch on the monitor: the LED starts flashing quickly waiting for the code.
4 - Program the desired code in the dip-switch.
5 - Validate it by pressing the button of tone selection (C).
6 – The LED turns to fixed blue and the monitor remains inactive.
7 - Switch off the monitor.
8 - Undo the shortcircuit between termi
Replace the dip-switch to the desired configuration.
nals.
It has been set.
Programming options
C ode Function
0 No ringtones.
1 One ringtone.
2 Two ringtones.
3 Three ringtones.
4 Four ringtones
5 No ringtones on the speaker, but in the auxiliary output the
number of ringtones will be the previously programmed.
6
7 AUX output pulse type (1seg)
8 AUX output toggle type
Electronic call extension activated during the whole call (30seg)
Programación del número de tonos de llamada
1- Apagar.
2- Poner un hilo de cortocircuito entre
las bornas del pulsador de puerta o
presionar el pulsador si es que existe.
3- Encender: El led azul parpadea rapidamente en espera del código.
4- Programar el código deseado en el dip-switch de configuración.
5- Validar presionando el pulsador de cambio de melodías (C).
6- El led se queda en fijo en azul y se queda bloqueado.
7- Apagar.
8- Deshacer el cortocircuito entre bornas.Reponer el dip-switch
a la configuración deseada.
Ya está programado.
TABLA 1
TABLE 1
Teléfono INTERCOM
Ajuste del volumen - volume adjust
1º PULSE PARA CAMBIAR EL VOLUMEN (ALTO-BAJO)
PRESS TO CHANGE THE VOLUME (HI-LOW)
sw7:
Sw8:
Sw1 al Sw3 Código de intercomunicación 0-6
Sw1 to Sw3 Intercom code 0-6
Activado el modo de solo recepción de llamadas
“Only reception” mode activated
Recepción de llamadas “a todos” NO permitida
Broadcast call reception disabled

POL. IND. EL OLIVERAL - CALLE C , NAVES 9-10 46394 RIBARROJA DEL TURIA (VALENCIA)
TFNO. +34 96 164 30 20 - FAX. +34 96 166 52 86 E-MAIL: AUTA@AUTA.ES HTTP://WWW.AUTA.ES
sw7:
Sw8:
Sw1 al Sw3 Código de intercomunicación 0-6
Sw1 to Sw3 Intercom code 0-6
Activado el modo de solo recepción de llamadas
“Only reception” mode activated
Recepción de llamadas “a todos” NO permitida
Broadcast call reception disabled
Table of contents
Other Auta Intercom System manuals

Auta
Auta Analog Compact User manual

Auta
Auta 760595 User manual

Auta
Auta NEOS DIGITAL KVD-1 S1 COAX User manual

Auta
Auta NEOS DIGITAL KVD-1 S1 COAX User manual

Auta
Auta 2H User manual

Auta
Auta neos Series User manual

Auta
Auta AC-900 User manual

Auta
Auta 754005 User manual

Auta
Auta 702105 User manual

Auta
Auta 702005 User manual

Auta
Auta Avant Digital KVD-1 S1 VISUALTECH 5W User manual

Auta
Auta COMPACT DIGITAL 2H User manual

Auta
Auta Neos Digital User manual

Auta
Auta onex KVD-1 S1 COAXLESS User manual

Auta
Auta 701905 User manual

Auta
Auta SLIM 2H User manual

Auta
Auta neos 751946 User manual

Auta
Auta NEOS User manual

Auta
Auta VISUALTECH 751501 User manual

Auta
Auta ANALOG Neos 701820 User manual