AG Neovo ME-2401 User manual

ME-2401 LCD Monitor
User Manual
www.agneovo.com

TABLE OF CONTENTS
2
SAFETY INFORMATION
WEEE...........................................................................................................................................................3
PRECAUTIONS
Notice ...........................................................................................................................................................4
Cautions When Setting Up ........................................................................................................................... 4
Cautions When Using...................................................................................................................................5
Cleaning and Maintenance........................................................................................................................... 6
Notice for the LCD Monitor........................................................................................................................... 6
CHAPTER 1: PRODUCT DESCRIPTION
1.1 Package Contents .................................................................................................................................. 7
1.2 Installation ..............................................................................................................................................8
1.2.1 Installing the Stand...................................................................................................................... 8
1.2.2 Adjusting the Viewing Angle and Height...................................................................................... 9
1.2.3 Wall Mounting............................................................................................................................10
1.3 Overview .............................................................................................................................................. 11
1.3.1 Front View ................................................................................................................................. 11
1.3.2 Control Buttons..........................................................................................................................12
1.3.3 Rear View..................................................................................................................................14
CHAPTER 2: MAKING CONNECTIONS
2.1 Connecting the AC Power .................................................................................................................... 15
2.2 Connecting Input Source Signals ......................................................................................................... 15
2.3 Connecting Audio Devices ................................................................................................................... 16
2.4 Cable management .............................................................................................................................. 16
CHAPTER 3: ON SCREEN DISPLAY MENU
3.1 OSD Menu Tree ................................................................................................................................... 17
CHAPTER 4: ADJUSTING THE LCD MONITOR
4.1 Colour Setting....................................................................................................................................... 19
4.2 OSD Setting .........................................................................................................................................20
4.3 Other Setting ........................................................................................................................................ 21
4.4 Reset Setting........................................................................................................................................22
CHAPTER 5: APPENDIX
5.1 Warning Messages...............................................................................................................................23
5.2 Troubleshooting....................................................................................................................................24
CHAPTER 6: SPECIFICATIONS
6.1 Monitor Specications .......................................................................................................................... 25
6.2 Monitor Dimensions.............................................................................................................................. 26

3
SAFETY INFORMATION
Waste Electrical and Electronie Equipment-WEEE
Attention users in European Union private households
Disposal of Waste Equipment by Users in Private Household in the European Union.
This symbol on the product or on its packaging indicates that this product must not be disposed
of with your other household waste. Instead, it is your responsibility to dispose of your waste
equipment by handing it over to a designated collection point for the recycling of waste electrical
and electronic equipment. The separate collection and recycling of your waste equipment at
the time of disposal will help to conserve natural resources and ensure that it is recycled in a
manner that protects human health and the environment. For more information about where
you can drop o your waste equipment for recycling, please contact your local city oce, your
household waste disposal service or the shop where you purchased the product.
For Private Households in the European Union.To help conserve natural resources and ensure
the product is recycled in a manner that protects human health and the environment, we would
like to bring your attention to the following:
• The crossed-out dustbin on the device or outer packaging indicates the product is compliant
with European WEEE (Waste Electrical and Electronic Equipment) Directive.
• Always dispose of the old devices separately from household waste.
• Batteries should be removed beforehand and disposed separately to the right collection
system.
• You are responsible with regard to the deletion of personal data on old devices before disposal.
• Private households can hand in their old devices free of charge.
• For more information about where you can drop o your waste equipment for recycling,
please contact your local city oce, your household waste disposal service or the shop
where you purchased the product.

PRECAUTIONS
4
PRECAUTIONS
CAUTION
RISK OF ELECTRIC SHOCK
DO NOT OPEN
Symbols used in this manual
This icon indicates the existence of a potential hazard that could result in personal injury
or damage to the product.
This icon indicates important operating and servicing information.
Notice
• Read this User Manual carefully before using the LCD monitor and keep it for future reference.
• The product specications and other information provided in this User Manual are for reference only. All
information is subject to change without notice. Updated content can be downloaded from our web site at
www.agneovo.com.
• To protect your rights as a consumer, do not remove any stickers from the LCD monitor. Doing so may
aect the determination of the warranty period.
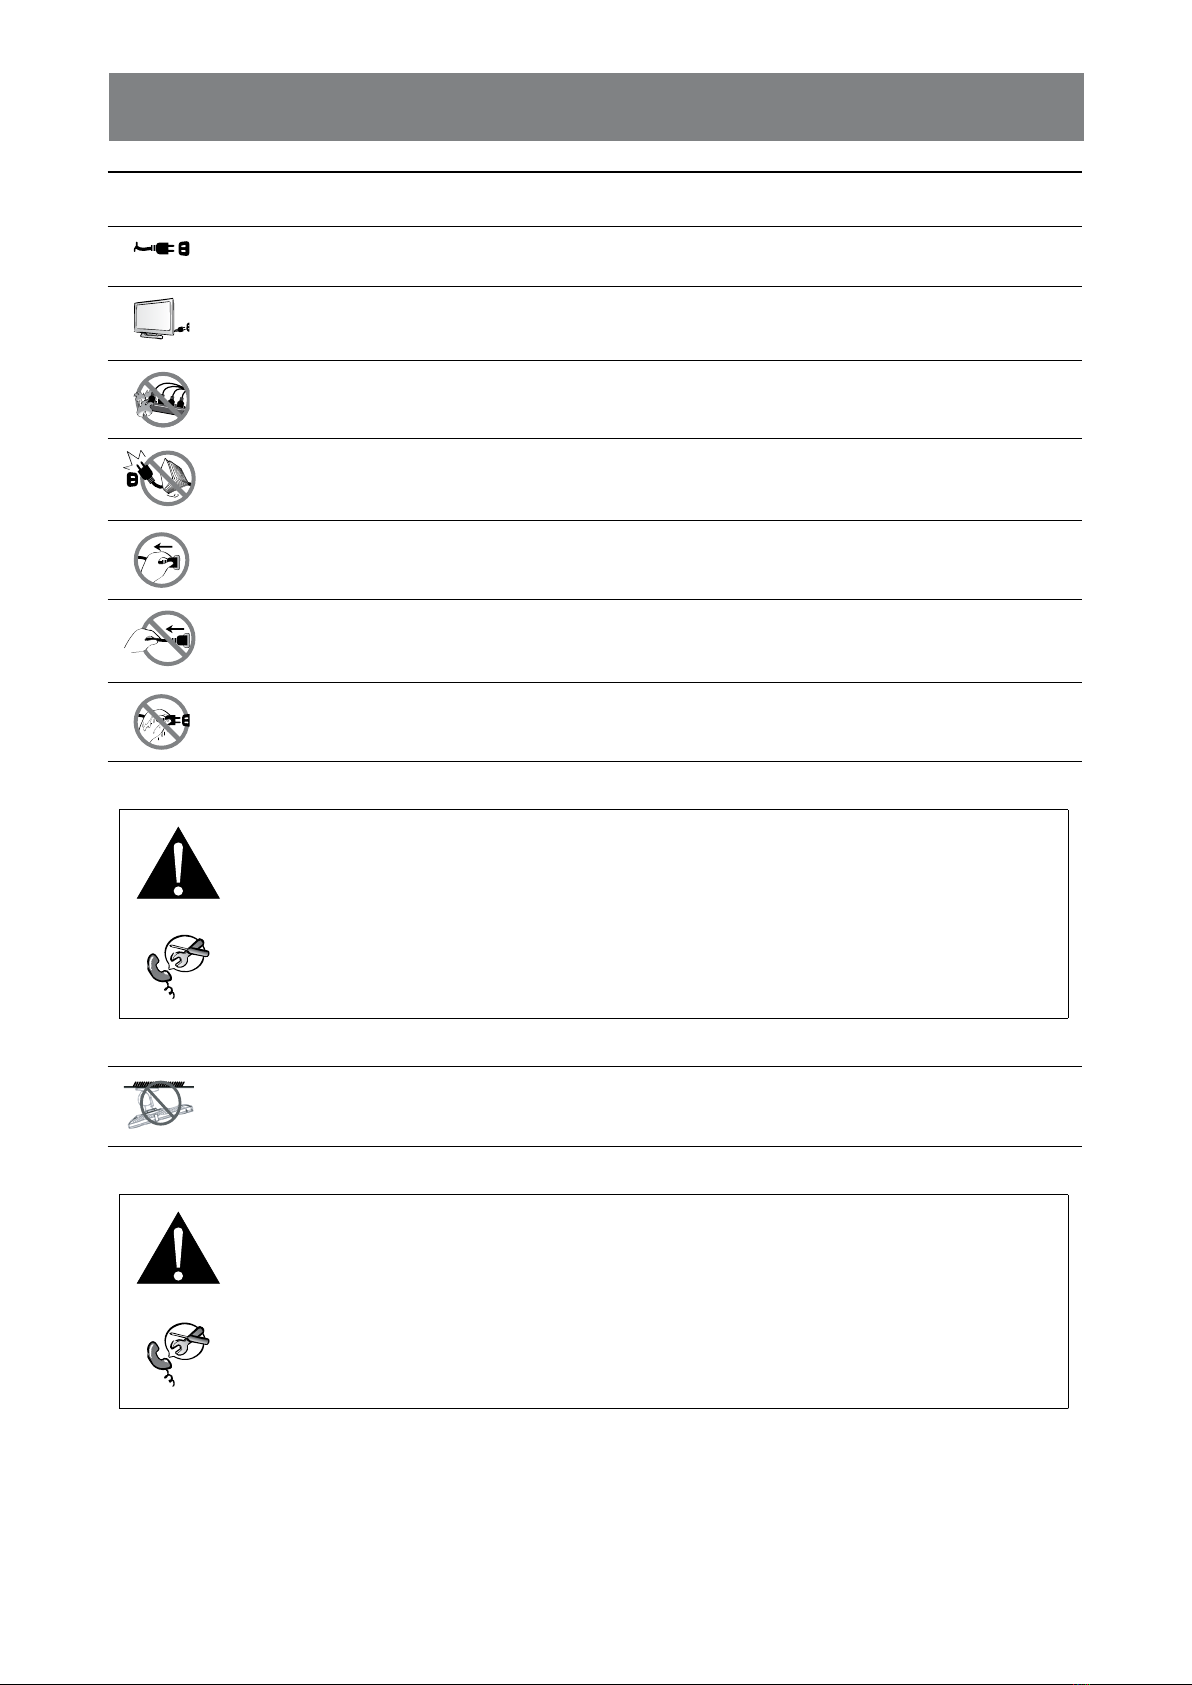
Cautions When Setting Up
Do not place the LCD monitor near heat sources, such as a heater, exhaust vent, or in direct
sunlight.
Do not cover or block the ventilation holes in the housing.
Place the LCD monitor on a stable area. Do not place the LCD monitor where it may subject to
vibration or shock.
Place the LCD monitor in a well-ventilated area.
Do not place the LCD monitor outdoors.
Do not place the LCD monitor in a dusty or humid environment.
Do not spill liquid or insert sharp objects into the LCD monitor through the ventilation holes.
Doing so may cause accidental re, electric shock or damage the LCD monitor.
5
PRECAUTIONS
Cautions When Using
Use only the power cord supplied with the LCD monitor.
The power outlet should be installed near the LCD monitor and be easily accessible.
If an extension cord is used with the LCD monitor, ensure that the total current consumption
plugged into the power outlet does not exceed the ampere rating.
Do not allow anything to rest on the power cord. Do not place the LCD monitor where the
power cord may be stepped on.
If the LCD monitor will not be used for an indenite period of time, unplug the power cord from
the power outlet.
To disconnect the power cord, grasp and pull by the plug head. Do not tug on the cord; doing
so may cause re or electric shock.
Do not unplug or touch the power cord with wet hands.
WARNING:
Unplug the power cord from the power outlet and refer to qualied service personnel under
the following conditions:
• When the power cord is damaged.
• If the LCD monitor has been dropped or the housing has been damaged.
• If the LCD monitor emits smoke or a distinct odor.
Ceiling mount or mount on any other horizontal surface overhead are not advisable.
WARNING:
Installation in contravention of the instructions may result in undesirable consequences,
particularly hurting people and damaging property. Users who have already mounted the
monitor on the ceiling or any other horizontal surface overhead are strongly advised to
contact AG Neovo for consultations and solutions to help ensure a most pleasurable and
fullling monitor experience.

6
PRECAUTIONS
Cleaning and Maintenance
Do not attempt to service the LCD monitor yourself, refer to qualied service personnel.
Opening or removing the covers may expose you to dangerous voltage or other risks.
Notice for the LCD Monitor
In order to maintain the stable luminous performance, it is recommended to use low brightness setting.
Due to the lifespan of the lamp, it is normal that the brightness quality of the LCD monitor may decrease
with time.
When static images are displayed for long periods of time, the image may cause an imprint on the LCD
monitor. This is called image retention or burn-in.
To prevent image retention, do any of the following:
• Set the LCD monitor to turn o after a few minutes of being idle.
• Use a screen saver that has moving graphics or a blank white image.
• Switch desktop backgrounds regularly.
• Adjust the LCD monitor to low brightness settings.
• Turn o the LCD monitor when the system is not in use.
Things to do when the LCD monitor shows image retention:
• Turn o the LCD monitor for extended periods of time. It can be several hours or several days.
• Use a screen saver and run it for extended periods of time.
• Use a black and white image and run it for extended periods of time.
There are millions of micro transistors inside the LCD monitor. It is normal for a few transistors to be
damaged and to produce spots. This is acceptable and is not considered a failure.
7
CHAPTER 1: PRODUCT DESCRIPTION
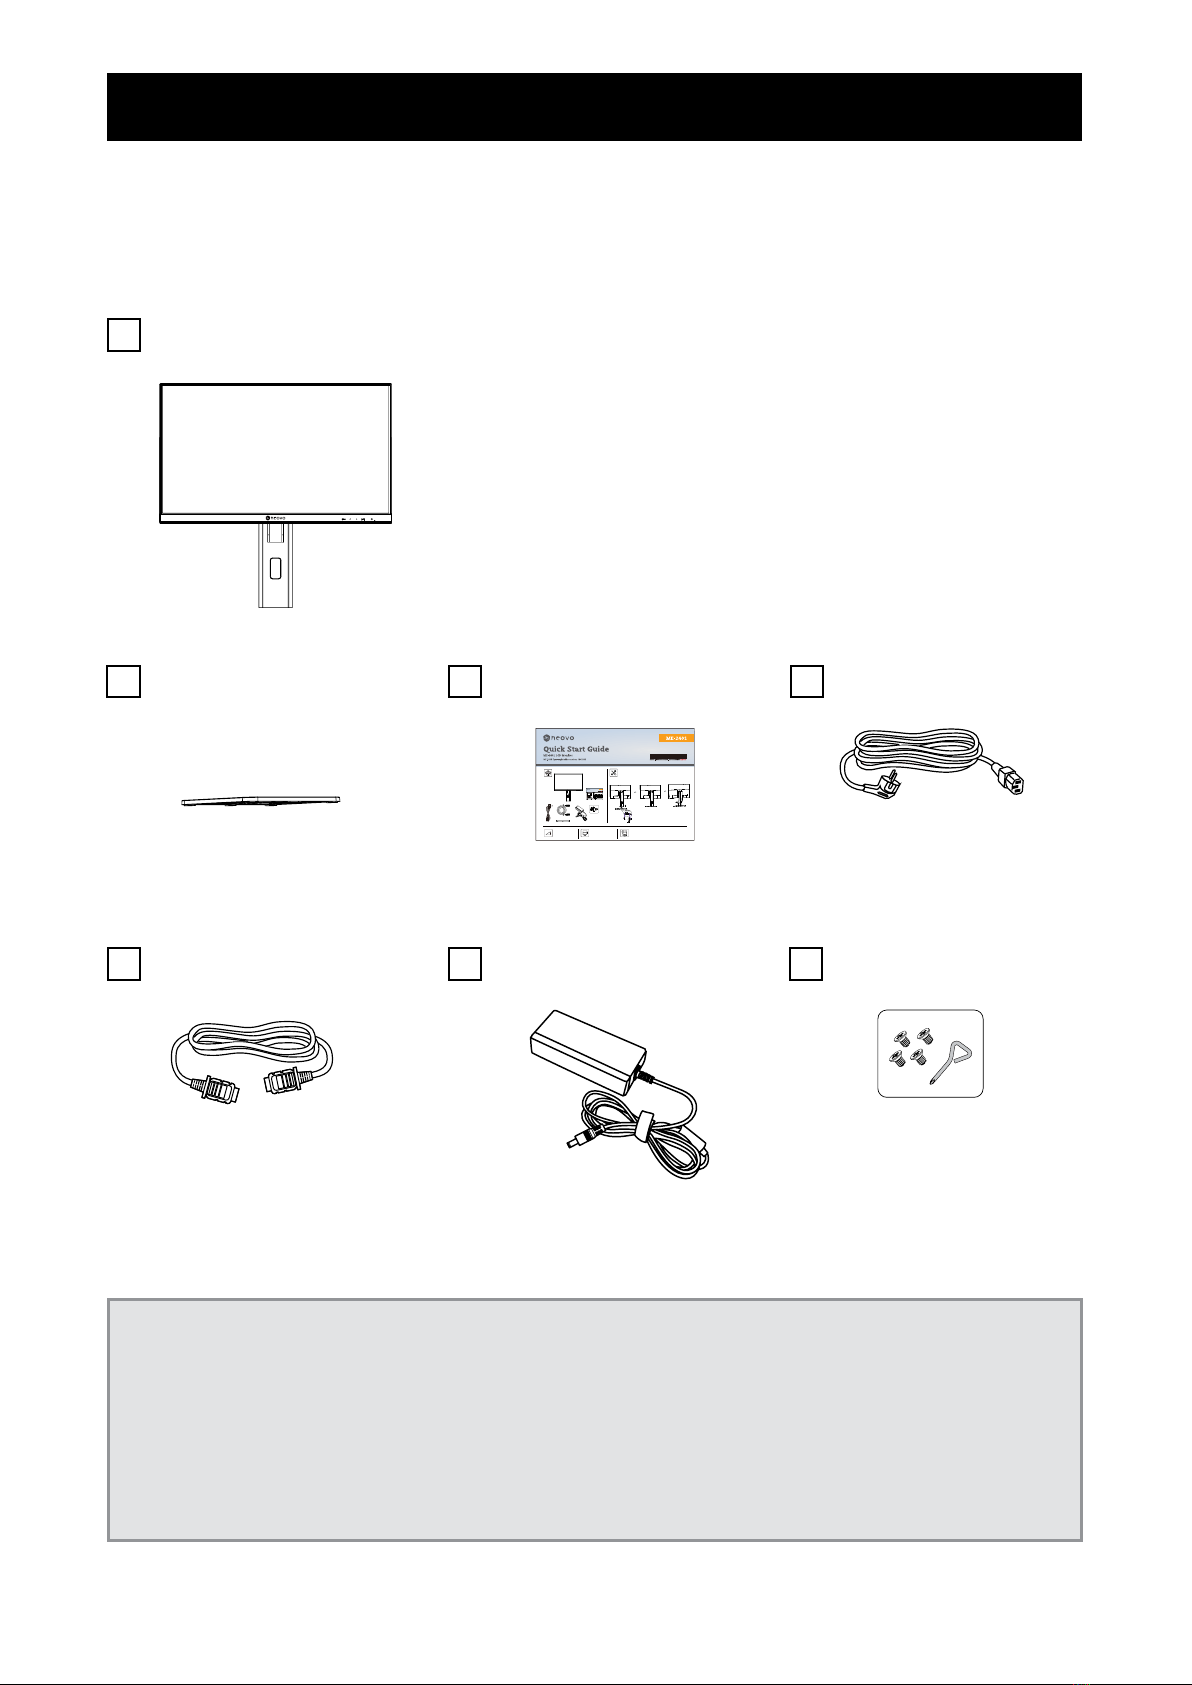
1.1 Package Contents
When unpacking, check if the following items are included in the package. If any of them is missing or
damaged, contact your dealer.
Note:
• Use only the supplied power cord.
• The above pictures are for reference only. Actual items may vary upon shipment.
• (*) Must use only the supplied power adapter:
• - Vendor: Adaptor
• - Model no.: ATM065T-P120 (Medical)
• - Rating: 12V, 5.0A (Medical)
LCD Monitor
Quick Start Guide Power Cord
ME-2401
QuickStartGuide
ME-2401LCDMonitor
ME-2401Eprelregistrationnumber:1642680
HDMI Cable Power Adapter Screw kits
Stand

8
PRODUCT DESCRIPTION
1.2 Installation
1.2.1 Installing the Stand
1. Place the LCD monitor with the screen side down on a cushioned surface.
2. Attach the stand to the LCD monitor.
Attach the stand to the base mount then fasten the screw to secure the stand.
1.2.2 Adjusting the Viewing Angle and Height
For optimal viewing, it is recommended to look at the full face of the screen, then adjust the screen of the LCD monitor
angle and height according to your preference.
Hold the stand so that the screen does not topple when you make the adjustment.
You are able to adjust the screen angle and height as below:
• Tilt angle:
+20°
-5°

9
PRODUCT DESCRIPTION
• Swivel angle:
45°
45°
• Pivot angle:
Note: Before making the adjustment, make sure to adjust the height to the highest position, and then tilt the
screen 90˚.
• Height adjustment:
0-120m
m

10
PRODUCT DESCRIPTION
1.2.3 Wall Mounting
To wall mount the LCD monitor, do the following steps:
1. Remove the base mount.
a. Remove the screws securing the base mount from the LCD monitor.
2. Wall mount the LCD monitor.
Screw the mounting bracket to the VESA holes at the rear of the LCD monitor.
Note: Take measures to prevent the LCD monitor from falling down and lessen possible injury and damage
to the monitor in case of earthquakes or other disasters.
• Use only the 100 x 100 mm wall mount kit recommended by AG Neovo. All
AG Neovo wall mount kits comply with VESA standard.
• Secure the LCD monitor on a solid wall strong enough to bear its weight.
• It is suggested to wall mount the LCD monitor without tilting it facing
downward.
100
mm
100
mm
Table of contents
Other AG Neovo Monitor manuals

AG Neovo
AG Neovo E-W19 User manual

AG Neovo
AG Neovo LA-2202 User manual

AG Neovo
AG Neovo HX-24E User manual

AG Neovo
AG Neovo L-W22C User manual

AG Neovo
AG Neovo PM-48 User manual

AG Neovo
AG Neovo C-19P User manual

AG Neovo
AG Neovo TX-15 User manual

AG Neovo
AG Neovo QM-43 User manual

AG Neovo
AG Neovo DR-22 User manual

AG Neovo
AG Neovo TS-15S User manual

AG Neovo
AG Neovo TX-42P User manual

AG Neovo
AG Neovo RX-22G User manual

AG Neovo
AG Neovo F-17 User manual

AG Neovo
AG Neovo SX-15 User manual

AG Neovo
AG Neovo M-15V User manual

AG Neovo
AG Neovo E-W22 User manual

AG Neovo
AG Neovo H-W22 User manual

AG Neovo
AG Neovo SC-2402 User manual

AG Neovo
AG Neovo F-415 User manual

AG Neovo
AG Neovo X-24 User manual


