Wenger Tourmaster 024F Series User manual
Owner’s Manual
,2/*01"/&0"/0
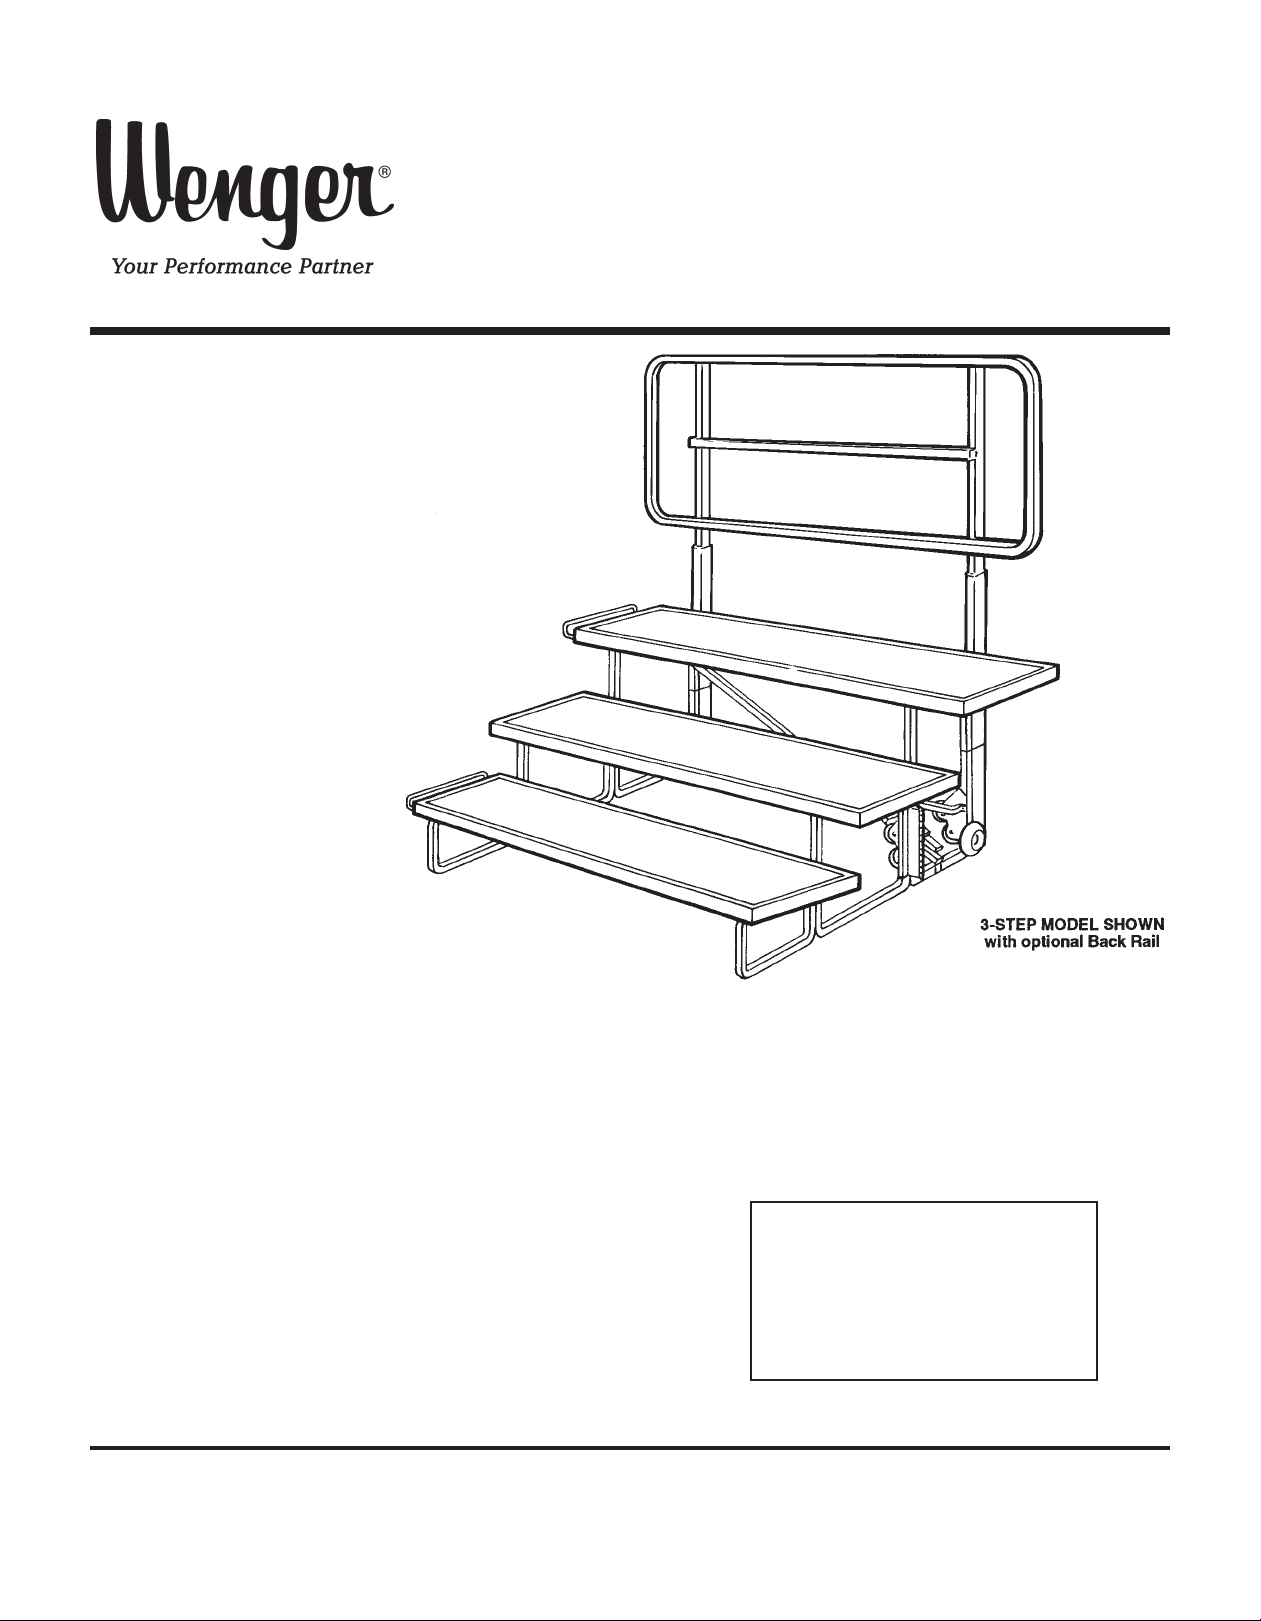
Series 024F 2-Step
Series 024F 3-Step with foot-operated slider
To Set Up a 3-Step Riser ...................................................................................2
To Take Down a 3-Step Riser ............................................................................4
To Set Up a 2-Step Riser ...................................................................................5
To Take Down a 2-Step Riser ............................................................................7
To Lock Units Together.......................................................................................8
To Reverse the Step Arrangement (3-Step Riser) .............................................8
To Reverse the Step Arrangement (3-Step Riser with Optional 4th-Step Unit) .9
To Attach an Optional 4th Step to a 3-Step Riser ............................................10
To Attach an Optional Back Rail to a 3-Step Riser...........................................11
To Store a Back Rail (3-Step Risers) ...............................................................12
To Attach Optional Side Rails to the Riser.......................................................13
To Store Risers on the Optional Riser Cart......................................................16
Load Back Rails ...........................................................................................16
Load Risers onto the Cart ............................................................................19
Load 4th-Steps onto the Cart.......................................................................23
Replacement Parts List ....................................................................................24
Basic 3-Step Unit .........................................................................................24
Basic 2-Step Unit .........................................................................................25
4th-Step Unit (for 3-Step Riser)....................................................................26
Back Rail (for 3-Step Riser) .........................................................................27
Side Rails .....................................................................................................28
Riser Cart .....................................................................................................29
Troubleshooting................................................................................................30
Warranty...........................................................................................................31
Please take a few minutes to read this
manual and to familiarize yourself with
Tourmaster’s unique operating features.
If you should need additional information
on your new Tourmaster Riser, just
write or phone.
©Wenger Corporation 2011 Printed in USA 08/11 Part #024H636-01
"+$"/,/-,/1&,+ 555 Park Drive, P.O. Box 448, Owatonna, Minnesota 55060-0448
Questions? Call.....USA: 800-4WENGER (493-6437) • Worldwide: 1-507-455-4100 • www.wengercorp.com
2
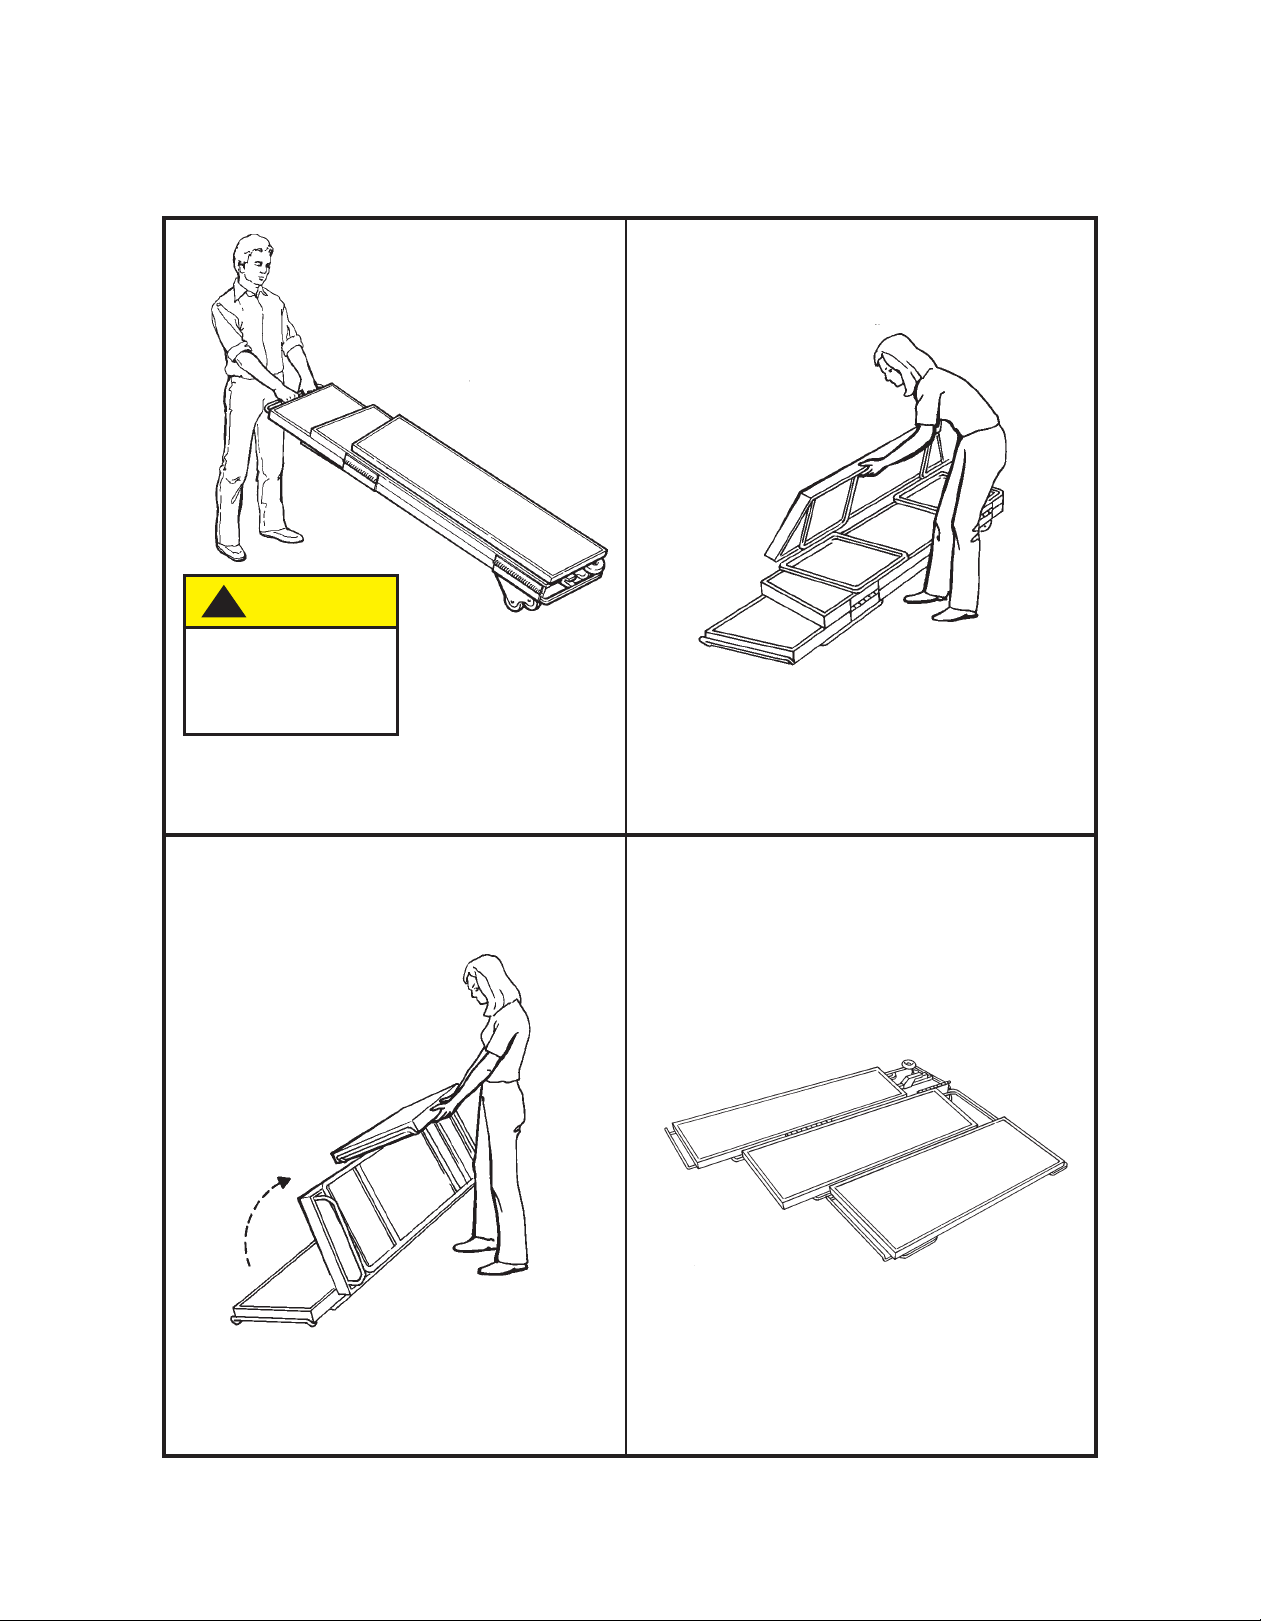
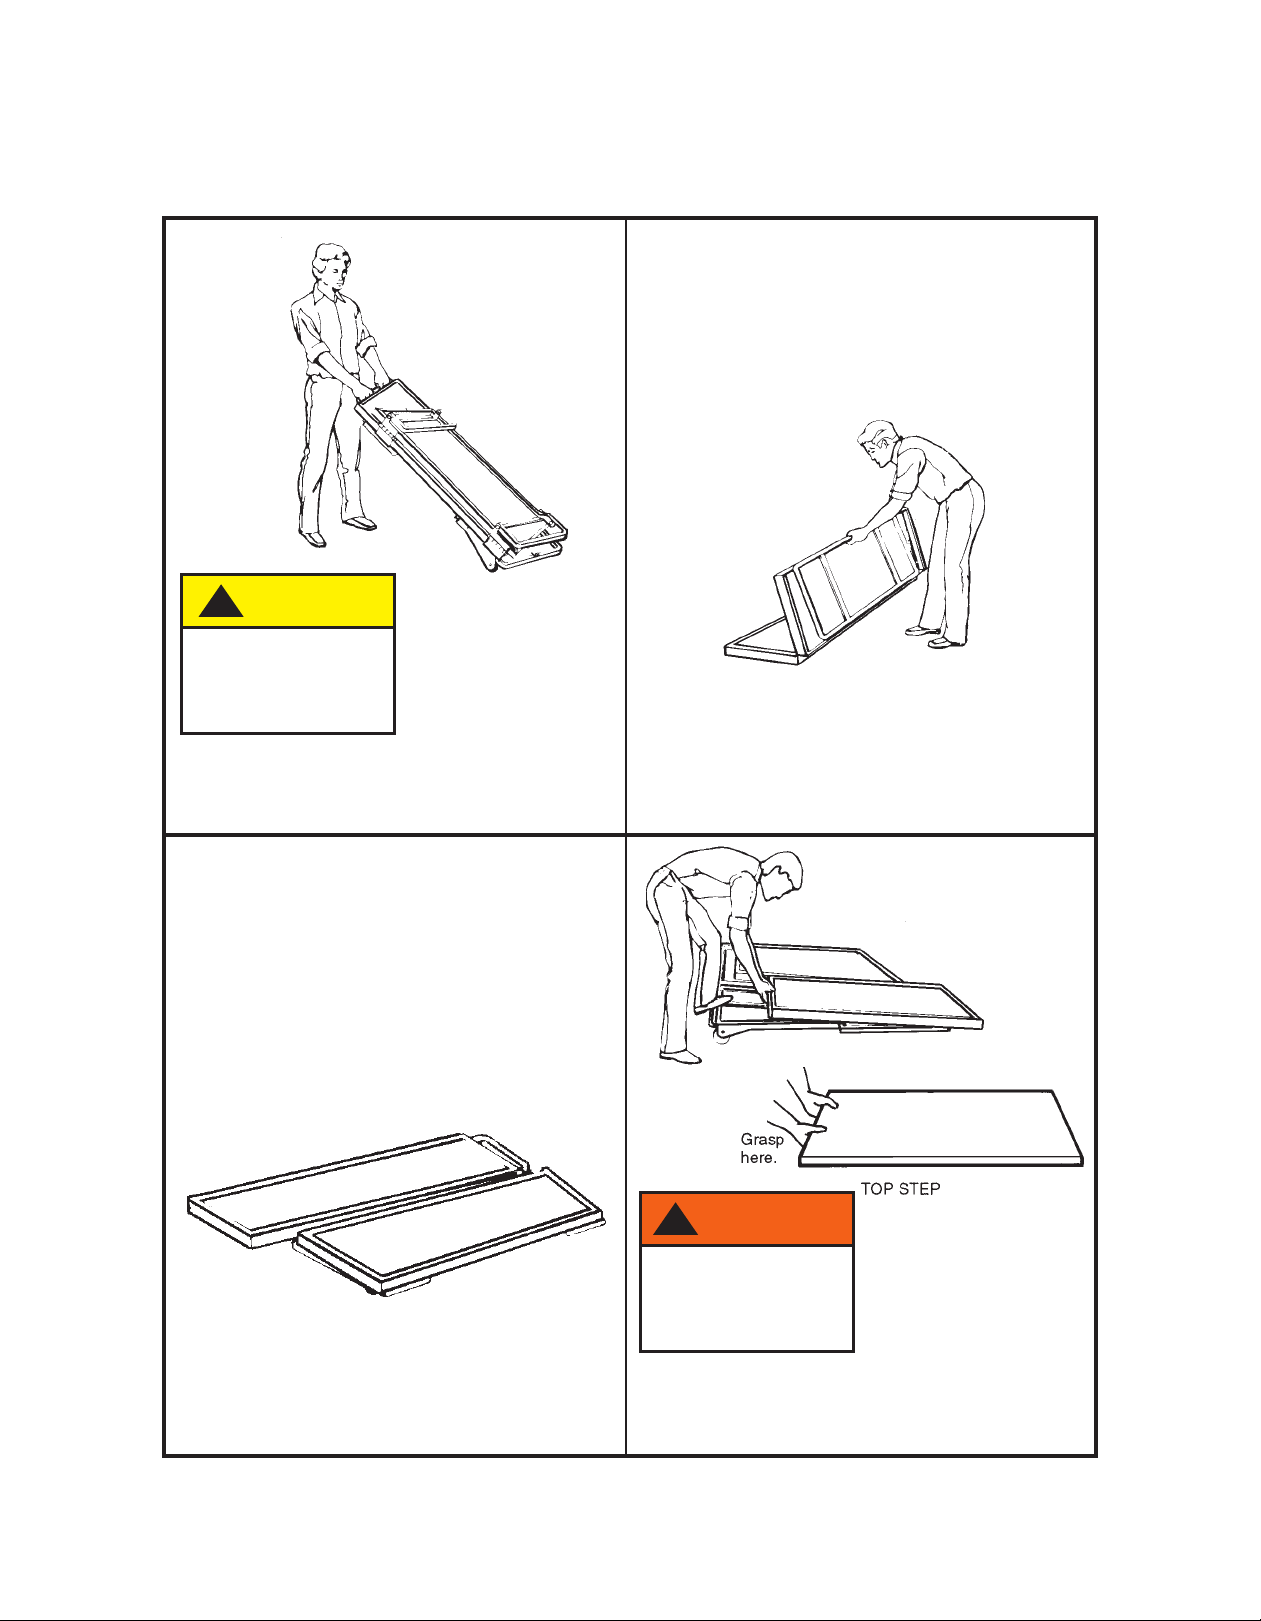
TO seT Up A 3-sTep rIser
1. Roll the riser (push or pull it) to the
performance or rehearsal area.
2. Grasp the side of the top step.
3. Unfold 4. Lay the riser flat on the floor, carpet-side up.
!CAUTION
"12-+!20"
1%"/&0"/,+)5,+
02/# "
3
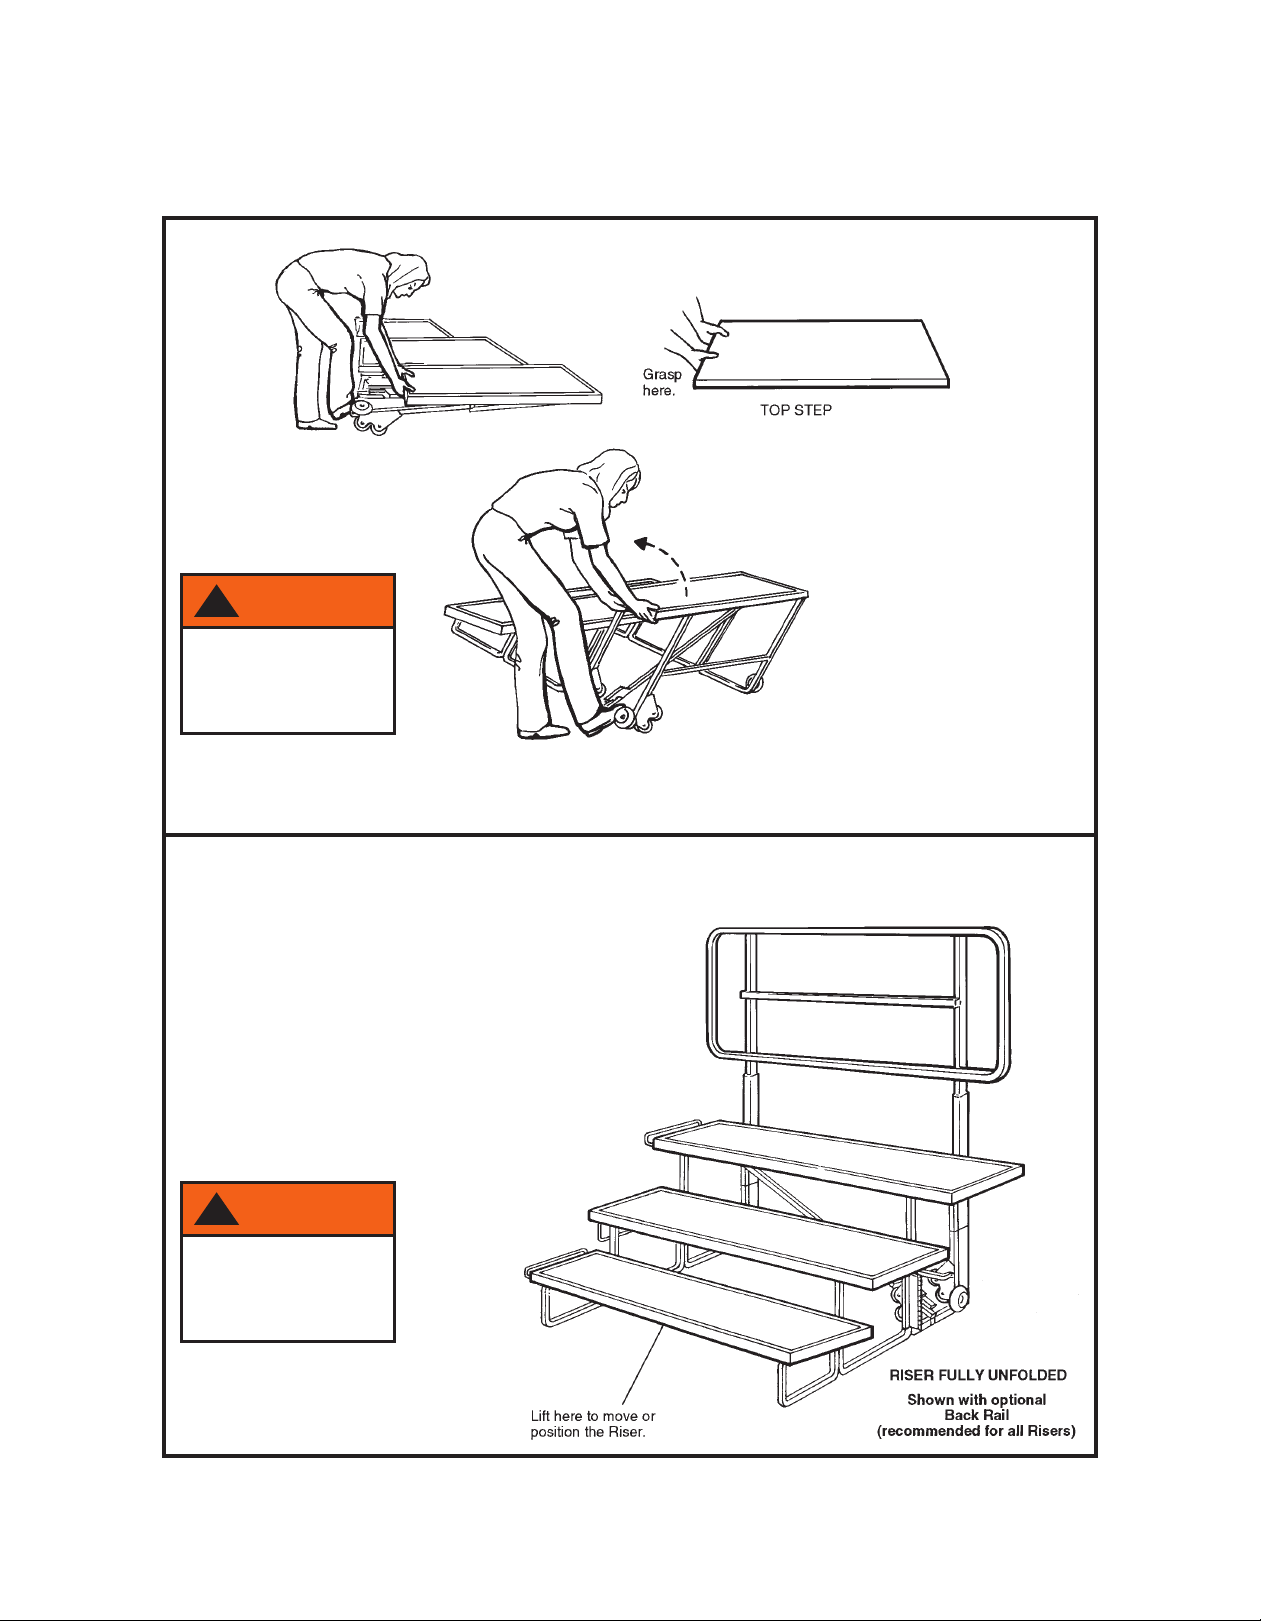
TO seT Up A 3-sTep rIser (CONTINUed)
5. Grasp the end of the top step at the “hand position” decals, and place your right foot on the
riser leg decal.
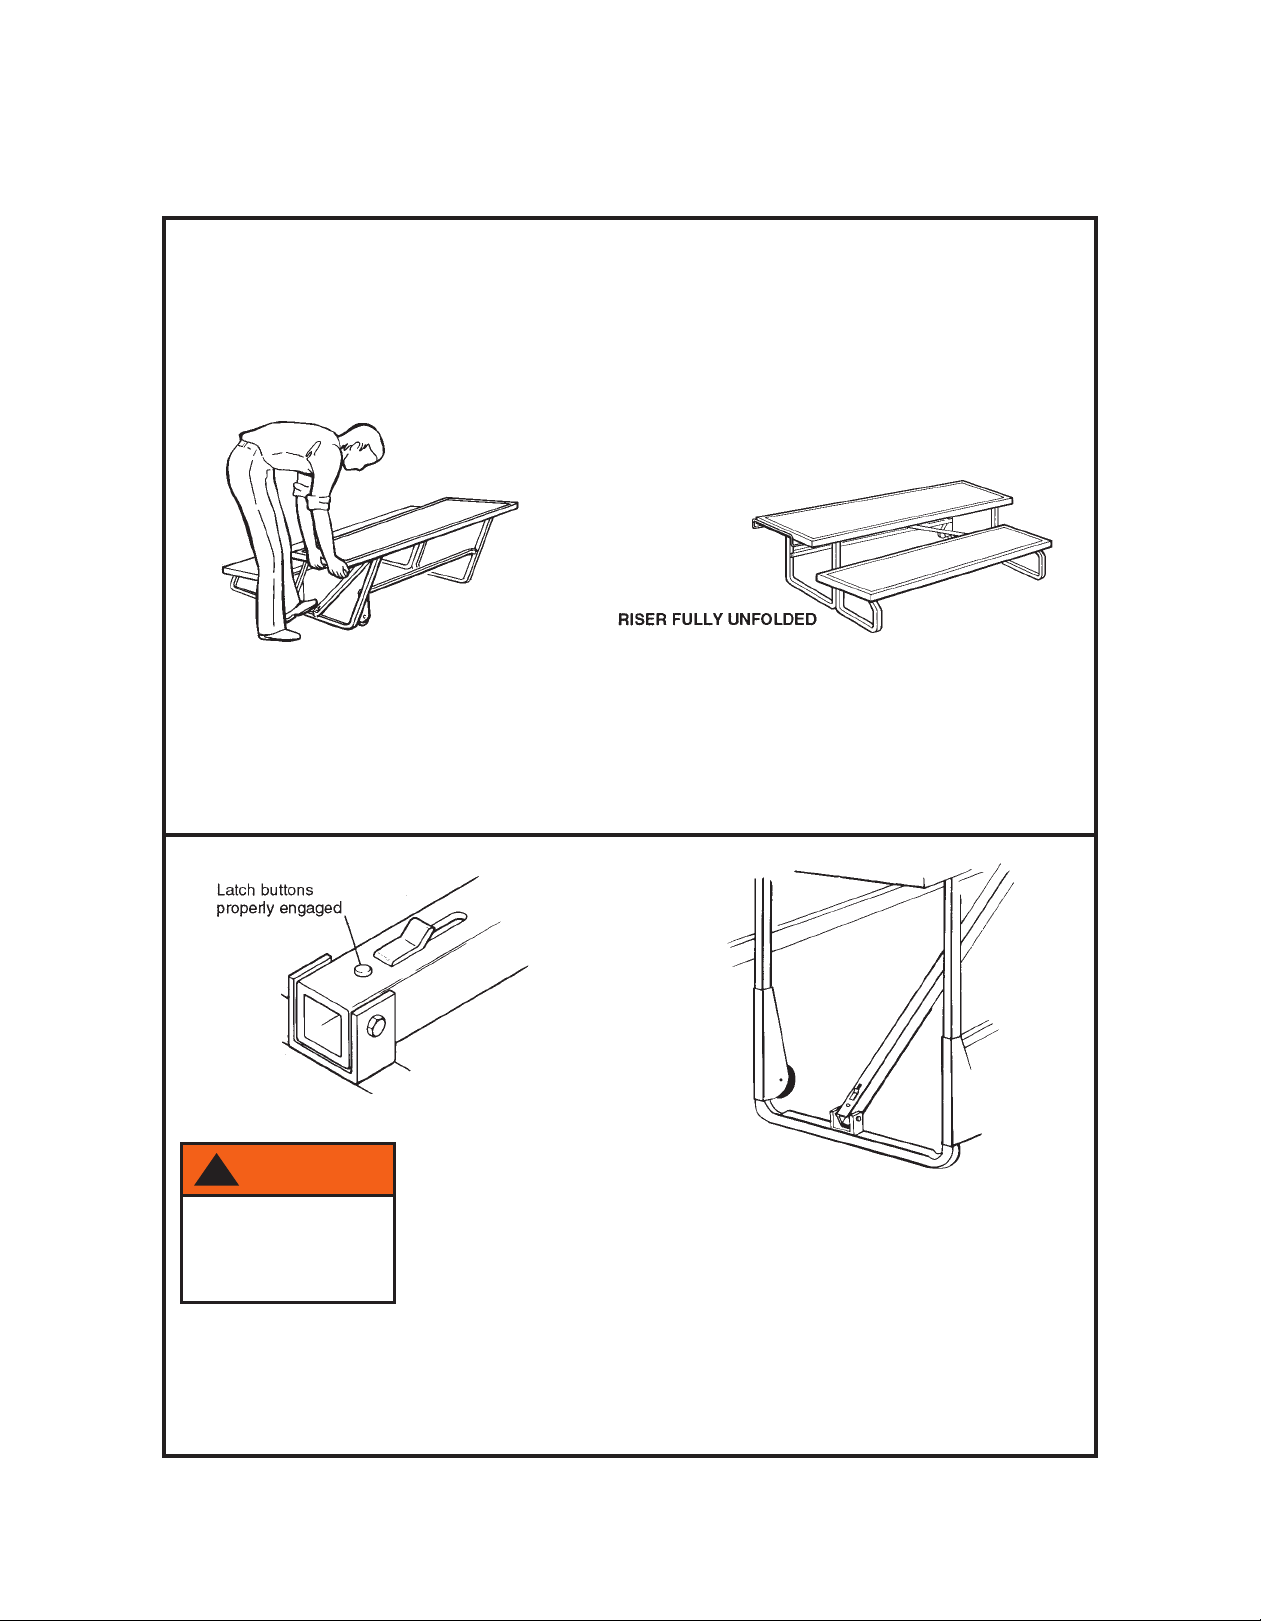
6. Lift the riser toward you until
you hear the latch pin snap
twice. When lifting, keep your
foot on the leg decal and lean
back so your body weight helps
pull up the riser.
IMPORTANT: The rear legs
must be straight up and down,
and the second lock must be
engaged, or the riser is not
fully latched.
7. To install a back rail, side rail or
4th step unit, refer to the
instructions on pages 8 to 10.
!wArNINg
,3,&!&+'2/5
$/0-"+!0,#1,-
01"-,+)516%+!
-,0&1&,+7!" )0
!wArNINg
&0"/4&))#))&#
)1 %-&+&0+,1
-/,-"/)5"+$$"!
4
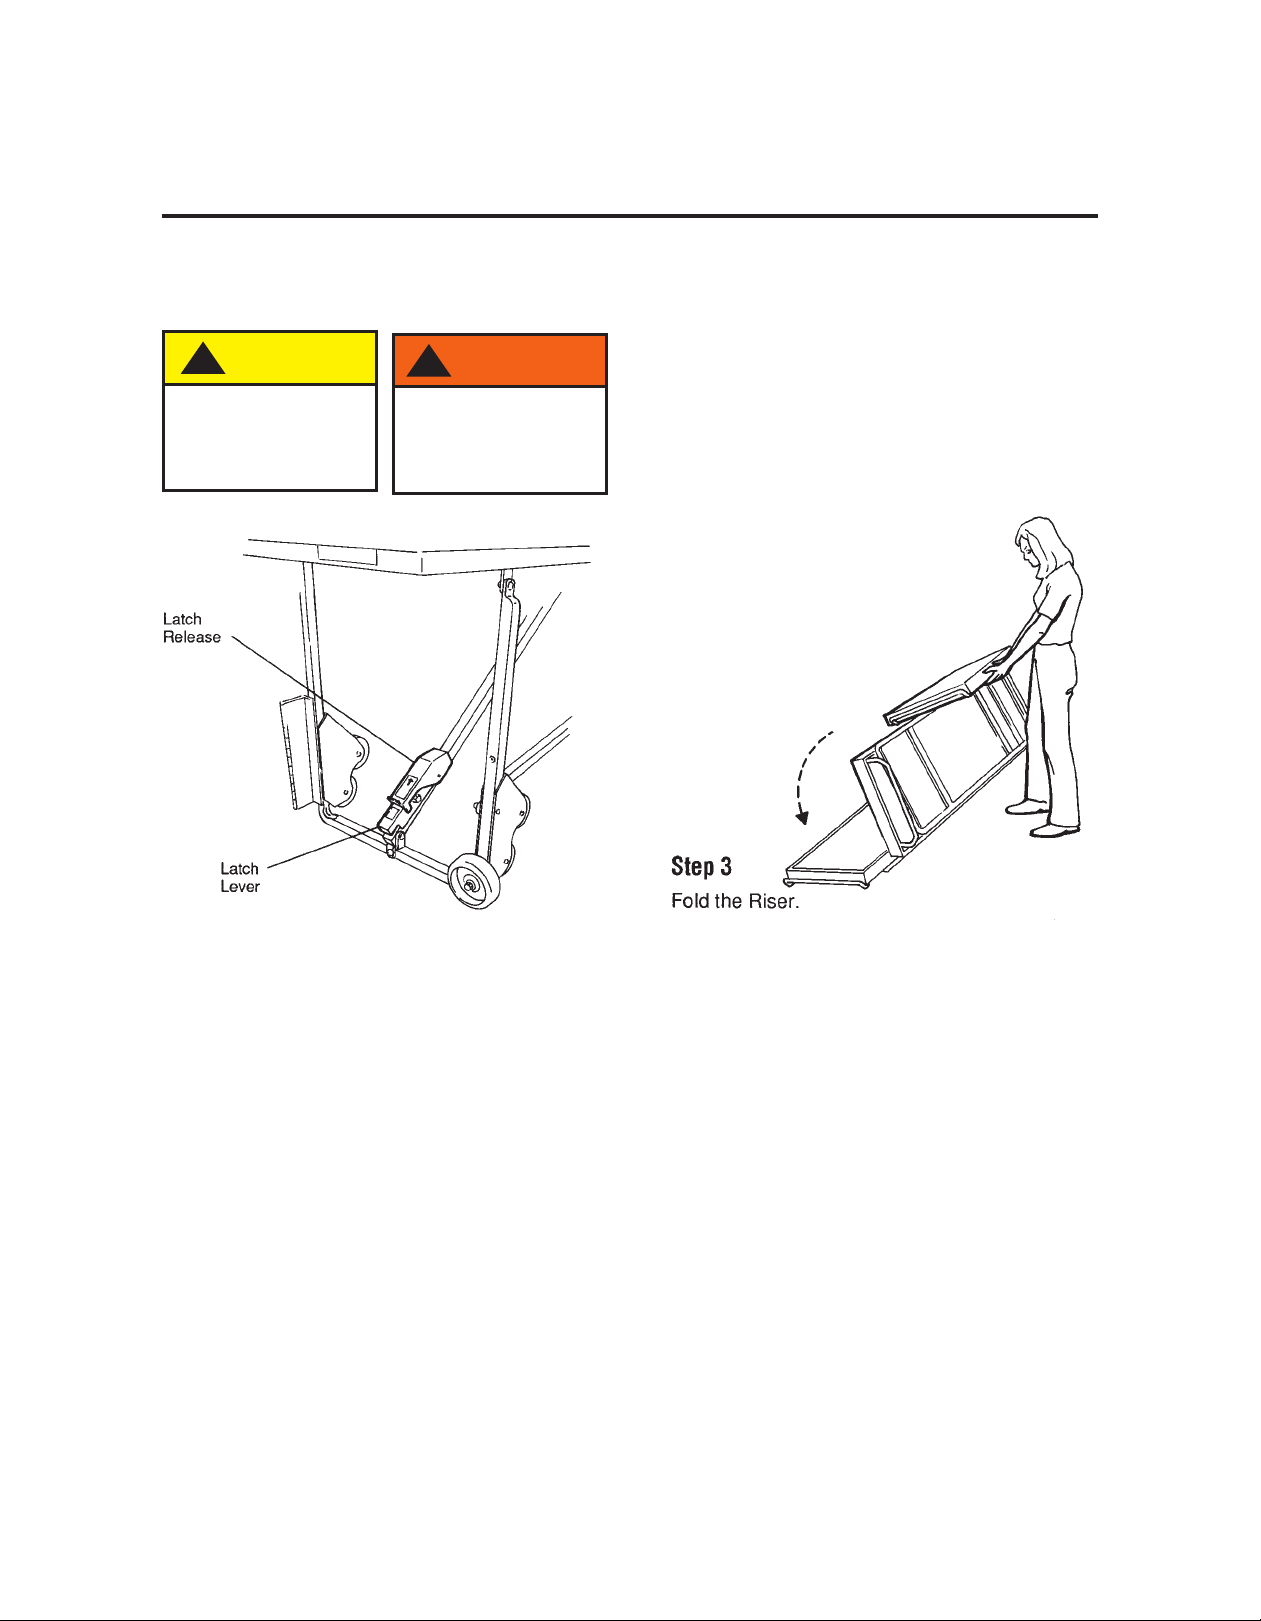
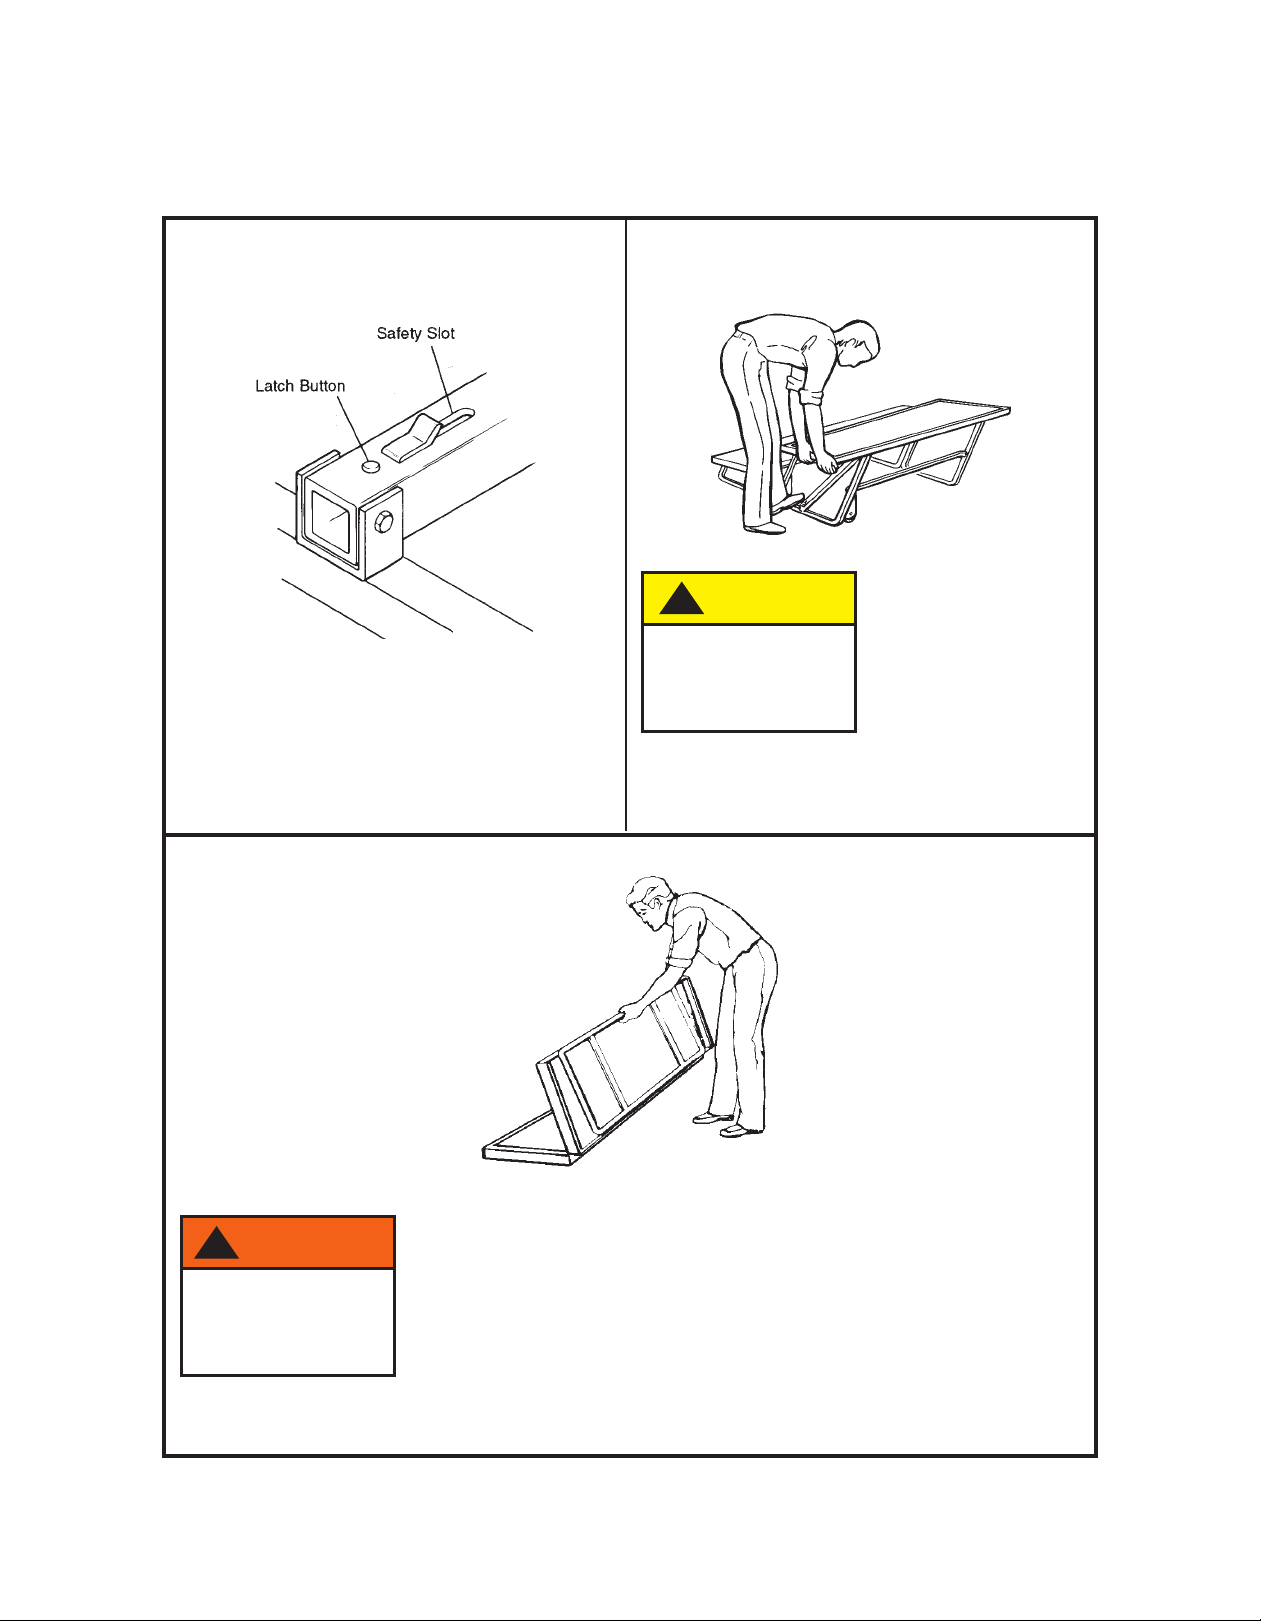
1. ick the latch release forward, and at the same time press down the latch lever with your foot.
2. Grasp the end of the top step at the “hand position” decals, and lower the unit flat on the floor.
TO TAke dOwN A 3-sTep rIser
!wArNINg
,+,101,/"/&0"/
2+&1001+!&+$,+
"+!
!CAUTION
%"2+&14&))!/,-1,
1%"#),,/.2& ()5
5
TO seT Up A 2-sTep rIser
1. Roll the riser (push or pull it) to the
performance or rehearsal area.
2. Unfold.
3. Lay the riser flat on the floor, carpet-side up. 4. Grasp the end of the top step at the center,
and place your left foot on the riser leg
decal.
!wArNINg
,3,&!&+'2/5
$/0-"+!,#1,-
01"-11%" "+1"/
!CAUTION
"12-+!20"
1%"/&0"/,+)5,+
02/# "
6
TO seT Up A 2-sTep rIser (CONTINUed)
5. Lift the riser toward you until you hear the latch buttons snap twice.
6. Look at the latches to be sure the latch buttons are engaged in the bottom hole (not in the slot).
NOTE: Steps cannot be reversed on a 2-Step Riser.
!wArNINg
&0"/4&))#))&#
)1 %211,+0/"
+,1-/,-"/)5
"+$$"!
7
TO TAke dOwN A 2-sTep rIser
1. Press both latch buttons in and push the
step away from you. Press the top button in
again to release from the safety slot.
2. Grasp the end of the top step at the center,
and lower the unit to the floor.
3. Fold the riser.
!wArNINg
,+,101,/"/&0"/
2+&1001+!&+$,+
"+!
!CAUTION
%"2+&14&))!/,-1,
1%"#),,/.2& ()5
8
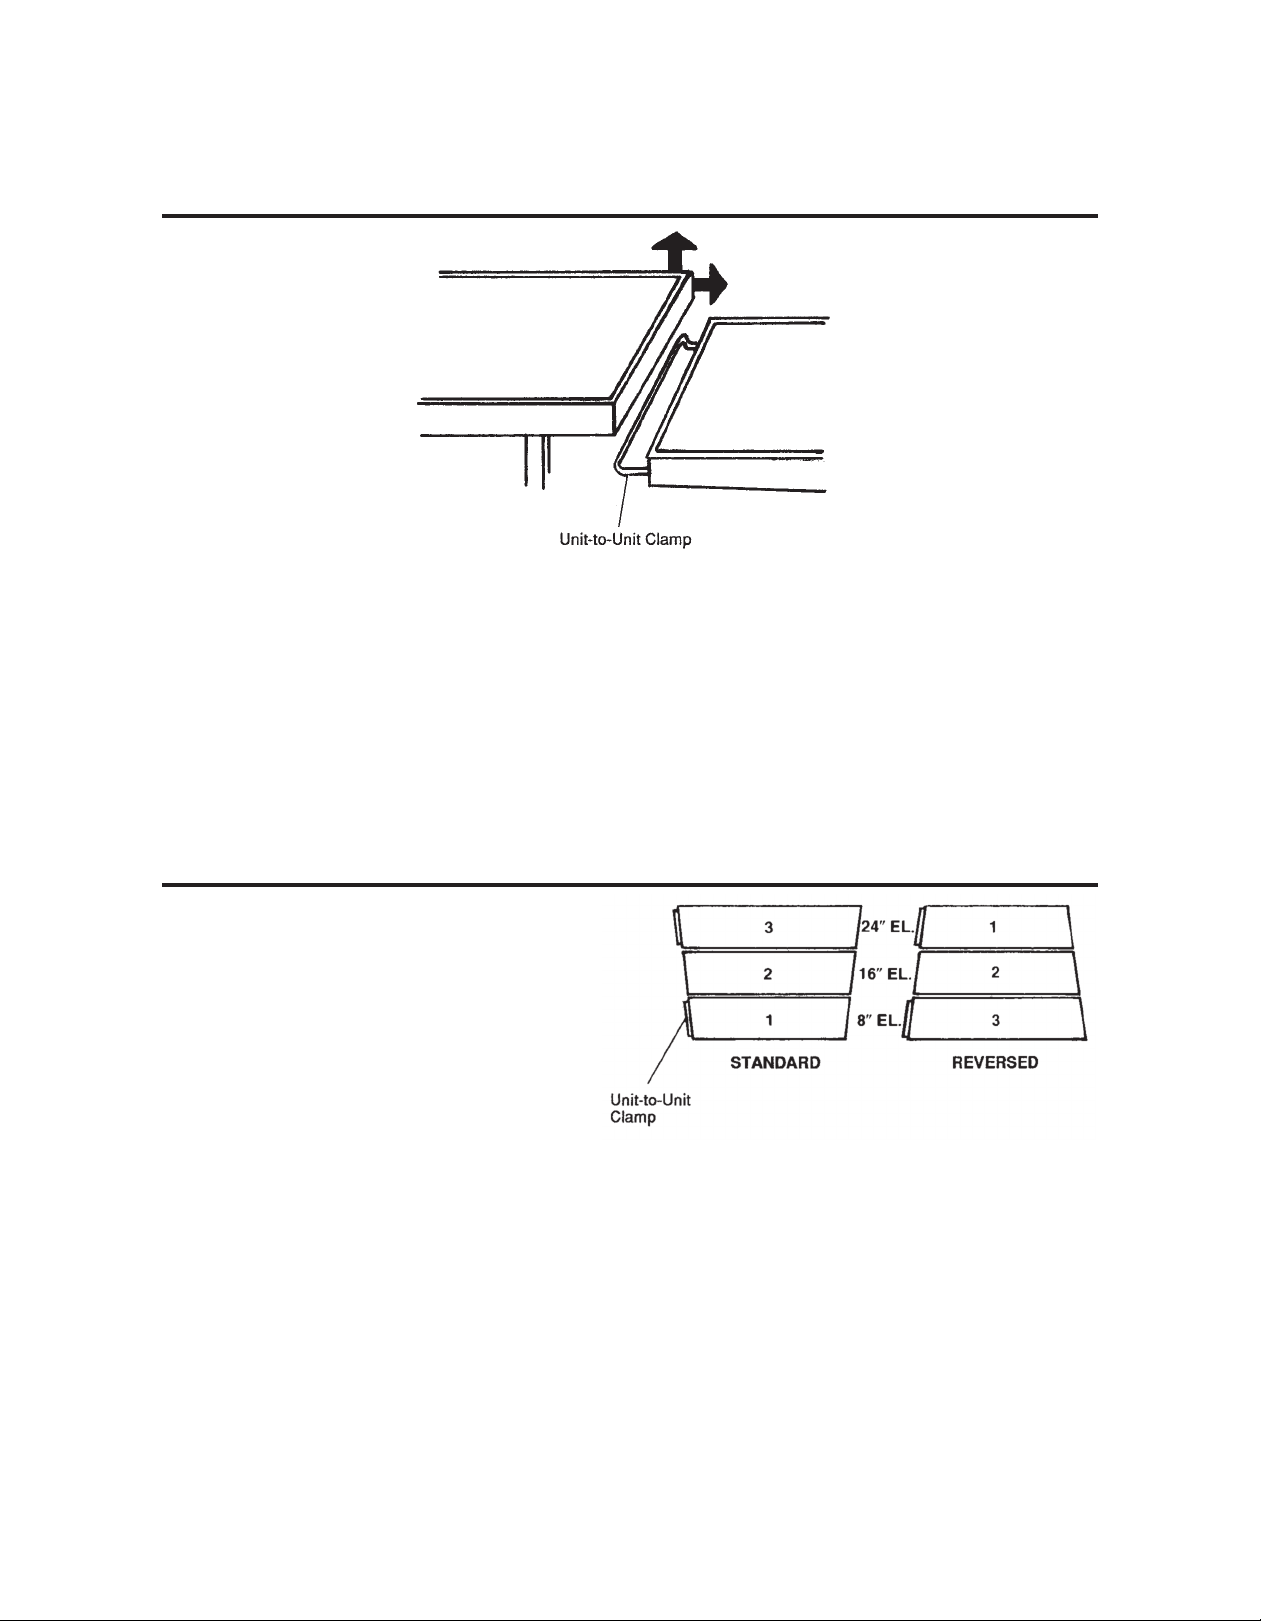
TO lOCk UNITs TOgeTher
1. Before you lock any units together, set up all units and move them into position next to each
other. To move a 3-Step Riser, lift the 1st step and roll the unit on its two positioning wheels.
With 3-Step Risers, also attach any Back Rails and 4th-Step options (see pages 10-11).
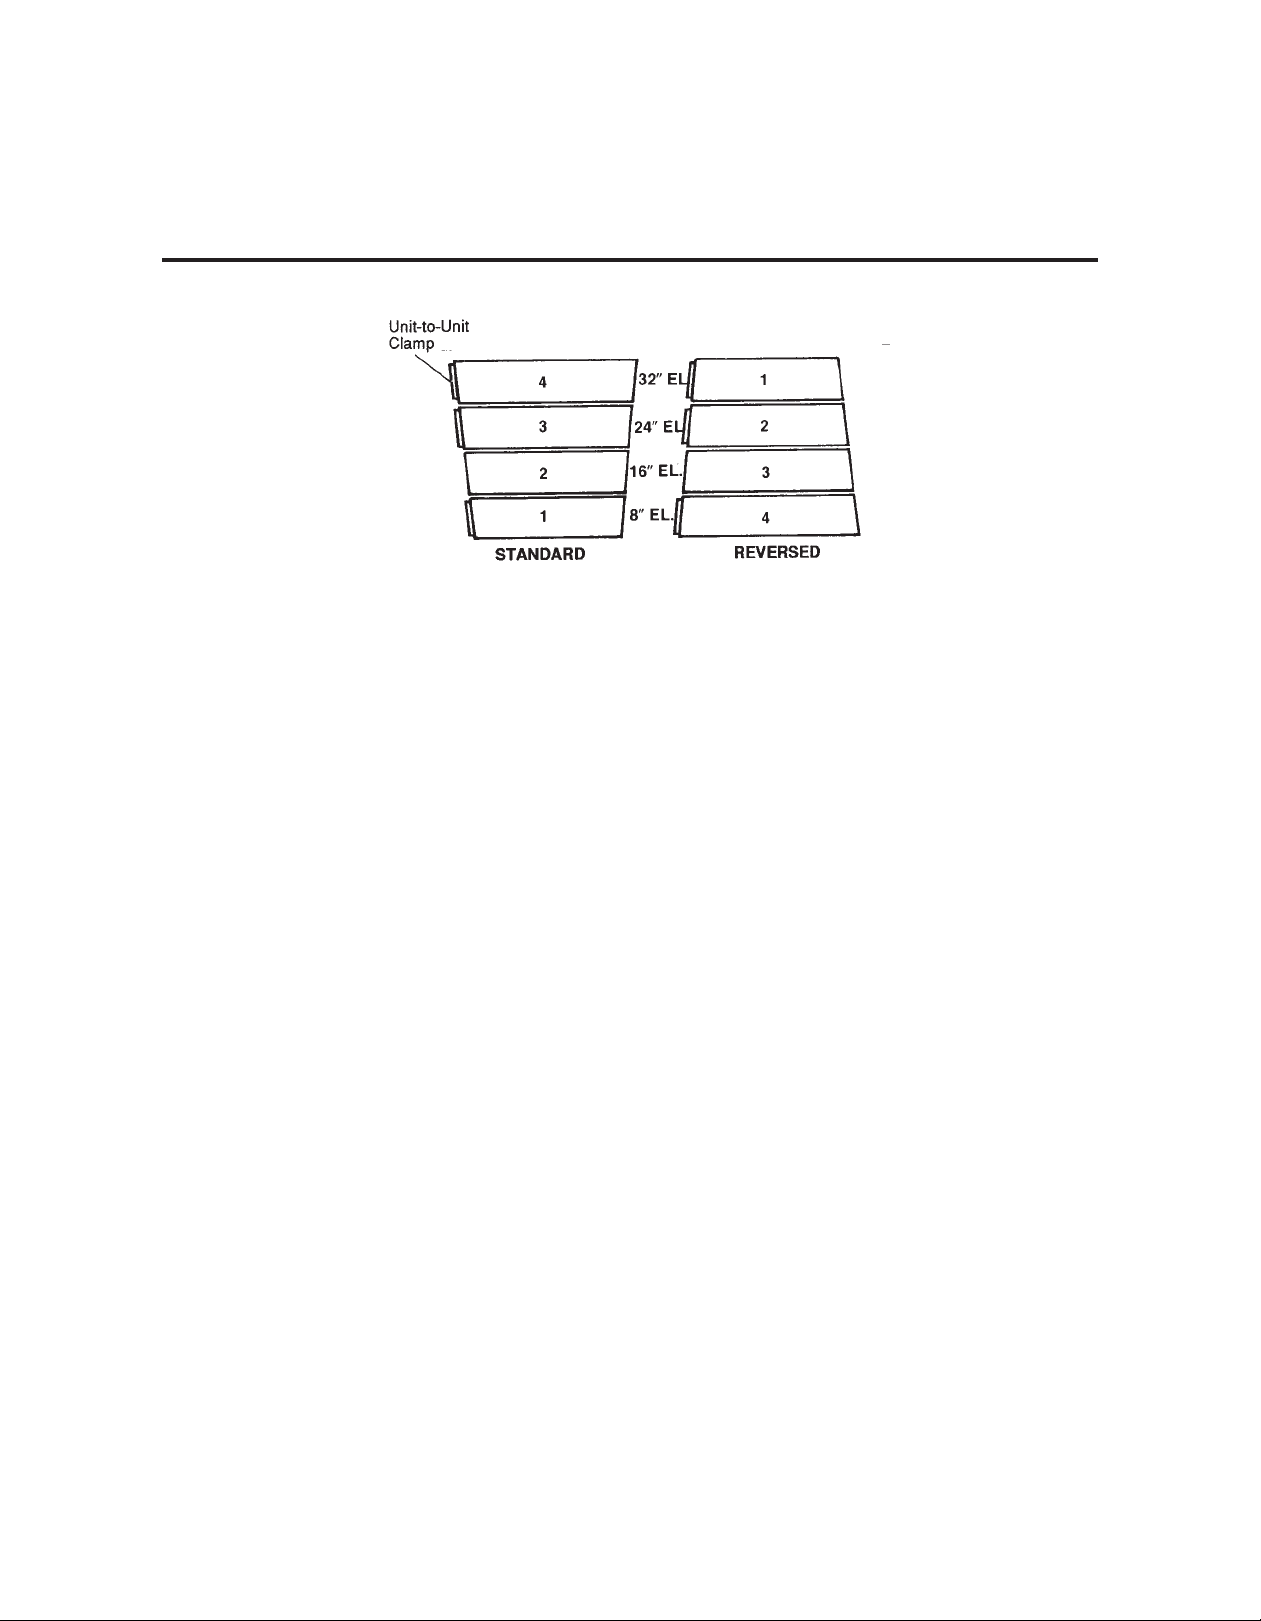
2. Lift one Riser, and place it over the unit-to-unit clamp on a second unit.
If the Riser hangs up on the clamp, loosen the clamp’s two capscrews. Adjust to fit, and
retighten the capscrews.
NOTE: Steps cannot be reversed on a
2-Step Riser.
1. Take off the first and third steps by
loosening the capscrews that hold the
steps to the legs. Don’t loosen the
second steps capscrews yet.
2. Turn the first and third steps end-for-end,
and switch their places as shown.
Reattach the steps to the legs.
3. Remove the second step, turn it end-for-end, and reattach it to the legs.
4. Be sure all capscrews are tightened securely.
5. Remove the unit-to-unit clamps, and reattach them at the opposite end of the steps.
6. If a back rail is used on a reversed riser, reverse the rail loop also.
To do this, depress the two snaps, separate the loop, turn the rail around, and snap it back together
(see page 11).
TO reverse The sTep ArrANgemeNT (3-sTep rIser)
9
TO reverse The sTep ArrANgemeNT
(3-sTep rIser wITh OpTIONAl 4Th-sTep AddITION)
NOTE: Steps cannot be reversed on a 2-Step Riser.
1. Take off the first and fourth steps by loosening the capscrews that hold the steps to the legs.
Don’t loosen the second or third steps capscrews yet.
2. Turn the first and fourth steps end-for-end, and switch their places as shown.
Reattach the steps to the legs.
3. Remove the second and third steps.
Turn them end-for-end, switch their places as shown, and reattach them to the legs.
4. Be sure all capscrews are tightened securely.
5. Remove the unit-to-unit clamps, and reattach them at the opposite end of the steps.
6. If a back rail is used on a reversed riser, reverse the rail loop also.
To do this, depress the two snaps, separate the loop, turn the rail around, and snap it back together
(see page 11).
10
TO ATTACh AN OpTIONAl 4Th sTep AddITION TO A
3-sTep rIser
1. If the riser has a Back Rail installed, remove it before attaching the 4th step.
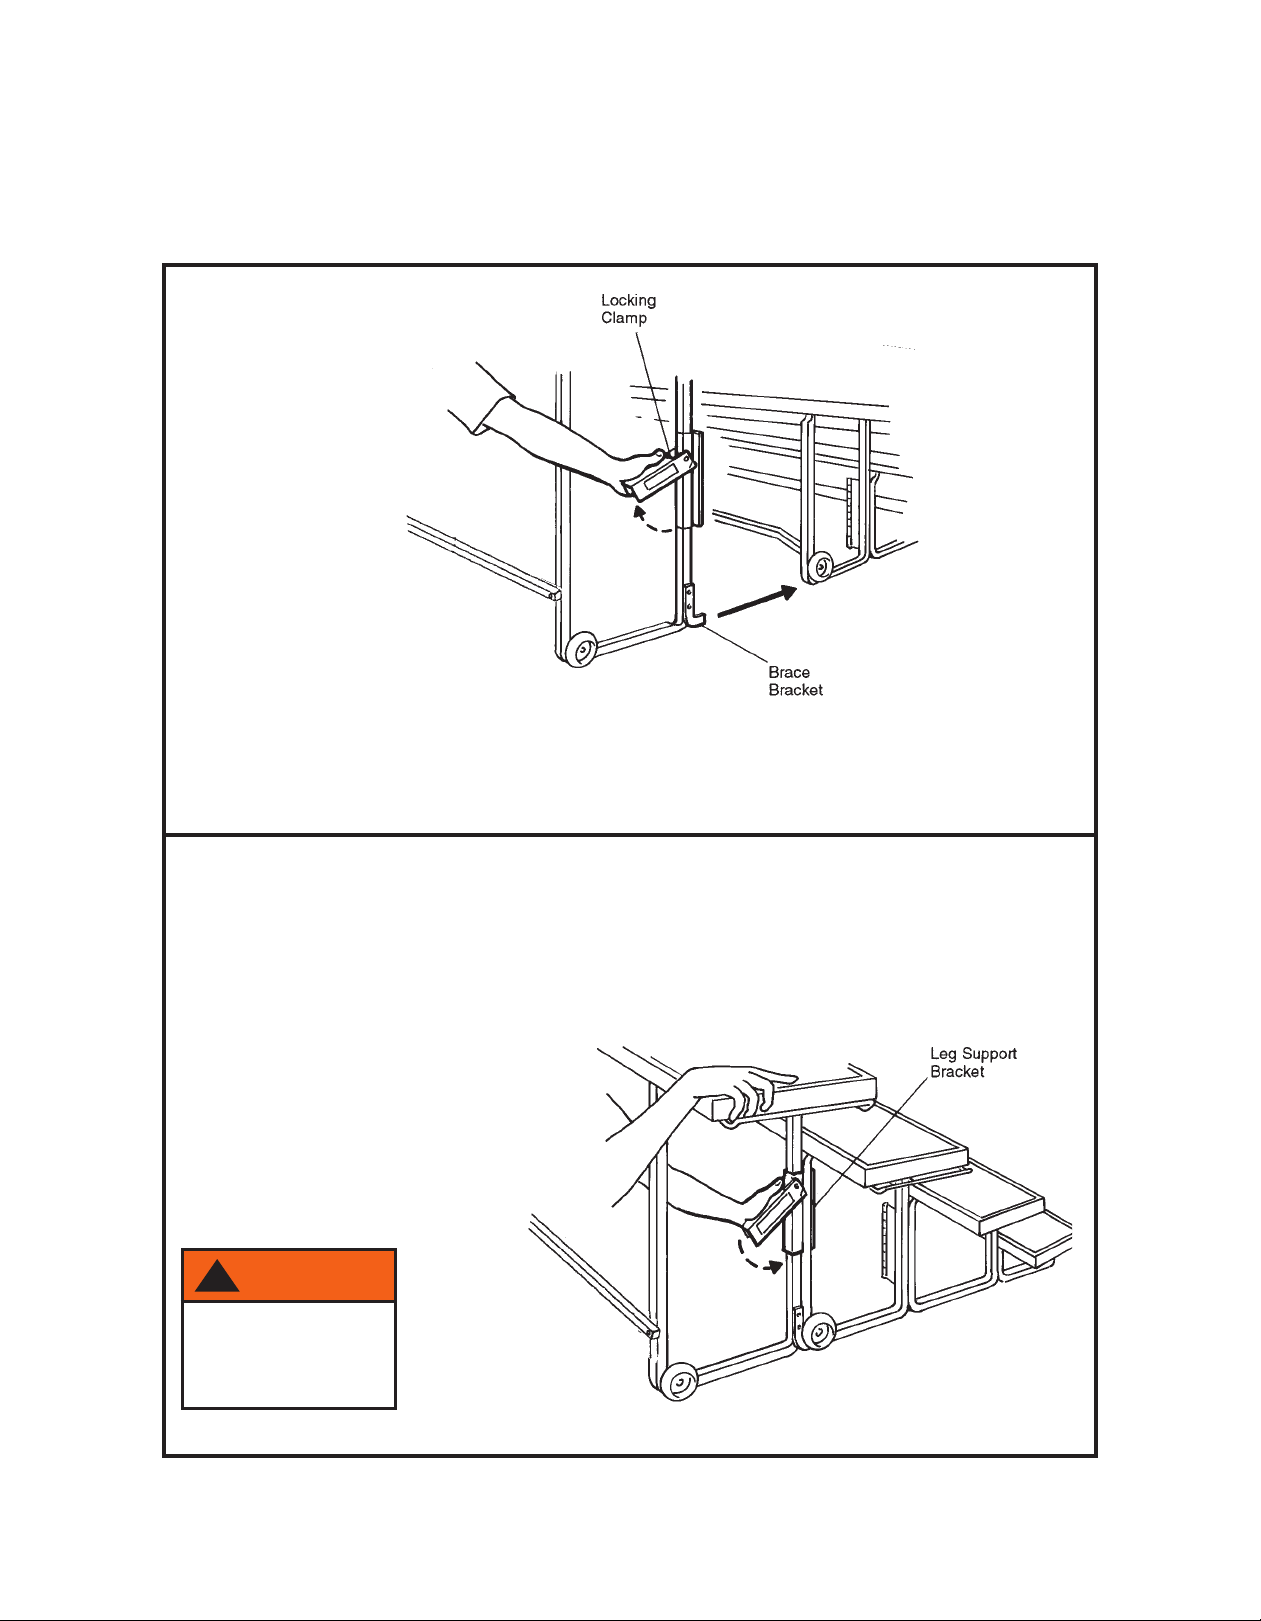
2. Open both locking clamps on the 4th step.
3. Position the 4th steps brace
brackets to the right side
(viewed from the rear) of the
risers leg assemblies. On the
right side, place the bracket
between the leg and the
positioning wheel.
4. Lean the 4th step to the left,
and slip its leg support brackets
over the riser leg assemblies.
5. Push the locking clamps down
so that they cover both leg
assemblies on the riser.
!wArNINg
&0"/&02+0#"
2+)"00,1% )*-0
/"#2))5), ("!
Table of contents
Other Wenger Ladder manuals


