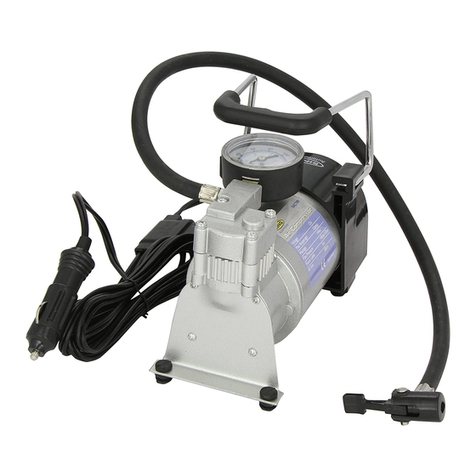
VIAIR 400H-A User manual

IMPORTANT:
It is essential that you and any other operator of this
product read and understand the contents of this manual
before installing and using this product.
SAVE THIS MANUAL FOR FUTURE REFERENCE
USER MANUAL
400H-A – HARDMOUNT AUTOMATIC AIR COMPRESSOR KIT
PART NO. 40041
450H-A – HARDMOUNT AUTOMATIC AIR COMPRESSOR KIT
PART NO. 45041
450H-A
400H-A

IMPORTANT SAFETY INSTRUCTIONS
CAUTION - To reduce risk of electrical shock or electrocution:
- Donotdisassemble.Donotattemptrepairsormodications.Refertoqualiedservice
agenciesforallserviceandrepairs.
- Donotusethisproductinanareawhereitcanfallorbepulledintowaterorotherliquid.
- Donotreachforthisproductifithasfallenintoliquid.
- Usethiscompressorwith12-voltDCsystemsonly.
- Thisproductshouldneverbeleftunattendedduringuse.
WARNING - To prevent injury:
- Neverallowchildrentooperatethiscompressor.Closesupervisionisnecessarywhenthis
compressor is being used near children.
- Thiscompressorwillbecomeveryhotduringandimmediatelyafteruse.Donottouchanypartof
this compressor with bare hands, other than the ON/OFF switch, during and immediately after use.
- Donotusethisproductnearamesorexplosivematerialsorwhereaerosolproductsarebeingused.
- Donotoperatethisproductwhereoxygenisbeingadministered.
- Do not pump anything other than atmospheric air.
- Neverusethisproductwhilesleepyordrowsy.
- Donotuseanytoolsorattachmentswithoutrstdeterminingmaximumairpressureforthat
tool or attachment.
- Neverpointanyairnozzleorairsprayertowardanotherpersonoranypartofthebody.
- ThisaircompressorisequippedwithAutomaticResetThermalProtector,andcanautomatically
restartafterthethermalprotectorresets.Alwayscutopowersourcewhenthermalprotector
becomesactivated.
- Wear safety glasses or goggles when operating this product.
- Useonlyinwellventilatedareas.
INSTALLATION
Thisaircompressorisidealformountingunderthehoodoreveninsideyourvehicle.Thecompact
sizeofthiscompressorrequiresminimalspace,andoil-lessdesignpermitsmountinginmany
dierentareasofyourvehicle.PleasereadandfollowtheseInstallationInstructionscarefullytoavoid
injuryordamagetothecompressorortoyourvehicle.
Eachofouraircompressorsandpartshavebeencarefullyproducedandpackaged.Beforeyou
begininstallation,pleasefamiliarizeyourselfwithInstallationPartsList(Fig.1)ofthismanual.
Guidelines for Selecting Mounting Location:
The selection of proper mounting location for your air compressor will help ensure a long and
troublefreecompressorservicelife.Pleasepay close attention to the following guidelines:
1. Select a FLAT,UPRIGHTANDSECURE location where the compressor can be mounted.
2.Tomaximizeaircompressorperformance,locatecompressorasCLOSETOTHEBATTERY
aspossiblesothatlengthofpositiveleadwirerequiredisataminimum.
3.ChoosemountinglocationthatisascoolaspossibleandAWAYFROMHEATSOURCES.
Thecoolertheambienttemperaturethelesschancethecompressorwilloverheat.
4. This compressor is moisture & splash resistant, but NOTWATERPROOF. Do not mount
compressorinlocationswheretheunitislikelytocomeincontactwithwater.
5. Select compressor mounting location where air line can be routed from compressor air inlet to
remoteinletairlter.MakesureRemoteInletAirFilterislocatedinadrylocation,awayfrom
water splashes.
6. If it is necessary to mount the air compressor further away from the battery, such as inside
yourvehicleorinthebedofyourpickup,useaminimum8AWGpositiveleadwirefor
remoteinstallation.(Seewiregaugereferencechart)
7.Donotmountcompressornearareaswhereammableliquidsarestored.
USER MANUAL
400H-A - 450H-A Hardmount Automatic Air Compressor Kit

MOUNTING AND WIRING
1. Disconnectgroundcablefromvehicle’sbattery.
2. Temporarilypositiontheaircompressorinthelocationwhereitwillbemounted.Routethe
positivewiretothepositivepostofthebattery.Measureandcutpositivewiretotheappropriate
length and use appropriate inline fuse.
3. Routegroundwiretothenegativepostofthebatteryortoanappropriatechassisgrounding
point and cut ground wire to length as needed.
4. Mounttheaircompressorwiththefoursetsofbolts,nuts,washers,andlockingwashers
provided.(SeeFig.2forMountingInstructions).Useofthreadsealantisrecommended.
5. Attachgroundwiretothenegativepostofthebatteryorchassisgroundingpoint.
Checktomakesurethattheaircompressor’sON/OFFswitchisintheOFFposition.
Attachpositivewiretopositiveterminalofthebattery.
6. Re-checktomakesurethatallconnectionsaremadesecurely.
(Fig. 1) 400H-A/450H-A Hardmount Automatic Air Compressor Kit Installation Parts List:
K
A. MountingBolts(4pcs)
B. FlatWashers(8pcs)
C. LockingWasher(4pcs)
D. Nuts(4pcs)
E. 1/4”Fx3/8”TubeFitting(1pcs)
F. 3/8”AirLine(1pc)
G.AirLineClips(3pcs)
H. Screws(3pcs)
I. RemoteInletAirFilterwithFilterElement(1pc)
J. Positive(Red)RingTerminal(1pc)
K. Negative(Black)RingTerminals(2Sizes)
400H-A - 450H-A Hardmount Automatic Air Compressor Kit
USER MANUAL
ACDE
G
H
I
F
B
C
C
D
E
F
(Fig. 2) Compressor
Mounting Hardware
B.MountingBolt
C.FlatWasher
D.LockingWasher
E. Nut
F. Vibration Isolator
J
B
OPERATING INSTRUCTIONS
1. IMPORTANT:AlwaysoperatethecompressoratorbelowtheMAXIMUMPRESSURERATINGof
thecompressor.PleaserefertoApplication&SpecicationsSectionsofthismanualfordetails.
2.AlwaysobservetheMAXIMUMDUTYCYCLEoftheaircompressor.RefertoCompressor
ApplicationsandSpecicationsSectionsofthismanualfordetails.Operationexceeding
maximumpressureratingsand/ordutycyclewillresultindamagetotheaircompressor.
3.YouraircompressorisequippedwithanAUTOMATICTHERMALOVERLOADPROTECTOR.
Thisfeatureisdesignedtoprotecttheaircompressorfromoverheatingandcausingpermanent
damagetoyouraircompressor.Thethermaloverloadprotectorwillautomaticallycutpowerto
youraircompressorshouldtheinternaloperatingtemperatureoftheaircompressorriseabove
safelevelsduringexcessiveuse.
4.Shouldyourcompressorshutosuddenlyafterextendeduse,donotattempttorestarttheair
compressor. Turn power switch to the air compressor to the OFF position.
Theautomaticthermaloverloadprotectorwillautomaticallyresetwheninternaltemperatureofthe
aircompressordropsbelowsafelevels.Allowaircompressortocooloforabout30minutes,
before resuming use of the air compressor.
5.Foryourconvenience,andtoprotecttheaircompressorfromover-pressureoperationthat

OPERATING INSTRUCTIONS (continued)
cancausepermanentdamagetotheunit-thiscompressorisequippedwithbuilt-inpressure
switchwithafactorysetcut-onpressureof130PSI(±5%)andafactorysetcut-opressureof
155PSI(±5%).Duringinationoftirepressuresbetween130PSIto155PSI,ifyoustopination,
the compressor may not restart. This is completely normal, since inline pressure is greater than
cut-onpressureofthepressureswitchandlessthancut-opressureofthepressureswitch.
Torestartcompressor,deatetirepressuretobelow130PSI,reconnecttirechucktotirevalve
stemandresumetireination
6.ONLYOPERATETHEAIRCOMPRESSORINWELL-VENTILATEDAREAS.
7.Compressorperformanceisalsoenhancedwhenoperatingcompressorwithvehicle’s
engine running.
TIRE INFLATION
Thisaircompressorcomeswith1/4”quickconnectstud.Anextensioncoilhoseandatire
inationgunarealsoincludedwithyourcompressor.Eachendoftheextensioncoilhoseis
equippedwitha1/4”quickconnectcoupler.Thetireinationguncomeswitha1/4”quick
connectstud,pressuregauge,rubberhose,bleedervalveandtirechuck.Attachoneendof
theextensioncoilhosetothestudonyourcompressorandtheotherendtothestudonthe
tiregunkit.Thetiregunkitcanbeusedforbothairingupandairingdown.Pleasefamiliarize
yourselfwiththefollowingfunctionsofthisversatileairtool.
1.Attachoneendoftheextensioncoilhosetothecompressorandtheotherendtothetiregunkit.
2.Pushthetirechuck,withtheleverintheuprightposition,downoverthetirevalvestemandthen
pushtheleverdowntothehorizontalpositiontolockinplace.
3.Turncompressorswitchonandholddownthetriggeronthetiregunkittobeginination.
TIRE DEFLATION
1.Pushthetirechuck(withtheleverintheuprightposition)downoverthetirevalvestemandthen
pushtheleverdowntothehorizontalpositiontolockinplace.
2.Pressthebleedervalvebuttononthetiregunkittodecreasetirepressure.
3.Whendesiredpressureisreached,releasethebleedervalvebuttontohaltdeation
IMPORTANT: AlwaysmakesurethePortableCompressor’spowercordisuncoiledandfully
extendedwhenusingyouraircompressortoavoidoverheatingthepowercord.
INLINE PRESSURE GAUGE
1.Thepressuregaugeontheinationgunprovidesconvenienttirepressuremonitoringwhenairing
upordown(notairowofthecompressor).Thiseliminatesswitchingbackandforthbetweena
tirechuckandatirepressuregauge.
2.Pleasenotethatduringinationanddeation,duetoairvelocity,pressuregaugecannotprovide
accuratepressurereadings.Releaseleveronthetireinationgunduringinationtochecktire
air pressure.
NOTE:Toreleaseexcesspressure,turnocompressoranddisconnecthosefromcompressor.With
thetireinationgunstillconnectedtotheotherendofthecoilhose,pulltriggeronthetireination
guntoreleaseexcesspressure.
SAFETY PRECAUTIONS:
1.Alwaysinatetirestomanufacturer’srecommendedtirepressures.Exerciseextremecaution
whendrivingwithaired-downtires.Reinatetiresbeforehigh-speedroadwaytravel.
2.Neverexceed20M.P.H.whendrivingwithpartiallyinatedtires.
3.Nevermakesharpturnswhiledrivingwithreducedtirepressure.
4.Re-inatetiresbeforehighspeedtravelingontoroadways.
USER MANUAL
400H-A - 450H-A Hardmount Automatic Air Compressor Kit

INLINE PRESSURE GAUGE (continued)
5.Useheat-resistant,minimum200PSI-ratedworkingpressureextensionhose.Donotuse
aftermarkethoseswithlessthan200PSIworkingpressure.Someaftermarkethosesmaynotbe
suitable for use with this air compressor due to heat and pressure typically generated by this type
of air compressors.
MAINTENANCE & REPAIRS
1.Periodicallycheckallelectricalandttingsconnections.Cleanandtightenorrepairasneeded.
2.Periodicallycheckallmountingbolts.Tightenasneeded.
3.Replaceairlterelementperiodically.Replacementfrequencydependsonoperatingfrequency
andoperatingenvironment.Forfrequentuseindustyenvironment,werecommendthatyou
replaceairlterelementatleastonceamonth.
4.Regularlycleandustanddirtfromcompressorcoolingnsandmotorhousing.
5.Youraircompressorisequippedwithapermanentlylubricated,maintenance-freemotor.
Nevertrytolubricatecompressor.
6.AllrepairsshouldbeperformedbyManufacturerorManufacturer’sAuthorized
ServiceAgenciesonly.
CAUTION:Nevertouchtheaircompressororttingsconnectedtotheaircompressor,withbare
handsduringorimmediatelyafterusage.Ifnecessary,wearheatresistantglovestohandlettings,
air line, and coil hose.
SPECIFICATIONS
•PartNo.40041/400H-AAutomaticAirCompressor
MotorVoltage: 12Volts
Max.CurrentConsumption: 30Amps
MotorType: PermanentMagnetic
Max.WorkingPressure: 150PSI
Max.DutyCycle(@72°F&100PSI): 33%
(Min.On/O@72°F&100PSI) 20On/40O
Max.RestartPressure: 150PSI
Max.AmbientTemperature: 158°F
Min.AmbientTemperature: -40°F
Fuse: 40 amps
Dimensions: 11.25”Lx4”Wx6.75H”
NetWeight: 8.95Lbs.
•PartNo.45041/450H-AAutomaticAirCompressor
MotorVoltage: 12Volts
Max.CurrentConsumption: 23Amps
MotorType: PermanentMagnetic
Max.WorkingPressure: 150PSI
Max.DutyCycle(@72°F&100PSI): 100%
(Min.On/O@72°F&100PSI) Continuous
Max.RestartPressure: 150PSI
Max.AmbientTemperature: 158°F
Min.AmbientTemperature: -40°F
Fuse: 30 amps
Dimensions: 12”Lx4”Wx6.75H”
NetWeight: 11.05Lbs.
USER MANUAL
400H-A - 450H-A Hardmount Automatic Air Compressor Kit

USER MANUAL
400H-A - 450H-A Hardmount Automatic Air Compressor Kit
COMPRESSOR APPLICATION GUIDE
Toensurethatyougetthehighestlevelofsatisfactionfromyourcompressorperformance,referto
information below:
VIAIR COMPRESSOR REFERENCE CHART
COMPRESSORSERIES MAX.WORKING DUTYCYCLE
PRESSURE (100PSI@72°F)
090SERIES 120PSI 9%
092SERIES 120PSI 9%
095SERIES 120PSI 9%
097SERIES 130PSI 10%
098SERIES 130PSI 10%
100SERIES 130PSI 15%
250IGSERIES 150PSI 100%
275SERIES 150PSI 25%
280SERIES 150PSI 30%
325SERIES 150PSI 33%
330IGSERIES 150PSI 100%
350SERIES 150PSI 100%
380SERIES 200PSI 100%
55%@200PSI
400SERIES 150PSI 33%
420SERIES 150PSI 33%
425SERIES 175PSI 33%@175PSI
50%
444SERIES 200PSI 100%
50%@200PSI
450SERIES 150PSI 100%
450IGSERIES 150PSI 100%
460SERIES 150PSI 100%
480SERIES 200PSI 100%
50%@200PSI
485SERIES 200PSI 100%
100%@200PSI
ABOUT COMPRESSOR DUTY CYCLE:
Dutycyclereferstotheamountoftimeacompressorcanbeoperatedinagiventimeperiodat100
PSI,andastandardambienttemperatureof72°F.Itiscommonlyexpressedinpercentageformat:
Compressorontime÷(ontime+otime)=DutyCycle%.
ONE-HOUR DUTY CYCLE MINUTES ON /
(100PSI@72°F) MINUTES OFF
9% 5Min.On/55Min.O
10% 6Min.On/54Min.O
15% 9Min.On/51Min.O
20% 12Min.On/48Min.O
25% 15Min.On/45Min.O
30% 18Min.On/42Min.O
33% 20Min.On/40Min.O
50% 30Min.On/30Min.O
100%1HourRunTime
NOTE:Allcompressors,regardlessofrateddutycycle,requiresucientresttimeinbetweencycles
toallowforpartialorcompleteheatdissipation.Heatdissipationratesmayvarydependingon
ambient temperatures and operating conditions.
ABOUT RATED WORKING PRESSURE:
Toensuretroublefreeservicelifeofyourcompressor,alwaysoperatecompressorwithinrated
workingpressureofthecompressor.Neveruseapressureswitchwithahighercut-opressurethan
compressor’sratedworkingpressure.

TROUBLESHOOTING GUIDE:
Compressorruns
continuouslyandairow
lower than normal
1.Excessiveairusage
2.Looseconnections
3.Wornpistonringorinletvalve.
4.Cloggedairlterelement
1. Decrease air usage
2.Checkallconnectionswith
soap and water solution
and tighten.
3.Replacecompressor
4.Replaceairlterelement
Compressorruns
continuously
1. Faulty pressure switch 1.Replacepressureswitch
Compressorwillnotrun 1. No power, or power switch
in OFF position
2.Blownfuse
3.Motoroverheats
4. Faulty pressure switch
(ifhookeduptoa
pressureswitch).
1.Makesurecompressor
switch is ON
2. Disconnect compressor
from power source, replace
fuse.(RefertoSpecications
section for correct
fuseamperage)
3.Letcompressorscoolofor
about 30 minutes to allow
thermaloverloadswitchtoreset.
4.Replacepressureswitch
Thermaloverload
protector cuts out
repeatedly
1.Lackofproperventilationor
ambient temperature is too high
2.Compressorvalvesfailed
1.Movecompressortowell
ventilatedarea,orareawith
lower ambient temperature
2.Replacecompressor
Excessiveknocking
or rattling
1.Loosemountingbolts
2. Worn bearing on eccentric or
motor shaft
3.Cylinderorpistonringisworn
1. Tighten bolts
2.Replacebearingor
piston assembly
3.Replacepistonorcompressor
CAUTION: NEVER DISASSEMBLE COMPRESSOR WHILE
COMPRESSOR IS PRESSURIZED.
USER MANUAL
400H-A - 450H-A Hardmount Automatic Air Compressor Kit
PROBLEM: POSSIBLECAUSE(S) CORRECTIVEACTION

400H-A - 450H-A Hardmount Automatic Air Compressor Kit
15EDELMAN•IRVINE,CA92618
TEL:(949)585-0011•FAX:(949)585-0188
www.viaircorp.com
Wiring Diagram:
(Fuse Not Included)
USER MANUAL
AMERICAN WIRE GAUGE GUIDE 12-VOLT:
Amp Draw
Lengthofwirefrombatteryto
compressor(infeet)
5 10 15 20
5 16 16 16 14
10 16 14 12 10
15 16 12 10 10
20 14 10 10 8
25 14 10 86
30 12 10 86
40 12 8 6 6
50 10 6 6 4
60 10 6 4 4
LIMITED WARRANTY:
VIAIRCorporationwarrantsthisproduct,whenproperlyinstalledandundernormalconditionsofuse,tobefreefromdefectsin
workmanshipandmaterialsforaperiodofoneyearfromitsoriginaldateofpurchase.Toreceivewarrantyserviceorrepair,please
contactVIAIRCorporation.
Returnsshouldbemadewithinoneyearofthedateofpurchase,afteraReturnGoodsAuthorization(RGA)numberhasbeen
assignedbyVIAIRCorporation.ToobtainRGA,faxacopyofyourreceiptto(949)585-0188.Forcompletewarrantydetails,please
visit:www.viaircorp.com/warranty
PLEASE NOTE:
THISWARRANTYCOVERSPRODUCTDEFECTSONLY;ITDOESNOTCOVERINCIDENTALORCONSEQUENTIALDAMAGES
ASRESULTOFMISUSEORABUSE.
ThisManualisproprietarytoVIAIRCorporationandnoownershiprightsareherebytransferred.NopartoftheManualshallbe
used,reproduced,translated,converted,adapted,storedinaretrievalsystem,communicatedortransmittedbyanymeans,forany
commercialpurpose,includingwithoutlimitation,sale,resale,license,rentalorlease,withoutthepriorexpresswrittenconsentofVIAIR.
VIAIRdoesnotmakeanyrepresentations,warrantiesorguarantees,expressorimplied,astotheaccuracyorcompletenessofthe
Manual.UsersmustbeawarethatupdatesandamendmentswillbemadefromtimetotimetotheManual.Itistheuser’sresponsibility
todeterminewhethertherehavebeenanysuchupdatesoramendments.NeitherVIAIRnoranyofitsdirectors,ocers,employees
oragentsshallbeliableincontract,tortorinanyothermannerwhatsoevertoanypersonforanyloss,damage,injury,liability,costor
expenseofanynature,includingwithoutlimitationincidental,special,directorconsequentialdamagesarisingoutoforinconnection
withtheuseoftheManual.
R1-062220
This manual suits for next models
3
Table of contents
Other VIAIR Air Compressor manuals

VIAIR
VIAIR 400H User manual

VIAIR
VIAIR 93 User manual

VIAIR
VIAIR POWER SPORT Series User manual

VIAIR
VIAIR 88P SXS PORTABLE POWERSPORT Series User manual

VIAIR
VIAIR 40043- 400P User manual

VIAIR
VIAIR 40043 User manual

VIAIR
VIAIR 100C User manual

VIAIR
VIAIR 325C User manual

VIAIR
VIAIR 00071 User manual

VIAIR
VIAIR SPORT COMPACT Series User manual