VBX Wellness 5000 User manual


Safety Information
Warranty Information
Machine Diagram
Assembly Instructions
Control Panel Diagram
Control Panel Operation
Specifications
Quick Reference
02-03
03
04
05-07
08
19-10
11
12
BEFORE USE…
•Check the exercise speed before operating to ensure it’s at a safe and comfortable
level for you.
•Hold the safety handle before beginning the program to ensure your balance.
•Keep a recommended gap of 30cm between your feet in the initial stages.
•Prior to cleaning the machine, make sure the machine is off and the power cord is
unplugged.
✴NOTE: Using corrosive cleaner is prohibited. Do not use benzene or thinner to
clean the machine. Do not spray insecticide on the machine.
•When the machine is not in use, turn off the power and unplug the power cord, to
both save energy and reduce the risk of fire.
•When the machine is not in use, use a cover to protect the vibration plate from
accumulating dust.
USE CAUTION
•IMMEDIATELY DISCONTINUE USE IF YOU HAVE ANY DISCOMFORTS AND
DO NOT RESUME USE UNTIL CONSULTING A PHYSICIAN.
•Do not coil the power cords, as this may cause the machine to malfunction and
could damage the power cords.
•Do not exercise in the same pose for more than ten (10) minutes, as this may
result in muscle cramping.
•Do not operate the machine with more than one person at a time, as this may
result in injury or machine damage.
•Do not operate the machine with wet hands, as this could cause an electric shock.
of212
SAFETY INFORMATION
TABLE OF CONTENTS

•Do not reduce or use force to relocate the product, as this may cause damage to
the machine.
•Do not store the vibration plate near heat or open flame; in direct sunlight or high
temperatures for a prolonged period of time; or in humidity.
•Do not use any kind of sharp tools (i.e. knife) on the vibration plate.
•Do not use the machine 30 minutes before and after eating a meal.
•Do not use the machine for any purpose other than exercise.
•Do not use the machine in wet areas (i.e. bathroom), as this may result in electrical
shock.
•Do not use the vibration plate for any purpose other than its intended use, as
described in this manual.
FIVE (5) YEAR - Limited Warranty
The manufacturer warrants that this machine, when subject to normal and proper use,
will be free from manufacturing defects for a period of five (5) years from the date of
purchase. Should any defect occur during the specified time period, the manufacturer
will repair the defective product, or provide replacement parts and components
material, at its own option. The manufacturer also reserves the right to issue a full
refund of the purchase price in lieu of repair or replacement. This warranty is not
transferable. This warranty replaces all other oral or written warranties, liabilities or
obligations of the manufacturer. Pertinent state law shall control for what period of time
following the purchase a consumer may seek a remedy under the implied warranty of
merchantability or fitness for a particular purpose. In no event shall the manufacturer
be liable for consequential or incidental damages of any kind resulting from the breach
of this warranty. Some states do not allow limitations on - or the exclusion of -
incidental or consequential damages, so the above exclusions may not apply to you.
This warranty gives you specific legal rights, and you may also have other rights which
vary from state to state.
of312
WARRANTY INFORMATION
of412
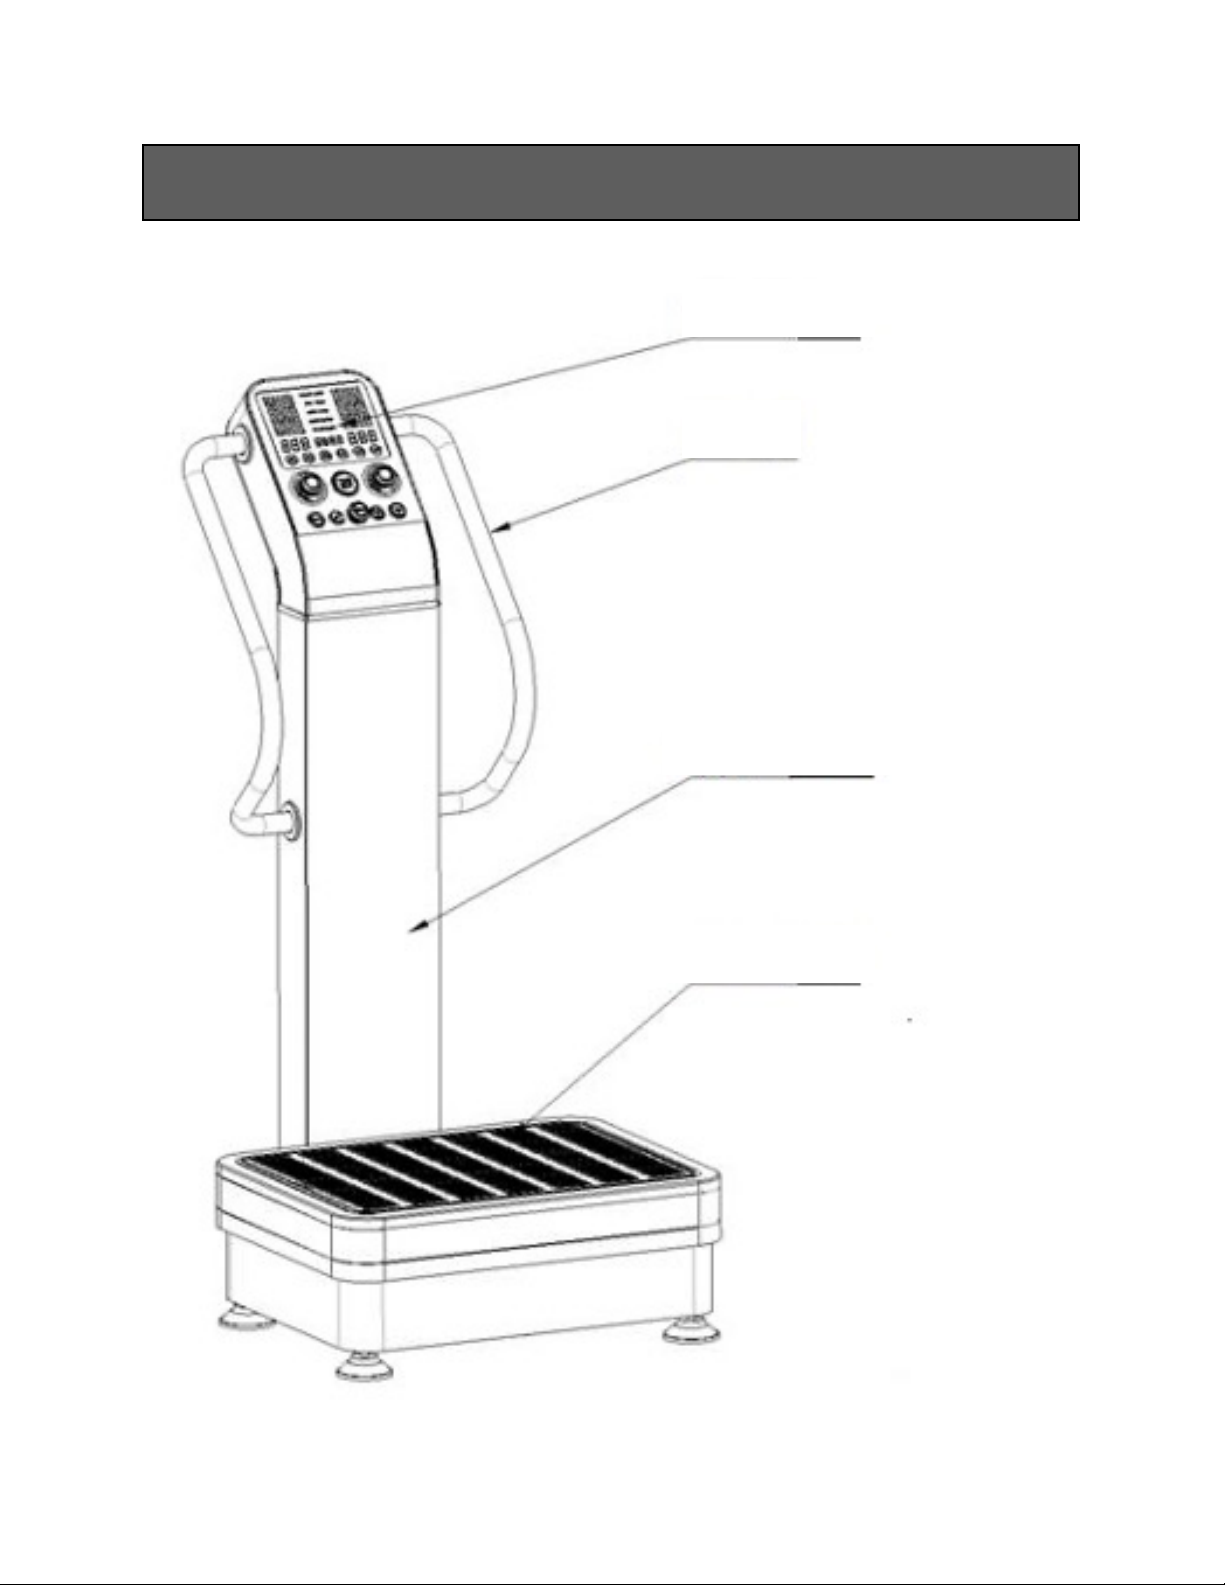
MACHINE DIAGRAM
Control Panel
Handrail
Tower
Base
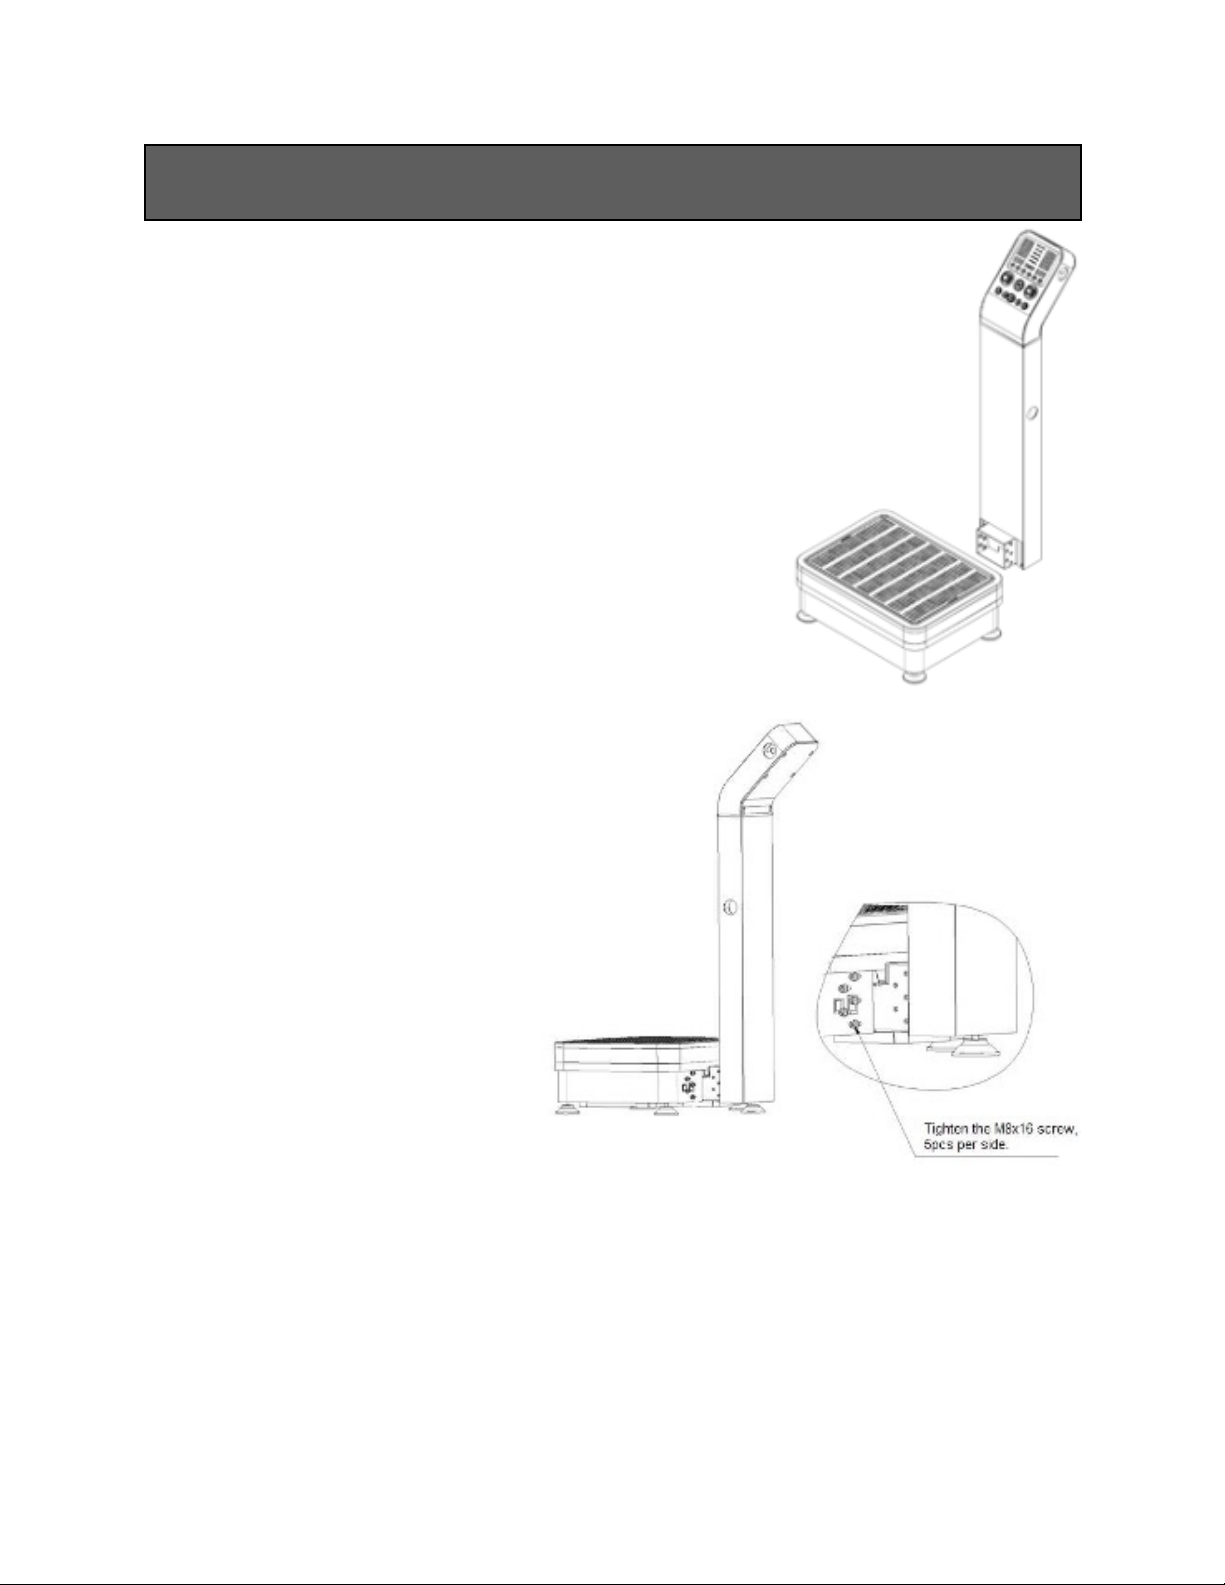
1. Take the machine out of the box and put the tower
onto the base.
2. Fasten the tower with part #4
(qty: 10), part #5 (qty: 10), and
part #6 (qty: 10), 5pcs per side.
Tighten the screws.
of512
ASSEMBLY INSTRUCTIONS

3. Using part #1 (qty: 4), screw the metal deco cover on to the base, 2pcs per side.
4. Align the handrail flange with
the screw hole on the tower.
Using part #3 (qty: 8), screw
the handrails onto the tower,
4pcs per side. Tighten the
screws.
of612

5. Install the deco ring covers onto the
handrails, using part #2 (qty: 8), 4pcs
per side.
6. Enjoy your new VBX machine!
of712

of812
CONTROL PANEL DIAGRAM
1
2
3
4
5
6
7
8
9
10
11
12
13

1. The horizontal vibration time display displays the horizontal vibration time or
displays the horizontal and linear vibration times combined. The preset time is 0-20
minutes.
2. The horizontal vibration speed display displays the horizontal vibration speed,
ranging from H00-H60
•NOTE: When the display reads “H00”, the linear vibration will not work.
3. The linear vibration time display displays the linear vibration time or displays
the linear and horizontal vibration times combined. The preset time is 0-20 minutes.
4. The time indicator indicates the time.
5. The linear vibration speed display displays the linear vibration speed, ranging
from L00-L60
•NOTE: When the display reads “L00”, the horizontal vibration will not work.
6. The horizontal vibration switch & speed knob will adjust the horizontal
vibration speed or start/stop the horizontal vibration.
•To increase speed, rotate the knob clockwise. To decrease speed, rotate the
knob counter-clockwise.
•To start or stop vibration, press the knob.
7. The start/stop button turns the machine on and off.
8. The linear vibration switch & speed knob will adjust the linear vibration speed
or start/stop the linear vibration.
•To increase speed, rotate the knob clockwise. To decrease speed, rotate the
knob counter-clockwise.
•To start or stop vibration, press the knob.
9. The program button programs your workout into the machine’s memory. P1-P3
are default automatic programs, U1-U3 are user defined programs.
•Rotate the ‘MODE’ knob to choose the program set desired (U1-U3).
•Press ‘PROG’ to start programming.
•Press ‘TIME’ to set the time for the current speed.
of912
CONTROL PANEL OPERATION

•Press the left ‘SPEED +/-’ knob to set the horizontal vibration speed. Rotate to
adjust.
•Press the right ‘SPEED +/-’ knob to set the linear vibration speed. Rotate to
adjust.
•Press ‘PROG’ to confirm settings.
•Repeat as needed until the program is set to your satisfaction.
10. The standby button will pause the machine. Press the start/stop button to
resume.
11. The mode selection knob lets you choose between the different program modes
(P1-P3, U1-U3) by rotating the knob.
12. The time up button increases the time. The starting default time is ten (10)
minutes and the maximum adjustment is twenty (20) minutes.
13. The time down button decreases the time. The starting default time is ten (10)
minutes and the maximum adjustment is twenty (20) minutes.
of10 12
Table of contents
Other VBX Wellness Fitness Equipment manuals


