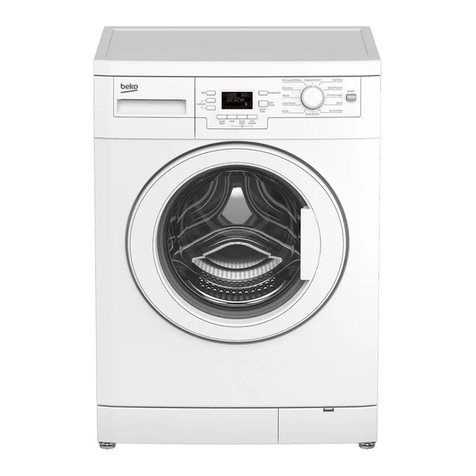
Trieste TR-KQB60-560 User manual

Please carefully read this operation manual before using the product.
Please keep this operation manual for your future reference.
FULLY AUTOMATIC WASHING MACHINE
INSTRUCTION MANUAL
TR-XQB60-560

CONTENTS
Safety and precaution.............................................2
Parts identification of the washer............................5
Explanation of washer control panel.......................6
Installation of washer..............................................8
Preparation before washing....................................9
Operation of normal wash program.......................10
Operation of single wash / rinse / spin program....12
Operation of other full-automatic wash program...13
About procedure of full-automatic wash program..14
Application of wash detergent, softener
and bleacher..........................................................15
Identifying common troubles of washer..................16
Following phenomena are not problems of
Washer...................................................................17
Specifications and technical parameters
of washer................................................................17
Preparation before application About washing program Maintenance of washer
FIRSTLY
You should know
SECONDLY
When you want to use
FURTHER
Easier for your operation
If
You are in trouble
Detergent etc
Operation of full load of soiled clothes...........11

SAFETY AND PRECAUTION
Observe the following items in order to prevent from injuring yourself,
to others and the damage of property:
Please observe following contents of graphics.
Warning
Warning
Caution
This indicates serious injury or death to human being
may be caused.
This will remind you that injury to people and damage
to property may occur.
Do not rinse the machine with water
when cleaning. A damped clothes or
sponge is recommended for
cleaning purposes.
Do not install the machine in
damp and raining environment to avoid
electric shocking, catching fire, faults
and distortion
accidents.
No dismantling No touching
No dampness No rinsing
This graphics represents operation prohibited], and detailed prohibitive
items will be displayed inside the graphics.
This graphics represents cause attention and detailed cautions
will be displayed inside the graphics.
This graphic represents [forced execution], and detailed force
execution items will be displayed inside the graphics.
Do not disassembly
and assembly the
machine without
authorization.
Do not insert your hand
and take out clothes during
spin process until
it is fully stopped.
The appliance should be connected to the water mains using new hose-sets and old hose-sets
should not be reused.
When the appliance is placed on a carpet, the ventilation openings in the base must not be
obstructed.
This appliance is not intended for use by persons (including children) with reduced physical,
sensory or mental capabilities, or lack of experience and knowledge, unless they have been
given supervision or instruction concerning use of the appliance by a person responsible for
their safety.
Young children should be supervised to ensure they do not play with the appliance.

Do not let children climb the
machine or peer into the rotating
basket to avoid accidents.
It is prohibited to wash the clothes
damped with kerosene, gasoline,
alcohol and other Flammable materials.
Do not damage power flexible
cord and power plug to avoid electric
shocks, short circuit and catching
fire.
(Recommendation)
Regularly clean the power plug to
remove dust and dirt to avoid contact
failure.
(Recommendation)
Please pull out plug from the socket
if the machine is not in use.
(Recommendation)
Connect the earth line of socket to
avoid electric shocking by accidental
leakage.
(Recommendation)
insert the power plug tightly.
Prohibited
Prohibited
Prohibited
Smoke and fire prohibited
Earthing
Pull out the plug
Warning
Please do not place on the washer burning
candle, mosquito-repellent incense,
cigarette and other
flammable things, as well
as electric stove, air
heating fan and other
heating sources.
Preparation before application
Gasoline
Alcohol
Kerosene

For the correct operation of your washer
machine a Please
use 240V AC
power source is
recommended.
Please do not pull out or insert the
plug with wet hands to avoid electric
shocking.
Drawing or legend for "type" plug is
required according to IEC 335, clause
.12.5. If power cord
is damaged, report to
service technician
agent or qualified
personal to repair it.
Do not place heavy weights nor allow
people or
children sit or
climb over
washer cover.
Do not pull the electric cord
when pulling out the
plug.
Do not wash raincoat, fishing
coat and similar clothes in the
washer.
Wet hands are
prohibited
The water temperature shall not exceed
50 when washing
with warm water.
Prohibited
Prohibited
Prohibited
Prohibited
Caution
Please ensure that the water inlet pipe
is connected and the tap is opened
before washing
clothes.

Parts identification of the washer
Water inlet valve(in the back) Handle of lid
Handle
Power cord
Adjustable
foot knob
Impeller
Cabinet
Inlet hose 2pc Self-tapping screw 1pc
(M4 X 12)
Base plate 1pc
Accessories
Bleach filling
inlet
Power switch
Softener inlet
Control panel
Preparation before application
UpperDrain hose 1pc
UpperDrain hose

WATER LEVEL PROCESS PROGRAM
Wash rinse spin
Explanation of washer operating panel
If "wash" button is pressed, wash
lamp will be on . If "rinse" button is
pressed, rinse lamp will be on. If "spin"
button is pressed, then spin lamp will be on.
Press power switch to turn on the power,
pressing power switch again to shut down
the power.
.
Water level selection button is used by customer to
select and change water level Continuously pressing
this button, the lamp circularly will display between
"high - extra low".
[Start / Pause] button has both function of start
and pause. Continuously press this button, the
machine will be switched between start and
pause mode.
Before start, continuously press this
button for switching over between
"normal", " cold ", " warm ", "heavy"
and "speedy" programs.
Program selection
Water level selection
Start / Pause
Power switch
Five water levels are
available .
Preparation before application

Installation of the washer
Remove package
Installation of the bottom board
Installation of drain hose
!Remove package and take out the bottom board of
the cabinet on the foam cover.
!Open the washer's lid and take out accessories.
!Remove the convex plastic block placed at the
center of foamed plastic cushion of the packing case.
this is for fixing the washer during shipment rather than a part of washer.
!A trial operation or washing with foamed cushion base is strictly forbidden.
!Tilt the back of washer forward slightly, push bottom board along
the base insertion grooves from the back of washer until it is
completely in place.
!Fix the bottom board on the base of washer with screws.( There
is a small hole in rear side of bottom board ).
Convex plastic block
Base foamed cushion
!Completely seat the drain hose over the
drain connector. Installation of water
inlet hose.
!Fix and tighten it with a hoop. ( As shown
in the figure, and you can use a pliers to
finish it.)
Installation of water inlet pipe
Put the water
inlet pipe(which
has metallic
filtering bag)
screw on to the
tap.
Note: Use only the new supplied water
hose with your new appliance do not
use a hose from your existing machine
or a hose that has been used previously.

Preparation before application
Preparation before washing
Adjustable foot
(extend when clockwise
rotating and shorten when
counterclockwise rotating)
Knob of adjustable foot
( loosen by clockwise
rotating tighten by
counterclockwise
rotating)
In the back
1! Leveling of washer
Before operation,check that the washer is both level and stable on the floor,
otherwise the washer barrel will incline and knock against the cabinet,
(Hint:Use a spirit level aligned with the top edge of the metal
casing both at the front and side to check if
the machine is level).
Adjust the adjustable feet at the front and right
hand side rear of the unit as per the diagram.
To adjust:
a) Loosen the outer grey knob of adjustable
foot by turning in a clockwise direction
b) Slightly incline the washer and rotate the
black rubber foot clockwise to extend and
counter-clockwise to retract.
c) Once the machine is both level and stable
on all four corners lock each adjustable foot
by rotating the outer grey knob in a counter-
clockwise direction.
Note:If the floor is severely out of level then
correction will need to be made to the floor surface.
2 ! Install the hot and cold water inlet hoses.
3 ! Connect machine to power outlet.
4 ! Turn on the water supply
5 ! Hang the upper drain hose on the side
of the laundry sink or tub
6 ! Load the washer with a suitable wash
load and amount of washing powder
When washing,ensure that all coins,keys and other hard items removed form
wash articles and close zip fasteners to prevent damage to clothes and machine.
Only machine washable items should be put into the washer.Wash delicate items
in a suitable wash bag.
are
>750mm
Note:
The water will overflow
when the height of the
drain hose under 750mm.
Tightly screw another end of water inlet
hose on water inlet valve . (with rubber
seal ring inside).
Note: When tightening the clamping nut,
evenly apply the force and do not twist
the water inlet valve or hose to avoid
breaking of water inlet valve joint.
Clamping
nut
Hot water
Cold water
Water inlet hose

WATER LEVEL PROCESS PROGRAM
Operation of normal wash program
Description of the normal
wash program Preparation before washing
!"normal" wash program is the
easiest, most convenient and
most common washing program.
!Close the lid when machine is
running, otherwise, it will
automatically stop working
during spin process and send
out abnormal warning.
!The washer will not work until
the filled water reach the set
water level.
Press the power switch.
Press "start / pause" button.
Completion of washing
The "normal" program set as default
is now ready for washing.
"normal" program starts working.
!Upon completion of washing, the buzzer will buzz continuously
for 6 times and then the power will be automatically cut off.
!Close the water tap.
!Although the power can be cut off automatically, however, the
as well for safety.mains power switch should be turned off
Select the proper water level,
according to the weight of the
clothes.
- Plug in the power cord
- open water tap
- load clothes uniformly
- put in suitable amount of detergent
- close the lid.
Normal program
This manual suits for next models
1
Table of contents
Other Trieste Washer manuals
Popular Washer manuals by other brands

Tricity Bendix
Tricity Bendix AW 1000 W Operating & installation instructions

Panasonic
Panasonic NA-F60L5WRB operating instructions

GE
GE WSLP1500 Dimensions and installation information

Electrolux
Electrolux EWF1284EDW Service manual

Bosch
Bosch WAN2829BSN User manual and installation instructions

LG
LG TV2516DV3B owner's manual