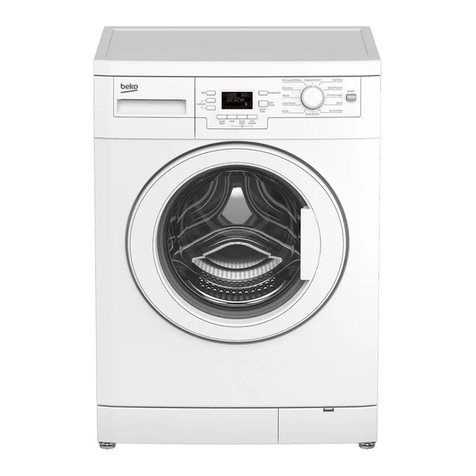
Treedental TR-DWD01 User manual

Instrument Washing Machine
TR-DWD01

01 Overview
Product Brief Introduction & Feature
The machine accord with the new oral disinfection
technical specification requirements, touch screen realized fully automatic
washing, simple operation, energy conservation and environmental
protection. the machine could show & print temperature at any time.
When setting the washing temperature to be 93°C, the A0 value reach and
above 3000, meeting the moist heat sterilization standard. The design of 2
layers mesh basket plus professional hand piece cleaning bracket and
super capacity can satisfy one-time cleaning of dental hand pieces,
appliance, surgical instruments and other experimental vessels. According
to the instruments type, our machine is optimized to provide six smart
washing procedures to meet the diversification of cleaning .
TR-DWD01

02 Safe Handling Attentions
Warning
Please read the instruction before using to avoid accidents
Incorrect grounding lead connection may take you dangerous.
Please check the reliability of the grounding lead connection. Do not use
self-buying power cord. If your socket is not match with our machine’s power
cord, please find a qualified electrician to match it for you
Do not use the washer before installing it properly
if the soft wire of power supply is damaged, in order to avoid danger, must ask
maker’s professional person to change for you.
Please do not use the function if the machine without.
When installing, do not over bend and squeeze the power cord.
Do not change the connection of the circuit board.
If overflow occurs, turn off the tap before repairing.
If the chassis is flooded due to overflow or leakage, the water must be wiped up
before starting the machine.
The machine must be used indoor.

Attentions
1.When the machine is working, please do not open the door to avoid burning
by the steam. If you need open the door midway, please press the "pause" button and
take safeguard protective, then open the door slowly.
2.Do not place any heavy object on the opening door of the machine. The door
should not keep in open status all the time.
3.Must be sure that the power cord of the machine is properly grounded. The
machine is with grounded lead’s connection terminal, so please use the matched
socket with the terminal. Please make sure that the power cord is connected, the
machine’s grounding wire can be effectively connected with public power of the
ground wire.
4.Do not place instruments over the cleaning tank.
5.Do not plug or pull the power plug by wet hand .
6.Do not wipe the surface of the machine by something with solvent and
abrasive.
7.Must avoid Strong electromagnetic interference when using.
8.Must use special Multi-enzyme detergent ,other products cannot instead of it.
9.The machine with water softener must use special salt, and it is not allowed to
replace the salt with edible salt. After adding salt, must run the washing program to
prevent the salt water overflow from corroding the filter, inner and other important
parts.
10.When maintenance the machine or long-term not using, must unplug the
power plug and turn off the faucet.

03 Technical Feature
Product Parameters
1.Power supply:220V 50Hz;Rated power:≤1760W
2.Rated external water pressure: 0.04-1.00MPa.
Supporting cold/hot water;
3.Internal flow pressure:0.3-0.4MPa;
4.Collocating intelligent water softener:Adding special salt can improve water
quality and enhance cleaning effect;
5.Safety device:Automatic fault diagnosis (prompt) and emergency shutdown;
6.Water inlet filter:Porosity 96%;The filter speed:20-85m/h
7.Lumen volume:160L;
8.Dry method:hot wind dry
9.Dimension-Main Unit:590*570*830(L*W*H mm);
10.Packing size:680*680*930(L*W*H mm);
11.Net weight:≤44.5kg;
12.Working Noise:≤50dB
Packing List
1.Mainframe 1 piece 7.Drain pipe 1strip
2.Cleaning basket 2 pieces 8.Specification 1 piece
3.Salt hopper 1 piece 9.Rubber Isolators 32pieces
4.Cleaning rack 1 piece 10.End cap 32pieces
5.Accessories basket 2 pieces 11.Measuring cup 2 piece
6.Water inlet 1 strip 12.Upper rack 1 piece

04 Installation Instructions
Remove the packing and install mounting plate.
Remove the packing, then open the front door of the machine and remove
accessories . It is strictly prohibited to test the machine on foam bottom mat or
cleaning it.
Place the washer
The ground should be solid and flat, you could the height of the machine can be
adjust the height through rotating the stand bar to
keep it in level.
Inlet pipe installation
The inlet pipe need connect to the inflow blast hole on the back machine, and the
inflow pipe’s elbow should be horizontal and same direction as the inlet water.
Drain-pipe connection
Put the outlet water end of the drain pipe into the sink or sewer line. In order to ensure the
washer’s performance , the length of
drainage pipe should be not exceed 5
meters, the hanging height of the drainage
pipe should be not higher than 600mm ,
not lower than 300mm.
Power connection
Connect the power socket well. The power voltage and frequency should be same as the
parameters of the product.
Power line
Inlet pipe
Inlet pipe nut Drain-pipe
Two t
y
pes
Type 1
Type 2
Max600mm

Detergent
drawer
Brightener
Open
05 Direction For Use
Dispenser Using
Gently press the open cover button to push outward along the direction of the
arrow. As the picture showing to open the drawer and add the needed
multi-enzyme detergent and brightener. Then you can push it to close it until the
“Ka”sound.
Detergent: The main washing water intake is about 3~3.5L, please add cleaning
enzyme at a ratio of 300:1 (that is, 300ml of water needs to add 1ml of cleaning
enzyme). also pls follow the instruction from detergent factory.
To fill the brightener about 70ml, it can be used for many times. And close the cover
of the brightener drawer.

Special Salt Addition
The salt to be soft the hardness of the water. If you
use the pure water. Pls do not need to add the salt.
Counterclockwise open the cover of the
water softener and insert the salt hopper.
Need add about 70g (10 pieces of special salt for
each machine, which can be used many times
for one addition. After adding salt, add water to
the water softener, do not overflow; clockwise rotate the softener cover to prevent
salt leakage from corroding the inner tank. If salt is spilled on the bladder, the
procedure must be run to flush once.
Note:The indicator light may not be off immediately after adding salt, which is normal
and will not affect normal use (Due to differences of water quality and room
temperature, it will take 2 to 6 days for salt to be dissolved and reach saturated state).
Baskets
The washing area of instruments cleaning machine is divided into two layers, which
can be used as per your demand。
open
Close

Upper hand pieces cleaning rack placement
The hand pieces are inserted directly into the rubber seat of the rack. Please do not put
it to the bottom to prevent water from flowing into the hand pieces. The rack can clean
at most 32 hand pieces each time. when the machine working, you could cover the end
cap on the rubber seat.
Bottom Layer
The sub layer basket can be used matching the accessory basket, It can be placed more
than 100 mouth mirror, 20 tooth forceps, 70 forceps apparatus sterilization box tray
and so on each time.
Description Of Control Panel
Display Screen Introduction
End cap
Hand pieces
Rubber Seat

The interface of the program choose
①
②
④
⑤
⑥
①choose the washing programs as per your requirements.
③
⑦
②Set up the Dry function:the dry function is closed by default. press the dry key,the
dry function is on when the key turn dark.
(not all the machine have the dry function)
③Set up Disinfect function:the disinfect function is closed by default.press the
disinfect key. The disinfect function is on when the key turn dark.
④The display of the water temperature
⑤Start/pause:after choosing the program, press the key . The program
start up. press the key to pause.
Notice: when the program is running, except the start/ pause key. other key are no longer
in force.
⑥Stop the program. Press the key .there will a notice “whether cancel this
program” . press yes, this program will be stop.
⑦when the program stop running, the machine can back to main interface.
Time
Operator
Set up system
Choose the programs
Table of contents
Popular Washer manuals by other brands

Tricity Bendix
Tricity Bendix AW 1000 W Operating & installation instructions

Panasonic
Panasonic NA-F60L5WRB operating instructions

GE
GE WSLP1500 Dimensions and installation information

Electrolux
Electrolux EWF1284EDW Service manual

Bosch
Bosch WAN2829BSN User manual and installation instructions

LG
LG TV2516DV3B owner's manual