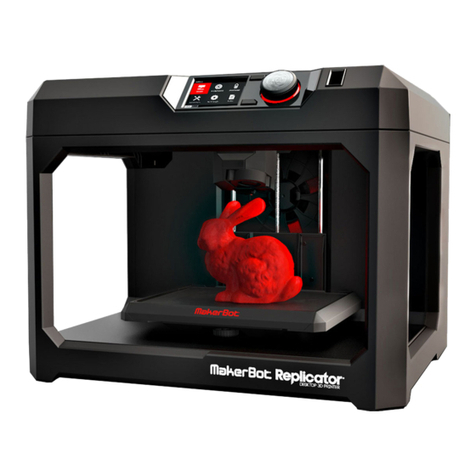
TierTime UP300D User manual

1
Tiertime UP300D
User Manual
www.tiertime.com

2
Index
☼Marked topics are essential contents that highly recommended for first time users.
Tiertime UP300D.................................................................................................................... 1
User Manual............................................................................................................................ 1
1. Safety and Printing Environment.........................................................................................4
1.1 Safety Precautions........................................................................................................................4
1.2 Printing Environment..................................................................................................................5
1.3 One Year Warr anty..................................................................................................................... 5
1.4 Compliance................................................................................................................................... 5
2. Unboxing............................................................................................................................... 6
2.1 Unboxing the UP300D................................................................................................................. 6
2.2 What’s in the box......................................................................................................................... 7
3.1 Main Par ts of UP300D.................................................................................................................8
4. Printer Installation................................................................................................................ 9
4.1 Install the Pr int Board.................................................................................................................9
4.2. Install Software UP Studio 3.0................................................................................................. 10
4.3 Update the Touchscreen Firmwar e.......................................................................................... 10
5. Prepare UP300D for Printing.............................................................................................11
5.1 USB Connection......................................................................................................................... 11
5.2 Auto Calibration........................................................................................................................ 12
Auto Calibr ation from Touchscreen.............................................................................................. 12
5.3 Load Filament............................................................................................................................ 13
6. First Print............................................................................................................................ 16
6.1. Slicing......................................................................................................................................... 16
6.2 Connect and Send Pr int Job to Printer....................................................................................20
6.3 Remove the Printed model........................................................................................................ 21
7. Printer Calibration.............................................................................................................. 22
7.1 Nozzle Height Measur ement..................................................................................................... 22
7.1 Set Nozzle Height through Touchscreen, please r efer to page xxx........................................23
7.2 Setup Nozzle Height Value thr ough Wand (computer hosted)..............................................23
7.3 Matr ix Leveling (9-Point Compensation)................................................................................ 25
7.3.1 Auto Matr ix Leveling through touchscreen, r efer to page xxxx.........................................26
7.3.2 Auto Matrix Leveling thr ough Wand (computer hosted)................................................... 26
7.4 Manual calibr ation.....................................................................................................................27
7.6 Dimensional Calibration............................................................................................................32
7. Wand - the Printer Hosting Software................................................................................. 53
7.1 Wand Inter face ......................................................................................................................... 53
7.2. Printer Calibr ation................................................................................................................... 54
7.4 Ethernet Connection.................................................................................................................. 55

3
7.6 Wi-Fi Connection....................................................................................................................... 56
8. Touchscreen Introduction...................................................................................................58
8.1 Printer Status Bar ...................................................................................................................... 58
5.2 Mater ial.......................................................................................................................................60
8.2 Print.............................................................................................................................................62
8.3 Calibrate..................................................................................................................................... 65
8.4 Information.................................................................................................................................66
8.5 Config.......................................................................................................................................... 67
8.5 Network Connection.................................................................................................................. 68
8.6 Wi-Fi Networ k Connection and Settings:................................................................................70
9. Initialize.........................................................................................................................................72
10. Print Boards.......................................................................................................................73
10.1 Perf Glass Board...................................................................................................................... 73
10.2 Flex Glass Board...................................................................................................................... 73
10.3 Glass Surface............................................................................................................................ 73
11. Extruders........................................................................................................................... 74
11.1 Convergence Dual Extr uder................................................................................................... 74
11.2 Single Extr usion Print Heads..................................................................................................75
12. Maintenance...................................................................................................................... 76
8.1 Clean the Waste Tray................................................................................................................ 78
8.2 Dual Filtration System...............................................................................................................78
12. Specification...................................................................................................................... 80
13. Customer Service...............................................................................................................81

4
1. Safety and Printing Environment
1.1 Safety Precautions
1. The UP300D 3D printer requires the power adapter provided by the original
manufacturer, otherwise the machine could be damaged or even cause fire. Keep
the power adapter away from water and out of high temperature environments.
2.During printing, the temperature of the nozzle of the printer could reach 300°C and
the temperature of the print platform could be over 100°C. Do not touch these parts
with your bare hands when the printer is in the operation mode, not even with the
heat resistant gloves included in the accessories, as the temperature could damage
the gloves and injure your hands.
3. During printing, the print head and other mechanical parts move at high speed.
Touching these parts while they are moving could cause injuries.
4. Wear goggles when removing the supporting material from models or detaching
models from the build plates.
5. When printing with plastic filaments, the process could generate slight and, for
some people, annoying odor. It is recommended to run the printer in a well ventilated
environment. We also suggest to keep the printer in an environment with a stable
temperature as unwanted cooling could cause adverse effects to the print quality.
6. When using the “Extrude” function, make sure there is enough space between the
print head nozzle and the build platform. 50mm is recommended, otherwise the
nozzle could be blocked.
7. Fasten moving parts. Tie back loose hair, secure loose clothing and keep all
printer doors closed during operation.
8. Do not leave the printer unattended during operation. Watch to make sure the first
a few layers adhere correctly.
9. Adult Supervision: Adult supervision is required in the presence of children. Small
printed parts are a choking hazard, and always keep sharp tools away from children.

5
1.2 Printing Environment
As the slight odor could be generated during printing, keep the printer in a well
ventilated environment. The UP300D's ideal working temperature is between 15°C
and 30°C with a relative humidity between 20–50%. Printing at temperatures out of
this range could cause adverse effects to the printing process and print quality.
1.3 One Year Warranty
Tiertime and its authorized resellers warrant to the original purchaser that this
product is free from defects in material and workmanship. Tiertime or its resellers will
for one year, at its option, repair or replace at no charge for parts and labor from the
date you purchased the product from Tiertime or a reseller. Print heads, Nozzles and
Print Boards are warranted for ninety (90) days.
• Tiertime reserves the right to determine the validity of all warranty claims.
• Warranty is voided if the product serial number has been altered or removed.
• Warranty is voided if the product has been misused or damaged or if evidence is
present that the product was altered, modified, or serviced by unauthorized service
people.
For the detailed Warranty and Service Level Agreement, please visit our website
https://www.tiertime.com.
1.4 Compliance
FCC
RoHS
CE

6
2. Unboxing
2.1 Unboxing the UP300D
1. Cut open the tape on the top of the cardboard box, and open the box from the top.
2. Take out the two boards on the top foam, and remove the top foam.
3. Remove the plastic cover and the square shaped foam wrapping around the
machine.
4. Lift the printer out of the cardboard box using two handles on both sides of the
printer, and place it on a flat surface.
5. Open the Top Lid and remove all the tights and foams inside the printer. There are
six tights in the machine.
6. Open the Front Door, and take out the two foams and two extruders beneath the
build platform. As figures show below:
7. Take out the roll of filament, the accessory box and the power cord at the bottom
of the cardboard box.
8. Put all the foams back to the box, and keep the box for the future use.

7
2.2 What’s in the box
The Convergence dual extruder is installed on the UP300D.
1. Accessory box
One ABS Type single extruder
One USB Cable
One Pliers
One Scarper
One Nozzle Wrench: 8mm
One Nozzle Wrench: 10mm
One Pair of Gloves
One SD Card Reader
One SD Card
One Calibration Card
One Nozzle Height Detector
Two PTFE Tube: Shorter one for PLA Extruder; Longer one for TPU Extruder
Three Allen Keys: 2mm, 2.5mm, 3mm
Three Nozzles: 0.2mm, 0.4mm, 0.6mm
2. In the UP300DD box
One roll of 500g PLA Filament
One roll of 500g Water Soluble Support Filament
One Flex Glass Board
One Perf Glass Board
One Power Adapter
One Power Cord
Notice: All accessories may subject to change without prior notice. If anything is
missing, please contact your local distributor, or Tiertime’s global technical support

8
3.1 Main Parts of UP300D
1. Dual Filter
2. Build Platform
3. Waste Tray
4. Front Door
5. Touchscreen
6. Front USB Port
7. Top Lid
8. Right Side Handle
9. Filament Bay
10. Power Switch
11. Ethernet Socket
12. USB Port
13. Power Socket
Y- Axis
X-Axis
Z-Axis
Build Platform
Extruder Mount

9
4. Printer Installation
4.1 Install the Print Board
1. Find the “perforated print board”.
2. Open the front door.
3. Slide the board onto the build platform and make sure to push the board all the
way to the back.
4. Close the front door.
4.4 Connect the Power Cable
1. Plug in the power on the back of the UP300D
2. Plug the other end of the cable into a wall outlet.

10
4.2. Install Software UP Studio 3.0
To operate the UP300D, you need to install the UP Studio 3.0 software on your
computer. Although UP Studio 2.X can also work with UP300D, it does not support
dual extrusion function and is obsoleted.
You can download the installation files of UP studio software from the following url:
https://www.tiertime.com/downloads/software
System Requirements:
Supported Operating Systems:
Windows 7 (SP1) or higher (64 bit only)
Mac OS 10.10 or higher
Hardware requirements:
Open GL 2.0
At least 4GB of RAM
Installation
Make sure you download the correct version of software based on your computer’s
configuration.
4.3 Update the Touchscreen Firmware
We regularly update the Tiertime 3D printer’s touchscreen program. It is important to
make sure your UP300D’s touchscreen system is up-to-date before the first use and
pay attention to the upgrade announcement for touchscreen system in the future.
1. Download the UP300D Touchscreen Upgrade Program from
https://www.tiertime.com/touchscreen-upgrade-program/
2. Save the file to the root directory of the USB drive which comes with the UP300D,
and make sure the file is named as “UP300D_x.x.x_update.tt” (Case sensitive), x.x.x
being the version number.
3. Insert the USB drive to the USB socket under the touch screen, and turn on the
printer. Wait until the printer is fully ready, go to Information Page, and press the
“Upgrade” button. Follow the instructions on the touchscreen afterwards.
4. Keep the USB drive handy for the future use.
Other manuals for UP300D
1
Table of contents
Other TierTime 3D Printer manuals

TierTime
TierTime UP mini 2 Configuration guide

TierTime
TierTime UP BOX User manual

TierTime
TierTime UP Plus 2 User manual

TierTime
TierTime UP600 User manual

TierTime
TierTime UP300 User manual

TierTime
TierTime Filament Dryer PRO User manual

TierTime
TierTime UP300D User manual

TierTime
TierTime UP BOX+ User manual

TierTime
TierTime UP mini User manual

TierTime
TierTime UP BOX Installation and operation manual