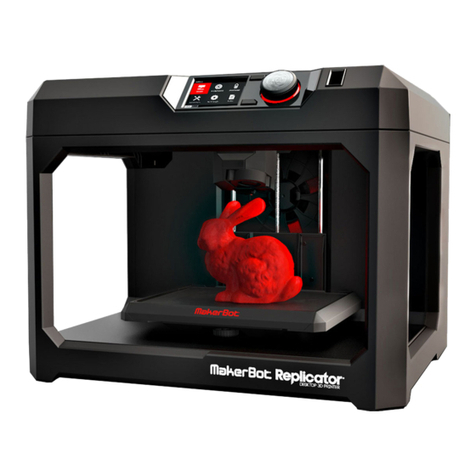
TierTime UP Plus 2 User manual

version:4.6.5
UP Plus 2
user manual

Table of Contents
Precautions .......................................................................................................
Printer Body illustration ...................................................................................
Accessories .......................................................................................................
Remove Shipping Clips .....................................................................................
Install UP software ............................................................................................
Initialization of Printer
........................................................................................
Platform Calibrate:
1.Setting Nozzle Height .................................................................................
2.Setting Compensation Values ....................................................................
Coarse manul platform leveling .......................................................................
Print A Model ....................................................................................................
Software Interface ............................................................................................
Pause of Print Job ............................................................................................
Moving Model ...................................................................................................
Rotate Model ....................................................................................................
Duplicate Model ...............................................................................................
Printing Parameters .........................................................................................
Annotation of Printing Parameters ...................................................................
Repair Model ....................................................................................................
Calibration for the Correct Dimension ...............................................................
Printing Techniques ..........................................................................................
Troubleshooting ................................................................................................
Appendix A .......................................................................................................
01
03
04
05
06
07
08
09
10
12
14
15
16
17
18
19
20
21
22
23
24
25
26

01
1. UP Plus 2 3D printer requires power adapter provided by original
manufacturer. Otherwise machine could be damaged or even cause fire
hardzard. Please also keep the power adapter away from water and high
temperature.
2. During printing, the nozzle of the printer will reach 260oC and the print
platform could reach 100oC. Please do not touch these parts with bare hand
while they are hot, not even with the heat resistant gloves included with
machine as the temperature could damage the gloves and your hand.
4. During Printing, the nozzle and print platform will move at high speed, do not
touch these parts while they are moving.
5. Please wear goggles when removing the supporting material from models
and detaching models from perf board.
6. When printing ABS and PLA, slight smell will be produced, please run the
printer in a well ventilated environment. We also suggest you put the printer
in an enviroment with stable temperature, as unwanted cooling could cause
adverse eects on print quality.
7. When UP softwre is sending data to the printer, where the status bar on the
left bottom corner is showing "sending layers", do not unplug USB cable as
this will disrupt data transfer and resulted in printing failure. USB cable can be
unpluged after data transfer was nished.
8. UP Plus 2's working temperature is between15oC and 30oC relative humidity
20%-50%. It is recommended to discharge static charge from user's body
before touching the machine to prevent interruption of printing and potential
damage to the printer.
Warning label on printer:
High Temperature, do not touch!
Warning label on printer:
Moving parts, do not touch!
Precautions

02
UP Plus 2 Specication
Printing Technology MEM (Melted Extrusion Manufacturing)
Build Volume 140 x 140 x 135mm (W x H x D)
5.5" x 5.5" x 5.3"
Print Head Single, Modular for easy replacement.
Z-Resloution 0.15/0.20 /0.25 /0.30 /0.35 /0.40 mm
Supporting Structure Smart Support Technology:
automactically generated, easy to
remove, ne-tunable.
Platform Leveling Automatic leveling and automatic
detection of nozzle height.
Print Surface Heated bed with perf board
Unterthered Printing Yes
Average Operational Noise 55dB
Bundled Software UP Software
Compatible File Formats STL, UP3, UPP
Connectivity USB
Operating System WinXP/Vista/7/8, Mac OS
Power adapter 110-240VAC, 50-60Hz, 220W
Chassis Metal, Open form
Printer Weight 5KG / 11 LB
Printer Dimiension 245(W) x 350(H) x 260mm(D)
9.5" x 10.5" x 14"
Weight with Packaging 9.2KG / 21LB
Packaging Dimension 370 x 420 x 310 mm (W x H x D)
14.5" x 16.5" x 12.2"
Printing
Software
Power Supply
Mechanical

03
Initialization button
Spool Holder
Printer Body illustration
Print Head
Print Platform
Filament Guiding Tube
Filament Spool
3.5mm interface
Nozzle height
Detection Device
Cable Clip
Power Interface USB Interface
Power Button

04
Accessories
USB Cable Power Adapter Spool HolderPerf Board
ABS Filament Filament
Guiding Tube
Nozzle Wrench
Plier
Blots and Nuts
Hex Keys
Gloves
Shovel
Nozzle height
Detector
3.5mm Cable

05
Install Perf Board and Spool Holder
Spool holder hook
on the left side of
the machine. Put on the platform
and hold it with spring
clips.
Hold the Perf Board with
spring clips.
Remove Shipping Clips
User may keep the shipping clips in case the printer need to
be shipped in the future.

06
Put the filament spool on
the spool holder and insert
the filament through the
guiding tube and into the
print head.
Install UP software
After installation,in the UP folder:
Driver folder contains the printer drivers.
Example the example folder contains STL files for the printed
parts of UP printers and example les.
Install the Filament Guiding Tube
1.Go to support section of www.pp3dp.com to
download the latest version of UP Software.
2.Double click UP! Setup.exe to install the
software (default installation path C:\
Program files\UP) a pop up window will
appear, select"install" and following the
instruction to finish. The printer's driver is
now installed into the system.
UP
Top View

07
First make sure computer and printer is
connected to computer via USB cable
and the printer is switched on. The LED
indicator next to the initialization button
should be light up in red color.
UP
Testing of Printer Driver Installation
Initialization of printer
Initialization is required for everytime the machine is switched on. During initialization the
print head and print platform move slowly and hit the endstops of XYZ axes. This is essential
as the printer need to find the endpoints of each axis. Only after initialization, the other
software options will light up and become available for use.
Two ways of initialization:
1. UP Plus 2 can be initialized by clicking initialization option in the menu which is shown
above.
2. The printer has an Initialization Button in front of the machine shown in the picture
below. When the printer is idle, long press this button will trigger initialization
The other functions of
Initialization Button:
1. Stop current print job: During
printing press and hold the button.
2. Reprint last job: Quick double hit
of the button.
Initialization Button
In Software main menu,
Click "3D Print".
"Initialize" and "Maintenance"
options will light up and avaliable
for selection. This indicate the
successful installation of printer
driver.

08
Quick functional Buttons
Main Menu
Status Bar
Display the statsu
of printer and
software.
Software Interface
1. Open: Load a model.
2. Save:Save the model into .UP3, a propritory 3D le format for UP printers.
3. Unload: Unload the selected model.
4. Print:Print the current print plate.
5. About:Display software version, printer model, rmware version and etc.
6. View Perspective: A variety of pre-set of perspective.
7. Adjustments:Move, Rotate, Scale.
8. Set the value of adjustments.
9. Set the orientation of adjustments.
10. Place:
Place the model to the center of the print plate. If more than one model exist
software will optimize their positions and distances to each other.
11. Stop: If connected to printer, click this will stop the printing process. (cannot be
resumed)
1
2
3
4
5
6
7
8
9
10
11
Print Plate
-left mouse click and hold, moving
mouse to adjust camera angle.
-Right mouse click and hold, moving
mouse to move print plate.
-Mouse wheel could scale the print
plate view.
-The print plate size depend on
the printer model connected to
computer.
Table of contents
Other TierTime 3D Printer manuals

TierTime
TierTime UP600 User manual

TierTime
TierTime UP mini User manual

TierTime
TierTime Filament Dryer PRO User manual

TierTime
TierTime UP300 User manual

TierTime
TierTime UP300D User manual

TierTime
TierTime UP BOX Installation and operation manual

TierTime
TierTime UP BOX User manual

TierTime
TierTime UP BOX User manual

TierTime
TierTime UP300D User manual

TierTime
TierTime UP mini 2 Configuration guide