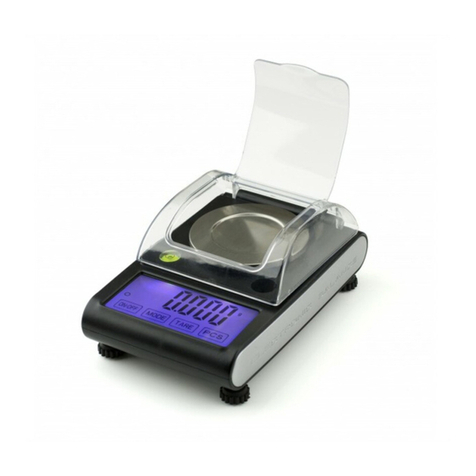
Tanita KP-601 User manual

Instruction Manual
Read this Instruction Manual carefully and keep for future reference.
Bedienungsanleitung
Lesen Sie sich diese Bedienungsanleitung bitte sorgfältig durch und bewahren Sie sie zum späteren
Nachschlagen auf.
Notice d’utilisation
Veuillez lire avec attention cette Notice d’utilisation et la conserver pour de futures références.
Gebruikershandleiding
Lees deze gebruikershandleiding aandachtig en bewaar hem voor naslagdoeleinden.
Manuale d’istruzione
Leggere questo manuale d’istruzione attentamente e conservarlo per riferimento futuro.
Manual de Instrucciones
Lea este manual de instrucciones cuidadosamente y guárdelo para una futura referencia.
Manual de Instruções
Leia este manual de instruções com atenção e o mantenha para referência futura.
Инструкция по эксплуатации
Внимательно прочтите данную инструкцию по эксплуатации и сохраните ее для будущих обращений.
使用說明書
請詳細閱讀本說明書, 並小心保存. KP6017651 (1)0906FA

This device features radio interference supression in compliance with valid EC Regulation
2004/108/EC.
Dieses Gerät ist funkentstört entsprechend der geltenden EG-Richtlinie 2004/108/EG.
Cet appareil est conforme à la directive 2004/108/CE (compatibilité électromagnétique) en
vigueur.
Questo apparecchio è conforme alla normativa 2004/108/CE vigente in materia di radiodisturbi.
Este aparato tiene supresión antiparasitaria según la directiva CEE vigente 2004/108/CE.
Dit apparaat is storingvrij volgens de geldende EGG richtlijn 2004/108/EG.
Este aparelho caracteriza-se pela supressão de interferência a rádio, em cumprimento ao
Regulamento 2004/108/CE da CE.
Данное устройство соответствует требованиям подавления радиопомех согласно действующей
ЕС-директиве 2004/108/EC.
EC REGULATION 2004/108/EC

1
This scale is a precision instrument and must be used under certain
conditions to ensure accurate measurement. Please observe the following
when using this scale.
1.Never disassemble the unit.
2.
Use in a vibration-free location that is not exposed to direct sunlight.
3.The scale will not measure accurately in an environment subject to
large temperature and humidity changes. The unit takes approximately
two hours to adjust to such changes.
4.Keep water and chemicals off the scale. Wipe with a damp cloth from
time to time.
5.
Do not use or store near heat sources(ovens, heaters, etc.).
6.When not used for a long time, remove the batteries and store the unit
in a dry, dust-free location.
7.Check and replace batteries before sending the unit for repair. If repair
is necessary, remove the batteries, repack the unit in the original
carton and protect with packing materials before shipment.
8.Do not leave objects on the weighing tray when the scale is not in use.
9.To avoid measurement error, do not measure while using equipment
that generates radio waves, such as mobile phones.
1.To avoid electric shock, do not insert or remove the plug with wet
hands.
2.To avoid electric shock, do not use the equipment near water.
CAUTIONS
WARNING

2
IMPORTANT
1. Use on a hard flat surface confirming that it is level using the bubble level.
2. To prevent wind from affecting measurement, close cover.
3. Clean using mild detergent. Chemical should not be used.
4. Always use the provided Gem cup.
5. Wait about five minutes after turning the power on when calibrating.
6. When the display shows a big difference from the test weight after calibration, repeat the
calibration several times.
7. Press TARE if the display doesn't read zero when you remove the object.
8. This scale can be affected by wind, vibration, and temperature changes. If the stable mark
keeps blinking, please use in an area away from those.
9. Close the wind shield when the stable mark isn’t displayed.
NAMES OF PART
1Wind sheild (cover)
2Hinge
3Gem cup
4 LCD display (front)
5 LCD display (back, option)
6 Test weight
7 Open button
8 Lo battery mark
9 Stable mark
0 Minus sign
q Calibration mark
w Weighing modes
e ON/OFF button
r TARE button
t CALIBRATION button
y MODE button
u AC adaptor inlet
i Adjustable feet
o Battery compartment
p USB port (option)
a Level
s AC adapter (option)
d USB cable (option)
VQ
B
J
P
RFS
X
UZ
s
E

3
BEFORE USE
When using with batteries
1. Open the battery cover.
2. Remove the battery cover and insert 4 size AA (LR6) batteries.
3. Replace the battery cover.
When using with AC adaptor
1. Do not use any AC adaptor except those with the following specification.
*Only use an AC adaptor with a CE marking
2. To use AC adaptor, put the DC jack into the inlet.
◆
◆
Check the level to make sure that the scale is horizontal.◆
Adjust with the
adjustable feet.
Adjust so that the
bubble is the center
circle.
How to remove and attach the cover◆
[How to remove]
Push the hinge to
one side.
Twist and pull it up.
[How to attach]
Insert one side of
hinge.
Twist and pull it
down.
Note: Make sure all 4 feet make contact with surface.
1 2 3 4
1 2 1 2

4
CALIBRATING
Use the provided 100 g test weight.
Turn the power on.Press the open
button to open the
cover.
The weighting unit
that was used when
the power was
turned off last time
will be displayed.
Default is g.
Set the Gem cup.
Calibration is
complete. Calibration
is not complete when
not showing .
Make sure the stable
mark is displayed.
Press CAL. Remove the test
weight.
When blinks,
place the test weight
gently onto the gem
cup.
WEIGHING
Press OFF.Place the object. Remove it.
1 2 3 4
5 6 7 8
2 3 4
: Overload. The object being weighed exceeds the maximum capacity.
When the scale is on
1
or : See TROUBLE SHOOTING

5
TARE FUNCTION
If TARE is pressed in the middle of weighing, zero (0) appears in the display enabling additional
weighing.
Place the object to
be measured on the
scale.
When the stable
mark is on, press
TARE.
SWITCHING UNIT
When the weighing function is available, press the MODE button and the display switches in the
order below.
g →ct →oz →ozt →dwt →grain →HT →TT
1 2
→
COUNTING
When the scale
is on
Press and hold
MODE.
Press CAL. Place 10
specimens to be
weighed.
When stabilized,
a stable mark is
displayed.
Press CAL. The number of
specimens are
displayed.
Place the number
of objects that you
wish to count.
Remove the
objects after
measurement is
finished.
1 2 3 4 5
6 7 8 9 10

6
Press ON/OFF to
turn off.
* When the registered weight is insufficient, “PC-25” is displayed. In that case, increase the
number of specimens to 25 pieces. When the stable mark is displayed, press CAL. If the register
is still insufficient, the display changes to show the number of specimens to be increased.
Therefore, increase the number of specimens, and press CAL again. This operation is repeated
until the registered weight becomes 1 g or more. will be displayed when you press CAL if
the registered weight is too low to measure. Numeric numbers change as follows. (Press TARE
to increase the number of specimens)
10 →25 →50 →100 →150 →200 →250 →500
11
PROGRAMMING AUTO POWER OFF
Default setting is 10 minutes
The auto power off time can be programmed between 0 (= no auto power off) to 60 minutes by
10 minutes increments according to preference.
◆
◆
Press CAL to display
.
When the power
is off
Press MODE to
confirm
While pressing
MODE press
ON/OFF.
50
60
20
10
0
40 30
Wen you have made
your selection, press
MODE to confirm.
The numeric values
are displayed.
Setting is finished.Press TARE to cycle
through the time
options.
*If the power turns off before appears, the setting is not saved.
1 2 3 4
5 6 7 8
* This scale might have an error within 1% margin when the specimen is
too light.

7
PROGRAMMING BACKLIT BRIGHTNESS
Press CAL to display
.
When the power
is off
Press MODE to
confirm.
While pressing
MODE press
ON/OFF.
3
4
2
1
0
When you have
made your selection,
press MODE to
confirm.
The numeric values
are displayed.
Setting is finished.Press the TARE to
cycle through the
backlit options.
BATTERIES REPLACEMENT
When batteries are running low, is displayed. When batteries are running out, is
displayed and the power is automatically turned off.
Immediately replace with new batteries (all 4 batteries). Do not apply excessive force to the
measuring section when replacing batteries.
Default setting is “2”.◆
1 2 3 4
5 6 7 8
TROUBLE SHOOTING
• The power doesn’t turn on.
Insert new 4 size AA (LR6) batteries. Be sure that the polarity of the batteries is set properly.
• or appears on the display.
The scale needs to be repaired. Please contact your retailer.
• appears on the display.
Place the test weight AFTER blinks.
If it doesn't work, the scale needs to be repaired. Please contact your retailer.
• appears on the display.
Place the gem cup BEFORE blinks and do not remove it until calibration is complete.
If it doesn't work, the scale needs to be repaired. Please contact your retailer.

8
TECHNICAL SPECIFICATIONS
Test weight 100 g (included)
Capacity 100.000 g / 500.00 ct / 3.5273 oz /3.2150 ozt / 64.300 dwt /
1543.25 grain / 2.6717 HT / 2.6666 TT
Graduation 0.002 g / 0.01 ct / 0.0001 oz / 0.0001 ozt / 0.002 dwt / 0.05 grain /
0.0001 HT / 0.0001 TT
Power DC 6V AA (LR06) x 4 (included)
AC adaptor (DC 6V 200 mA) (Option)
Power Consumption
(MAX)
Dual LCD: 45 mA, single LCD: 40 mA
*Not legal for trade
OUTPUT DATA FORMAT (USB verison only)
This section covers the exporting of data from the scale to an external device (e.g. PC) using a
USB compliant signal.
• USB interface is for data OUTPUT ONLY!
• This scale is not capable of receiving instructions from an external device.
• This scale will only output data from 0.04g to 100.00g.
Specifications
Communications standard USB
Communications method Asynchronous transaction
Signal speed 9600 baud
Data bit length 8 bits
Parity None
Stop bit 1 bit
Terminator CR+LF
Note:
• USB connecter (mini-B-type 4-pin female) is located on the side of the scale.
Caution
If you want to use the USB output, you must install the necessary driver onto your
PC, available to download from http://www.tanita.com
USB Port
Other manuals for KP-601
2
Table of contents
Other Tanita Scale manuals

Tanita
Tanita BF-626 User manual

Tanita
Tanita HD 325 User manual

Tanita
Tanita HD-351BT User manual

Tanita
Tanita KW-002 User manual

Tanita
Tanita KD-403 User manual

Tanita
Tanita UM-052 User manual

Tanita
Tanita HD-357 User manual

Tanita
Tanita InnerScan BC-551 User manual

Tanita
Tanita HS-302 User manual

Tanita
Tanita BF-664 User manual

Tanita
Tanita UM User manual

Tanita
Tanita TBF-521 User manual

Tanita
Tanita WB-100A User manual

Tanita
Tanita BC-545F User manual

Tanita
Tanita BC 541 INNERSCAN User manual

Tanita
Tanita WB-100A User manual

Tanita
Tanita HD 370 User manual

Tanita
Tanita BF-2000 User manual

Tanita
Tanita KW-210 User manual

Tanita
Tanita InnerScan Pro BC-1500PRO User manual