Sub-Zero 315W Guide

INSTALLATION &OPERATION
MODEL 315W WINE COOLER

SUB-ZERO
®
is a registered trademark of Sub-Zero Freezer Company, Inc.
As you follow these instructions, you will
notice WARNING and CAUTION symbols.
This blocked information is important for the
safe and efficient installation of Sub-Zero
equipment. There are two types of potential
hazards that may occur during installation.
Another footnote we would like to identify is
IMPORTANT NOTE: This highlights informa-
tion that is especially relevant to a problem-
free installation.
signals a situation where minor injury or
product damage may occur if you do not
follow instructions.
states a hazard that may cause serious
injury or death if precautions are not
followed.
CONTENTS
Model 315W Features 4
Model 315W Installation 5
Installation Checklist 13
Model 315W Operation 14
Troubleshooting Guide 17
Service Information 18
Sub-Zero Warranty 19
Features and specifications indicated herein and
on the website are subject to change at any time
without notice. Check our website, subzero.com,
for the most up-to-date specifications.

3
THANK YOU
Congratulations on the purchase of your
Sub-Zero Model 315W wine cooler. This unit is
designed and manufactured in the Sub-Zero
tradition of superior quality and reliability.
The importance of the installation of the Model
315W wine cooler cannot be overemphasized.
Installation should be done by a qualified
installer.
Before you begin the installation process,
it is recommended that you read the entire
installation instructions. There are key details
that you should take special care to observe
during the installation. By reading these
instructions carefully, you will make the
installation process easier, problem-free and,
most importantly, safe.
Any questions or problems about the
installation should be directed to your
Sub-Zero dealer or the Sub-Zero Customer
Service Department at 800-222-7820. You can
also visit our website at subzero.com.
SUB-ZERO MODEL 315W INSTALLATION AND OPERATION
The Model 315W wine cooler is protected by
a warranty that is one of the finest in the
industry. Take a moment to read the warranty
statement on page 19 and refer to it should
service become necessary.
The Operation information in this book will
answer most of your questions about the
features, operation and maintenance of your
wine cooler. If you have questions that are
not addressed here, call Sub-Zero Customer
Service at 800-222-7820 or visit our website,
subzero.com.
CONTACT
INFORMATION
Sub-Zero
Customer Service:
800-222-7820
Website:
subzero.com

4
MODEL 315W FEATURES
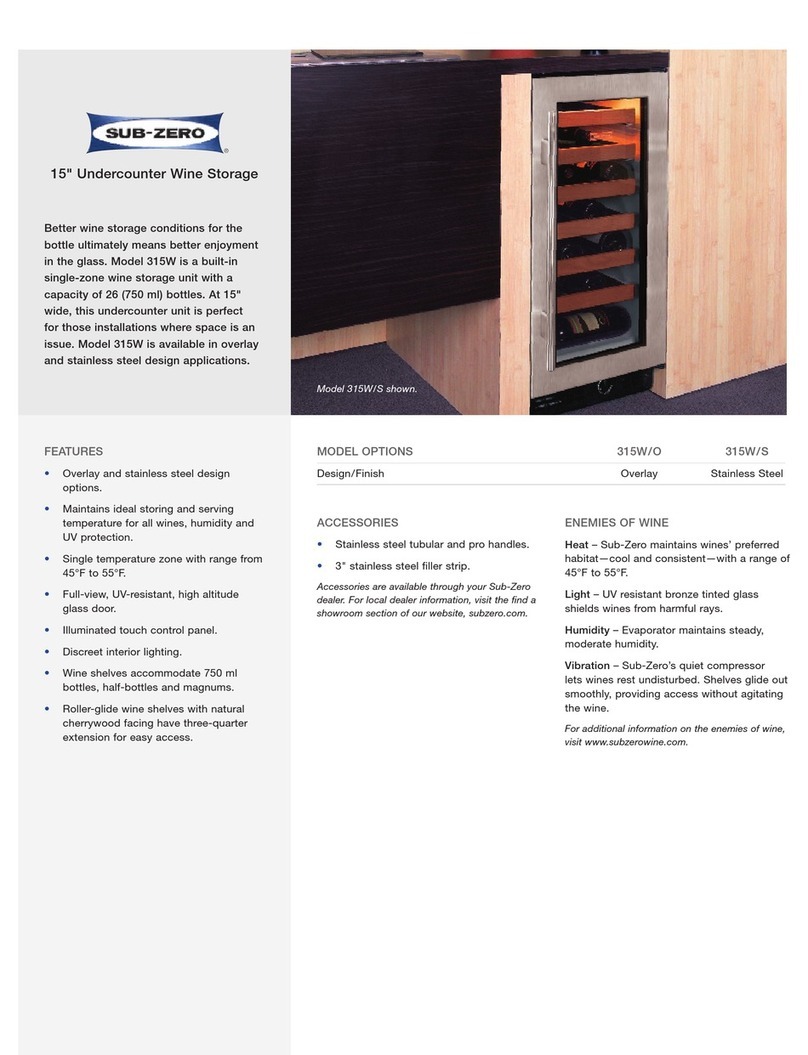
Undercounter wine cooler with 26
(750 ml) bottle capacity
Overlay and stainless steel design options
Ideal humidity and temperature range of
45˚F (7˚C) to 55˚F (13˚C).
Sturdy, rustproof wire shelves accommo-
date standard 750 ml bottles, half-bottles,
as well as magnums
Roller-glide shelves faced with natural
cherry wood have a three-quarter extension
for easy access
WARRANTY
Sub-Zero products
are covered by a
two, five and
twelve year resi-
dential warranty
(exclusions apply).
See warranty
details at the end
of this guide.
SUB-ZERO MODEL 315W FEATURES
MODEL 315W
Wine cooler
Serial Number Plate Wine Bottle Shelves
Intake Vents Discharge Vents
Temperature ControlLight Switch Kickplate
Full-view glass door with UV resistant glass
protection
High altitude glass door
Discreet low voltage interior lighting
UL approved for US and Canada
Two, five and twelve year residential
warranty – exclusions apply, see warranty
at the end of this guide

5
Dimensions in parentheses are in
millimeters unless otherwise specified.
INSTALLATION SPECIFICATIONS
MODEL 315W DIMENSIONS
Overall Width 151/8" (384)
Overall Height 341/16" (865)
Overall Depth – 315W/S 235/32" (588)
Overall Depth – 315W/O 223/8" (568)
Rough Opening Width 151/4" (387)
Rough Opening Height 341/2" (876)
Minimum Height Required
(levelers in) 341/16" (865)
Rough Opening Depth 24" (610)
Dimensions may vary +_
1
/
8
" (3).
SUB-ZERO MODEL 315W INSTALLATION
OVERALL DEPTH
235/32" (588) MODEL 315W/S
223/8" (568) MODEL 315W/O
341/16"
(865)
OVERALL
HEIGHT
151/8" (384)
OVERALL WIDTH
3/8"
(10)
SIDE VIEW
FRONT VIEW
247/8"
(632)
TO HANDLE
MODEL 315W/S
151/8" (384)
OVERALL WIDTH
TOP VIEW
111/16"
(281)
2"
(51)
141/4"
(362)
180˚ DOOR OPENING
DOOR SWING
90˚ DOOR OPENING
120˚
171/4"
(438)
OVERALL DIMENSIONS
Stainless steel unit shown
Dimensions may vary +_
1
/
8
" (3).
NOTE: Door swing not reversible.

Dimensions in parentheses are in
millimeters unless otherwise specified.6
SUB-ZERO MODEL 315W INSTALLATION
INSTALLATION SPECIFICATIONS
AREA REQUIREMENTS
Before moving the unit into place, be sure that
the rough opening dimensions, electrical
location, and minimum door clearances are
accurate. Refer to the illustration below. Also
Refer to page 5 for overall dimensions.
Be sure your electrician and cabinet installer
have this information before finishing work is
completed.
IMPORTANT NOTE:
Make sure the floor under
the unit is level with the surrounding finished
floor.
IMPORTANT NOTE:
For corner installations,
door swing may be limited due to handle
contact with the adjacent wall or cabinet face.
You must allow a minimum of 2" (51) from the
wall for a 90˚ door opening. This will ensure
that the wine shelves can be fully extended.
341/2" (876)
ROUGH
OPENING
HEIGHT
341/16" (865)
MINIMUM
(LEVELERSIN)
151/4" (387)
ROUGH
OPENING
WIDTH
NOTE: ROUGH OPENING DEPTH IS24" (610)
LOCATE
ELECTRICAL
ANYWHERE ON
BACK WALL
E
FRONT VIEW
Wine bottles are heavy. A fully loaded
unit will weigh over 200 lbs (91 kg). Be
sure the subflooring is adequate for the
weight of both the unit and its contents.
The Model 315W is intended for indoor
use only.
ROUGH OPENING DIMENSIONS

7
SUB-ZERO MODEL 315W INSTALLATION
KICKPLATE AIRFLOW
The wine cooler uses a fan to take in room air
through vents in the left side of the kickplate,
and discharges warm air through vents in the
right side. These vents must be kept clear of
obstructions or decorative panels. Blocking or
obstructing the kickplate will restrict air flow
and cause a decrease in performance and
efficiency. Refer to the illustration below.
IMPORTANT NOTE:
The minimum air
temperature the wine cooler will operate in is
50˚F (10˚C), and the maximum is 100˚F (38˚C).
MOVING THE UNIT
IMPORTANT NOTE:
When you move the unit
using a hand truck or dolly, position the dolly
on the side of the unit and secure the door so
it does not open while transporting.
IMPORTANT NOTE:
When moving and
installing the Model 315W/S, be sure to protect
all stainless steel surfaces from scratches.
Once the unit is in place, remove any tape or
other packaging material from the inside.
Check that all wine shelves fully extend.
ELECTRICAL REQUIREMENTS
A 115 V AC, 60 Hz, 15 amp circuit breaker and
electrical supply are required. A separate
circuit is required for each unit.
The Model 315W is equipped with a power
supply cord with a 3-prong grounding plug,
which must be plugged into a mating 3-prong
grounding-type wall receptacle. Refer to the
illustration below. Follow the National
Electrical Code and local codes and ordinances
when installing the receptacle. For location of
the electrical supply, refer to the Rough
Opening Dimensions illustration on page 6.
IMPORTANT NOTE:
A ground fault circuit
interrupter (GFCI) is not recommended and
may cause interruption of operation.
GROUND
NEUTRAL
LINE POWER
(VOLTAGE)
C
O
L
D
E
R
ROOM AIR IN
WARM AIR OUT
Grounded electrical outlet Kickplate airflow
Do not use an extension cord or two-
prong adapter. Electrical ground is
required on this appliance. Do not remove
the power supply cord ground prong.
Any finished flooring should be protected
with appropriate material to avoid any
damage from moving the unit.

Dimensions in parentheses are in
millimeters unless otherwise specified.8
SUB-ZERO MODEL 315W INSTALLATION
LEVELING THE UNITBLOCKING FOR SAFETY
A metal antip-tip bracket and screws are
provided with the unit. Attach the anti-tip
bracket to the top of the unit, opposite the
hinge side. The bracket offset flange should be
facing up with the two oblong holes also in the
front. Once the unit is moved into position,
open the door and secure the anti-tip bracket
to the countertop. Refer to illustration below.
IMPORTANT NOTE:
The unit must be leveled
prior to placing it in the rough opening.
There are four leveling legs on the Model
315W, one at each corner. To assist you in
adjusting the front leveling legs up or down,
tip the unit back slightly to allow access to
leveling legs. Use a pliers and place around
the leveling leg, or use a screwdriver and turn
the front leg to make necessary adjustments.
To level the unit, turn the leveling legs counter-
clockwise to raise the unit, or clockwise to
lower it. Refer to the illustration below.
To assist you in proper leveling, we recom-
mend using a 2' (.6 m) level. There are two
recommended level locations: along the top of
the unit or on either exterior side of the unit.
These positions will help determine the vertical
and horizontal level point. In order to access
these leveling positions, the unit will have to
be slightly out of the opening.
Place the unit in the rough opening. Make sure
the power cord is plugged in before position-
ing the unit. Turn the power back on to the
electrical outlet.
Shut off the power to the electrical outlet.
Anti-tip bracket Adjusting leveling legs
To prevent the unit from tipping forward
if multiple loaded bottle racks are pulled
out at one time, and to provide a stable
installation, the unit must be secured in
place with an anti-tip device.

9
SUB-ZERO MODEL 315W INSTALLATION
PANEL CONSIDERATIONS
The Model 315W offers two door panel design
alternatives; stainless steel (/S) or overlay (/O).
Both of these design options are available with
glass (G) doors.
Model 315W/S (classic stainless steel) is
shipped from the factory with the decorative
stainless steel door panel and matching handle
in place.
The Model 315W/O (overlay) door is designed
to accept a decorative door panel to match
surrounding cabinetry. The door panel and the
handle will be provided by the customer.
For overlay panel handle hardware, we recom-
mend a D-style handle, centered top to bottom
along the edge opposite the hinge. You may
have to countersink screw heads to ensure
hardware does not interfere with panels fitting
flush with unit doors.
Before beginning installation, check for the
correct components for the fit and finish
desired.
If you have questions, contact your Sub-Zero
dealer or cabinet supplier. Additional panel
information can be found in the Sub-Zero
Design Guide. Check our website at
subzero.com.
KICKPLATE INSTALLATION
Once the Model 315W is in place, you can
install the kickplate. There is some adjustment
to the mounting assembly so that the kickplate
will fit flush with the surrounding area. Be sure
that nothing obstructs the vents of the kick-
plate. Refer to the illustration below.
The kickplate can be painted another color, if
you choose. Follow these easy steps:
Rough up surface to be painted with fine
grit sandpaper
Wipe with alcohol to ensure it is clean and
dry
Use an appliance or industrial grade oil
base, or high gloss enamel paint
IMPORTANT NOTE:
The Model 315W has
been designed to be serviced in place, but in
some cases it may be necessary to pull the
unit out for service. For this reason, do not
restrict access to the cabinet at the front top
and bottom.
If a floor is to be installed after the unit has
been installed, spacing shims equal to the
thickness of the floor should be installed under
the unit to keep it level with the floor.
Kickplate installation
DO NOT cover the kickplate area.

Dimensions in parentheses are in
millimeters unless otherwise specified.10
SUB-ZERO MODEL 315W INSTALLATION
Inspect the door panel for the minimum 5/8"
(16) thickness, the finished inside edge and the
10 lbs (5 kg) weight limit. See the Wine
Storage section of the Sub-Zero Design Guide
for additional panel information. Check our
website at subzero.com.
Decide if the handle will be attached through
the glass door frame or just through the deco-
rative door panel. If it is just through the door
panel, the handle must be attached first.
If you choose not to use the pre-drilled handle
mounting holes, it will be necessary to fasten
the handle from the rear of the door panel
only, or drill one or more additional holes
through the metal frame of the glass door.
2915/16"
(760)
2515/16"
(859)
143/4" (375)
FRONT VIEW
103/4"
(273)
PANEL
DESIGN
Additional panel
design information
can be found in
the Sub-Zero
Design Guide.
Check our website
at subzero.com.
A solid panel must not be installed on a
glass door unit, as this may cause
moisture to form behind the panel.
OVERLAY PANELS
OVERLAY PANEL SPECIFICATIONS
Door Panel Width – 1/8" (3) reveal* 15" (381)
Door Panel Height – 7/16" (11) reveal**
4" (102) toe space 301/16" (764)
Width of Rails and Stiles 21/4" (57) min
Door Panel Thickness 5/8" (16) min
Door Panel Weight 10 lbs (4.5 kg) max
Dimensions may vary +_
1
/
8
" (3).
*
1
/
8
" reveal is required if two units are placed side
by side.
**
7
/
16
" (11) reveal from top of door panel to top of
hinge.
OVERLAY DOOR DIMENSIONS
Overlay unit shown
Other manuals for 315W
12
Table of contents
Other Sub-Zero Wine Cooler manuals

Sub-Zero
Sub-Zero 315W Guide

Sub-Zero
Sub-Zero 427R User manual

Sub-Zero
Sub-Zero 315W User manual

Sub-Zero
Sub-Zero 424 User manual
Sub-Zero
Sub-Zero 315W User manual

Sub-Zero
Sub-Zero 315W User manual

Sub-Zero
Sub-Zero WS-30 User manual

Sub-Zero
Sub-Zero 424FS User manual

Sub-Zero
Sub-Zero 424G User manual

Sub-Zero
Sub-Zero IW-18 User manual
Sub-Zero
Sub-Zero ICB424 User manual

Sub-Zero
Sub-Zero 427R Instructions for use

Sub-Zero
Sub-Zero ICB424 Owner's manual

Sub-Zero
Sub-Zero 427 User manual

Sub-Zero
Sub-Zero 427RG Guide

Sub-Zero
Sub-Zero 424 Owner's manual

Sub-Zero
Sub-Zero 430 User manual

Sub-Zero
Sub-Zero 427RB User manual
Sub-Zero
Sub-Zero ICB424 User manual

Sub-Zero
Sub-Zero BW30ORH User manual