8 9
5.5 Fitting Behind Aperture / Fitting to the Front of the Aperture (External Fit)
Lift the frame assembly into position and align centrally with the aperture. Ensure the guide rails are vertical (in
both directions) and are parallel to each other, at the same height and the correct distance apart.
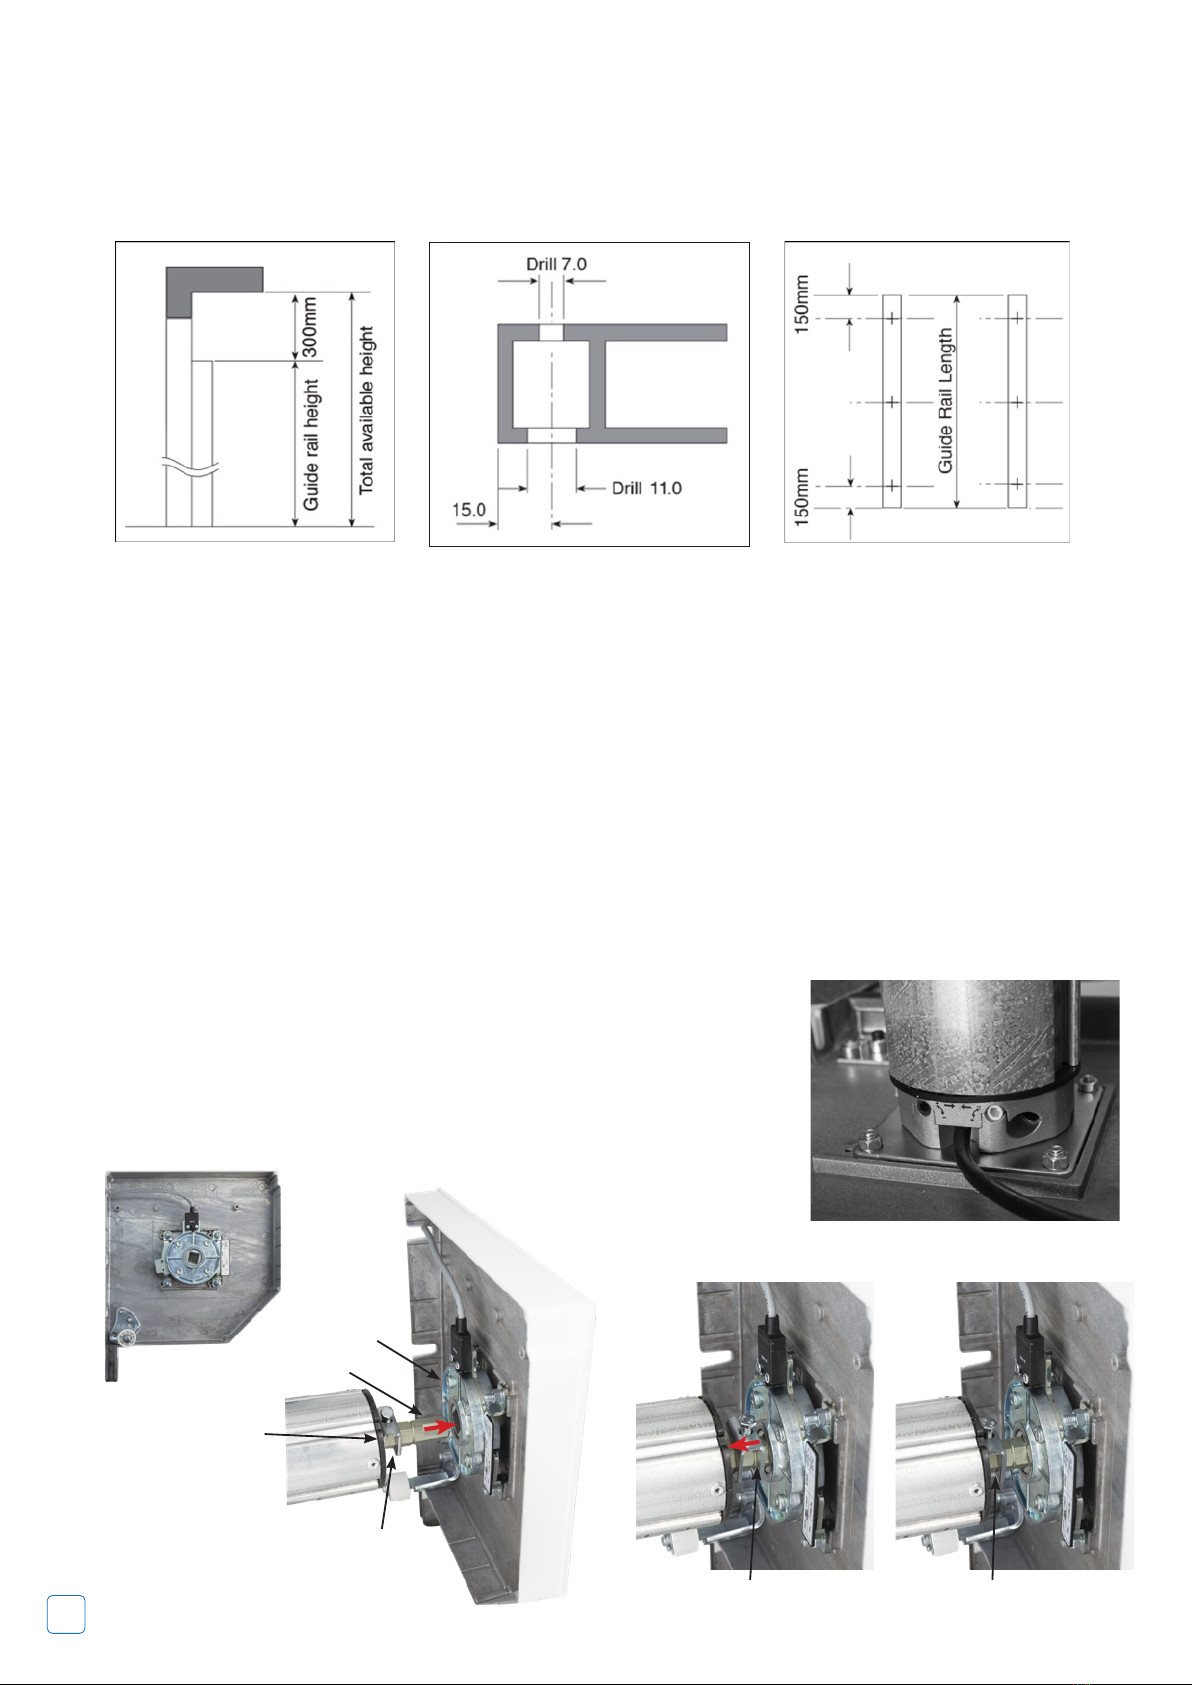
NOTE: Some width adjustment is available on the sliding shaft end of the axle. The correct distance apart is
shown in Fig 13.
When tting to the front of the aperture (external t/reverse roll), once installation is complete, the
box must be siliconed at the interface with the aperture and along all edges and joints to prevent
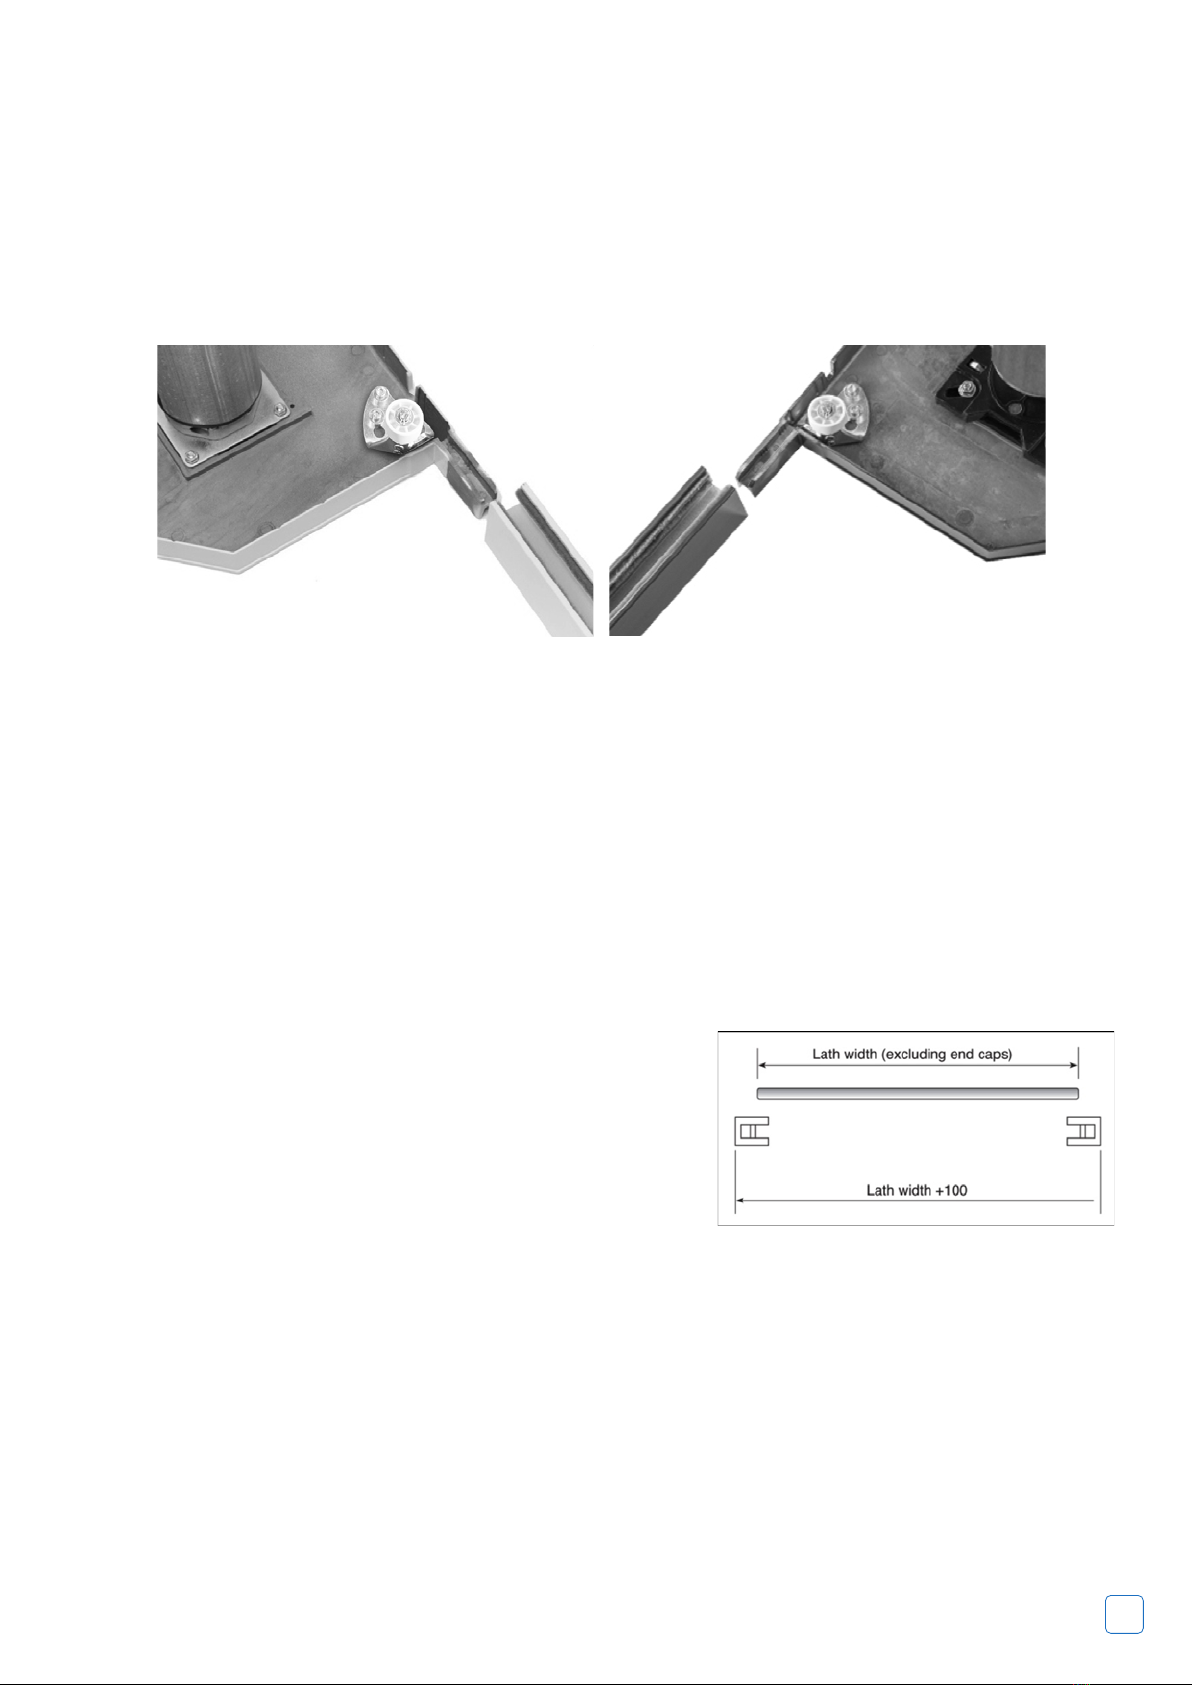
water ingress. Failure to seal will invalidate the warranty. The bottom slat transmitter must be tted
to the inside face of the bottom slat (concave face). Fitting to the external face of the slat will lead to
failure and invalidate the warranty.
Ensure axle assembly is horizontal by using a spirit level.
5.6 Once the frame is correctly positioned, mark and drill for xings (xings not supplied).
5.7 When guide rails are securely xed, double check for vertical, parallel and correct spacing and that the axle
is level.
NOTE: Once the frame is fully tted and checked, use the plastic plugs supplied to cover the xing holes in the
guide rails to give a‘fully nished’ eect.
5.8 Fixing the Head Plates
Fix the head-plates into position ensuring that the head-plates are level and that the locating pegs are fully
located into the guide section. Fix securing screws through back of head-plate and attach securely to the wall.
Where a back box is tted it may be necessary to x the back box to the opening header to stop any marking
of the curtain during door operation. If additional xings are required in the back box, use countersunk screws,
ensuring that the screw heads do not protrude, as curtain damage could occur.
Always ensure that the back box is adequately xed to eliminate any rubbing of the curtain on the
back box during the door operation.
6. Installing the Curtain Assembly
6.1 Carefully unwrap and remove the outer bubble wrap protection and place over shaft to stop damage to
inside of curtain during installation.
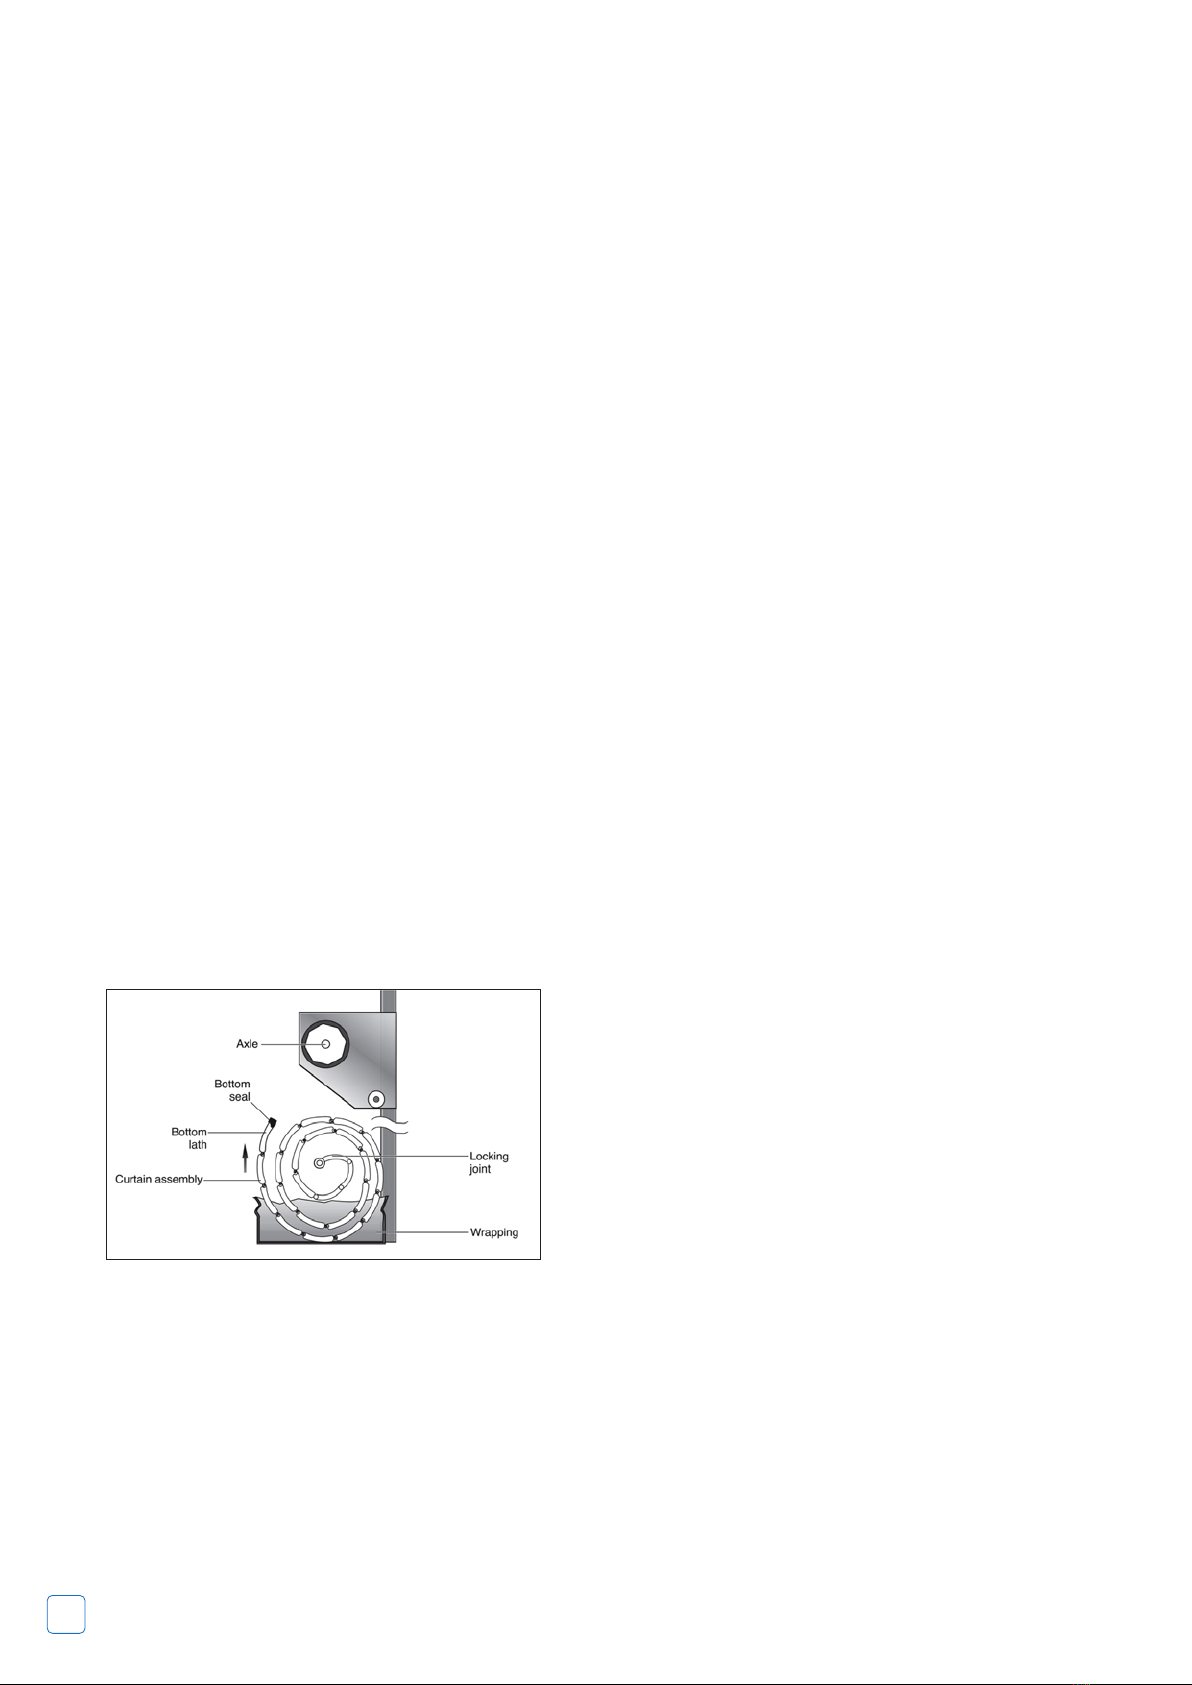
6.2 Carefully position the curtain assembly in the door
aperture, below the axle as shown in Fig 14, slit the
packaging to gain access to the curtain but leave some
packaging to protect the curtain.
6.3 SAFETY NOTE: A minimum two people are required
for this procedure to ensure safe handling.
6.4 It is essential to place sections of bubble wrap over the
axle to prevent marking the curtain as it is installed.
6.5 Using minimum 2 people carefully lift the curtain
assembly up level with the axle. Practice has shown that it
is best to place one hand on the axle, keeping that arm straight, and support the curtain roll on that shoulder
as shown in Fig 15.
6.6 Feed the bottom lath over the top of the axle and down between the guide rails, as shown in Fig 16 taking
care not to scu the curtain assembly, proceed until half of the curtain has been fed over the axle, carefully
unroll the remaining curtain until this is balanced over the shaft, once this is done carefully feed the curtain
into the guide until the curtain is reaches the oor.
NOTE: Do not let the curtain ‘free fall’ over the axle as this will result in damage to the Curtain and/or the
Safety Edge Transmitter.
Fig 14