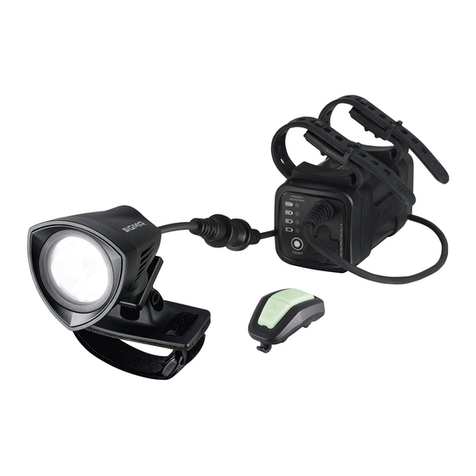
SRAM Elixir 5 User manual

2012
Elixir™5
Service Manual
GEN.0000000003519 Rev C

2
SRAM LLC WARRANTY
SRAM warrants its products to be free from defects in materials or workmanship for a period of two
years after original purchase. This warranty only applies to the original owner and is not transferable.
Claims under this warranty must be made through the retailer where the bicycle or the SRAM
component was purchased. Original proof of purchase is required.
This warranty statement gives the customer specific legal rights. The customer may also have other
rights which vary from state to state (USA), from province to province (Canada), and from country to
country elsewhere in the world.
To the extent that this warranty statement is inconsistent with the local law, this warranty shall be
deemed modified to be consistent with such law, under such local law, certain disclaimers and
limitations of this warranty statement may apply to the customer. For example, some states in the
United States of America, as well as some governments outside of the United States (including
provinces in Canada) may:
a. Preclude the disclaimers and limitations of this warranty statement from limiting the statutory rights of
the consumer (e.g. United Kingdom).
b. Otherwise restrict the ability of a manufacturer to enforce such disclaimers or limitations.
To the extent allowed by local law, except for the obligations specifically set forth in this warranty
statement, in no event shall SRAM or its third-party suppliers be liable for direct, indirect, special,
incidental, or consequential damages.
· This warranty does not apply to products that have been incorrectly installed and/or adjusted
according to the respective SRAM technical installation manual. The SRAM installation manuals can be
found online at www.sram.com, www.rockshox.com, www.avidbike.com, www. truvativ.com, or
www.zipp.com.
· This warranty does not apply when the product has been modified.
· This warranty does not apply when the serial number or production code has been deliberately altered,
defaced or removed.
· This warranty does not apply to damage to the product caused by a crash, impact, abuse of the product,
non-compliance with manufacturer’s specifications of usage or any other circumstances in which the
product has been subjected to forces or loads beyond its design.
· This warranty does not apply to normal wear and tear. Wear and tear parts are subject to damage as a
result of normal use, failure to service according to SRAM recommendations and/or riding or installation
in conditions or applications other than recommended.
Wear and tear parts are identified as:
Dust seals/Bushings/Air sealing o-rings/Glide rings/Rubber moving parts/Foam rings/Rear shock
mounting hardware and main seals/Stripped threads and bolts (aluminum,titanium, magnesium or steel)/
Upper tubes (stanchions)/Brake sleeves/Brake pads/Chains/Sprockets/Cassettes/Shifter and brake
cables (inner and outer)/Handlebar grips/Shifter grips/Jockey wheels/Disc brake rotors/Wheel braking
surfaces/Bottom out pads/Bearings/Bearing Races/Pawls/Transmission gears/Spokes/Free hubs/
Aero bar pads/Corrosion/Tools
· This warranty shall not cover damages caused by the use of parts of different manufacturers.
· This warranty shall not cover damages caused by the use of parts that are not compatible, suitable and/
or authorized by SRAM for use with SRAM components.
· This warranty shall not cover damages resulting from commercial (rental) use.
AVID BRAKE SERVICE
We recommend that you have your Avid brakes serviced by a qualified bicycle mechanic. Servicing Avid
brakes requires knowledge of brake components as well as the special tools and fluids used for service.
This publication includes trademarks and registered trademarks of SRAM Corporation designated by the symbols ™ and ®, respectively.
Copyright © SRAM LLC 2013
For exploded diagram and part number information, please refer to the Spare Parts Catalog available on our web site at www.sram.com.
For order information, please contact your local SRAM distributor or dealer.
Information contained in this publication is subject to change at any time without prior notice. For the latest technical information, please visit our website at www.sram.com.
Your product‘s appearance may differ from the pictures/diagrams contained in this catalog.
Product names used in this document may be trademarks or registered trademarks of others.

3
TABLE OF CONTENTS
ELIXIR 5 BRAKE LEVER OVERHAUL....................................................................................................................................... 5
PARTS AND TOOLS NEEDED FOR SERVICE: ................................................................................................................................................................. 5
ELIXIR 5 BRAKE CALIPER OVERHAUL..................................................................................................................................15
PARTS AND TOOLS NEEDED FOR SERVICE: ................................................................................................................................................................15
AVID BRAKE HOSE LENGTH ADJUSTMENT .........................................................................................................................21
PARTS AND TOOLS NEEDED FOR SERVICE: ................................................................................................................................................................21
AVID BRAKE BLEED PROCEDURE ........................................................................................................................................ 25
PARTS AND TOOLS NEEDED FOR SERVICE: ...............................................................................................................................................................25
DISC BRAKE PAD INSTALLATION INSTRUCTIONS.............................................................................................................31
DISC BRAKE PAD AND ROTOR BED-IN PROCEDURE....................................................................................................... 32

SAFETY FIRST!
At SRAM, we care about YOU. Please, always wear your safety
glasses and protective gloves when servicing your
componentry.
Protect yourself! Wear your safety gear!
Important: Your parts may look different from those illustrated.

5elixir 5 brake lever overhaul
ELIXIR 5 BRAKE LEVER OVERHAUL
Avid brake lever assemblies need to be serviced periodically to optimize braking function. If brake fluid is leaking from any area
of the brake lever assembly, there may be damage or wear and tear to the internal moving parts. If your brake was filled with fluid
OTHER than DOT 5.1 or 4 (such as mineral oil or DOT 5), damage to all rubber and plastic internal parts may exist. If your brake was
damaged in a crash, there may be damage to the lever blade and pushrod assemblies, as well as the housing assembly. Inspection
and/or replacement of these parts, due to any of the above situations, will be necessary to restore proper brake function.
WARNING:
• AvidhighlyrecommendstheuseofnitrilegloveswhenhandlingDOTfluids.
• DOTfluidswilldamagepaintedsurfaces!Ifanyfluidcomesincontactwithapaintedsurface(i.e.yourframe)orprinting
onthebrakes,wipeitoffimmediatelyandcleanwithisopropylalcoholorwater.Removalofpaintand/orprintingbyDOT
fluidisnotcoveredunderwarranty!
• Donotallowanybrakefluidtocomeincontactwiththebrakepads.Ifthisoccurs,thepadsarecontaminatedandmustbe
replaced.
• Forbestresults,useonlyAvidHigh-Performance5.1DOTFluid.IfAvidfluidisnotavailable,onlyuseDOT5.1or4fluid.
DonotusemineraloilorDOT5fluid.
• UsedDOTfluidshouldberecycledordisposedofinaccordancetolocalandfederalregulations.
• NeverpourDOTfluiddownasewageordrainagesystemorintothegroundorabodyofwater.
PARTS AND TOOLS NEEDED FOR SERVICE:
• Safety glasses
• Nitrile gloves
• Small Phillips head screwdriver
• Flat blade screwdriver
• Long snap ring pliers
• Oil pan
• Avid High-Performance 5.1 DOT Fluid or DOT 4 Fluid, or Avid
DOT Grease or DOT 5.1 or 4 compatible grease
• Torque wrench
• 4 mm hex bit socket
• 8 mm flare nut crowfoot
• 8 mm flare nut wrench
• 2, 3, and 4 mm hex wrenches
• Bench vise or 10 mm open end wrench
• Isopropyl alcohol
• Clean, lint-free rag

6elixir 5 brake lever overhaul
A
H
C
G
D
EXPLODED VIEW - ELIXIR 5 BRAKE LEVER ASSEMBLY
E
A. LEVER BODY F. LEVER BLADE/PUSHROD ASSEMBLY
B. LEVER SPRING G. PISTON/BLADDER ASSEMBLY
C. REACH ADJUST KNOB H. PIVOT BUSHINGS
D. REACH ADJUST SCREW I. LEVER BOLT
E. PIVOT PIN
I
BF

7elixir 5 brake lever overhaul
1
Remove the brake lever from the handlebar. Use a 4 mm hex to
remove the brake clamp bolts from the clamp. Pull the hose
boot off the compression nut and slide it down the hose.
If dirty, clean the levers with alcohol and a clean rag.
2
Use an 8 mm flare nut wrench to unthread the hose
compression nut. Pull the brake hose and compression fitting
from the brake lever body.
3
Allow any brake fluid to drain into a container. Hold the lever
assembly over the container and squeeze the lever to pump
any brake fluid from inside the lever assembly.
If the system has been contaminated with the wrong fluid,
you will need to flush all the parts with soapy water, rinse,
and allow to dry prior to rebuilding. You will also need to
install all new seals and a new hose.
4 mm
8 mm

8elixir 5 brake lever overhaul
4
Rotate the reach adjust knob until the Phillips head screw is
visible. Use a small Phillips head screwdriver to turn the screw
in the reach adjust knob counter-clockwise and unthread it
from the knob.
5
Use a 3 mm hex to turn the lever bolt counter-clockwise and
unthread it from the lever body.
6
Use a flat blade screwdriver to carefully remove the reach
adjust knob and attached spring.
CAUTION
Eye Hazard: Do not look directly into the lever body
while performing this step. The internal reach adjust
knob/spring assembly is preloaded and will come out
of the lever body quickly. Wear safety glasses.
3 mm

9elixir 5 brake lever overhaul
7
Pull the lever blade to the open position to disengage the
pushrod from the piston.
8
Use your finger to push the pivot pin out of the lever body.
Remove the lever blade along with the pushrod.
The pivot bushings may fall out of the lever blade, this
is ok. Simply re-insert them into the lever blade.

10 elixir 5 brake lever overhaul
9
Clamp a 2 mm hex into a vise with the long end extending
upward. Install the lever body onto the hex and insert the hex
into the hole located in the fluid flow port.
Place a clean rag under the lever body to wipe up any fluid
that may spill out.
10
Use long snap ring pliers to compress the snap ring located in
the lever body. Then apply downward pressure to the lever
body and use the pliers to remove the snap ring and piston/
bladder assembly. Remove the lever body from the hex.
The piston/bladder assembly is attached to the snap ring.
CAUTION
Eye Hazard: Do not look directly into the lever body
while performing this step. The internal piston/
spring assembly is preloaded and will come out of
the lever body quickly. Wear safety glasses.
11
Replace the entire piston/bladder/snap ring assembly with a
new assembly. Lubricate the new assembly by dipping it into
Avid High-Performance 5.1 DOT Fluid.
You can also use Avid DOT Grease, or DOT 5.1
or 4 compatible grease, as a lubricant.
2 mm
Table of contents
Other SRAM Bicycle Accessories manuals

SRAM
SRAM RSC User manual

SRAM
SRAM RockShox Deluxe RT3 User manual

SRAM
SRAM X.0 User manual

SRAM
SRAM RockShox Reba Series User manual

SRAM
SRAM BOXXER TEAM 2015 User manual

SRAM
SRAM eTap AXS User manual

SRAM
SRAM i-motion 3 User manual

SRAM
SRAM RockShox Super Deluxe Coil User manual

SRAM
SRAM Time ATAC User manual

SRAM
SRAM Rock Shox TwistLoc User manual

SRAM
SRAM DUB MTB Series User manual

SRAM
SRAM RockShox Super Deluxe User manual

SRAM
SRAM EAGLE AXS Series Installation guide

SRAM
SRAM AXS POWER METER User manual

SRAM
SRAM MTB Series User manual

SRAM
SRAM QOLLECTOR User manual

SRAM
SRAM ROCK SHOX BoXXer User manual

SRAM
SRAM HydroR User manual

SRAM
SRAM Guide R User manual

SRAM
SRAM Guide T Caliper User manual